I'm concerned. It would seem this build is producing a surplus in the swear jar...Bumblers Notebook page 8: Planking the Boiler deck.
Finished planking Boiler Deck. Now I need to square and round edges of the deck before applying the cap rails.
View attachment 270753
BTW: I contrived a new modeling tool. I needed some small footprint weights to hold the planks until the glue set. Filled a half dozen pill holders with coins from the “Swear” jar and ……..
View attachment 270754
Worked like a charm
Jan
-

Win a Free Custom Engraved Brass Coin!!!
As a way to introduce our brass coins to the community, we will raffle off a free coin during the month of August. Follow link ABOVE for instructions for entering.
-

PRE-ORDER SHIPS IN SCALE TODAY!
The beloved Ships in Scale Magazine is back and charting a new course for 2026!
Discover new skills, new techniques, and new inspirations in every issue.
NOTE THAT OUR FIRST ISSUE WILL BE JAN/FEB 2026
You are using an out of date browser. It may not display this or other websites correctly.
You should upgrade or use an alternative browser.
You should upgrade or use an alternative browser.
Chaperon 1884 Stern Wheeler
- Thread starter Pathfinder65
- Start date
- Watchers 35
-
- Tags
- chaperon model shipways
Indeed that may be the case, BUT the surplus is being repurposedI'm concerned. It would seem this build is producing a surplus in the swear jar...

Jan
Bumblers Notebook Page 9: The Boiler Deck Structure
It took patience, perseverance and lots of coffee to place and glue all of those little 1/16 inch square “Battens” one at time, but that step is finally done. I lost count after cutting 128 plus of those little bits. The investment in a “Chopper ” helped with that little chore. The coins from the temporary weights have been returned to the “Bad Word Jar”.
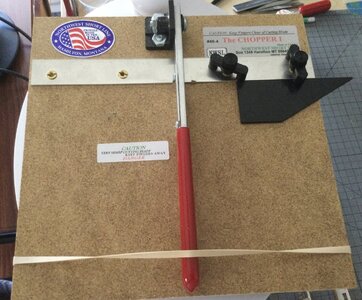
Great tool for cutting multiple piece of the same length.
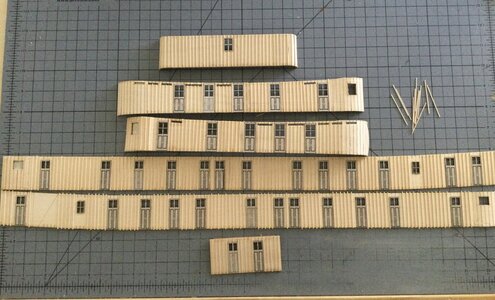
Pieces of the 1/16 inch square Battens are on the upper right. The long pieces are the Boiler deck structure, the pieces above that are the Hurricane deck structure.
The next step is to assemble everything.
Jan
It took patience, perseverance and lots of coffee to place and glue all of those little 1/16 inch square “Battens” one at time, but that step is finally done. I lost count after cutting 128 plus of those little bits. The investment in a “Chopper ” helped with that little chore. The coins from the temporary weights have been returned to the “Bad Word Jar”.

Great tool for cutting multiple piece of the same length.

Pieces of the 1/16 inch square Battens are on the upper right. The long pieces are the Boiler deck structure, the pieces above that are the Hurricane deck structure.
The next step is to assemble everything.
Jan
Beautiful, Jan.Bumblers Notebook Page 9: The Boiler Deck Structure
It took patience, perseverance and lots of coffee to place and glue all of those little 1/16 inch square “Battens” one at time, but that step is finally done. I lost count after cutting 128 plus of those little bits. The investment in a “Chopper ” helped with that little chore. The coins from the temporary weights have been returned to the “Bad Word Jar”.
View attachment 271995
Great tool for cutting multiple piece of the same length.
View attachment 271996
Pieces of the 1/16 inch square Battens are on the upper right. The long pieces are the Boiler deck structure, the pieces above that are the Hurricane deck structure.
The next step is to assemble everything.
Jan
I do get a deja vu with all that repetitive work.
Invest now and reap later when you start building it.
Regards, Peter
They also have different sprayheads. I felt comfortable with the wide.
“The standard sprayhead has a spray width of ca. 5-6 cm; interchangeable sprayheads available in spray widths fine (ca. 1 cm), medium (ca. 4-5 cm), wide (ca. 8-10 cm) and variable (ca. 13-14 cm)”
Regards, Peter
“The standard sprayhead has a spray width of ca. 5-6 cm; interchangeable sprayheads available in spray widths fine (ca. 1 cm), medium (ca. 4-5 cm), wide (ca. 8-10 cm) and variable (ca. 13-14 cm)”
Regards, Peter
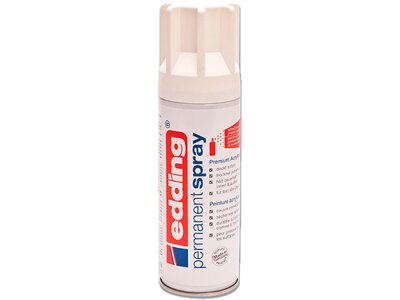
Thank you for the response, BUT it's not available in the US of AHi Jan. I can only tell you that I used for my Lee the spray from Edding:
View attachment 272613
I used the Mat Traffic White. But they also have Glossy. My experience with spray painting was not much. But this one was very ‘forgiving’.
Regards, Peter
Jan
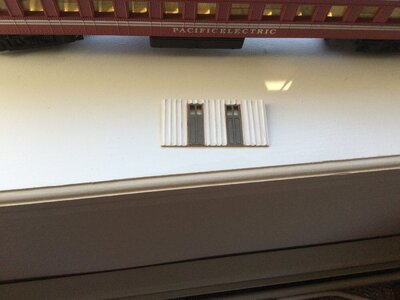
The Acrylic I used was a flat white applied with a fine brush, the rattle can was a white satin? In natural light the Acrylic looked OK, but sitting on a shelf it has sort of a shadowy look. I'm going to do a couple of the longer pieces with the Acrylic and have the Admiral render an opinion.Not sure if you were using a flat or matte white vs a semi gloss which would shine a bit more. I agree the flat looks more natural. You can also put a coat of poly on it to make it shine a bit more.
Jan
Hi Heinrich,To me that looks very natural, but I leave assistance in this regard, to the paint experts.
My paint expertise ranks close to zero along with few other skills required to build these fine ships. I'm always glad to get advice and learn something new.
Jan
Bumblers Notebook #10: Finishing the Main Deck.
The Main deck needs some more attention before the boiler deck structures can be added.
1) Prepare and paint the Boiler smoke stack covers. Only a couple of steps involved with that process.
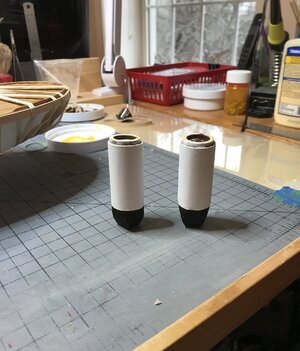
2) Bend and add the cap strip to the Boiler deck. Took several tries and some bad words to complete that build part.
3) Bend and add the rub rail to the Main deck. Another adventure in bend, break a piece, do it again, figure out how to clamp and glue it, etc. More bad words. ( I'm going to have to get a bigger Bad Word Jar)
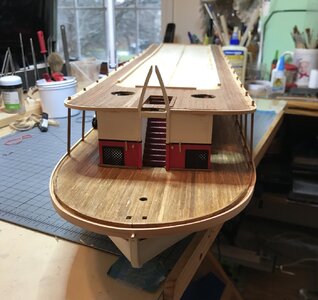
The cap rails on the Boiler deck were easier to work with since there was surface hold clamps. The rub rail was a little more of a challenge. Some good places to clamp at the bow but not so on the sides.
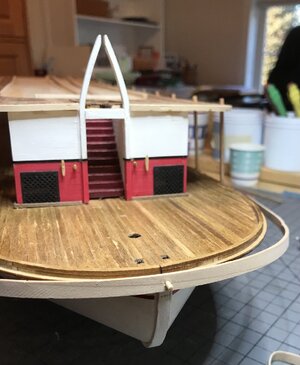
The start. A temporary pin at the bow to hold the strip in place at the right height.
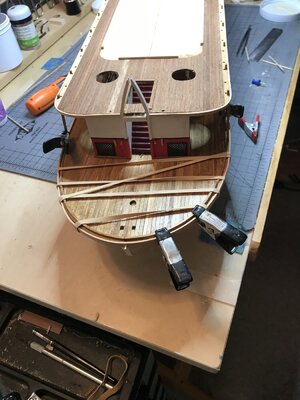
Port side clamping/holding in place while the glue sets.
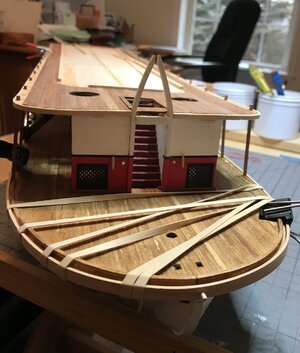
Repeat for the Starboard side.
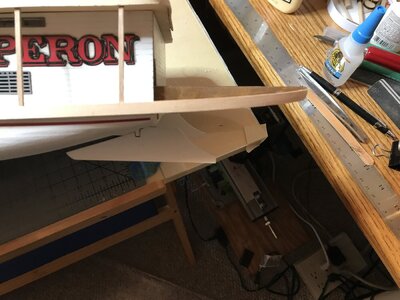
Rub rail finished at stern.
4) The final step is to cut and install all the bullrails, but as per the build manual those will be done later to prevent them being damaged because of all the handling.
It didn't take many words to explain the couple of hours a day to accomplish this build part, but it all takes time. Slowly but surely I'm getting there.
Jan
The Main deck needs some more attention before the boiler deck structures can be added.
1) Prepare and paint the Boiler smoke stack covers. Only a couple of steps involved with that process.

2) Bend and add the cap strip to the Boiler deck. Took several tries and some bad words to complete that build part.
3) Bend and add the rub rail to the Main deck. Another adventure in bend, break a piece, do it again, figure out how to clamp and glue it, etc. More bad words. ( I'm going to have to get a bigger Bad Word Jar)

The cap rails on the Boiler deck were easier to work with since there was surface hold clamps. The rub rail was a little more of a challenge. Some good places to clamp at the bow but not so on the sides.

The start. A temporary pin at the bow to hold the strip in place at the right height.

Port side clamping/holding in place while the glue sets.

Repeat for the Starboard side.

Rub rail finished at stern.
4) The final step is to cut and install all the bullrails, but as per the build manual those will be done later to prevent them being damaged because of all the handling.
It didn't take many words to explain the couple of hours a day to accomplish this build part, but it all takes time. Slowly but surely I'm getting there.
Jan
Looking very nice Jan. I'm wondering why you didn't simply soak and prebend those rubbing strips with your plank bender/iron?
H Paul,Looking very nice Jan. I'm wondering why you didn't simply soak and prebend those rubbing strips with your plank bender/iron?
That is a good question. I've been experimenting with the plank bender and finally came up with a jig to hold and help with the bends. I have no trouble with the "casual" bends. The bending at the stem/bow was done with the "K" iron and wasn't a problem. The "sharp" right angle at the stern for the boiler deck is my downfall.
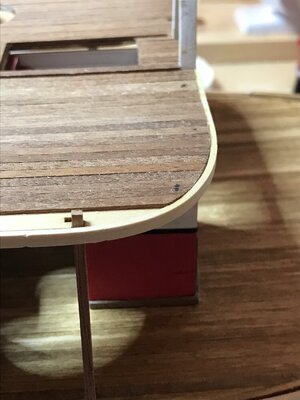
The above bend was fairly straight forward, after soaking in very hot water and using the Kolderstok iron I clamped the piece in place and let it dry.
But.....the one below???
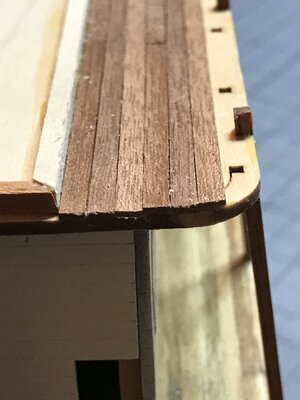
The Picture below is the Starboard side. I'm still not to happy with the result of that bend.
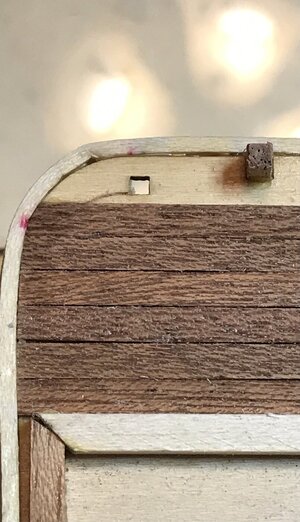
This corner of the boiler deck at the stern was and still is a "pain", I've not come up with a good bend yet, I'm on number ? for this one. I use the Kolderstok iron to set the bend but when I clamp the piece to the deck it breaks at a critical point, enough that I have to figure out how to make look "good"
Jan
Last edited:
- Joined
- Jan 9, 2020
- Messages
- 10,566
- Points
- 938

Hello Jan. With regards to that sharp bend. Pre-bend the clamp, place it in position and fix the point/edge. Take a bowl of cold water and brush and start brushing the bend with water. While you are doing this pre-heat the smaller fitment of the plank bender which has the angled flat end. When the plank is soft and pliable apply glue on the inside and pull it really tight around the corner holding it in place with finger pressure. Now stroke that curve/bend repeatedly with that flat edge, ironing it until the glue adheres the plank to the curve. If need be, elicit the help of the admiral for an extra pair of hands.
I see - that is quite an acute bend. Perhaps you could hide the crimped part with some careful shaping/beveling of the decking?H Paul,
That is a good question. I've been experimenting with the plank bender and finally came up with a jig to hold and help with the bends. I have no trouble with the "casual" bends. The bending at the stem/bow was done with the "K" iron and wasn't a problem. The "sharp" right angle at the stern for the boiler deck is my downfall.
View attachment 273797
The above bend was fairly straight forward, after soaking in very hot water and using the Kolderstok iron I clamped the piece in place and let it dry.
But.....the one below???
View attachment 273800
The Picture below is the Starboard side. I'm still not to happy with the result of that bend.
View attachment 273863
This corner of the boiler deck at the stern was and still is a "pain", I've not come up with a good bend yet, I'm on number ? for this one. I use the Kolderstok iron to set the bend but when I clamp the piece to the deck it breaks at a critical point enough that I figure out how to make look "good"
Jan
That's a good suggestion, I think a mix of PVA and sawdust lightly applied will do the job. We'll see.I see - that is quite an acute bend. Perhaps you could hide the crimped part with some careful shaping/beveling of the decking?
Jan
I'm finding that I need to know about wood grain. Some pieces I've tried snapped fairly quickly when after repeated soaking, heating and bending they almost fit the corner, Others were more pliable. My knowledge of wood types and their properties is close to zero, so it's learn as you go.Hello Jan. With regards to that sharp bend. Pre-bend the clamp, place it in position and fix the point/edge. Take a bowl of cold water and brush and start brushing the bend with water. While you are doing this pre-heat the smaller fitment of the plank bender which has the angled flat end. When the plank is soft and pliable apply glue on the inside and pull it really tight around the corner holding it in place with finger pressure. Now stroke that curve/bend repeatedly with that flat edge, ironing it until the glue adheres the plank to the curve. If need be, elicit the help of the admiral for an extra pair of hands.
I will try your suggestion on the next critical bend, unfortunately the two problem bends have been fiddled, diddled, pounded and glued in place.
Jan

 I know that type of thing takes a long time, but the result is well worth it! It looks incredibly realistic - I can't wait to those mounted and installed.