Chaperon 1884 Stern Wheeler

Definitely glue the deck to the hull first.
OOPs, I didn't do that. I used the exposed ribs to clamp on supports to hold the hull high enough so I could paint in even passes.

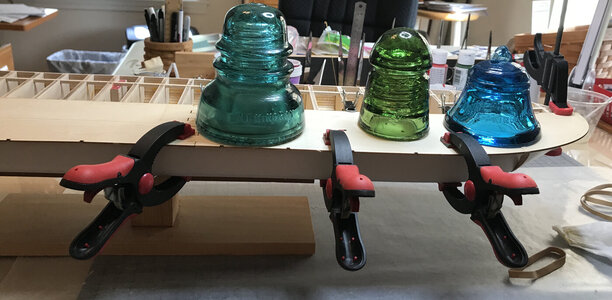
Found a good use for some the Admirals knick knacks. They work great for holding the deck in place while the glue dries.
5847F6E9-1176-4885-B5F0-9C2D58834E91_1_201_a.jpeg

The instructions label these two deck parts as 35S and 36S. The weights are needed to conform the decks to the curvature of the hull and keel.
12FE948D-CEC0-416F-AD9B-19676ACFB103_1_201_a.jpeg

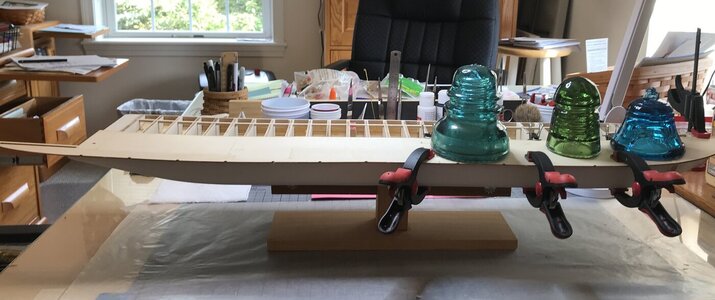
Overall view of the starboard side.

Jan
 
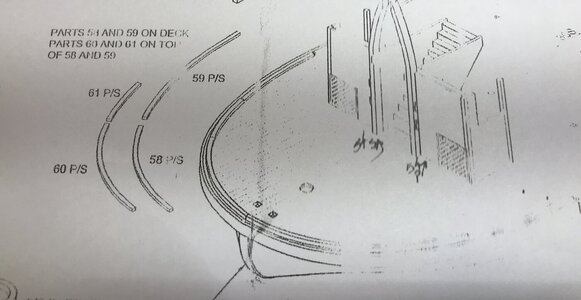
Plan reading 101:

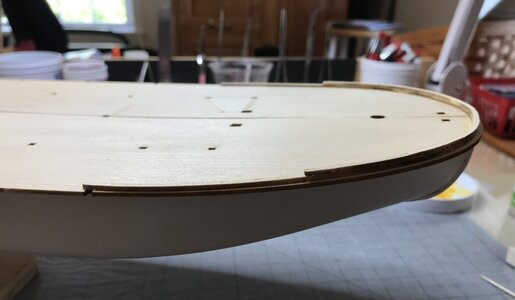
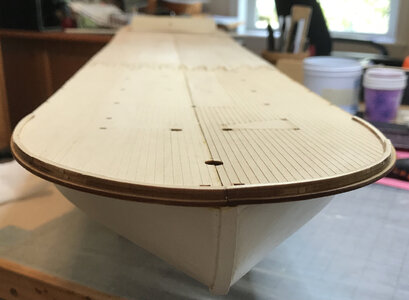
I decided to install the bow pieces, I have no clue as what they are called. I had a wee bit of difficulty translating what is shown on the plans

17779EBC-CB4E-4D06-917F-F95B04C9E7CC_1_201_a.jpeg

into the following.

DFFEFFC1-4BE2-4009-B62B-6B28B1634698_1_201_a.jpeg

F7C73C3F-7C19-4DDE-AE7D-A391296DF504_1_201_a.jpeg

But I think I've got it right.

My reasoning for doing this step now is to help with the planking of the deck. I'm thinking that trimming the new planks at the bow will be much easier with these pieces as a guide.

Jan
 
She is looking great Jan! That sure is one big deck!
I'm working very hard at not getting ahead of myself. It's awfully tempting to start some of the sub assemblies. I've made a list of the steps I went to do next and checked the build instructions to make sure I'm not skipping over any items.

Jan
 
A bit of executed temptation is always good for the motivation. But then ... sanity should prevail.
 
Plan reading 101:

I decided to install the bow pieces, I have no clue as what they are called. I had a wee bit of difficulty translating what is shown on the plans

View attachment 255979

into the following.

View attachment 255980

View attachment 255981

But I think I've got it right.

My reasoning for doing this step now is to help with the planking of the deck. I'm thinking that trimming the new planks at the bow will be much easier with these pieces as a guide.

Jan
That rim looks nice and tight, Jan. In the Cyclopedium from Alan Bates it's just called the coaming.;)
regards, Peter
 
Plan reading 101:

I decided to install the bow pieces, I have no clue as what they are called. I had a wee bit of difficulty translating what is shown on the plans

View attachment 255979

into the following.

View attachment 255980

View attachment 255981

But I think I've got it right.

My reasoning for doing this step now is to help with the planking of the deck. I'm thinking that trimming the new planks at the bow will be much easier with these pieces as a guide.

Jan
Looks good. One item to consider. I’m not sure how thick the planking you plan to use will be but by adding the coaming to the original deck you may encounter the situation where the coaming no longer stands up on the deck. Something to keep an eye out for.
 
Looks good. One item to consider. I’m not sure how thick the planking you plan to use will be but by adding the coaming to the original deck you may encounter the situation where the coaming no longer stands up on the deck. Something to keep an eye out for.
The planking I'm adding is 1/32 X 1/8 inch. The height of the two pieces that make up the coaming is an 1/8 inch. So I don't think there will be an issue adding the planking. Plus my intention is to only plank the deck area where the kit planking is laser inscribed, pieces 36 P/S have the Boiler area that I will leave as is and pieces 35P/S have the inside of the structure that needs not be planked.

2E410050-E6C4-4A1F-B269-7C10CC47355B.jpeg


Jan
 
Last edited:
The planking I'm adding is 1/32 X 1/8 inch. The height of the two pieces that make up the coaming is an 1/8 inch. So I don't think there will be an issue adding the planking. Plus my intention is to only plank the deck area where the kit planking is laser inscribed, pieces 36 P/S have the Boiler area that I will leave as is and pieces 35P/S have the inside of the structure that needs not be planked.

View attachment 256359


Jan
I will be using 1/32 planking as well. Doesn’t look like there is much difference from your picture. I think I am going to extend the planking to the end of the deck and just add the coaming on top. Less cutting and fitting that way. Thanks for sharing.
 
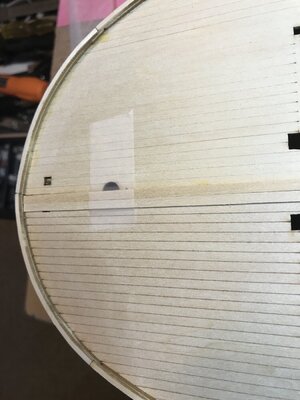
Planking Start:

8E55A3A6-66C3-43D3-9CB0-1839D4DC92F8.jpeg


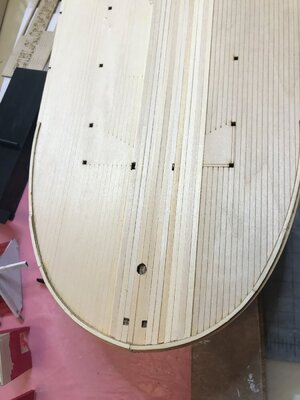
The plank lines on the starboard side of the deck are very faint. The plan is eventually stain the deck with Minwax Light Oak. Much of the deck will not be visible once all the structures are in place. But I do want see the plank lines on the part of deck that is.

So we are working away at it.

Jan
 
Planking Start:

View attachment 257048


The plank lines on the starboard side of the deck are very faint. The plan is eventually stain the deck with Minwax Light Oak. Much of the deck will not be visible once all the structures are in place. But I do want see the plank lines on the part of deck that is.

So we are working away at it.

Jan
Nice to see the start of the planking of the main deck, Jan.
Much of the deck will not be visible once all the structures are in place. But I do want see the plank lines on the part of deck that is.
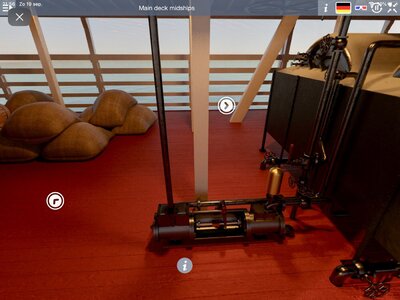
I think you will see still a lot of the planking. Much of the structures has open spaces. In the 3D video on the main deck, behind the steam engine:
F482D4EA-89E9-4F3A-9A10-C7D2535871D7.jpeg
So a good decision to provide the deck with a nice planking.
Regards, Peter
 
@Peter Voogt, thank you for your comments, I did manage to spent a few hours in my shipyard. There are a lot more planks to go, I’m about halfway done on the Port side and in process of setting the rear structure walls in place so I have a reference for the planking mid ships and at the stern. Both the Port and Starboard deck pieces there have very very faint Laser scribed lines. The walls will help to establish the new plank lines.

I reworked the front and side walls of the coal bins ( I think that’s a good name), the scribed lines For the boards were also faint, so both of those pieces got the new plank treatment. I test fitted one to make sure I had the alignment holes right after planking over the old ones. I went with the rework on those pieces since I really don’t have the skill set yet to do the 3D version. But I’m going to scratch build the steps with railings versus the kit version.

EC62A797-B595-4832-AC3F-0CADCC6C78A1.jpeg
Test fit of Port side coal bin walls.

Jan
 
Planking 101, Port side

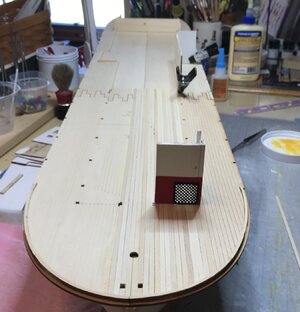
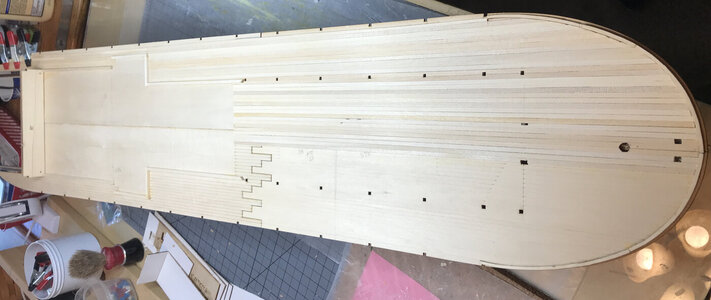
Manged to get a couple of hours work done. The Port side "over-planking" is complete.

38215EC7-A780-469A-9E80-517C84954C09_1_201_a.jpeg

Tough to take a picture with the iPhone because of the hull length. I was worried that the 1/8 inch wide planks would overlap too much at the edge of the hull. But I was pleased to find there was very little trim work to do and that was mostly at the stern. I think the best result of the "over-planking" will be the cover up of the four joints where the deck pieces come together. Those joints stand out at the bottom (Starboard) side in the picture.

Tomorrow we start the Starboard side.

Jan
 
Last edited:
O
Planking 101, Port side

Manged to get a couple of hours work done. The Port side "over-planking" is complete.

View attachment 257285

Tough to take a picture with the iPhone because of the hull length. I was worried that the 1/8 inch wide planks would overlap too much at the edge of the hull. But I was pleased to find there was very little trim work to do and that was mostly at the stern. I think the best result of the "over-planking" will be the cover up of the four joints where the deck pieces come together. Those joins stand out at the bottom (Starboard) side in the picture.

Tomorrow we start the Starboard side.

Jan
I agree those joints are not good nor is there a way to fully eliminate them. Nice work
 
Musings and thinking while the planking glue dries:

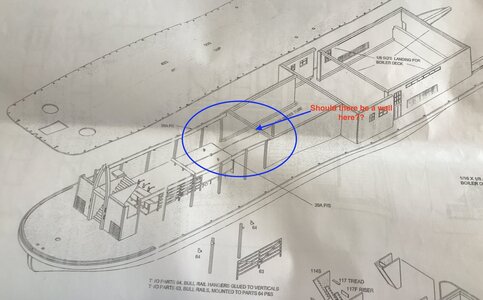
Looking ahead on the plans and deciding what steps to do next I found a couple of curiosity items.

3EE2AF4F-202C-4BC7-AA15-F7DA2FE35A39_1_201_a.jpeg

Me thinks it would be nice to have some sort of wall here to complete the structure. If one were to squint from the bow towards the boiler, or from either side towards to stern I think the opening would be visible. Hmm --- an opportunity for a Jan touch?

E6BEE292-C3F0-4A25-86B5-E3B876E86319_1_201_a.jpeg

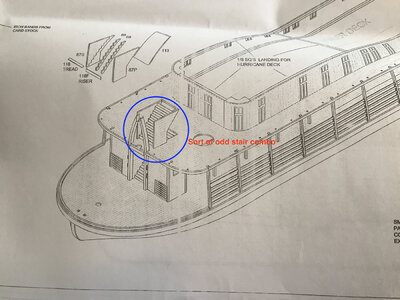
Another opportunity to make a slight change. I think 1:1 scale passengers would be hard put to squeeze by this small landing to get from the Boiler deck up to the Hurricane deck.

Ok. Guys chime in and tell me what you think.

Jan
 
Back
Top