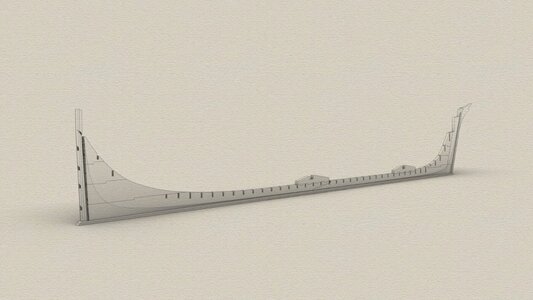
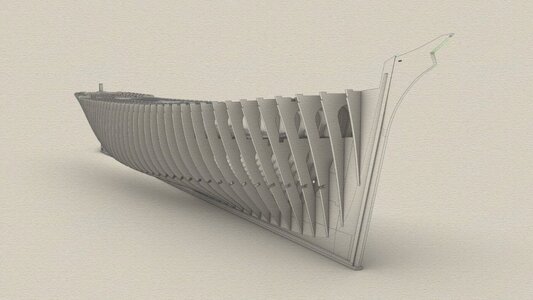
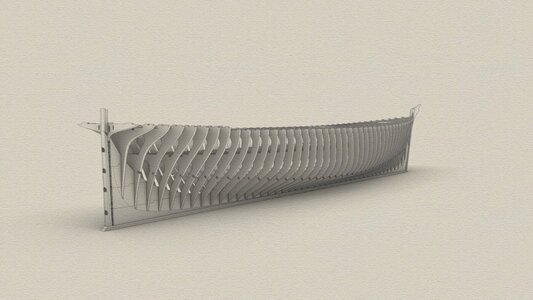
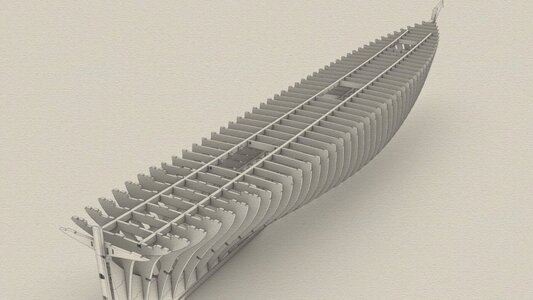
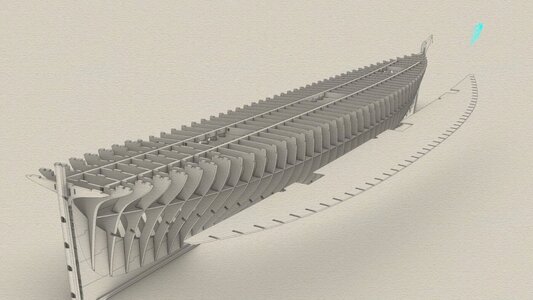
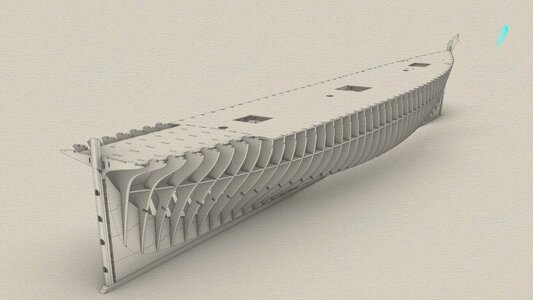
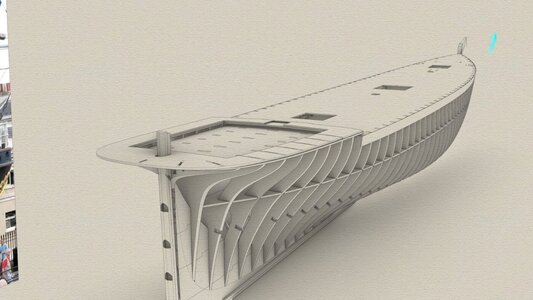
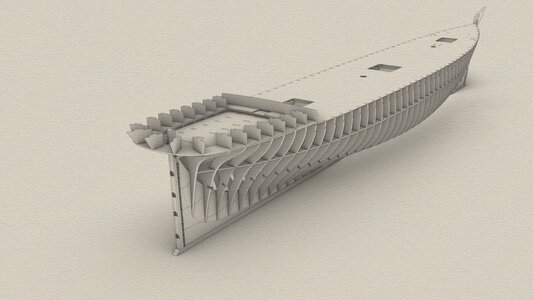
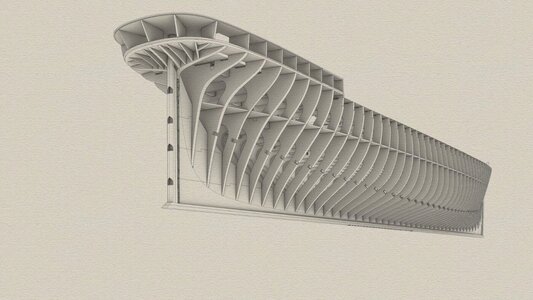
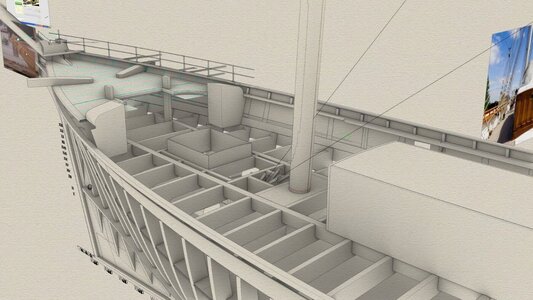
I hope you will include some of your CAD drawings with the plans. The one posted here explains a lot.
-

Win a Free Custom Engraved Brass Coin!!!
As a way to introduce our brass coins to the community, we will raffle off a free coin during the month of August. Follow link ABOVE for instructions for entering.
-

PRE-ORDER SHIPS IN SCALE TODAY!
The beloved Ships in Scale Magazine is back and charting a new course for 2026!
Discover new skills, new techniques, and new inspirations in every issue.
NOTE THAT OUR FIRST ISSUE WILL BE JAN/FEB 2026
You are using an out of date browser. It may not display this or other websites correctly.
You should upgrade or use an alternative browser.
You should upgrade or use an alternative browser.
Cutty Sark Semi Kit 1/40 Prototype
- Thread starter RichardHDunn
- Start date
- Watchers 32
The kit will come with renders of the cad model at various stages, let me puta few up here now. rabbet tool, you should never cut the rabbet along the keel with strokes with the grain, it is nearly impossible to keep the chisel going at the right angle as the wood will have its own agenda.
this is why when real ships are built and the rabbet is adzed to form its done in vertical strikes.
this is why when real ships are built and the rabbet is adzed to form its done in vertical strikes.
PM me and tell me what you want, scales 1/64 1/48/1/40..I am very interested in a set of plans!
The first half of the forward tween deck glued down, it only took 20mins to brush out glue and prop in sticks, it's down tight.
Note both sides are installed but only one is glued for now, but centre stick is over join to keep it flush, I use western red cedar as its soft.
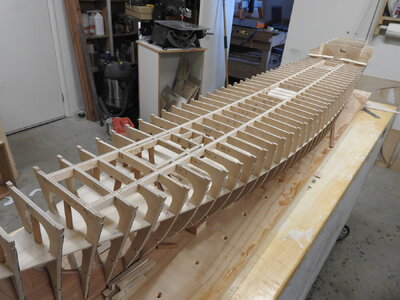
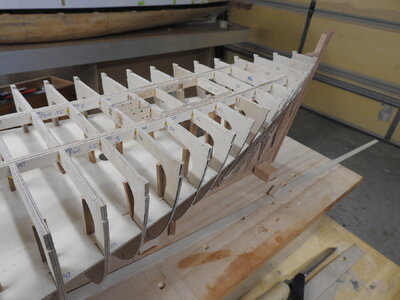
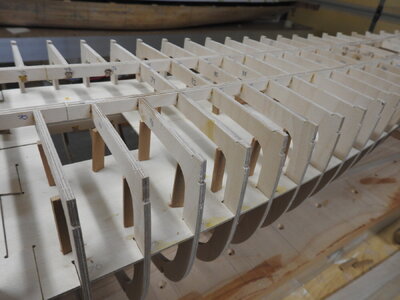
Centre sticks
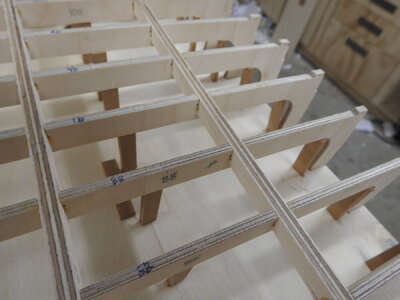
Underside nice and tight
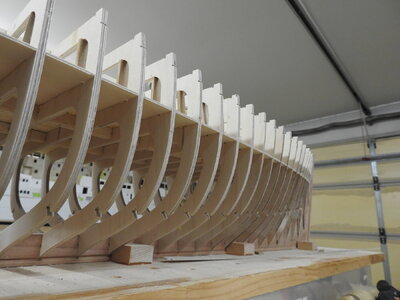
deck line is pretty good. where the deck is notched around frames will get a dab of thin CA later
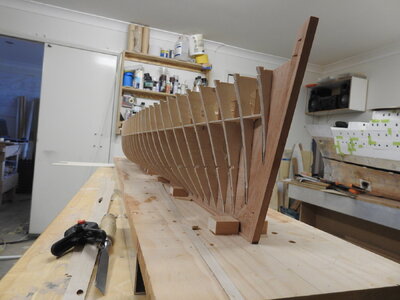
Note both sides are installed but only one is glued for now, but centre stick is over join to keep it flush, I use western red cedar as its soft.


Centre sticks

Underside nice and tight

deck line is pretty good. where the deck is notched around frames will get a dab of thin CA later

Last edited:
1:40 please, and postage to the UK.PM me and tell me what you want, scales 1/64 1/48/1/40..
Thanks
Included in Hull kit so far, and this will change
All cut frames with internals left in for scrap
Keel, Deadwood, stem and sternpost, mast steps and knightheads
The tween and main deck, all the counter frames and parts for the saloon.
The longitudinals on the decks and bilge stringers
Paper templates of the frames for bevels and of the rabbet.
The deckhouse carcasses
The main rail, Topgallant rail, break of poop plank and break of foredeck plank
The catheads with sheave slots cut in
The plates for the counter and bulwarks from ply and aluminium with washports and hawse pipes cut in
The topgallant vertical rail
Cnc cut decorative mouldings for the panelling. Estimated box size approximately 900mm x 500mm wide and 150mm deep
I need to find out about the whole bring wood into countries thing. When I moved to Australia from New Zealand in 2000 I had have all my guitar making wood fumigated.
The fore tween is now glued down, in hindsight I could have just penned in the deck on this ply before gluing into the hull but not even sure I will have hatch covers on or off yet.
Just for all the people who think this is too big I took some weird shots with the Gopro to make it look even bigger. The distortion is the lens.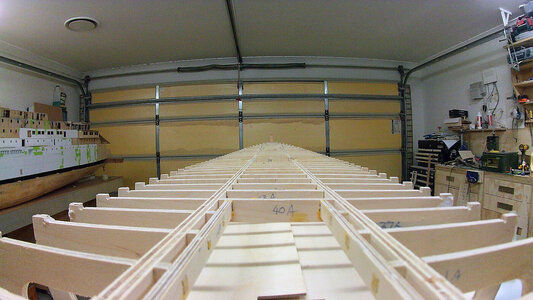
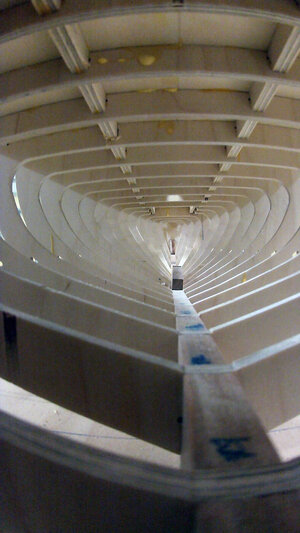
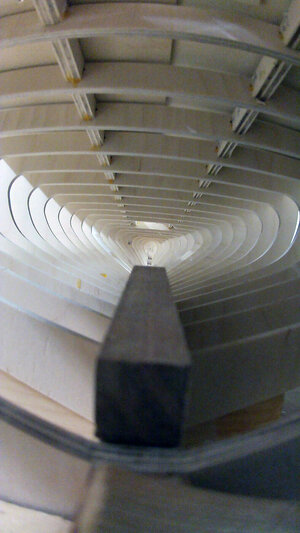
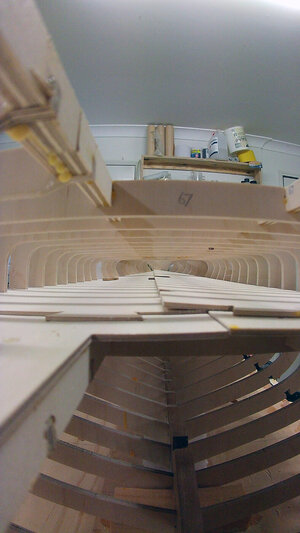
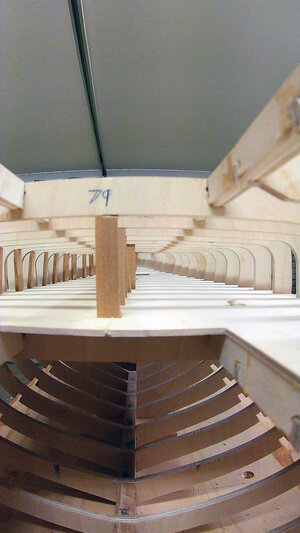


The Stbd bow is finished now ready for planking.
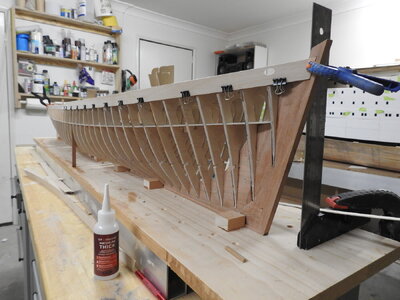
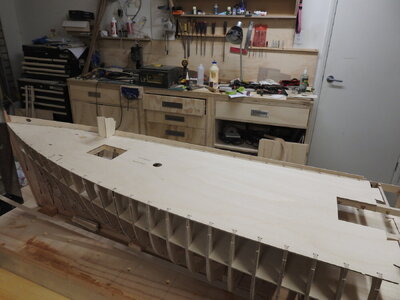
Aft Port Tween is glued in as well
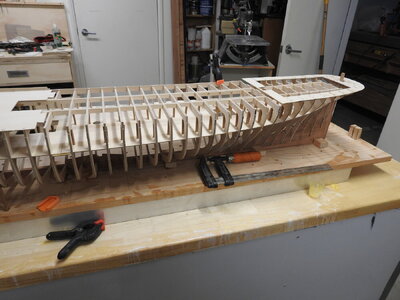
Here you can see the purpose of the sheerplate, it provides the fixing for the bulwark which gets glued to the inside and bolts and styrene frames can be added.
The height here varies along ship and was one of the most important measurements I got, it sets the whole look of the ships lines


Aft Port Tween is glued in as well

Here you can see the purpose of the sheerplate, it provides the fixing for the bulwark which gets glued to the inside and bolts and styrene frames can be added.
The height here varies along ship and was one of the most important measurements I got, it sets the whole look of the ships lines

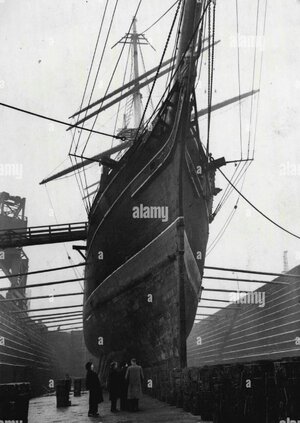
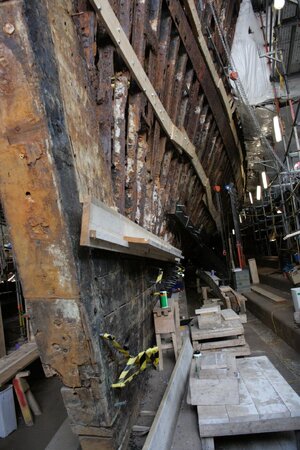
I just noticed that the foot of the bow is squared off. I thought it was rounded to match the upward curve of the hull. Never noticed that before. I also have been reading my book on clipperships and it refers to frame dimensions as "side and moulded". Which is which for the frames?The kit will come with renders of the cad model at various stages, let me puta few up here now. rabbet tool, you should never cut the rabbet along the keel with strokes with the grain, it is nearly impossible to keep the chisel going at the right angle as the wood will have its own agenda.
this is why when real ships are built and the rabbet is adzed to form its done in vertical strikes.
Nope Cutty Sark had a square forefoot and always did, If it was rounded a tiny bit(there is evidence of it) but it was only about 6" to 12" radius at most it was removed very early on when replacing the stem.I just noticed that the foot of the bow is squared off. I thought it was rounded to match the upward curve of the hull. Never noticed that before. I also have been reading my book on clipperships and it refers to frame dimensions as "side and moulded". Which is which for the frames?
It's not got any relation to the sheer of the ship, the design of the forefoot is about the ships ability to go to windward.
Also the cutwater is not on the model yet.
Thermopylae had a round one for example, moulded is the frame beam and extreme is the outside of planking.
I suggest reading the log of the Cutty Sark for more info on this. Her bow lines were modelled on the tweed
Last edited:
I do need to point out this is a semi kit meaning a lot of parts still have to be made by you and you still need a scroll saw and a table saw, Byrnes saw or Proxxon, lathe etc.
It's definitely not a beginners kit.
The main rail, Topgallant rail and margin planks are all cut into solid cherry but the wood is thicker than the 2.7mm needed so it will need to be run through a saw to release it from the wood and correct the thickness.
I will be cutting all that tomorrow and have machined enough for 4 builds.
Why is that Dale?My brain hurts after this thread. Can I use some of those paper towels you have?
Also you will need a Dremel and probably a mill and 1mm and .5mm end mill cutters
Maybe I will just buy the plans and see what they look like. I didn't know I'd have to put in a whole machine shop. Surely a model can be made without all that special equipment. Couldn't a good model maker get the hull, frames and decks and do a decent job of the rest? Maybe I should stick to my Great Republic and other New England clippers since I have a very detailed book on their construction. I'd like to get your plans and instructions anyway if the cost doesn't break my piggy bank. Nobody has mentioned prices yet so I assume they have yet to be established.
I have said several times that this is not a kit for a beginner and most model builders I know of have an MF70 Mill and Dremel., it's just an observation from watching other posts on sites like this, in fact wile watching other builds it was that that made me go and buy an MF70 mill, I only suggest it because the rails need to be grooved with a .5mm cutter to receive the topgallant rail and bulwarks, it would be difficult indeed to do it any other way.Couldn't a good model maker get the hull, frames and decks and do a decent job of the rest?
I have not decided if I will do full plans yet, I asked if people want plans or cut parts and the few answers I got was cut parts I simply don't have the time to do both.
Re price I have not worked it out but its doubtful I will make any profit on them otherwise nobody will buy it, Once you factor in material cost which is about$ 600-700AU and the other costs involved it will be between $1200 and $2000Au.. $1350 US, $1230 EU and $1050 pound
but its too soon to work it out and quantity plays a part as it depends how many orders I run as to how much wastage there is, I am not going to run stock, I will only run orders.
I am not going to just provide decks and frames as that would be a poor reflection on me because the other stuff may not be built correctly or to scale and that would void my guarantee of accuracy, all the important parts will be provided.
Last edited:
So far for one order the following is needed
4.2mm 8 ply 1220 x 1220- 2 off $95 per sheet frames
2.2mm 5 ply 1200 x1220 mm - 2 off $100 per sheet decks and deckhouse carcasses.
1mm 5ply 1220 x 1220mm - .5 off $110 per sheet
Then we have the American cherry
Thats roughly $100
Then the templates on Drafting film printing of those is about $40
There is $585 already
Darn, my piggy bank just fell off the table.
- Joined
- Nov 6, 2022
- Messages
- 243
- Points
- 113

As for my brain, it is because what you are trying to achieve is fantastic and the knowledge you have is overwhelming. As for the paper towels, I just saw them neatly mounted under one of the shelves and thought "very organized".Why is that Dale?


