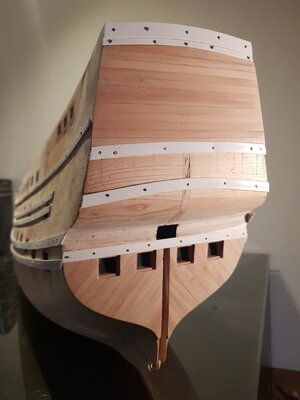
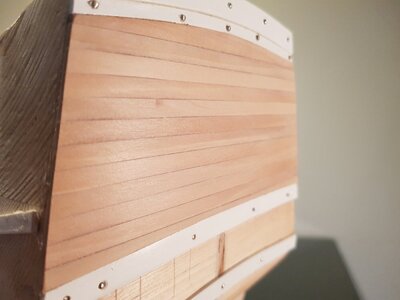
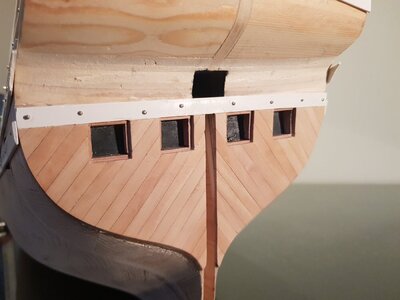
Thank you Heinrich for your kind words. I am now planking the stern and must say the plastic wales provide great support.Wow! This required some serious catching up on my part. That hull looks so good, Herman and the plastic wales show off the hull curvature perfectly - just like Nigel said. I love the ingenuity that you are employing in this build - and it all works to great effect!
-

Win a Free Custom Engraved Brass Coin!!!
As a way to introduce our brass coins to the community, we will raffle off a free coin during the month of August. Follow link ABOVE for instructions for entering.
-

PRE-ORDER SHIPS IN SCALE TODAY!
The beloved Ships in Scale Magazine is back and charting a new course for 2026!
Discover new skills, new techniques, and new inspirations in every issue.
NOTE THAT OUR FIRST ISSUE WILL BE JAN/FEB 2026
You are using an out of date browser. It may not display this or other websites correctly.
You should upgrade or use an alternative browser.
You should upgrade or use an alternative browser.
Herman, I love unique approach using the plastic wales as temporary placeholders. I am currently using painters tape to map my wales, but being basically two dimensional they don't provide the complete function I was looking for.
Would you tell us what what plastic material you are using and where you found it. I'd like to do a proof of concept with that material if I can get a hold of it.
Once again, your results are very impressive.
Thank you.
[/QUOTE
.
Hi Hoss.
Thank you for your interest.
You might find the strips looking for ''polystyrene profiles'.
I bought them at modelbouwshopnederland.nl . Most modelshops sell them with a standard length of about 30 cm. This was one of the shops that had profiles measuring 1 meter in length, just enough to cover the length of my model. They come in different sizes but I did have to adjust most of them to the correct width to match the wales.
Last edited:
Can't really do it better than that Herman! Awesome!
Absolutely neat work. Nicely done.
Hello Herrmann,
I think the idea with the plastic strips is brilliant, I wrote it down, thanks for sharing.
I think the idea with the plastic strips is brilliant, I wrote it down, thanks for sharing.
It has been a while since I posted anything. We needed a break from work so we recharged ourselves on a short vacation to Cyprus and after 10 years I bought a Harley again. As the weather has finally improved there was also a lot of gardening work to be done.
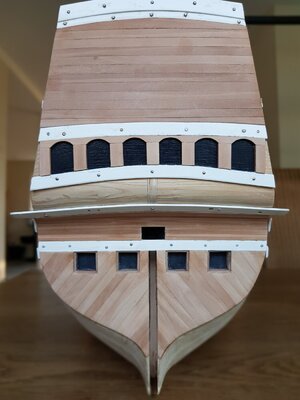
So many hobbies, so little time, but finally I have picked up modeling again. I have added a plastic strip to the stern and planked a further part of the stern.
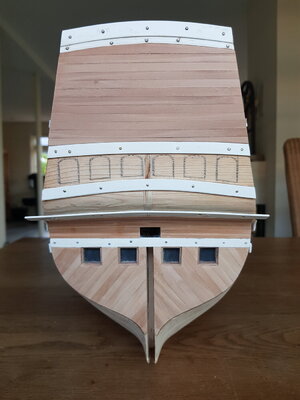
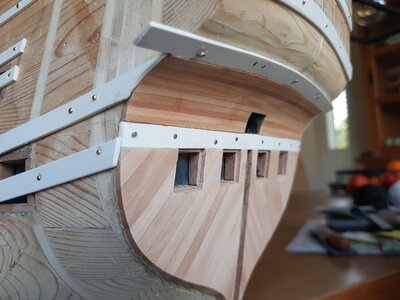
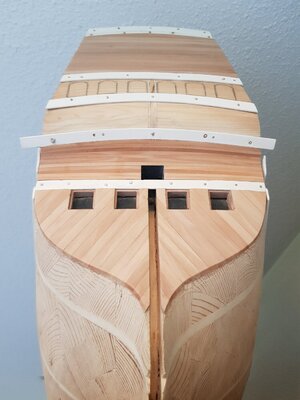
So many hobbies, so little time, but finally I have picked up modeling again. I have added a plastic strip to the stern and planked a further part of the stern.


Next, the window frames. I first painted the parts of the hull black that will act as background for the stained glass windows, these windows will be constructed in a later stage. Thereafter I made the upper beam with the curved recesses, followed by the vertical part of the window frames. The plastic strips have proven their worth again.
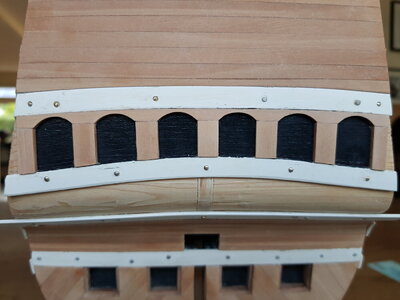
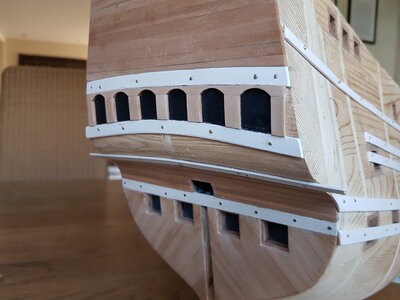


Thank you all for your likes, much appreciated.
It has been a while since I posted something. Last months we had fine weather, so gardening, riding the bike and in the meantime I have also installed an electric garage door.
One of the next steps in building will be planking the hull. I will start planking between the temporary plastic wales, later the planking above the wales and the last step will be the lower part of the hull including the keel.
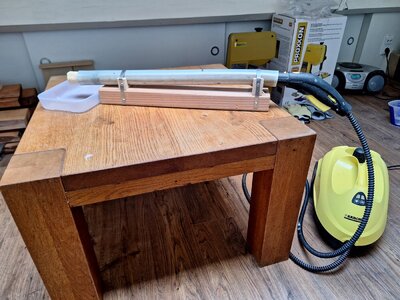
So on to my first step in bending wood. As we already have a steam cleaner I could make a simple steam pipe (on the lower end is a small hole to drain the water).
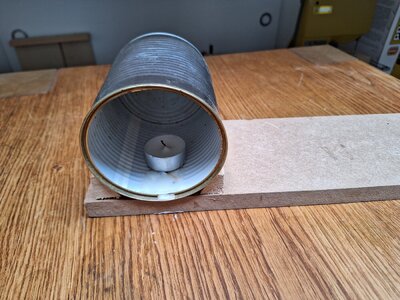
Following the idea of @El Capi to bend wood I use the simple yet effective food can / tealight method - using heat resisting gloves .
.
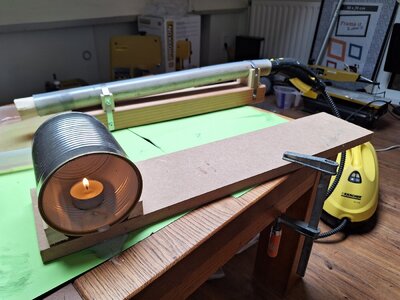
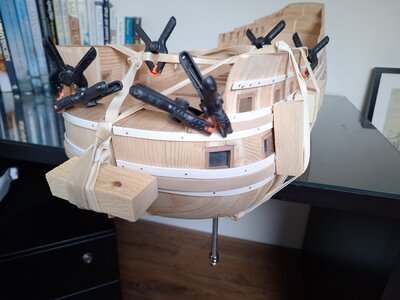
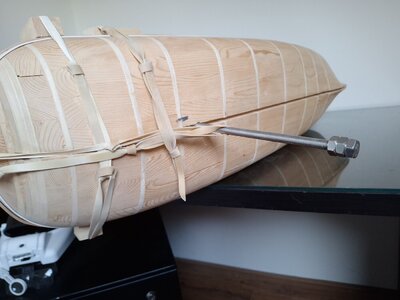
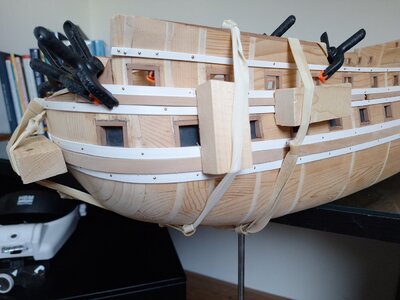
So the first pieces of pear wood (thickness about 3) have been steamed (about 10 minutes), bent to the proper form and fastened to the hull by means of post elastics to dry (also the first supporting task -holding the post elastics- for the screw struts on which the model will rest later).
I am satisfied with my first attempt bending wood. I confess some pieces of wood were broken in the process, not taking enough time in combination with some weak spots in the wood and a piece whose shape did not follow the grain of the wood. Lessons learned .
.
It has been a while since I posted something. Last months we had fine weather, so gardening, riding the bike and in the meantime I have also installed an electric garage door.
One of the next steps in building will be planking the hull. I will start planking between the temporary plastic wales, later the planking above the wales and the last step will be the lower part of the hull including the keel.
So on to my first step in bending wood. As we already have a steam cleaner I could make a simple steam pipe (on the lower end is a small hole to drain the water).

Following the idea of @El Capi to bend wood I use the simple yet effective food can / tealight method - using heat resisting gloves


So the first pieces of pear wood (thickness about 3) have been steamed (about 10 minutes), bent to the proper form and fastened to the hull by means of post elastics to dry (also the first supporting task -holding the post elastics- for the screw struts on which the model will rest later).
I am satisfied with my first attempt bending wood. I confess some pieces of wood were broken in the process, not taking enough time in combination with some weak spots in the wood and a piece whose shape did not follow the grain of the wood. Lessons learned


This is off to a fantastic start, Herman. I really like the tea-light bending form - such a cool idea. I might, though, make a small adjustment to one of the temporary wale spacers at the bow, just to the side of where the hawser entry will be; there appears to be a small gap between the filling plank and the plastic. It isn’t a problem now, but it will perpetuate gaps in the planking above. Simplest fix would be to fair the top hump in the plastic.
I like the idea of using flexible plastic strips. Great work. 
Thanks for your alertness and advice. Due to the steaming the wood has absorbed some water and did not fit easily between the plastic wales. I must have pushed the wale a bit out of position. I reckon I can push it back and maybe fix it in place with some extra nailing.This is off to a fantastic start, Herman. I really like the tea-light bending form - such a cool idea. I might, though, make a small adjustment to one of the temporary wale spacers at the bow, just to the side of where the hawser entry will be; there appears to be a small gap between the filling plank and the plastic. It isn’t a problem now, but it will perpetuate gaps in the planking above. Simplest fix would be to fair the top hump in the plastic.
Very interesting methods and tools (steaming, bending, keeping in place etc.)
It gives always a little vibe bending the first plank, Herman. With all it’s pro’s and con’s.Thank you all for your likes, much appreciated.
It has been a while since I posted something. Last months we had fine weather, so gardening, riding the bike and in the meantime I have also installed an electric garage door.
One of the next steps in building will be planking the hull. I will start planking between the temporary plastic wales, later the planking above the wales and the last step will be the lower part of the hull including the keel.
So on to my first step in bending wood. As we already have a steam cleaner I could make a simple steam pipe (on the lower end is a small hole to drain the water).
View attachment 387329
Following the idea of @El Capi to bend wood I use the simple yet effective food can / tealight method - using heat resisting gloves.
View attachment 387332View attachment 387333
So the first pieces of pear wood (thickness about 3) have been steamed (about 10 minutes), bent to the proper form and fastened to the hull by means of post elastics to dry (also the first supporting task -holding the post elastics- for the screw struts on which the model will rest later).
I am satisfied with my first attempt bending wood. I confess some pieces of wood were broken in the process, not taking enough time in combination with some weak spots in the wood and a piece whose shape did not follow the grain of the wood. Lessons learned.
View attachment 387344View attachment 387346View attachment 387345
A nice start.
Regards, Peter
Very,very sharp work Herman and that timber will look fabulous when you apply a finish to it.
Kind Regards
Nigel
Kind Regards
Nigel
I appreciate your unconventional approach to many aspects of this build Herman. Always something to learn here.
Hello Herrmann,
if you have a garden there is always something to do, I know that all too well and you have to take advantage of the nice weather. It's nice to see you working on the 7 provinces again and the result looks great.
if you have a garden there is always something to do, I know that all too well and you have to take advantage of the nice weather. It's nice to see you working on the 7 provinces again and the result looks great.


