-

Win a Free Custom Engraved Brass Coin!!!
As a way to introduce our brass coins to the community, we will raffle off a free coin during the month of August. Follow link ABOVE for instructions for entering.
-

PRE-ORDER SHIPS IN SCALE TODAY!
The beloved Ships in Scale Magazine is back and charting a new course for 2026!
Discover new skills, new techniques, and new inspirations in every issue.
NOTE THAT OUR FIRST ISSUE WILL BE JAN/FEB 2026
You are using an out of date browser. It may not display this or other websites correctly.
You should upgrade or use an alternative browser.
You should upgrade or use an alternative browser.
Lovely work Herman! Nice fit to the strakes and nice symmetry.
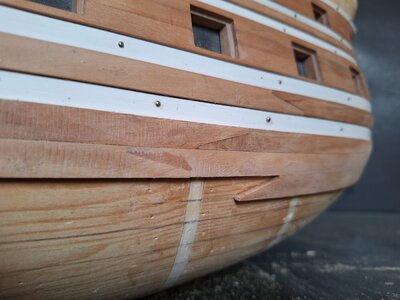
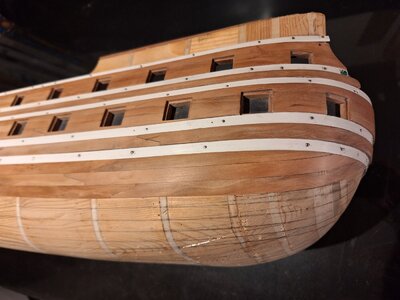
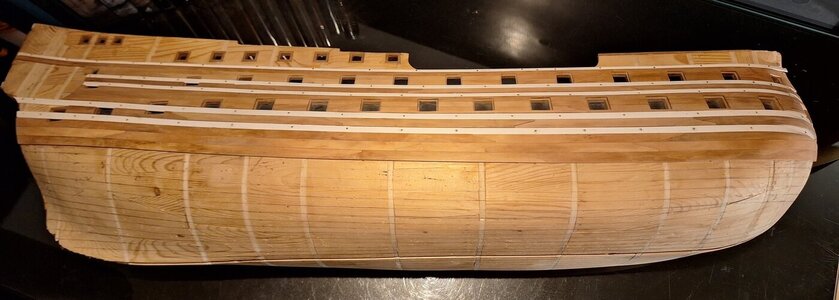
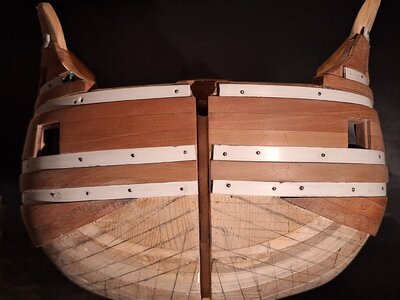
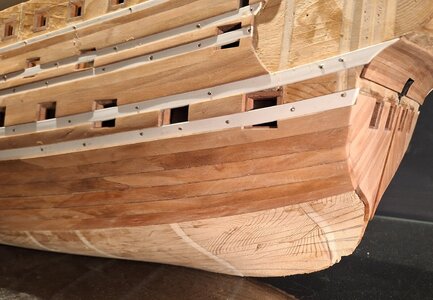
That’s looking very nice, Herman.To maintain some balance three rows of planks on the starboard side are also completed.
In progress:
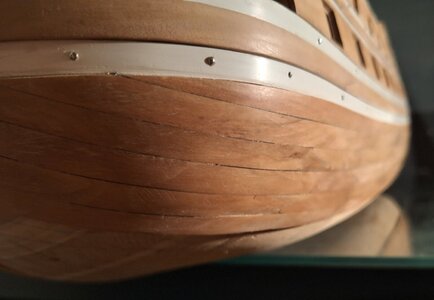
View attachment 403057
And completed:
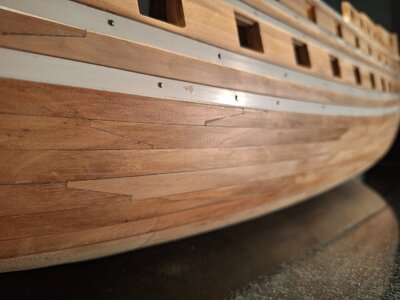
View attachment 403058
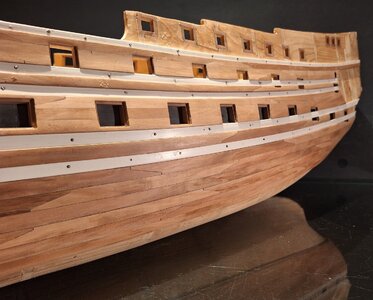
View attachment 403061
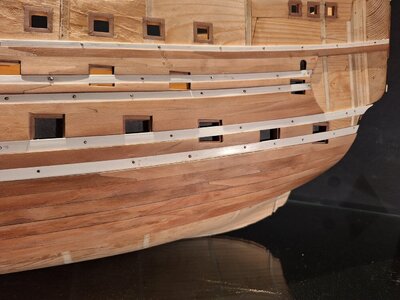
Front view:
View attachment 403060
Regard, Peter
Very good start with the planking - and you have definitely enough "meat" for later accurate sanding
- Joined
- Oct 15, 2017
- Messages
- 1,190
- Points
- 443

Love looking at your work Herman. Planking is looking very good. The wood's color is wonderfully warm. Is it completely untreated? Did you do any processing on it? It does not have that "raw" look. Maybe you steel wool it? Whatever, it looks great!  As for the ship, she is a wonderfully plump girl, round and sturdy. All good things, but even to the untrained eye, she is not a French girl.
  Keep up the wonderful work sir!
 As for the ship, she is a wonderfully plump girl, round and sturdy. All good things, but even to the untrained eye, she is not a French girl.
  Keep up the wonderful work sir!
Love looking at your work Herman. Planking is looking very good. The wood's color is wonderfully warm. Is it completely untreated? Did you do any processing on it? It does not have that "raw" look. Maybe you steel wool it? Whatever, it looks great!As for the ship, she is a wonderfully plump girl, round and sturdy. All good things, but even to the untrained eye, she is not a French girl.
Keep up the wonderful work sir!
Thank you Ken
The wood itself is still untreated. The photo "in progress" shows how it looks when I have glued the planks to the hull and roughly filed them to match in height.
The further photo's show the planks after initial sanding and indeed a treatment with steel wool (both just to make it more presentable here).
When the planking is almost completed I will sand all planking of the hull down to the proper shape.
"Almost completed" in this case meaning before the keel and garboard strakes are installed, making it easier to do that sanding job without damaging the keel etc.
When all planking including the keel etc are completed the hull will be treated.
Plank by Plank - there are only 10 or 11 more on this side of the hull - chaka, you will do it 

Nice planking, Herman. And the joints are looking better and better.And another 3 rows of planks completed on the port side.
View attachment 405911
View attachment 405909
View attachment 405910
View attachment 405913
View attachment 405912
On to the next 3 on starboard side.
Regard, Peter
Very tedious work with all the joints, but I think it's worth it because it looks excellent. Great job, Herrmann.
I echo everyone's statement Herman. Beautiful joinery. Did you already explain how you achieved such tight joints? Or would you?
Thank you.
Hi Ken. I will show how I make the joints. Nothing fancy, no jigs. I actually made a jig, but as the joinery on a Dutch vessel was uneven that would have turned out historically incorrect. The jig has not been used.
First make a plank fit to the adjacent plank and determine where a joint will be made (no joints directly next to each other). Draw the joint on the wood.
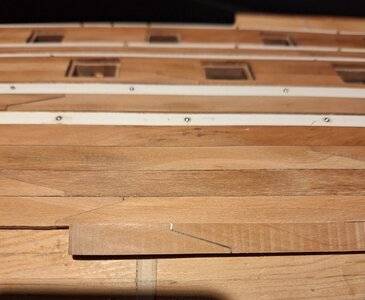
I use a scroll saw to cut the shape of the joint.
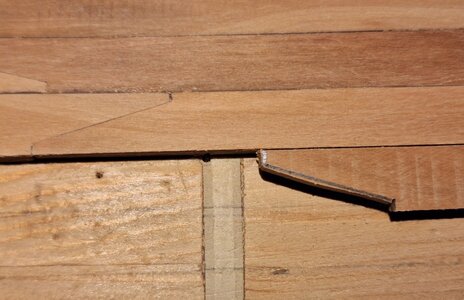
I then clean it up by file.
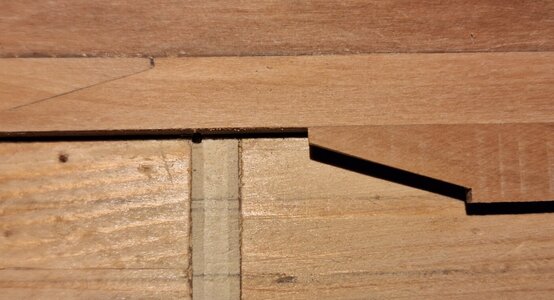
And copy this form to the next plank (prior to making the joint on that plank, it has been made to fit).
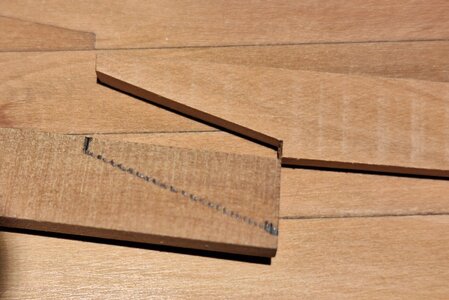
Use the scroll saw again (not my worst attempt I must say).
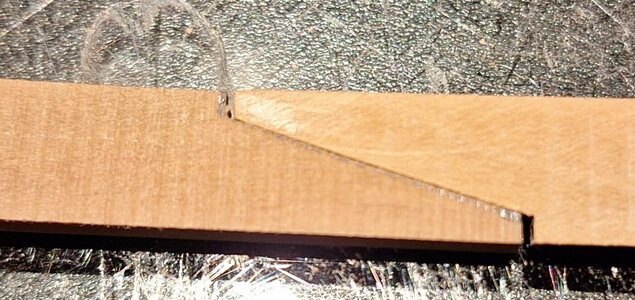
After some filing this is the result, looking good.
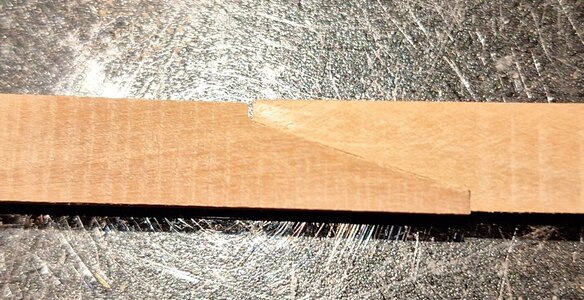
But only the angle and length are ok. I check it by pressing a plank to the joint, if there are gaps between the planks further work is needed.
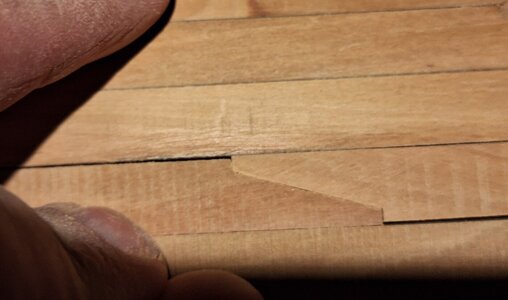
After carefully filing the joint the result is acceptable.
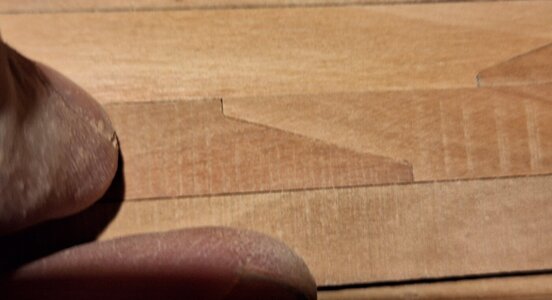
So just a lot of simple handwork. One joint goes better than the other. If you take too much off, just move the joint a short distance and start over again. The plank will be somewhat shorter, but that is no problem building a Dutch vessel, no fixed dimensions.
Excellent joinery work, Herrmann!
Wow, what great explanation of your joinery method. I will have to try that.
Your planking looks fantastic.
Jan
Your planking looks fantastic.
Jan
Thank you all for visiting and your likes.
I forgot to mention that I sand away the pencil marks directly after using the scroll saw. The pencil line only distracts me from filing a straight line.
Generally I hold the wood up to the light or other contrasting background to determine if I am filing in a straight line. The same applies to checking the form of the planks. My workplace doesn't have the best lighting; still have to address that issue.
- Joined
- Oct 15, 2017
- Messages
- 1,190
- Points
- 443

A BIG thank you Herman for your very detailed explanation! Quite a simple method. Free handed is even more impressive. I would imagine a hooked scarf joint could also be done the same way, although might take a little more time.
Thanks again!
Thanks again!
Excellent work Herman. I found rough cutting the Scarph on the bandsaw then trimming the slope in a large machine vice with a Scalpel works for me, using the face of the vice jaws as my trimming guide.Dave Steven's covered this in one of his logs I find it the easiest way after trying all the others

