DE 7 PROVINCIËN (1665) 1:50

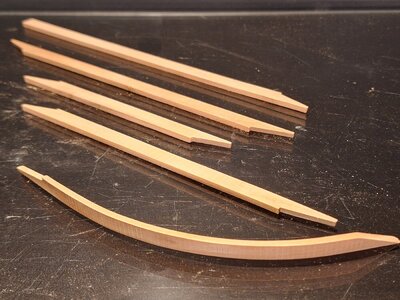
Excellent work Herman. I found rough cutting the Scarph on the bandsaw then trimming the slope in a large machine vice with a Scalpel works for me, using the face of the vice jaws as my trimming guide.Dave Steven's covered this in one of his logs I find it the easiest way after trying all the others
Thanks for your input Nigel.
I will give it a try, For the longer scarph joints on the wales it will certainly alleviate the task to get a straight line there.
 
I find a number 26 scalpel blade works best, you can flex the blade enough for it to follow the tops of the vice jaws ;)

The wales' thickness will be roughly about 6 mm / 0,25 inch. I have no experience handling a scalpel, but my first thought was that might be a bit much for the use of a scalpel?
On the other hand it will only have to take the last slice of wood off. That might work. I will give it a try.
Thanks Nigel.
 
I find a number 26 scalpel blade works best, you can flex the blade enough for it to follow the tops of the vice jaws ;)
The wales' thickness will be roughly about 6 mm / 0,25 inch. I have no experience handling a scalpel, but my first thought was that might be a bit much for the use of a scalpel?
On the other hand it will only have to take the last slice of wood off. That might work. I will give it a try.
Thanks Nigel.
I agree with Nigel: the use of scalpels is very useful. I have 3 types and de medical boxes with 100 pieces are rather cheap.
And to finish them very sharp, slice them over a piece of leather. I learned that from Stephan @Steef66
Regards, Peter
 
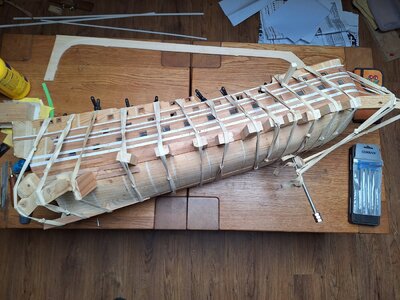
Just a few photos of work in progress.

One row of planks ready to be attached to the model.
20231111_191351_resized.jpg

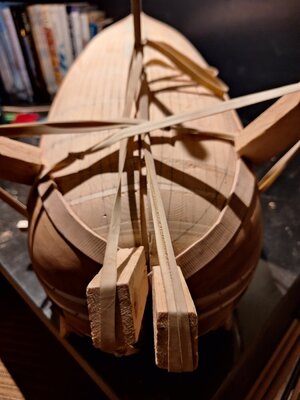
And the model in full bondage ;)
The front planks are held in place after gluing.
The planks on the rear are preformed in the correct curved shape and are now held in place to dry for a day.
20231112_134641_resized.jpg
 
Last edited:
Just a few photos of work in progress.

One row of planks ready to be attached to the model.
View attachment 407357

And the model in full bondage ;)
The front planks are held in place after gluing.
The planks on the rear are preformed in the correct curved shape and are now hold in place to dry for a day.
View attachment 407358
Excellent work, well done for the patient investment and accuracy, it is reflected in the model (even if it is surrounded by rubber bands and small wooden blocks:D)
 
so row by row - some hours work for only one row of the planking - great - I love my / our hobby :cool:
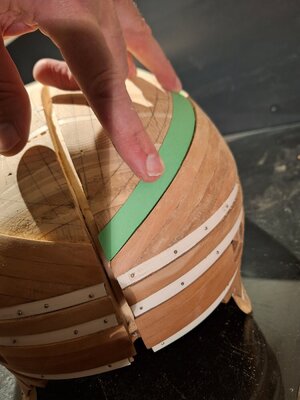
Sometimes even hours of work for only 1 plank. The first planks on the bow take up a lot of time. The upper 4 (straight) planks could be made to fit flat to the hull by means of edge-bending. When trying to make the lower ones fit using this method a gap forms under the bottom of that plank.

Time to change the method. The need for "natural curved" wood arises.

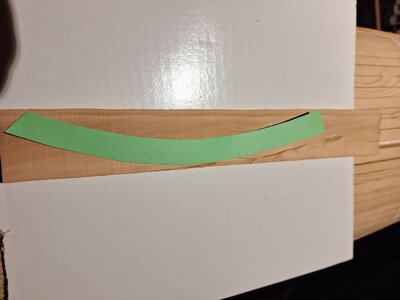
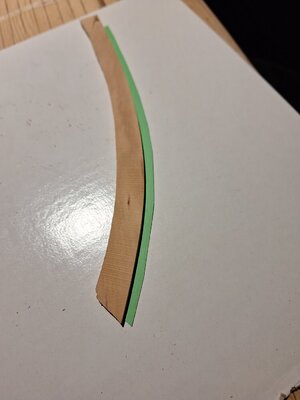
To get the right curvature I have first made a piece of cardboard in the desired shape.
20231116_185901.jpg

Copied the form to a piece of wood.
20231116_190007.jpg

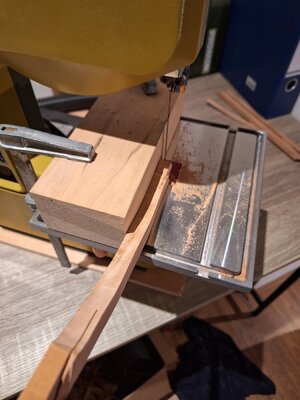
The wood was sawn, oversized.. I will reduce it to the proper width later on the model itself.
20231116_192508.jpg

And divided into two identical planks, each for one side of the hull.
20231116_190619.jpg

In this form they were bent and stay flat to the hull. Clamped to the hull, drying.
20231116_223013.jpg

This method should work! The planks follow the correct lines so the next planks can be made less oversized.
 
Sometimes even hours of work for only 1 plank. The first planks on the bow take up a lot of time. The upper 4 (straight) planks could be made to fit flat to the hull by means of edge-bending. When trying to make the lower ones fit using this method a gap forms under the bottom of that plank.

Time to change the method. The need for "natural curved" wood arises.

To get the right curvature I have first made a piece of cardboard in the desired shape.
View attachment 407421

Copied the form to a piece of wood.
View attachment 407422

The wood was sawn, oversized.. I will reduce it to the proper width later on the model itself.
View attachment 407423

And divided into two identical planks, each for one side of the hull.
View attachment 407424

In this form they were bent and stay flat to the hull. Clamped to the hull, drying.
View attachment 407427

This method should work! The planks follow the correct lines so the next planks can be made less oversized.

View attachment 407420
I just spent a month doing this exact same thing. You will find it won't hardly slow you down at all.
 
Cutting a semicircle under this saw is a big challenge. Usually, similar shapes don't come out of it, unless the saw cuts your fingers, it's always the same, but it is better not to try :oops:
 
Cutting a semicircle under this saw is a big challenge. Usually, similar shapes don't come out of it, unless the saw cuts your fingers, it's always the same, but it is better not to try :oops:
Let's say I took the challenge and won.
I once cut one of my fingers using the tablesaw and must say I am nowadays a lot more careful handling these machines. The last of the semicircle is pulled backwards from the machine instead of pushing it.
 
Back
Top