Donnie's HMS Blandford Cross Section Build: 1/32 Scale [COMPLETED BUILD]

Good job Donnie, from novice to Master Builder in one easy step.

Thank you for the group build project and the many detailed problem-solving explanations with step by directions and photos that contributed to the success of other members of the group.

Mike
 
Hallo my friend,
your work is really very good - very good quality.
Maybe it is allowed to give one tip for pimping, to get a final touch.
Due to the fact, that the model will be not rigged, your deadeyes will stay like they are shown now.
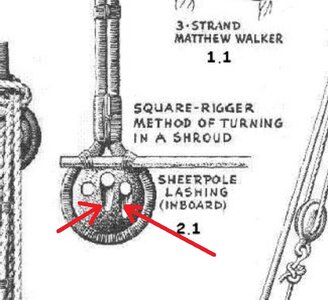
Therefore I would sand slightly the small notches into the outside of the deadeye - they were often cut into the wood, so that the ropes was not damaged running around the corner. Inboard they had two - on the outside on all three holes
Unbenannt.JPG
 
Thank you Uwe for sharing. Always you bring interesting things.

Well . . . the latest. I departed from the dead eyes and wanted to experiment quickly on the carriages. First stop was the wheels.

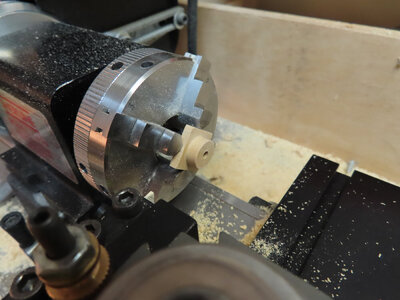
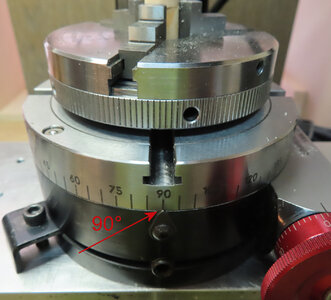
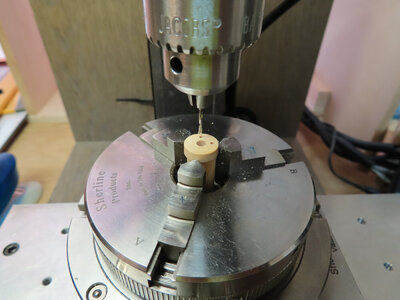
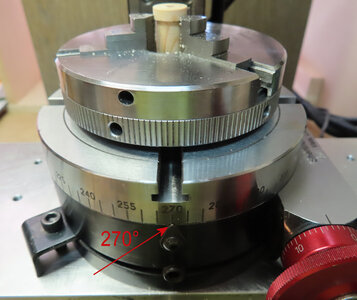
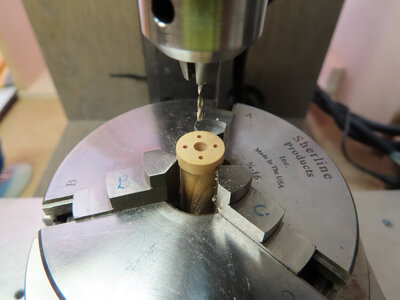
I know this is OVERKILL using a Rotating Table, but I had it and usually do not get to use it, so, I brought it out as I really wanted to take my time (since I am off today) and try to make a wheel prototype. I am using boxwood piece as you will see it is NOT a dowel. I am running out of wood to choose from and I have to use my imagination. Good thing about a lathe, it will take almost anything square or likewise and turn it into a round object. The Bolts on the wheels are brass blackened with 1.2mm brass rod and a drill bit to drill same.
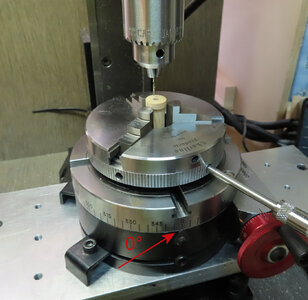
The Rotary Table has degrees marked off and there is no guessing here.
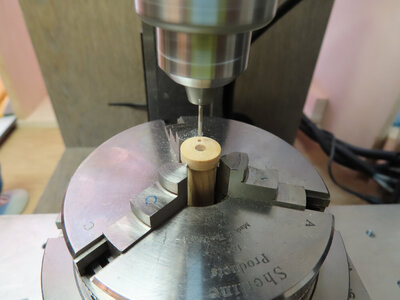
NOTE: Yes, I know the Rotary Table (Images) are shot NOT complete sequence and order as far as the 0, 90, 270, and 360, but I just demonstrated the "principle" - I know there are gaps in the process. Sometimes, in a sequence like this, it is very easy to forget what step you are at when you are trying to take pictures, document, and then pay attention to where you are. Mostly me forgetting to take a picture when I should have. :(

carriage-01.jpg

carriage-02.jpg

carriage-03.jpg

carriage-04.jpg

carriage-05.jpg

carriage-06.jpg

carriage-07.jpg

carriage-08.jpg

carriage-09.jpg

 
Last edited:
Thank you Uwe for sharing. Always you bring interesting things.

Well . . . the latest. I departed from the dead eyes and wanted to experiment quickly on the carriages. First stop was the wheels.

I know this is OVERKILL using a Rotating Table, but I had it and usually do not get to use it, so, I brought it out as I really wanted to take my time (since I am off today) and try to make a wheel prototype. I am using boxwood piece as you will see it is NOT a dowel. I am running out of wood to choose from and I have to use my imagination. Good thing about a lathe, it will take almost anything square or likewise and turn it into a round object. The Bolts on the wheels are brass blackened with 1.2mm brass rod and a drill bit to drill same.
The Rotary Table has degrees marked off and there is no guessing here.
NOTE: Yes, I know the Rotary Table (Images) are shot NOT complete sequence and order as far as the 0, 90, 270, and 360, but I just demonstrated the "principle" - I know there are gaps in the process. Sometimes, in a sequence like this, it is very easy to forget what step you are at when you are trying to take pictures, document, and then pay attention to where you are. Mostly me forgetting to take a picture when I should have. :(


View attachment 185721

View attachment 185722

View attachment 185723

View attachment 185724

View attachment 185725

View attachment 185726

View attachment 185727

View attachment 185728

The lathe was a good decision as we all know that dowels are not round but have irregularities in circumference and typically don't match the stated diameter. PT-2
 
Thank you Uwe for sharing. Always you bring interesting things.

Well . . . the latest. I departed from the dead eyes and wanted to experiment quickly on the carriages. First stop was the wheels.

I know this is OVERKILL using a Rotating Table, but I had it and usually do not get to use it, so, I brought it out as I really wanted to take my time (since I am off today) and try to make a wheel prototype. I am using boxwood piece as you will see it is NOT a dowel. I am running out of wood to choose from and I have to use my imagination. Good thing about a lathe, it will take almost anything square or likewise and turn it into a round object. The Bolts on the wheels are brass blackened with 1.2mm brass rod and a drill bit to drill same.
The Rotary Table has degrees marked off and there is no guessing here.
NOTE: Yes, I know the Rotary Table (Images) are shot NOT complete sequence and order as far as the 0, 90, 270, and 360, but I just demonstrated the "principle" - I know there are gaps in the process. Sometimes, in a sequence like this, it is very easy to forget what step you are at when you are trying to take pictures, document, and then pay attention to where you are. Mostly me forgetting to take a picture when I should have. :(


View attachment 185721

View attachment 185722

View attachment 185723

View attachment 185724

View attachment 185725

View attachment 185726

View attachment 185727

View attachment 185728

I am interested in that rotating table with the precise settings. Who produces or sells it? I am going to make the contact to see the price and consider the cost/benefit for how often I would use it. . . the accuracy cannot be duplicated by estimation with the equipment that I have on my drill press. THanks… . PT-2
 
PT-2
That is a Sherline accessory Rotating Table. I assume that it will work w any mini mill. It’s one of those things that is use very rarely, but it pays for itself in one use as far as I am concerned.
 
Thank you all for your likes. You are correct Uwe, for a nice touch, it is beneficial to add the notches from the holes instead of having sharp corners. I might revisit that after the carriages for final touch up.

The Carriage Wheels continued. This has been more effort and pain trying to get the brass pins to look halfway decent. Inserting the pins and sanding them flush was not the problem.

Therefore, I wanted to blacken them. So, I punched them out. BAD mistake and I am glad that I only punched one set of pins of one wheel. Very difficult to get back in (once they were blackened). It was not the blackening that made them so difficult to put back in. The fit is too tight.

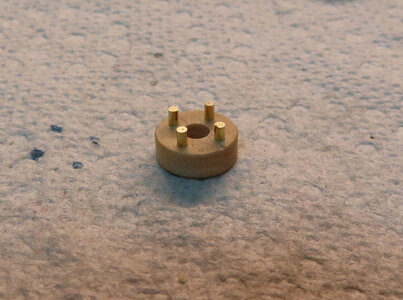
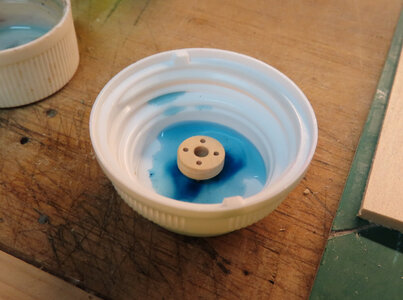
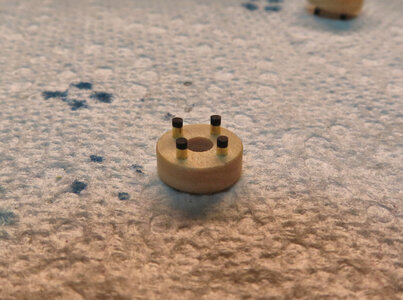
Plan "B": Then I proceeded to punch out the pins about halfway, then lower the whole wheel into a SHALLOW solution. Only to get the tips of the pins blackened and not drop the entire wheel into solution. Then when done, I taped the pins back in (much easier since they were already in the wheels and only needed to be pushed back in).

Main thing --- big ordeal -- glad it is over.

Here are some pics of the process the best I could do. I am not sure what to do about the INSIDE of the wheels Pins being non-blackened, but they will be hidden as they will be facing the carriage. If not, then I will take a very tiny drop of black paint on the pins on the inside.

PUSHING THE PINS OUT TO BLACKEN THE TIPS

carriage-10.jpg


CAREFULLY SETTING THE ASSEMBLY INTO SOLUTION NOT TO GET THE WHOLE WHEEL WET.

carriage-11.jpg


TIPS ARE BLACKENED AND CAN BE PUSHED BACK IN LEAVING A SLIGHT RISE TO SIMULATE BOLTS.

carriage-12.jpg


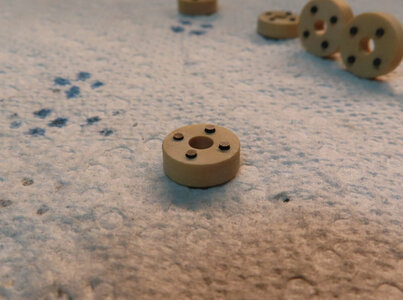
FINAL PRODUCT

carriage-13.jpg


ALL WHEELS DONE NOW ---
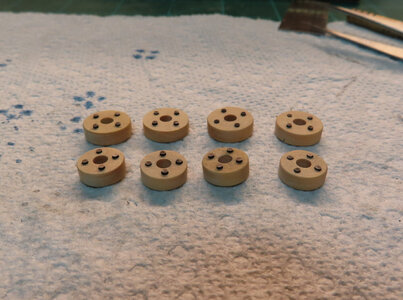
The ones in the front are smaller (9.75mm D). The ones in the back are (11.35mm D)
Made of boxwood.

carriage-14.jpg
 
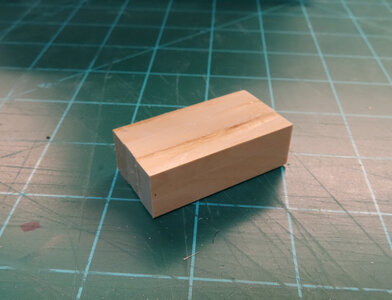
thank you Dave and et al. Well, I was tempted to stay with the Carriages. I got up enough nerve to try it. So, I did not have any boxwood big enough to Mill out in bulk what I wanted so, I had to glue or laminate some sections together to make one big block.

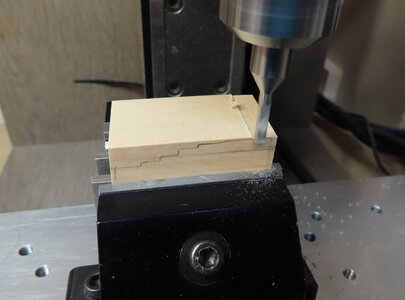
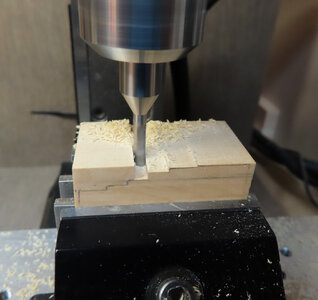
So, here it goes. I used a 3mm end mill (not usually used for wood, but the boxwood is hard enough)

carriage-15.jpg


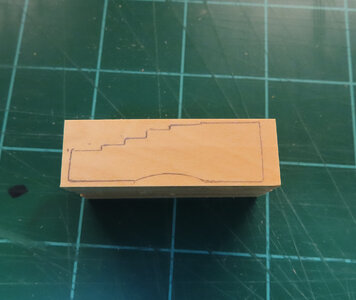
Traced out the template (note that I am using the Blandford AOTS for this)

carriage-16.jpg


Time to Hog out the wood. But must take it real slow.

carriage-17.jpg


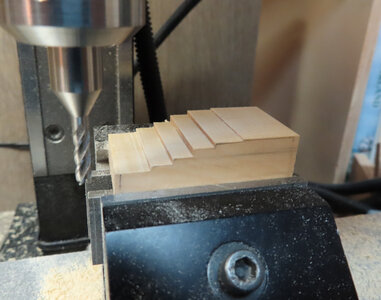
Continuing and things are looking fair - a little fraying, but a slight pass of the file will take care of it.

carriage-18.jpg


The file cleaned up edges almost effortlessly.

carriage-19.jpg


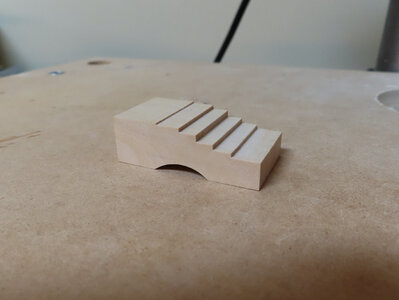
I failed to show that the curve was done on Spindle Sander.

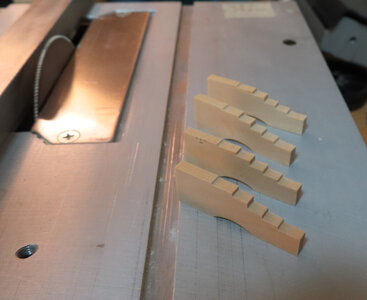
carriage-20.jpg


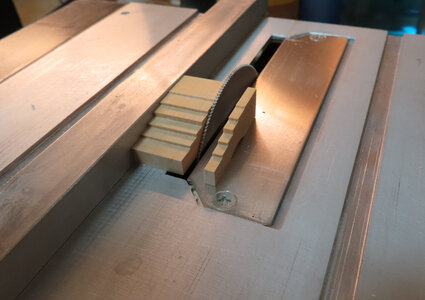
An intermediate step was finishing off the final full dimensions before slicing. Now, this part made me very nervous to do. This is the time NOT to make a mistake. Thicknesses are 3.52mm as the same as the wheel thicknesses.

carriage-21.jpg


I can take a deep sigh of relief now and hope that I did this right. I decided to make the trunnion holes later.

carriage-22.jpg


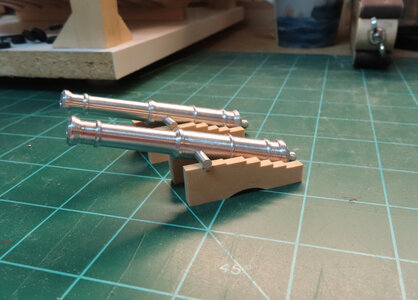
Now, they are starting to look more like Cannons now. The Barrels will be painted a Gun / Iron Metal. I realize that the carriages are in two pieces and I plan to simulate that effect later.

carriage-23.jpg
 
carriage-22.jpg
Very cleanly done, Donnie. Nice job.
 
Good job Donnie, from novice to Master Builder in one easy step.

Thank you Mike, but . . . . Master Builder - hmmm - not yet - not close - I think you are just kidding me -- LOL.
I still consider myself somewhere in the intermediate section.
I was determined to try to take my time with the Cannons to try and make up for all the other mistakes I encountered. Well, , , the Cannons are not complete yet, and there is still room for me to make a grand mistake --- ;)
 
Back
Top