Donnie's HMS Blandford Cross Section Build: 1/32 Scale [COMPLETED BUILD]

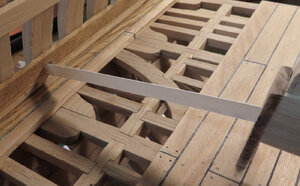
According to the AOTS Blandford book, the lower deck has two "Binding Planking" strips on each side.

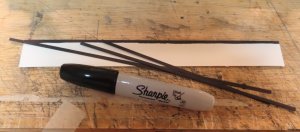
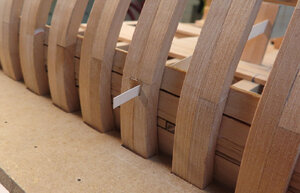
I wanted to add caulking so according to my calculations, it just so happen that the Admiral had some Water Color Paper that is .48mm thick. So, that seems within reason. The paper has a nice roughness to it like caulking. I used a fat sharpie and colored each side. The Sharpie bled through the paper (which is what I wanted) so the color will be all the way through.
I included the image of the WaterColor booklet.

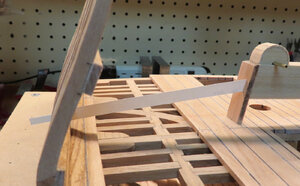
I am not sure if I can explain how I did this, but I would glue down one plank. Let it dry. I would NOT use any glue for the caulking, (the paper is really stiff) but rather, I would prepare the next plank to be put next to the other plank. BEFORE I laid down the plank, I only laid the slip of black paper down up against the first plank and then pressed the planks together. When the glue dried on the second plank, the caulking is in and is not going anywhere. This way, I did not have any glue mess on the black strip of paper.
Then I have the Mico-Mark mini chisel set. The wider chisel very easily trimmed the excess black paper even with the surface of plank. To finish it off, then I have a mini hand plane. To my surprise, none of this activity tore the paper, but made a nice clean surface.

The other planks on the Lower deck will not be as wide. The Binding Planks are much wider. There is also a wider plank that runs right down the center and that will be added next.
. . . to be continued of course.
ps. I cut the strips much wider (or taller).
pss I know I have to add the trenails.

paper01.jpg

paper02.jpg

LD-Planking01.jpg

LD-Planking02.jpg

 
I forgot that I needed to make the Mast opening hole in the lower deck. It has been a long time since I used my Sherline Boring tool. So, I dusted it off and refreshed myself again on how to use it. I decided to put this video together. Not the best video in the world. I envy those that put together a nice edited video and time-lapse it as that really is a time hog and takes a lot of time to do those. This is just raw bone of pushing recording button.


Well, Sherline has several models of the Mill. Some are not that expensive. I do suggest buying a 'package' that also includes the Digital Readout. Then you have to decide imperial or metric.
 
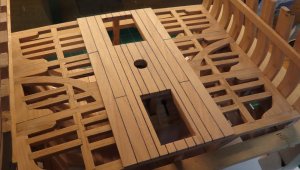
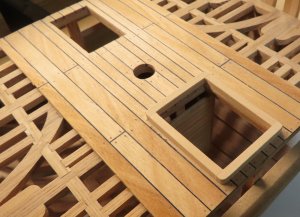
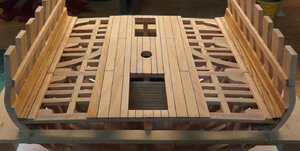
Latest. Got the Lower Deck Planking done. The wider planks are supposed to be Binding Planking.
Next will be
1) Trenails using 1mm drill and basic toothpicks.
2) Gratings
3) Chain Pump

The narrower planks I did not butt ends as when the Gratings and other items added, it might be covered up anyways. We will see.

LDPlanking01.jpg
 
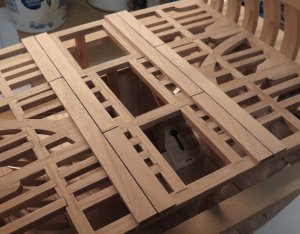
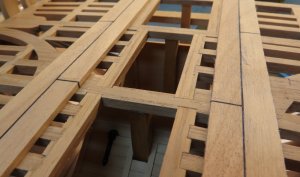
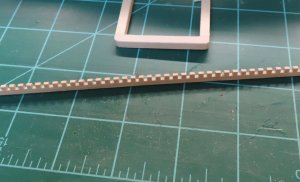
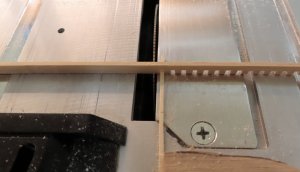
The latest. I must be a glutton for punishment. I decided to try and make my own gratings. Therefore, I had to drill and tap a hole in my table saw. I scrap made a simple jig to make the spacings of the grating (as much to scale as I could)
1) installed trenails (non-sexy approach) using toothpicks (sorry no picture show for that one.) I used about a .90mm bit for holes. Got a box of local grocery store toothpicks tap the ends with glue and gently hammered them in (not forced) - let dry and chisel them off.
2) built one hatch frame
3) making my own grating. Punishment.
EDIT: There are a few moving parts to the reason I am not using a block of wood to make the multiple passes of slots and then cut out from that whole block the slices. That was the way I wanted to do it. However, other circumstances mentioned later is the way I could not perform making the grates with one single block of wood. Variable resources and $$$. See Post #276

LD-Planking03.jpg


I know, not the best way to make gratings, but for now this was my only way - I know about using the single block of wood, but could not at this time. See Post #276

LD-Planking04.jpg

LD-Planking05.jpg

 
Last edited:
N
The latest. I must be a glutton for punishment. I decided to try and make my own gratings. Therefore, I had to drill and tap a hole in my table saw. I scrap made a simple jig to make the spacings of the grating (as much to scale as I could)
1) installed trenails (non-sexy approach) using toothpicks (sorry no picture show for that one.) I used about a .90mm bit for holes. Got a box of local grocery store toothpicks tap the ends with glue and gently hammered them in (not forced) - let dry and chisel them off.
2) built one hatch frame
3) making my own grating. Punishment.

Nice Donnie ,as you are a master ,I need a crash course of the making gratings.
 
Zoltan now that is truly funny. I forgot to mention that it is boxwood. Everything else I tried frayed really bad. The boxwood makes nice clean hard cuts. Well, I am still not finished with the gratings. Many mistakes could lie in the dark somewhere.
 
Hi Donnie,

I used some cabinet grade white pine for the grating on the Ontario cross section, the cuts were clean, and the little fingers did not break off like a lot of other woods will.
I think boxwood is the best for grating but is not available at local lumber suppliers, Lowes, Home Depot etc.
Making grating, blocks, ladders, and fittings is not exciting work but you can control the size, type of wood and quality of the parts.
Your grating looks good like the rest of your build.
 
Hello Donnie, Making gratings - is a success! I mentioned this method to Zoly in his Ontario build log. However didn't have any photos of process. One thing I want to mention, if I may, you can use the block of wood to cut the notches\groves and then using 0.016' thin blade just slice the strips. This way you can use different types of hardwood.
 
Last edited:
Yes Jim, I follow you exactly on the idea, but for some reason I was not able to manufacture that idea. I explain later.
 
There are a few moving parts to the reason I am not using a block of wood to make the multiple passes of slots and then cut out from that whole block the slices. Yes, this is the way I wanted to do it.
1) I do not have a solid block of wood that size
2) My saw blade is in dire need of replacing and it causes any significant large piece to bind on the fence
3) no funds at this time to purchase at least two new blades.
4) renovating shop took a chunk of my budget for the hobby.
 
Epic failure on the Hatch Strips. No problems. Just some time and a little wood wasted. The slots must be very accurate and of which I just do not have the equipment and resources to do such milling.
Now, I could put a block of wood on the Milling Machine, but I do not have an end mill to cut 1.5mm slots. To purchase this would be about $30 for such an End Mill. Then I have no wood stock. So, with this being said, taking into the pride factor, it is time to order and order I just did from Model Expo online. 45mm x 1.5mm grating strips.
 
Ok, so I guess I gave into panic buying at Model Expo before doing some research. I found out (and purchased) a .078 (5/64) downcut endmill. Now, in case the strips do not work out, then I will do what I should have done (but wasn't thinking) and put all this on the Mill since it has within 10 thousandths precision.
I am surprised that I was able to find such a small downcut endmill. I bought it from my reliable source http://www.2linc.com/
This one will cut very near to 1/36 scale gratings.

Diameter
.078"
(5/64")
Flute Length
.25"
(1/4")
Shank Size
.125"
(1/8")
Overall
Length
2.0"
No. of flutes
2​
part no.
PWD2-078-1
 
I received my .078 down-cut end mill rather quickly from 2Linc.com, but I have not tried it. I am working on finishing the deck planking and then the chain pump. Therefore, there are some pics - I am just like anyone else working my way through this thing.

Deck planking is completed.

LDPlanking02.jpg

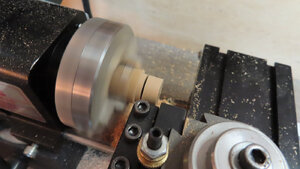
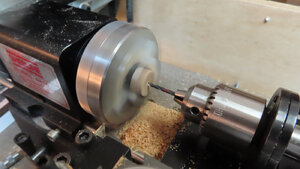
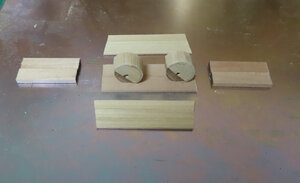
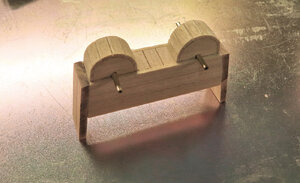
The next images show the process of making the Chain Pump.
chain-pump-01.jpg

chain-pump-02.jpg

chain-pump-03.jpg


Brass Rods is to keep alignment during the building process, they will be modified later.

chain-pump-04.jpg


Using a paper template to get angles correct.

chain-pump-06.jpg

chain-pump-07.jpg


chain-pump-05.jpg

I am aware of the fact that the underneath chain pump is not complete on bottom waterways.
 
Last edited:
Back
Top