-

Win a Free Custom Engraved Brass Coin!!!
As a way to introduce our brass coins to the community, we will raffle off a free coin during the month of August. Follow link ABOVE for instructions for entering.
-

PRE-ORDER SHIPS IN SCALE TODAY!
The beloved Ships in Scale Magazine is back and charting a new course for 2026!
Discover new skills, new techniques, and new inspirations in every issue.
NOTE THAT OUR FIRST ISSUE WILL BE JAN/FEB 2026
You are using an out of date browser. It may not display this or other websites correctly.
You should upgrade or use an alternative browser.
You should upgrade or use an alternative browser.
H.M.S. Victory by Caldercraft - Build Log
- Thread starter team118
- Start date
- Watchers 41
-
- Tags
- caldercraft victory
Peter, I assume you're asking me about the tape? If so, I just unrolled strips at length, scored them lightly, the size of a plate with an Exacto chisel blade, then applied from the keel up, following the pattern I found in illustrations. It's been about 5 years now, adhesion still fine, and the copper is getting a nice patina, the gloss in the pictures has gone. (Ha, started this one 6+ years ago, with 75 trips around, told one grandson he may have to finish her!)This is precisely the goal!
Ok, so how did you do this exactly?
Last edited:
- Joined
- Jun 17, 2021
- Messages
- 3,200
- Points
- 588

Thanks for the answer. I guessed as much. Sounds like the way to go. Or at least how I imagined it. Looks terrific! My clipper hull is such a different shape than the round bottomed Victory. It effected the lay of the substrate planks. But I went from the waterline down with the planking veneer. From the keel up may (I hope) prove a different story. I have some very mildly adhesive 3/16' wide, very disposable, masking tape to experiment with first. Plus, I expect the copper tape will flex wit a lot more leeway across the width.
- Joined
- Oct 21, 2022
- Messages
- 303
- Points
- 278

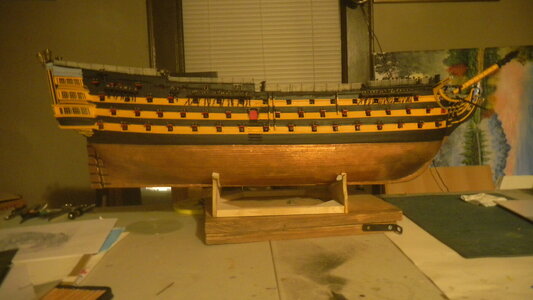
Seeing your mention of coppering, while the plates look much more authentic, I was getting frustrated by the time spent. so I removed the few on her and went the copper tape way. As much as authenticity I'd like to show, there are other things in life without spending an inordinate of time trimming & gluing some 4000 little pieces on a model. While the tiles are really nice, the tape is presentable, at least for myself. These pictures are from a few years ago, the tape has "aged" as it should. (By the way, I was in FairPORT, it's been a while).
You Made a beautiful Titanic She's very impressive, Great work.
And Your HMS Victory turned out very beautiful. not an easy ship at all,and you did a great job ! keep on !
It's nice that we have here few Victory builds.
Cheers
Guy
Are you kidding? Your Titanic is Gorgeous!
I am in the same boat you are. (Not literally, mine's a clipper ship) but as far as the planking goes, below the waterline, ( I've already finished the upper hull in ebony. Came out OK) the substrate planking is, well, less than gorgeous. With some filling and a lot of sanding and fairing, I'm hoping to have a good even surface for my copper plating. A daunting task I only have one shot at to get it right. So now, even though I'm sick to death of working on this hull, I have to take a step back, forget that I've just begun my79th trip around the sun, and take the attitude that I have all the time in the world to take all the time required to figure it out and get it right the first time. After all, how many times do I want to do the same task to get it right once? Plus, this is the largest scale I've ever attempted (outside restorations).
So I've seen a few models and YouTube videos where the builder used copper tape. Still a lot of work though, having to add the score marks and I think some folks used some type of wheel that added dimples. Although once that's done, laying the long strips on the hull probably goes pretty quick.
I suppose I will attempt it brick by brick and if it's July (it's March right now) and I am still laying copper plates, I may rethink things!!!!
Appreciate the kind words about the Titanic. That was a great learning curve on model building. I really wanted to start with a wooden ship based on my comfortability with wood working (not great skills....just comfort with a saw and hammer!). At that time I hadn't thought about which ship, but something along the line of the Bounty or the Surprise or perhaps showing some loyalty to the US and tackle the Constitution.
In the end I chose the Titanic based on the fact that for some reason I have 5 or 6 newspapers from sinking and have always been fascinated by it. It was the right choice, even though there isn't any wood involved, the need for microscopic work, photo etch work and more. There is even rigging at the end! I think I would have been COMPLETELY out of my league had I started with the Victory first. I could be wrong, but it seems that most builders of the Victory have other ships under their belt.
Just some thoughts for the new builder....should they actually read any of the words on a build page rather than just look at the pictures....which I am guilty of!!!!
Thanks, Peter. Yes, keel up was the way it done on the real ship. That's a good idea as a trial, and if you have any wood filler, a tape with little tack is another good idea.Thanks for the answer. I guessed as much. Sounds like the way to go. Or at least how I imagined it. Looks terrific! My clipper hull is such a different shape than the round bottomed Victory. It effected the lay of the substrate planks. But I went from the waterline down with the planking veneer. From the keel up may (I hope) prove a different story. I have some very mildly adhesive 3/16' wide, very disposable, masking tape to experiment with first. Plus, I expect the copper tape will flex wit a lot more leeway across the width.
, (watercolor tape I use in paintings has a very low tack). Yes, it does flex enough, as long as the bend isn't too drastic.
Just my 2 cents, but at this scale, I don't see the need to take the time to add rivets, on the real thing, small as they are, they really don't show up at any distance away. I also include bypassing the treenails on the decking, not really noticable from afar, unless your actually on the ship. (The horizontal lines in the pic are just the butt ends). Of course, I know many will disagree!So I've seen a few models and YouTube videos where the builder used copper tape. Still a lot of work though, having to add the score marks and I think some folks used some type of wheel that added dimples. Although once that's done, laying the long strips on the hull probably goes pretty quick.
I suppose I will attempt it brick by brick and if it's July (it's March right now) and I am still laying copper plates, I may rethink things!!!!
Appreciate the kind words about the Titanic. That was a great learning curve on model building. I really wanted to start with a wooden ship based on my comfortability with wood working (not great skills....just comfort with a saw and hammer!). At that time I hadn't thought about which ship, but something along the line of the Bounty or the Surprise or perhaps showing some loyalty to the US and tackle the Constitution.
In the end I chose the Titanic based on the fact that for some reason I have 5 or 6 newspapers from sinking and have always been fascinated by it. It was the right choice, even though there isn't any wood involved, the need for microscopic work, photo etch work and more. There is even rigging at the end! I think I would have been COMPLETELY out of my league had I started with the Victory first. I could be wrong, but it seems that most builders of the Victory have other ships under their belt.
Just some thoughts for the new builder....should they actually read any of the words on a build page rather than just look at the pictures....which I am guilty of!!!!
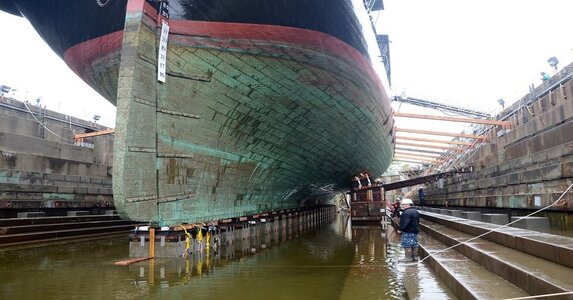
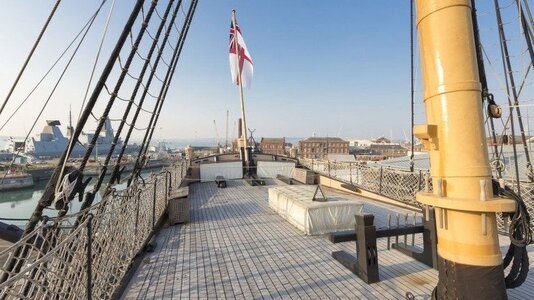
Last edited:
- Joined
- Jun 17, 2021
- Messages
- 3,200
- Points
- 588

Thanks for posting that photo, That's the look I'm going for, patina and vertical score lines and all. I can just vaguely see the nail heads, but the score lines look very distinct. I had thought I'd need to overlap, but that doesn't appear to be the look here. I think longer strips of tape neatly and finely scored will work. The gudgeon and pintle hinge straps also look very thin in comparison to the size of the hull, more akin to a clipper ship in conformation (Although the " Flying Cloud" had at least four, maybe more gore lines). also, I see that the lower of the two gore lines is laid right over top of the curved rows below it!Just my 2 cents, but at this scale, I don't see the need to take the time to add rivets, on the real thing, small as they are, they really don't show up at any distance away. I also include bypassing the pegs on the decking, not really noticable from afar, unless your actually on the ship. (The horizontal lines in the pic are just the butt ends). Of course, I know many will disagree!
View attachment 434054
View attachment 434055
That patina poses a very interesting issue on how best to achieve it without it looking overwhelmingly messy.
Welcome. Yep, no overlapping, just measuring equal distance for the scoring, of course. (Think I cut thru' the tape once or twice, but no big deal). As for patina, some use Jax on real copper tiles, some just wait for it natually. The latter is what I have to do, the Jax destroyed the tape, luckily, I did a test before using it! But, as I said, it's aging nicely on it's own.
- Joined
- Jun 17, 2021
- Messages
- 3,200
- Points
- 588

Thanks for all the skinny on your copper plating experience. It gives me a lot more confidence.Welcome. Yep, no overlapping, just measuring equal distance for the scoring, of course. (Think I cut thru' the tape once or twice, but no big deal). As for patina, some use Jax on real copper tiles, some just wait for it natually. The latter is what I have to do, the Jax destroyed the tape, luckily, I did a test before using it! But, as I said, it's aging nicely on it's own.

I'm sure it will be very helpful to Chris as well. Looks like he's gonna make use of it himself pretty soon.
- Joined
- Oct 21, 2022
- Messages
- 303
- Points
- 278

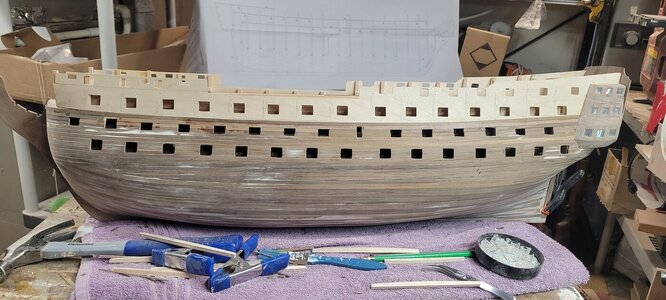
I started around 1pm today. I had given the other side a light sanding and decided to take a stab at the remaining planks.
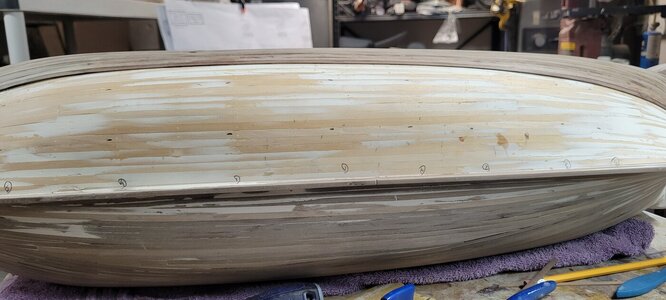
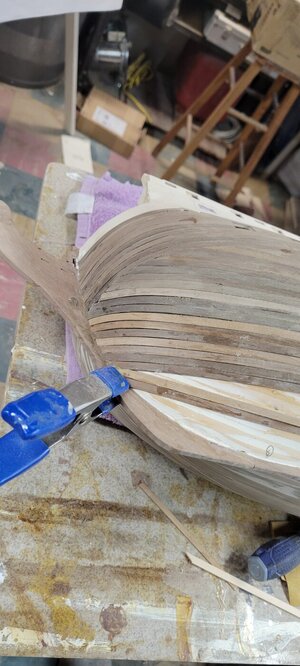
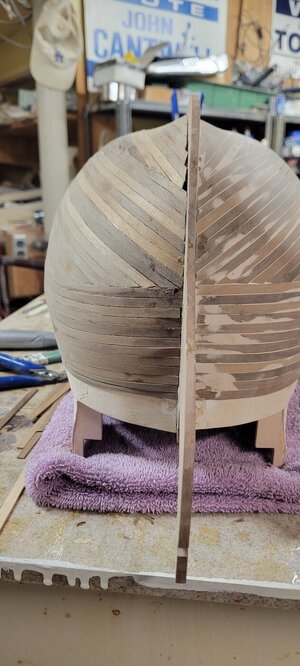
About an hour later I was making progress. I cheated by adding a plank inbetween the open space to reduce the twisting and bending. This helped get towards the end zone, but that then causes a need for the last 4 to 5 planks to be tapered on both ends. Adding more time to each plank. Choices...make em and stick with em!
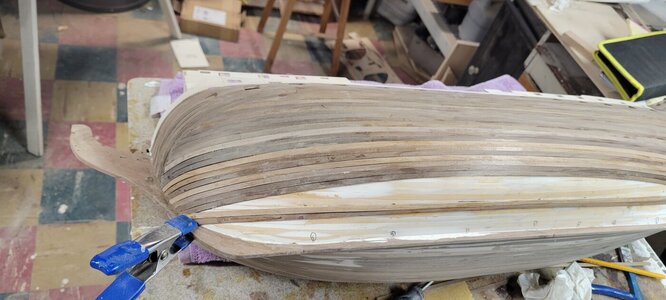
And 2 hours and 30 minutes later I was done! It's funny using those butterfly or micro tips helped. I have about 100 of them, but I never used them with the Titanic build. For some reason, I tried and either didn't do it right or it laid too much glue down for the small pieces I was dealing with.
However on this build, once I set one side of the plank in place with CA glue for a few seconds, I was able to lay a nice long bead of glue. It cut TONS of time of the process. I also used a paper towel to wipe up excess glue instead of my thumb.
I still got a ton of glue on my finger tips. I used nail polish remover to get most of it off, then soaked my fingers till they pruned up. I've been picking glue out of my fingerprints with my teeth for the past hour. Sadly both thumbs and index fingers have splits in them....reminds me of when I was working and in the winter I would have to wrap all my finger tips with white medical tape because of dry splitting of my fingers. WORTH IT because I crossed a pretty big hurdle in the build.
In my opinion, it's the first real task that will test your resolve.
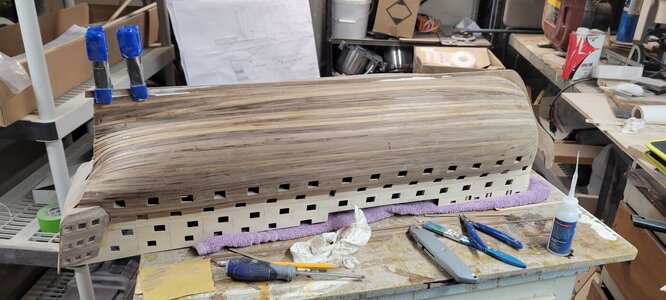


About an hour later I was making progress. I cheated by adding a plank inbetween the open space to reduce the twisting and bending. This helped get towards the end zone, but that then causes a need for the last 4 to 5 planks to be tapered on both ends. Adding more time to each plank. Choices...make em and stick with em!

And 2 hours and 30 minutes later I was done! It's funny using those butterfly or micro tips helped. I have about 100 of them, but I never used them with the Titanic build. For some reason, I tried and either didn't do it right or it laid too much glue down for the small pieces I was dealing with.
However on this build, once I set one side of the plank in place with CA glue for a few seconds, I was able to lay a nice long bead of glue. It cut TONS of time of the process. I also used a paper towel to wipe up excess glue instead of my thumb.
I still got a ton of glue on my finger tips. I used nail polish remover to get most of it off, then soaked my fingers till they pruned up. I've been picking glue out of my fingerprints with my teeth for the past hour. Sadly both thumbs and index fingers have splits in them....reminds me of when I was working and in the winter I would have to wrap all my finger tips with white medical tape because of dry splitting of my fingers. WORTH IT because I crossed a pretty big hurdle in the build.
In my opinion, it's the first real task that will test your resolve.

- Joined
- Oct 21, 2022
- Messages
- 303
- Points
- 278

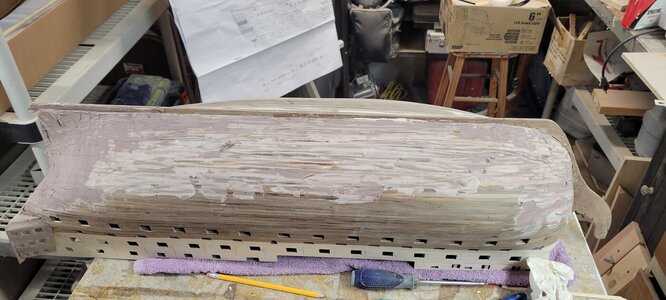
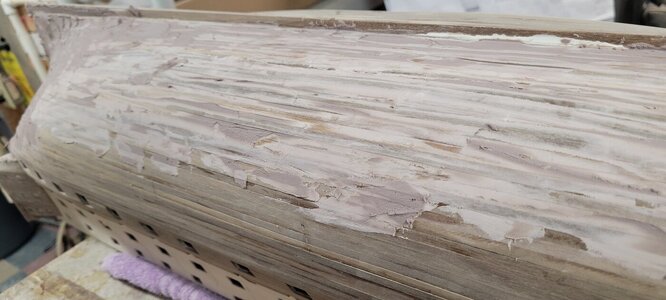
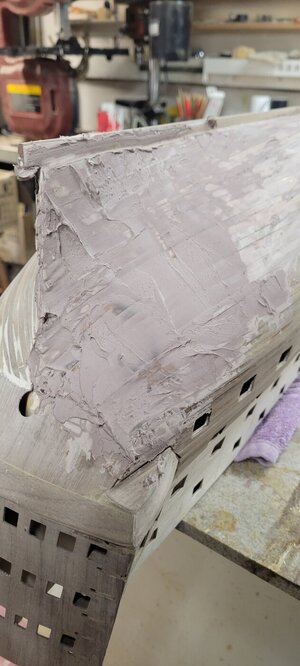
Once done, I planned on adding filler to smooth out any gaps for the next task of adding both the wales and eventually, copper plates.
I added a bit more stain to the filler for this side, but it is still coming out a bit reddish. It doesn't matter though as it will all be covered by paint or copper.
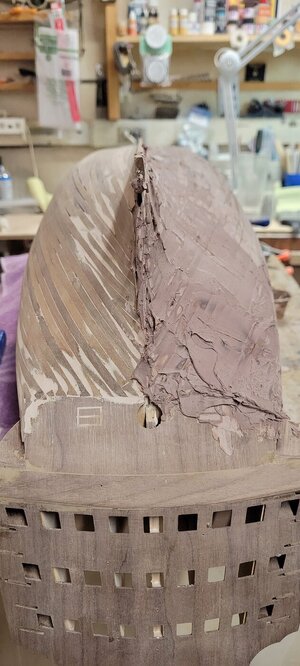
I know the filler looks pretty heavy on the stern, but it really sands off easily. Once it sets, it will shape up nicely.
I believe I have seen some builds where the stern part #372 (the one with the 2 dummy gun ports) is also covered in planks.
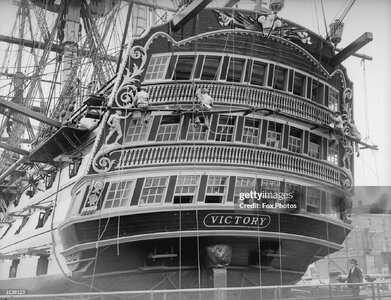
I have also seen some photos of the actual ship and this area appears to be planked. I'm thinking of trying this, I figure the worst that can happen is that I strip it and paint it! We shall see!
Here was the older photo of the stern of the ship and you can see the planking on the lower stern area.
Not sure if the photo is appropriate but it was from Getty Images and credited to Fox Photos.
I added a bit more stain to the filler for this side, but it is still coming out a bit reddish. It doesn't matter though as it will all be covered by paint or copper.
I know the filler looks pretty heavy on the stern, but it really sands off easily. Once it sets, it will shape up nicely.
I believe I have seen some builds where the stern part #372 (the one with the 2 dummy gun ports) is also covered in planks.
I have also seen some photos of the actual ship and this area appears to be planked. I'm thinking of trying this, I figure the worst that can happen is that I strip it and paint it! We shall see!


Here was the older photo of the stern of the ship and you can see the planking on the lower stern area.
Not sure if the photo is appropriate but it was from Getty Images and credited to Fox Photos.

- Joined
- Jun 17, 2021
- Messages
- 3,200
- Points
- 588

Mix some table salt in warm water. Before the crystals dissolve and are still grainy (A pretty thick mixture) rub the pasty glop between your finger tips and much (not all) of the CA will flake off. Saves exposing your skin to toxic chemicals and cracking and peeling. I don't believe I've had a single discernable fingerprint on my right hand since 1978. The chemical solvents will do more damage to your skin than the CA (which is only soluble for a second). If used too often the solvents will cause your skin to burn, itch or be painfully tender for days. Not to mention the internal damage done inhaling even just a little whiff of the vapors!Once done, I planned on adding filler to smooth out any gaps for the next task of adding both the wales and eventually, copper plates.
I added a bit more stain to the filler for this side, but it is still coming out a bit reddish. It doesn't matter though as it will all be covered by paint or copper.
I know the filler looks pretty heavy on the stern, but it really sands off easily. Once it sets, it will shape up nicely.
I believe I have seen some builds where the stern part #372 (the one with the 2 dummy gun ports) is also covered in planks.
I have also seen some photos of the actual ship and this area appears to be planked. I'm thinking of trying this, I figure the worst that can happen is that I strip it and paint it! We shall see!
View attachment 434126View attachment 434127View attachment 434128
View attachment 434129View attachment 434130
Here was the older photo of the stern of the ship and you can see the planking on the lower stern area.
Not sure if the photo is appropriate but it was from Getty Images and credited to Fox Photos.
View attachment 434134
More time with each plank will result in you getting better and better at shaping and fitting them. I try to keep each strake (the whole length of the " plank" bow to stern) divided up into a series of planks (a portion of a strake) of easily manageable lengths. Easier to tweak the shape and adjust for a good snug fit. Also easier to twist where necessary, especially at those stem and stern post areas. Easier as well to glue down a plank of a shorter length. The paper towel works pretty well for a quick wipe up of excess CA, but you gotta be quick with the paper. Once the CA grabs it the chemical reaction tries to set it on fire. I've had it burn and stick to my fingertips, making a hard, fuzzy paper-CA blob to pick off. Mostly It just wears off pretty soon. Some good hand lotion or Vitamin E oil will speed up the process of getting your fingers free of CA crust as well as healing your skin. A lot of years of dealing with the problem, searching for better cleanup options here.
Keep up the good work, all the very best with it!
Your work is shaping up well, better than I could do at the same stage. Bolder too. These are big bites to chew!
Pete
Last edited:
- Joined
- Oct 21, 2022
- Messages
- 303
- Points
- 278

Lined both entrances. A live picture I have shows that the interior trim in the entrance seems to run flush with the wales.
The included canopy is huge and really hides a lot of the entrance. I actually tried to thin some planks and create the panel trim on the sides of the entrance. I've seen others add a trapezoidal shape. I just don't think you'll see anything. I plan on painting the entrance a dark reddish mahogany color.
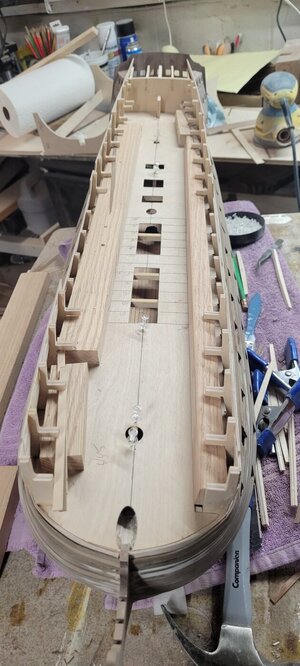
I installed the upper deck camber beams. No real issues.
Getting the upper deck to fit is tough. It's a fearful thing to bend the deck to get it to fit. I had to dremmel some of the side relief cuts that accomodate the bulkheads. I also had to cut about 1mm off of each side. Once I did that it slid into place. Still scary.
Now one of the things that didn't make sense was to attach the mast sleeves to the middle deck.
I didn't understand at first that both sleeves are glued together to help guide the mast.
In addition, they are VERY fragile. I broke the two #154's for the middle deck and had to glue them.
After, they would not accommodate the diameter of the mast. After a bit of dremmel work from above I got them open, but they broke loose from the deck. I am going to have to think about a solution to get them into place before I lose any access to that area.
I wedge some scrap under the bulkheads to keep the deck down while it dried.
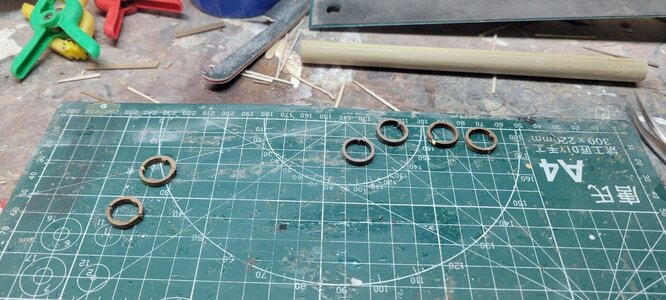
There's my look through the entrance. You can see the mast sleeve and the other entrance with my cute little cast iron rings and trim. lol....

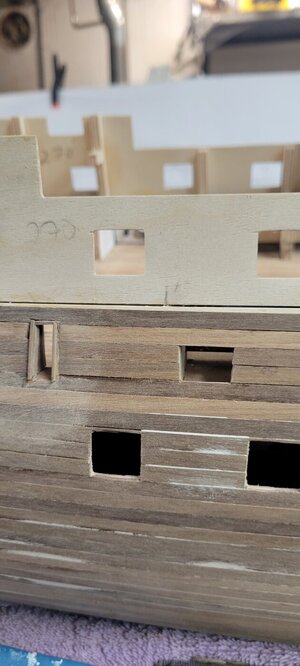
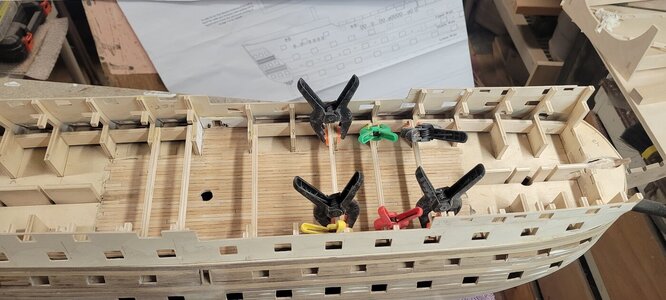
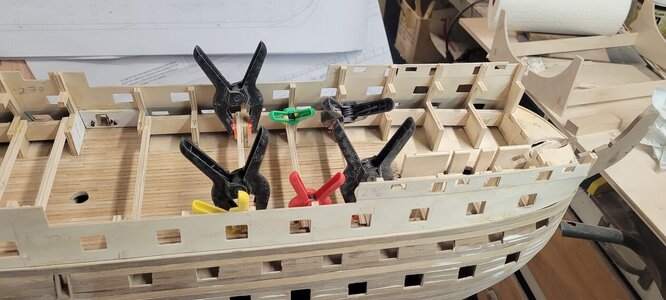
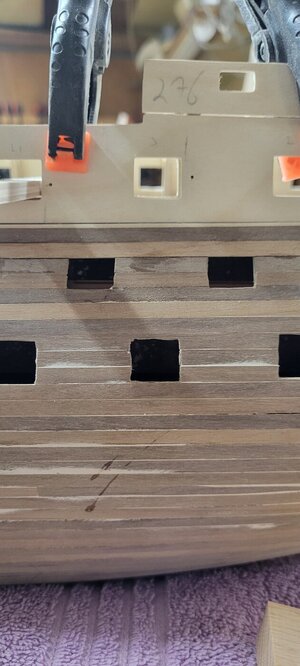
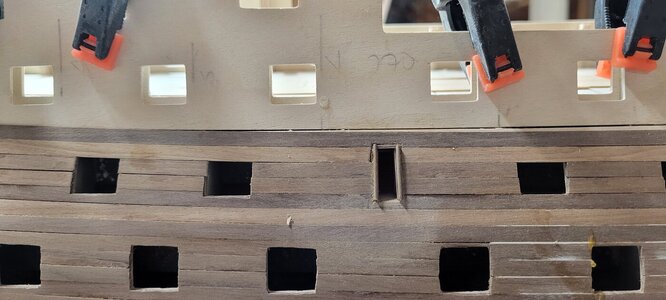
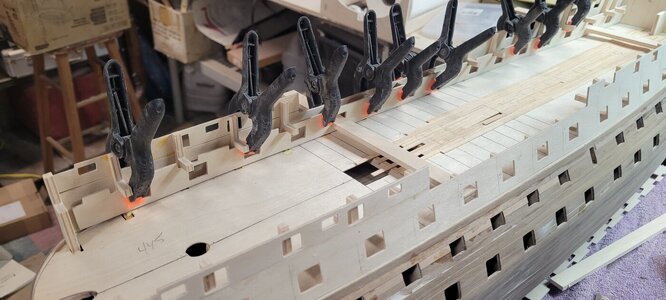
Installing the interior gunport patterns was a challenge.
They did not fit height wise. I ended up running about 1-2mm off the bottle with a belt sander. That worked and they fit fine.
I lined them up and it appears that they are at least in line vertically I'll wait to see after they dry if I am going to have an issue horizontally with the cannons. Hope not.
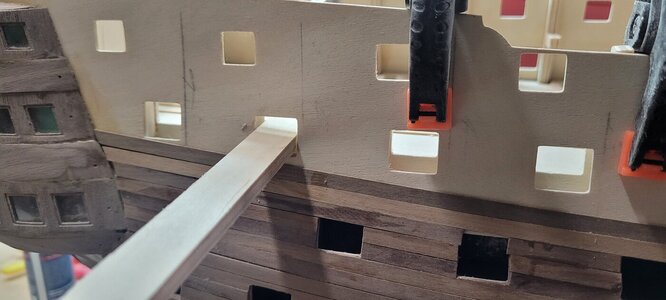
I also started the upper deck planking, it seems to be going well.
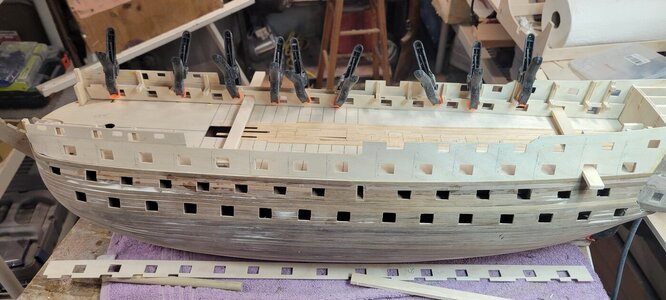
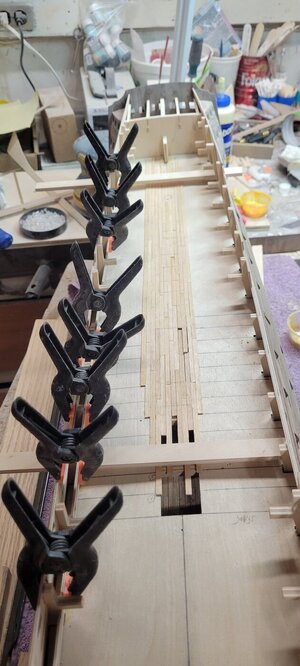
I don't know, as I was leaving for the night, I just see the possibilities. It's a huge model right now, I can't imagine what I'm going to be facing when I start the masts and rigging!
Oh the places we will go!
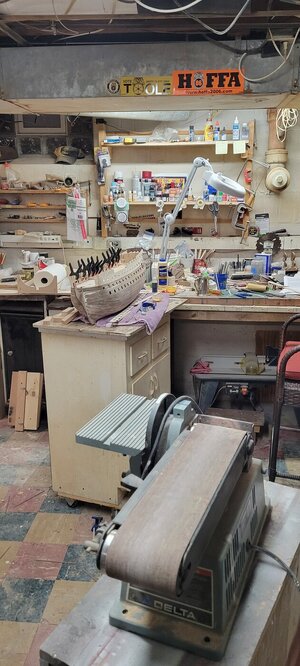
The included canopy is huge and really hides a lot of the entrance. I actually tried to thin some planks and create the panel trim on the sides of the entrance. I've seen others add a trapezoidal shape. I just don't think you'll see anything. I plan on painting the entrance a dark reddish mahogany color.

I installed the upper deck camber beams. No real issues.
Getting the upper deck to fit is tough. It's a fearful thing to bend the deck to get it to fit. I had to dremmel some of the side relief cuts that accomodate the bulkheads. I also had to cut about 1mm off of each side. Once I did that it slid into place. Still scary.


Now one of the things that didn't make sense was to attach the mast sleeves to the middle deck.
I didn't understand at first that both sleeves are glued together to help guide the mast.
In addition, they are VERY fragile. I broke the two #154's for the middle deck and had to glue them.
After, they would not accommodate the diameter of the mast. After a bit of dremmel work from above I got them open, but they broke loose from the deck. I am going to have to think about a solution to get them into place before I lose any access to that area.

I wedge some scrap under the bulkheads to keep the deck down while it dried.

There's my look through the entrance. You can see the mast sleeve and the other entrance with my cute little cast iron rings and trim. lol....

Installing the interior gunport patterns was a challenge.
They did not fit height wise. I ended up running about 1-2mm off the bottle with a belt sander. That worked and they fit fine.
I lined them up and it appears that they are at least in line vertically I'll wait to see after they dry if I am going to have an issue horizontally with the cannons. Hope not.


I also started the upper deck planking, it seems to be going well.


I don't know, as I was leaving for the night, I just see the possibilities. It's a huge model right now, I can't imagine what I'm going to be facing when I start the masts and rigging!
Oh the places we will go!


Well done so far, on a huge project. 
Chris, are you faniliar with this modeler? He's working on your same Victory, he can be quite helpful.
Nice work on the entranceway, but something that has been a bit of a question for me. I can't see a ship of the line engaging in battle with such an opening, surely, they must've had doors? I've searched articles and paintings for some time, nothing until seeing a documentary on her, shown in this view. Since all guns are out, I'm trying out a set of doors on mine, not sure to keep them, but hey, they do add a bit of color.



Last edited:
Good morning. Wow. Impressive work so far. With the Caldercraft Victory the paint and copper plates will cover any little stains, filler etc. I think the most important aspect is to get the hull sanded perfect especially for those gazillion of little plates. (Or buy the strips- Roger’s syren looks stunning with strips). Fantastic progress. Cheers GrantLined both entrances. A live picture I have shows that the interior trim in the entrance seems to run flush with the wales.
The included canopy is huge and really hides a lot of the entrance. I actually tried to thin some planks and create the panel trim on the sides of the entrance. I've seen others add a trapezoidal shape. I just don't think you'll see anything. I plan on painting the entrance a dark reddish mahogany color.
View attachment 434393
I installed the upper deck camber beams. No real issues.
Getting the upper deck to fit is tough. It's a fearful thing to bend the deck to get it to fit. I had to dremmel some of the side relief cuts that accomodate the bulkheads. I also had to cut about 1mm off of each side. Once I did that it slid into place. Still scary.
View attachment 434395View attachment 434394
Now one of the things that didn't make sense was to attach the mast sleeves to the middle deck.
I didn't understand at first that both sleeves are glued together to help guide the mast.
In addition, they are VERY fragile. I broke the two #154's for the middle deck and had to glue them.
After, they would not accommodate the diameter of the mast. After a bit of dremmel work from above I got them open, but they broke loose from the deck. I am going to have to think about a solution to get them into place before I lose any access to that area.
View attachment 434396
I wedge some scrap under the bulkheads to keep the deck down while it dried.
View attachment 434397
There's my look through the entrance. You can see the mast sleeve and the other entrance with my cute little cast iron rings and trim. lol....
View attachment 434398
Installing the interior gunport patterns was a challenge.
They did not fit height wise. I ended up running about 1-2mm off the bottle with a belt sander. That worked and they fit fine.
I lined them up and it appears that they are at least in line vertically I'll wait to see after they dry if I am going to have an issue horizontally with the cannons. Hope not.
View attachment 434401View attachment 434402View attachment 434400View attachment 434403
I also started the upper deck planking, it seems to be going well.
View attachment 434405
View attachment 434404
I don't know, as I was leaving for the night, I just see the possibilities. It's a huge model right now, I can't imagine what I'm going to be facing when I start the masts and rigging!
Oh the places we will go!
View attachment 434406
View attachment 434399
- Joined
- Jun 17, 2021
- Messages
- 3,200
- Points
- 588

Do Have a clone that works all night? 
Nice shop by the way.
Amazing progress.
Yes, they DO get BIG!

Nice shop by the way.

Amazing progress.
Yes, they DO get BIG!
- Joined
- Oct 21, 2022
- Messages
- 303
- Points
- 278

Chris, are you faniliar with this modeler? He's working on your same Victory, he can be quite helpful.
Nice work on the entranceway, but something that has been a bit of a question for me. I can't see a ship of the line engaging in battle with such an opening, surely, they must've had doors? I've searched articles and paintings for some time, nothing until seeing a documentary on her, shown in this view. Since all guns are out, I'm trying out a set of doors on mine, not sure to keep them, but hey, they do add a bit of color.
Good morning. Wow. Impressive work so far. With the Caldercraft Victory the paint and copper plates will cover any little stains, filler etc. I think the most important aspect is to get the hull sanded perfect especially for those gazillion of little plates. (Or buy the strips- Roger’s syren looks stunning with strips). Fantastic progress. Cheers Grant
Do Have a clone that works all night?
Nice shop by the way.
Amazing progress.
Yes, they DO get BIG!
Enjay...it's funny but the picture I grabbed off of the Napoleon movie shows two security like holders...I don't disagree, there would be no way they would just leave that open, they would have to put some type of door in place.
Oh, I do watch John's YouTube videos. I think I am actually paying $0.99 a month to get his member only access for now. I know he's been working on a different version of the Victory but is now working on a Caldercraft version too. Either way, his skills and processes are of a great help.
I also love Paul Vicker, John Aliprantis and Olha Batchvarov's YouTube playlists. They offer great advice and in some cases, step by step instructions on these builds.

Hey Grant, my hope is that I can cover all of the flaws and dimples or at least reduce them before a nice coat of paint or a few thousand copper plates!
Sadly Peter, I still seem to stay up to midnight or so (Eastern US Standard Time) and get up at 6am. The curse of working 40 years! I feel if I break that habit, I'll stay up till 3 in the morning and sleep till noon! Lol!


