Well sir I am in your club. After retiring five years ago I find the habits of working for forty seven years remain. I am awake every morning at three. While I refuse to get up at that hour I give up at get going at four. Just cant break a lifetime habit!Enjay...it's funny but the picture I grabbed off of the Napoleon movie shows two security like holders...I don't disagree, there would be no way they would just leave that open, they would have to put some type of door in place.
Oh, I do watch John's YouTube videos. I think I am actually paying $0.99 a month to get his member only access for now. I know he's been working on a different version of the Victory but is now working on a Caldercraft version too. Either way, his skills and processes are of a great help.
I also love Paul Vicker, John Aliprantis and Olha Batchvarov's YouTube playlists. They offer great advice and in some cases, step by step instructions on these builds.
View attachment 434638
Hey Grant, my hope is that I can cover all of the flaws and dimples or at least reduce them before a nice coat of paint or a few thousand copper plates!
Sadly Peter, I still seem to stay up to midnight or so (Eastern US Standard Time) and get up at 6am. The curse of working 40 years! I feel if I break that habit, I'll stay up till 3 in the morning and sleep till noon! Lol!
-

Win a Free Custom Engraved Brass Coin!!!
As a way to introduce our brass coins to the community, we will raffle off a free coin during the month of August. Follow link ABOVE for instructions for entering.
-

PRE-ORDER SHIPS IN SCALE TODAY!
The beloved Ships in Scale Magazine is back and charting a new course for 2026!
Discover new skills, new techniques, and new inspirations in every issue.
NOTE THAT OUR FIRST ISSUE WILL BE JAN/FEB 2026
You are using an out of date browser. It may not display this or other websites correctly.
You should upgrade or use an alternative browser.
You should upgrade or use an alternative browser.
H.M.S. Victory by Caldercraft - Build Log
- Thread starter team118
- Start date
- Watchers 42
-
- Tags
- caldercraft victory
Had the same thought, Chris, since it's an impossible bend, I just cut them from a sheet, there & above the top windows.Once done, I planned on adding filler to smooth out any gaps for the next task of adding both the wales and eventually, copper plates.
I added a bit more stain to the filler for this side, but it is still coming out a bit reddish. It doesn't matter though as it will all be covered by paint or copper.
I know the filler looks pretty heavy on the stern, but it really sands off easily. Once it sets, it will shape up nicely.
I believe I have seen some builds where the stern part #372 (the one with the 2 dummy gun ports) is also covered in planks.
I have also seen some photos of the actual ship and this area appears to be planked. I'm thinking of trying this, I figure the worst that can happen is that I strip it and paint it! We shall see!
View attachment 434126View attachment 434127View attachment 434128
View attachment 434129View attachment 434130
Here was the older photo of the stern of the ship and you can see the planking on the lower stern area.
Not sure if the photo is appropriate but it was from Getty Images and credited to Fox Photos.
View attachment 434134
- Joined
- Jun 17, 2021
- Messages
- 3,200
- Points
- 588

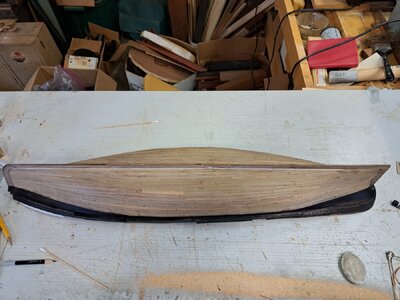
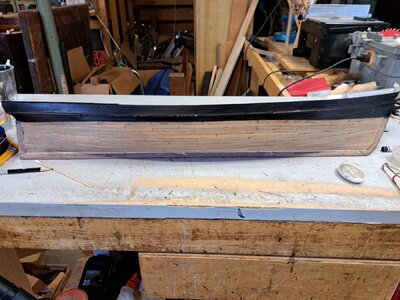
My "flying Cloud" bottom planked, prior to filling, sanding and fairing. Resultant fingers.Enjay...it's funny but the picture I grabbed off of the Napoleon movie shows two security like holders...I don't disagree, there would be no way they would just leave that open, they would have to put some type of door in place.
Oh, I do watch John's YouTube videos. I think I am actually paying $0.99 a month to get his member only access for now. I know he's been working on a different version of the Victory but is now working on a Caldercraft version too. Either way, his skills and processes are of a great help.
I also love Paul Vicker, John Aliprantis and Olha Batchvarov's YouTube playlists. They offer great advice and in some cases, step by step instructions on these builds.
View attachment 434638
Hey Grant, my hope is that I can cover all of the flaws and dimples or at least reduce them before a nice coat of paint or a few thousand copper plates!
Sadly Peter, I still seem to stay up to midnight or so (Eastern US Standard Time) and get up at 6am. The curse of working 40 years! I feel if I break that habit, I'll stay up till 3 in the morning and sleep till noon! Lol!
 Re
Re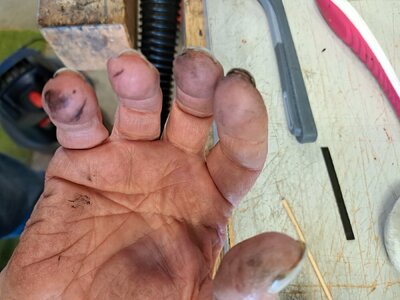
Just need a little sanding........the ship too!My "flying Cloud" bottom planked, prior to filling, sanding and fairing. Resultant fingers. View attachment 434858View attachment 434859ReView attachment 434860
- Joined
- Oct 21, 2022
- Messages
- 303
- Points
- 278

I don't feel so bad!!! Even though my splits still hurt and I can't help pick at them!!!!My "flying Cloud" bottom planked, prior to filling, sanding and fairing. Resultant fingers. View attachment 434858View attachment 434859ReView attachment 434860
- Joined
- Oct 21, 2022
- Messages
- 303
- Points
- 278

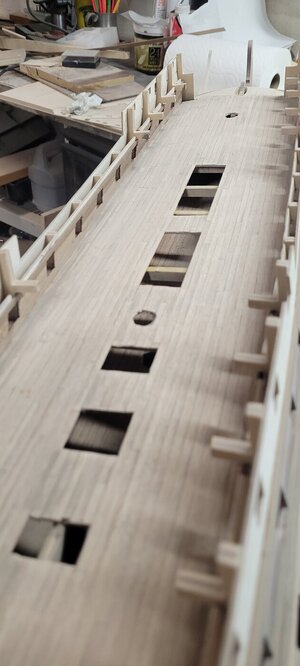
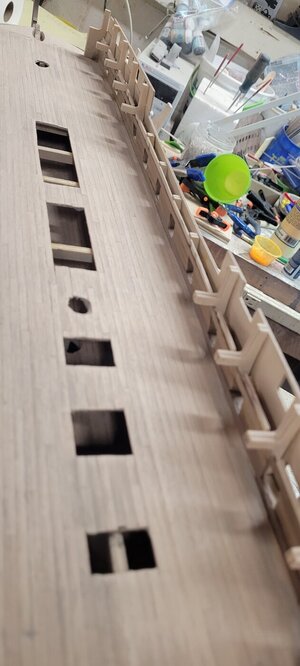
I finished the planking on the upper deck. There are a few voids along the interior gunports but I figure they will be covered once I add the side planking.
I have to sand everything and I think I will try the same stain/wood filler option again. I think this time I will take more time sanding afterwards to see if I can even out the color of the final result. I know most of this will be hidden, but it will be good final practice.
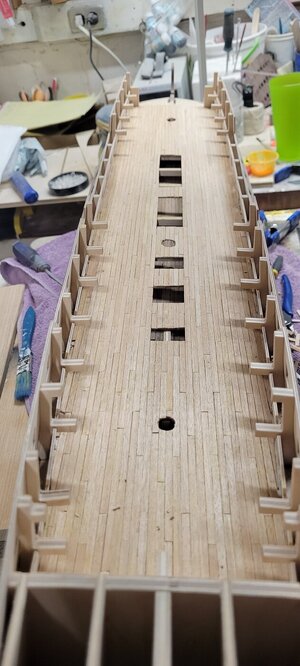
I have to sand everything and I think I will try the same stain/wood filler option again. I think this time I will take more time sanding afterwards to see if I can even out the color of the final result. I know most of this will be hidden, but it will be good final practice.

- Joined
- Oct 21, 2022
- Messages
- 303
- Points
- 278

The next task is to add gun port liners to the cannons that will not have lids.
While I thought I had done a good job lining everything up, it is obvious that even minor mistakes in the beginning have been amplified. Even an error of .5mm can expand to be 1 or 2 mm off. The interior and exterior gun ports don't quite line up.
The inner bulwark pattern has a bit of a curve in it. I noticed that when I had to trim a bit off the bottom to get it to fit. I followed this curve when I was taking a bit off to get it to fit. This curve seems to allow some of the ports to line up and others to be off, both horizontally and vertically.
The impatient side of me said to just live with it. But doing that would result in the bottom gun port liners to slant/cant downward. Now I suppose in real life that would make sense, creating an angle that would shed off water. But it was pretty aggressive.
I took my dremmel tool with its cone sander tip and ground down the interior bulwark. I had taken a pencil to create a line to sand down to. The first run created a bit of a messy dippy doo line, but using an exacto knife and a square edged file smoothed them out.
I'll circle back around tomorrow and clean them up and add the liners. Then I'll look at the port side and see how bad that is.
Not the end of the world but I think once it's cleaned up I shouldn't have any issues with cannons being too low or too high.
Hope, the mother of all model builders!
It seems like a bit of a negative angle on the sill liner. Maybe a bit too much.
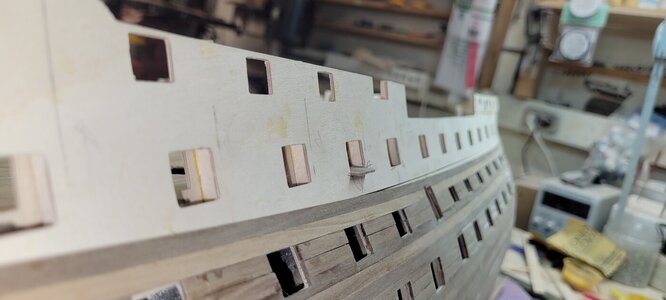
You can see the pencil lines that I created. All I did was draw the line as the pencil rested on the outside of the pattern. It is more to get an idea of how much wood I have removed and what more I need to do.
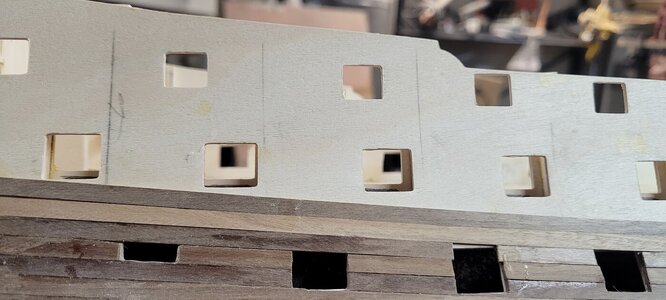
Once I did that, they appear more even.
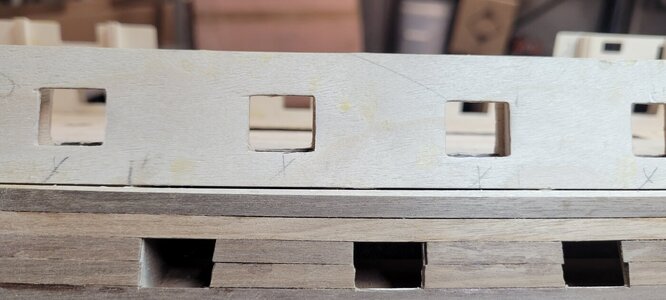
The lower sill is still crooked, but that can be fixed.
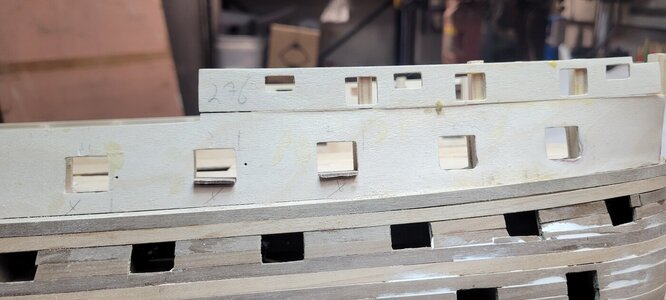
A bit straighter.
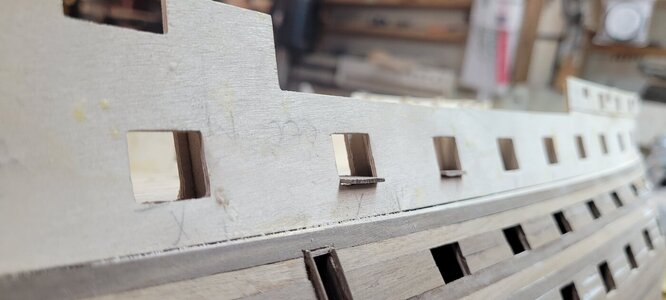
Here is what they looked like after the first pass with the dremmel. Not a pretty sight!
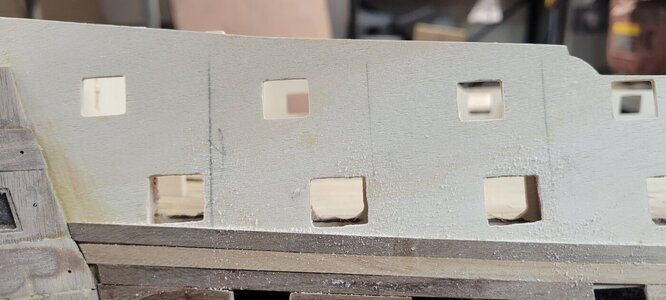
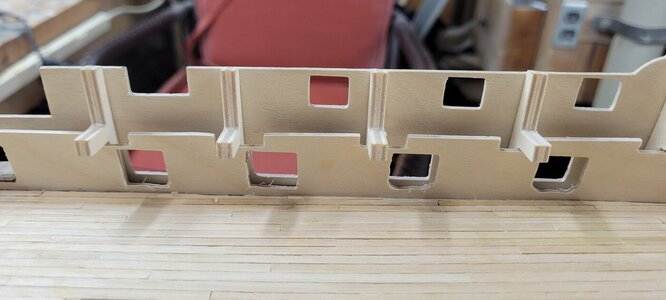
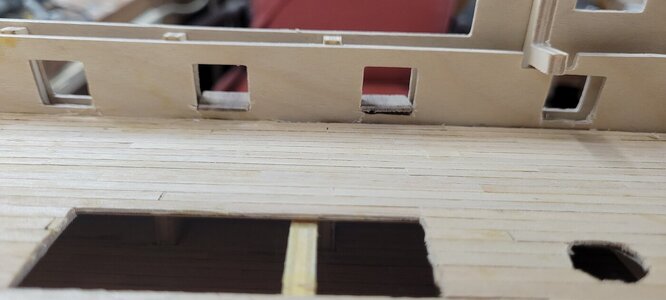
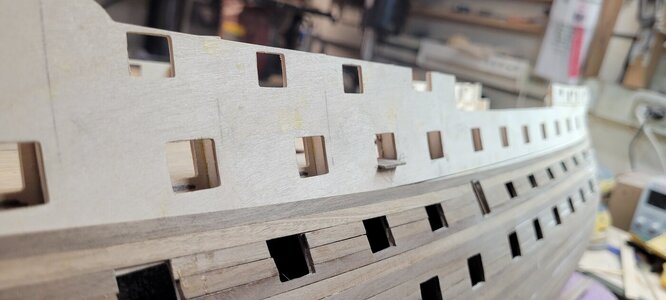
While I thought I had done a good job lining everything up, it is obvious that even minor mistakes in the beginning have been amplified. Even an error of .5mm can expand to be 1 or 2 mm off. The interior and exterior gun ports don't quite line up.
The inner bulwark pattern has a bit of a curve in it. I noticed that when I had to trim a bit off the bottom to get it to fit. I followed this curve when I was taking a bit off to get it to fit. This curve seems to allow some of the ports to line up and others to be off, both horizontally and vertically.
The impatient side of me said to just live with it. But doing that would result in the bottom gun port liners to slant/cant downward. Now I suppose in real life that would make sense, creating an angle that would shed off water. But it was pretty aggressive.
I took my dremmel tool with its cone sander tip and ground down the interior bulwark. I had taken a pencil to create a line to sand down to. The first run created a bit of a messy dippy doo line, but using an exacto knife and a square edged file smoothed them out.
I'll circle back around tomorrow and clean them up and add the liners. Then I'll look at the port side and see how bad that is.
Not the end of the world but I think once it's cleaned up I shouldn't have any issues with cannons being too low or too high.
Hope, the mother of all model builders!
It seems like a bit of a negative angle on the sill liner. Maybe a bit too much.

You can see the pencil lines that I created. All I did was draw the line as the pencil rested on the outside of the pattern. It is more to get an idea of how much wood I have removed and what more I need to do.

Once I did that, they appear more even.

The lower sill is still crooked, but that can be fixed.

A bit straighter.

Here is what they looked like after the first pass with the dremmel. Not a pretty sight!


- Joined
- Jun 17, 2021
- Messages
- 3,200
- Points
- 588

As they say "I feel ya bro". Literally! Meanwhile, doesn't look like it's held you back any!I don't feel so bad!!! Even though my splits still hurt and I can't help pick at them!!!!
Your ship proceeds beautifully at an amazing pace!

- Joined
- Oct 21, 2022
- Messages
- 303
- Points
- 278

I installed the upper gun deck planking. After, I coated the entire surface with my wood filler and jacobean stain. I have a lot of sanding to do to smooth it out, but again, it gives a nice worn, used look.
The hardest part is sanding and getting my hands whacked by the bulkhead extensions. It's a task for sure!
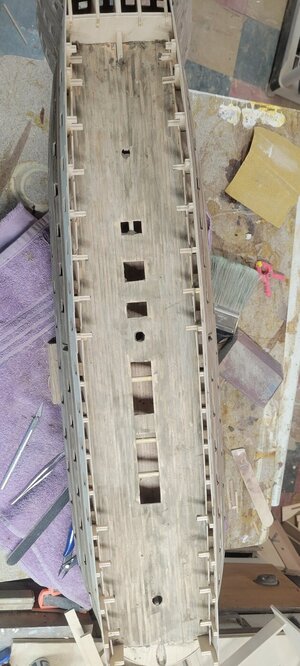
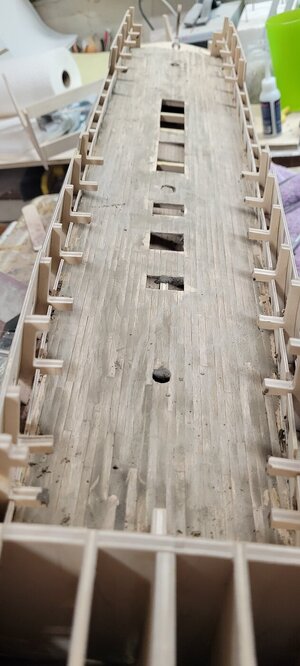
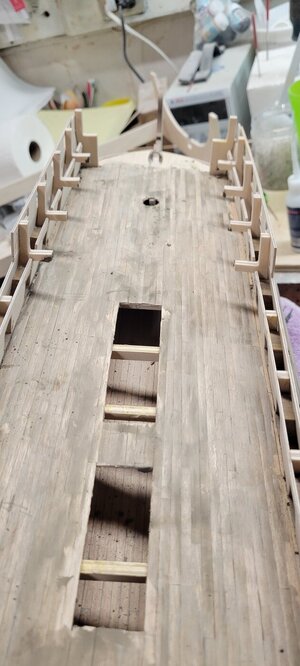
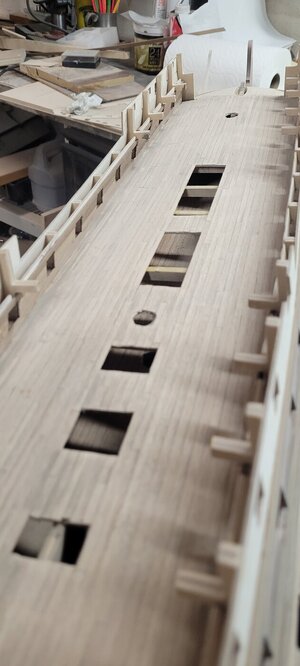
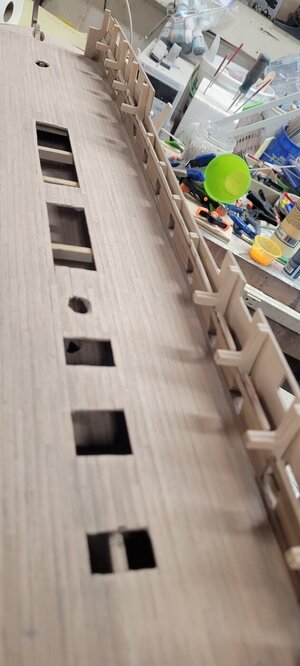
The hardest part is sanding and getting my hands whacked by the bulkhead extensions. It's a task for sure!


Hi ChrisAdding the interior gun port bulkhead planking went very well.
I had some issues with sanding and installing the various parts of these decks.
View attachment 435393View attachment 435394
Your work rate is impressive.
I found sanding the inner bulwark strakes is very difficult and needs to be done by hand or fingers only. Also if you decide to paint them it is hard to get a clean paint line at the deck and I painted the lowest strake first before installing. You will need to get a good masking tape with a tight seal.
I enjoy seeing your progress and look forward to more updates
- Joined
- Oct 21, 2022
- Messages
- 303
- Points
- 278

You're right about the sanding, my knuckles and for some reason my forearms are scratched to hell! I have one of those foam sanding pads with a pointy, tapered side that I wrap in sand paper. That seemed to help get into the bottom corners. I still ended up using my finger tips. I did give up and move on to other things to keep my sanity and will go back to finish today. I did put the quarter deck on and once again, it almost completely obscures the view of the upper deck once in place.Hi Chris
Your work rate is impressive.
I found sanding the inner bulwark strakes is very difficult and needs to be done by hand or fingers only. Also if you decide to paint them it is hard to get a clean paint line at the deck and I painted the lowest strake first before installing. You will need to get a good masking tape with a tight seal.
I enjoy seeing your progress and look forward to more updates
Another thing I've seen as I went through other builds last night is I don't see the need to actually plank the interior side walls all the way up to the camber beams. You cannot see them at all and seems like an unneeded task of cutting and/or fitting for a piece that can't be seen. That's why I didn't plank all the way up.
I am planning on using a airbrush to paint most of the areas. I do have Tamiya masking tape that I have had great success with. My thoughts now and how to handle the gun ports. I can see that I have to hand paint them, but if I plan on using an airbrush for hull, I can 'paint around them' but they will get some black or ochre spray into them. I think that trying to mask them would be a painful exercise. I also just thought about waiting to paint them until I have done the interior walls and the hull. That seems like a more prudent use of time....
- Joined
- Oct 21, 2022
- Messages
- 303
- Points
- 278

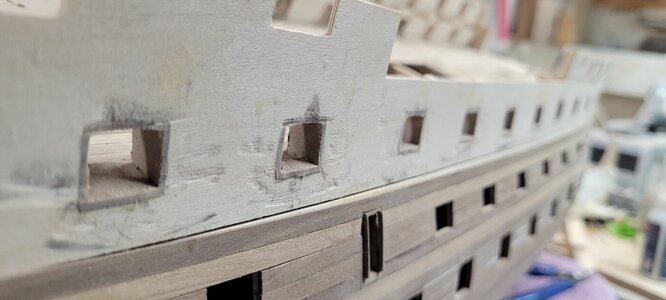
Earlier.....I attempted to install the upper gun port liners. There was a bit of an alignment issue so I had to be creative. While the instructions and other builds have installed the side walls first, I laid the lower sill first. The interior walls were a bit higher and I had used a dremmel to bring them down level with the exterior hull.
That seemed to work and most of the sills appeared level after installing them. I then flipped the boat over and did the top headers.
After they dried a bit (to the point they wouldn't fall) I added the side walls. All of the sides had to be tapered to get them to fit...the shorter side facing the interior. I used tongs to slide them into place.
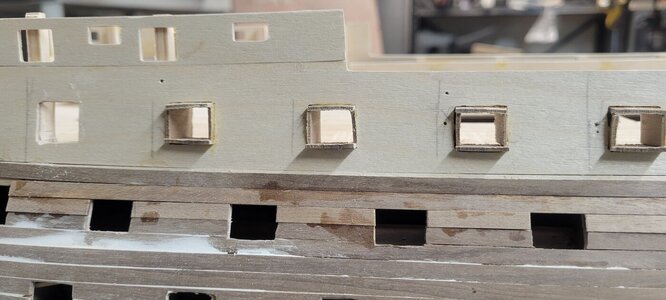
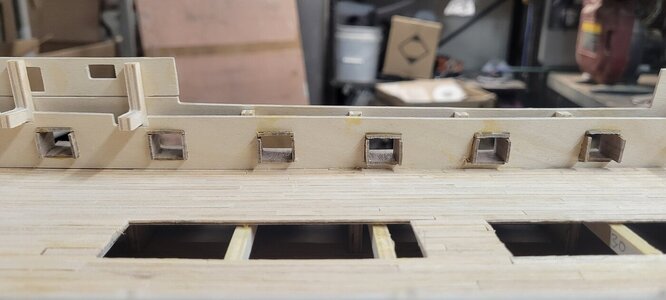
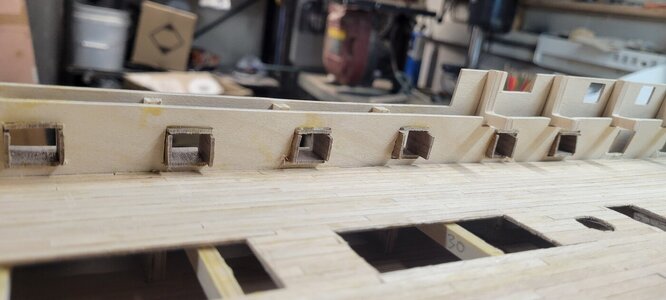
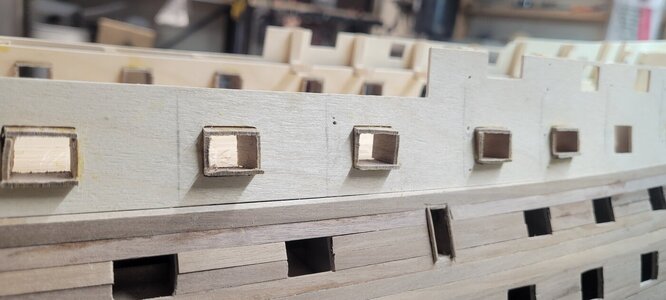
Removing the excess on the inside is not as easy as the instructions imply! Using an excato knife is doable to the open ports but the ones blocked by the bulwark stubs is hard. I finally used a dremmel with a sanding barrel to get them smooth. After a bit, I was able to get them smooth.
You can see I still have some sanding to do on the deck!!!!
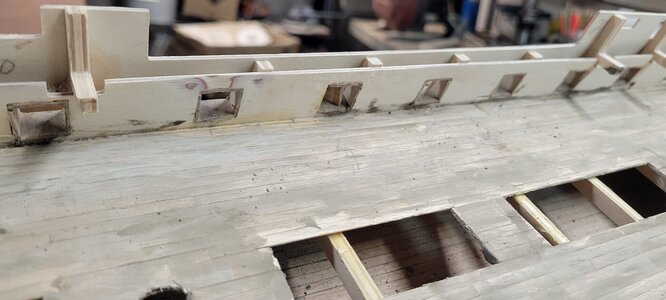
Yeah, those are rub marks there! But rubbing is sailing!
That seemed to work and most of the sills appeared level after installing them. I then flipped the boat over and did the top headers.
After they dried a bit (to the point they wouldn't fall) I added the side walls. All of the sides had to be tapered to get them to fit...the shorter side facing the interior. I used tongs to slide them into place.


Removing the excess on the inside is not as easy as the instructions imply! Using an excato knife is doable to the open ports but the ones blocked by the bulwark stubs is hard. I finally used a dremmel with a sanding barrel to get them smooth. After a bit, I was able to get them smooth.
You can see I still have some sanding to do on the deck!!!!

Yeah, those are rub marks there! But rubbing is sailing!

- Joined
- Oct 21, 2022
- Messages
- 303
- Points
- 278

After sanding the gun ports smooth, I installed the interior wall planking. I tried using CA glue on the first one, but for some reason didn't take as well as it did when I did the 2nd hull planking. Perhaps the template wood is either too porous or not porous enough? Either way, I used regular wood glue and that worked just fine.
I just have to clamp the lower plank before starting the rest.
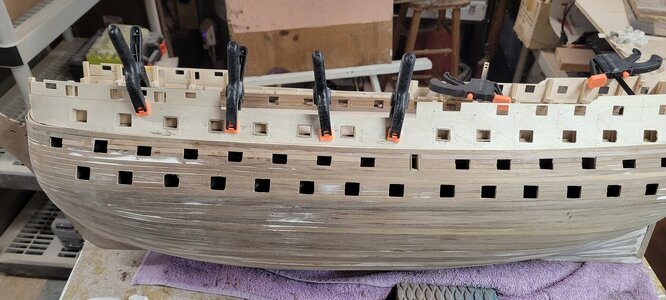
You can see here that I installed the plank above the gun ports, I had to mark them to notch out the very top.
I also opted not to add the very top plank. It just won't be seen. Shhhhh....don't tell anyone that comes over!
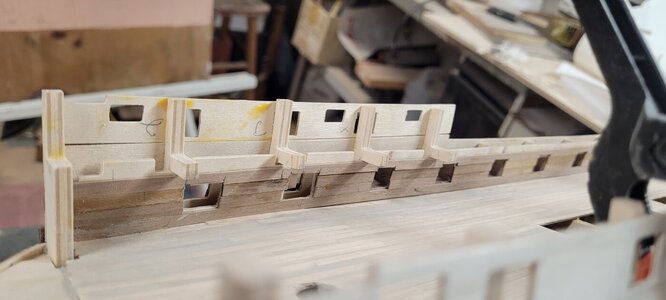
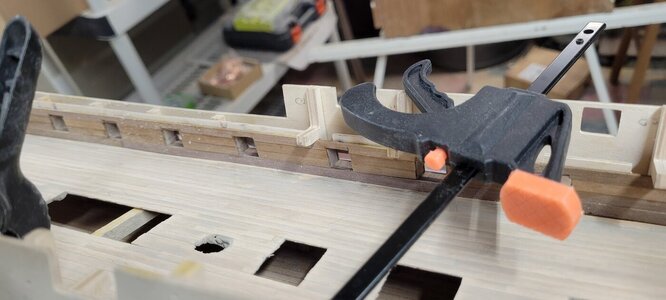
I just have to clamp the lower plank before starting the rest.

You can see here that I installed the plank above the gun ports, I had to mark them to notch out the very top.
I also opted not to add the very top plank. It just won't be seen. Shhhhh....don't tell anyone that comes over!


- Joined
- Oct 21, 2022
- Messages
- 303
- Points
- 278

I then starting on bringing the exterior planking up to the top. Or at least to the bottom of the gun ports on the quarter deck?
At first I was cutting the planking between ports, but decided it was easier to just run one long plank and then cut them out. I think it allowed for straighter lines in the openings, if that makes sense.
I spent a lot of time over the past day looking at other builds to see how the gun ports looked after planking. I have become obsessed with constantly shaving away little bits of wood to get them all square. At some point there will be no boat left! Just tiny, perfectly square ports....lol.
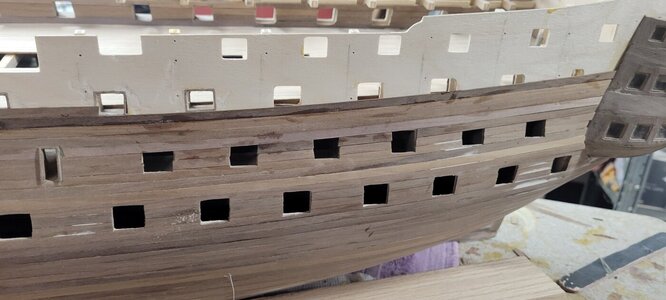
The lined ports actually look pretty good here. I used a small file to help square them up....although looking at this picture I can see the tops need a bit of work!!!!
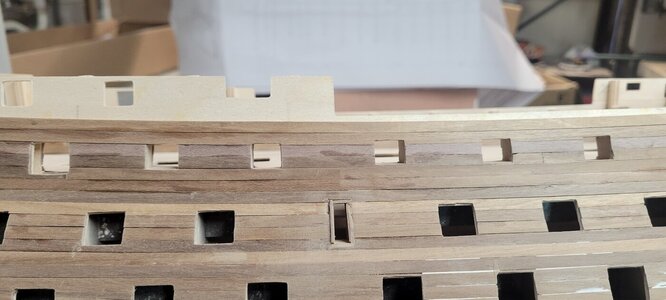
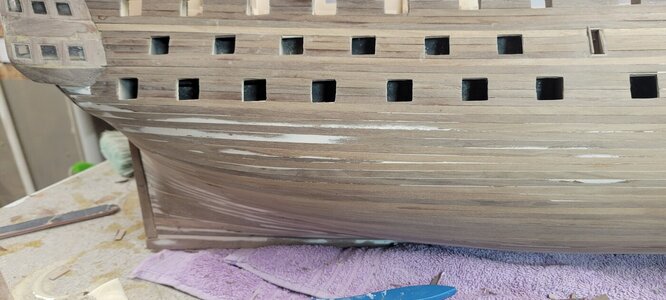
It's funny, looking at pictures brings out the worst sometimes. Looking at that most forward middle port, it looks like I added a teeny, tiny piece before the bend in the bow! What was I thinking. Also there is a stealer there and it caused all the planking above it to kind of 'tail up'. I think I did that because the planks fit tighter. Oh well, hopefully black paint will hide that!
Hopefully....
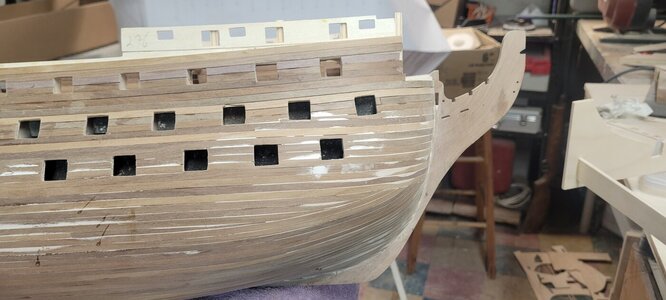
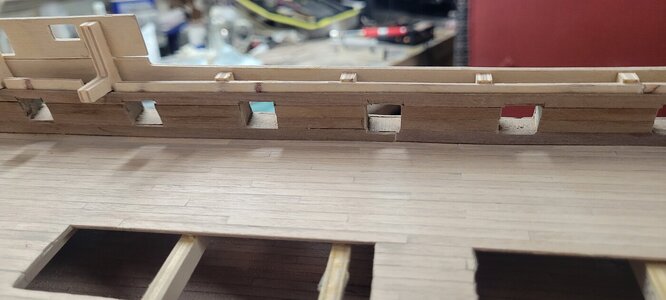
Cutting out the gun ports is finger breaking work. Even with a sharp exacto blade, it is a chore!!!!
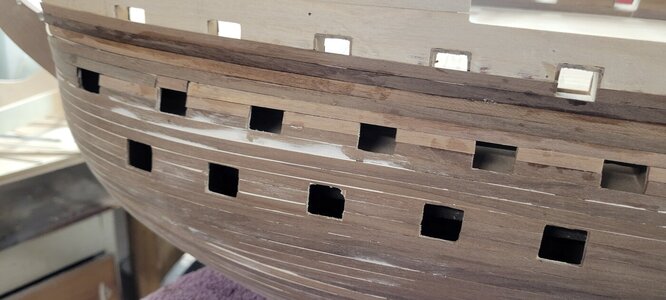
At first I was cutting the planking between ports, but decided it was easier to just run one long plank and then cut them out. I think it allowed for straighter lines in the openings, if that makes sense.
I spent a lot of time over the past day looking at other builds to see how the gun ports looked after planking. I have become obsessed with constantly shaving away little bits of wood to get them all square. At some point there will be no boat left! Just tiny, perfectly square ports....lol.

The lined ports actually look pretty good here. I used a small file to help square them up....although looking at this picture I can see the tops need a bit of work!!!!


It's funny, looking at pictures brings out the worst sometimes. Looking at that most forward middle port, it looks like I added a teeny, tiny piece before the bend in the bow! What was I thinking. Also there is a stealer there and it caused all the planking above it to kind of 'tail up'. I think I did that because the planks fit tighter. Oh well, hopefully black paint will hide that!
Hopefully....


Cutting out the gun ports is finger breaking work. Even with a sharp exacto blade, it is a chore!!!!

- Joined
- Oct 21, 2022
- Messages
- 303
- Points
- 278

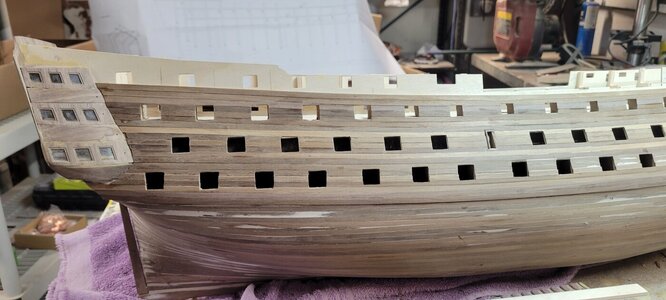
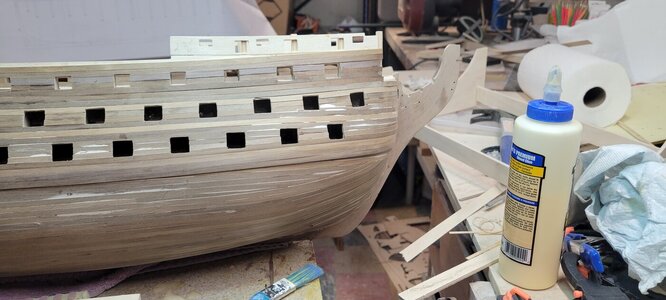
I still have to finish the port side planking but wanted to do something different. I looked ahead and saw that the next task before gun port lining was the wales.
I decided to give it a try. First, finding the proper planking was actually hard. All the different sizes and thicknesses are bundles together. So getting the calipers out to find the right pieces took some time.
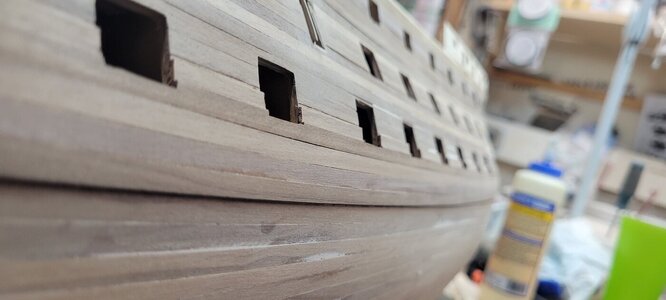
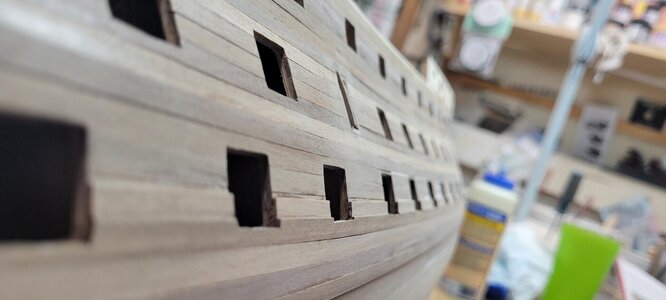
When it was all said and done, the lower wale looks pretty good. I kind of wish that perhaps the wale planking provided was a bit thicker so that it would show.
I did notice that my wales kind of tail up at the bow. So today I will explore other builds to see how their wales look.
I'll end up with wale envy, I'm sure!


- Joined
- Jun 17, 2021
- Messages
- 3,200
- Points
- 588

Your determination and energy are impressive! When do you sleep? This is a fun build to follow!I then starting on bringing the exterior planking up to the top. Or at least to the bottom of the gun ports on the quarter deck?
At first I was cutting the planking between ports, but decided it was easier to just run one long plank and then cut them out. I think it allowed for straighter lines in the openings, if that makes sense.
I spent a lot of time over the past day looking at other builds to see how the gun ports looked after planking. I have become obsessed with constantly shaving away little bits of wood to get them all square. At some point there will be no boat left! Just tiny, perfectly square ports....lol.
View attachment 435478
The lined ports actually look pretty good here. I used a small file to help square them up....although looking at this picture I can see the tops need a bit of work!!!!
View attachment 435474
View attachment 435475
It's funny, looking at pictures brings out the worst sometimes. Looking at that most forward middle port, it looks like I added a teeny, tiny piece before the bend in the bow! What was I thinking. Also there is a stealer there and it caused all the planking above it to kind of 'tail up'. I think I did that because the planks fit tighter. Oh well, hopefully black paint will hide that!
Hopefully....
View attachment 435476View attachment 435477
Cutting out the gun ports is finger breaking work. Even with a sharp exacto blade, it is a chore!!!!
View attachment 435479
Looks good, Chris. I Iike how this model incorporates the bend of the deck, mine doesn't, (I tried, something prevented it, ha, can't remember what). The wales look fine, remember when doing the lids, they'll match the wale as they do when closed.You're right about the sanding, my knuckles and for some reason my forearms are scratched to hell! I have one of those foam sanding pads with a pointy, tapered side that I wrap in sand paper. That seemed to help get into the bottom corners. I still ended up using my finger tips. I did give up and move on to other things to keep my sanity and will go back to finish today. I did put the quarter deck on and once again, it almost completely obscures the view of the upper deck once in place.
Another thing I've seen as I went through other builds last night is I don't see the need to actually plank the interior side walls all the way up to the camber beams. You cannot see them at all and seems like an unneeded task of cutting and/or fitting for a piece that can't be seen. That's why I didn't plank all the way up.
I am planning on using a airbrush to paint most of the areas. I do have Tamiya masking tape that I have had great success with. My thoughts now and how to handle the gun ports. I can see that I have to hand paint them, but if I plan on using an airbrush for hull, I can 'paint around them' but they will get some black or ochre spray into them. I think that trying to mask them would be a painful exercise. I also just thought about waiting to paint them until I have done the interior walls and the hull. That seems like a more prudent use of time....
As to painting, I've worked as an airbrush artist, (also in oils), and see ship modelers going that way. While the way to go for plastic, cars etc., really no need on wood. With the taping, preping the airbrush, masking, going back to cover overspray, thoroughly cleaning the airbrush, touching up, not such a great time saver. You can get great results with a quality brush & paint, (I use enamel, levels itself out). If you hand paint the liners red, (can you not paint them before you install them on the Caldercraft?), it's easy to now paint around them in black, inside ochre, & less taping, (using only enough paint to cover at the tape line to prevent seepage). It's more of a challenge to neatly paint the liners doing that last, better to paint outside in. For the hull ochre, you can spot them in, mark & tape, then black above & below the masking. Of course, we all have our ways.
Ah, forget my question, just saw you've started with the liners, maybe for the rest, paint & install them after the black & ochre?
Last edited:
- Joined
- Oct 21, 2022
- Messages
- 303
- Points
- 278

I thought about painting the liners first, but I figure that no matter what I do, I'll get paint on them and have to touch them up again...Looks good, Chris. I Iike how this model incorporates the bend of the deck, mine doesn't, (I tried, something prevented it, ha, can't remember what). The wales look fine, remember when doing the lids, they'll match the wale as they do when closed.
As to painting, I've worked as an airbrush artist, (also in oils), and see ship modelers going that way. While the way to go for plastic, cars etc., really no need on wood. With the taping, preping the airbrush, masking, going back to cover overspray, thoroughly cleaning the airbrush, touching up, not such a great time saver. You can get great results with a quality brush & paint, (I use enamel, levels itself out). If you hand paint the liners red, (can you not paint them before you install them on the Caldercraft?), it's easy to now paint around them in black, inside ochre, & less taping, (using only enough paint to cover at the tape line to prevent seepage). It's more of a challenge to neatly paint the liners doing that last, better to paint outside in. For the hull ochre, you can spot them in, mark & tape, then black above & below the masking. Of course, we all have our ways.
Ah, forget my question, just saw you've started with the liners, maybe for the rest, paint & install them after the black & ochre?
I know what you mean about the up time and down time using an airbrush. When I did the Titanic model, using a brush was just so bad. I saw many builders who only used brushes and it looks so bad up close. That was what I was afraid of, that the paints would look poor if I brushed them.
I suppose I will try both ways and see. The good thing is it's paint and I can always do again and again!
- Joined
- Oct 21, 2022
- Messages
- 303
- Points
- 278

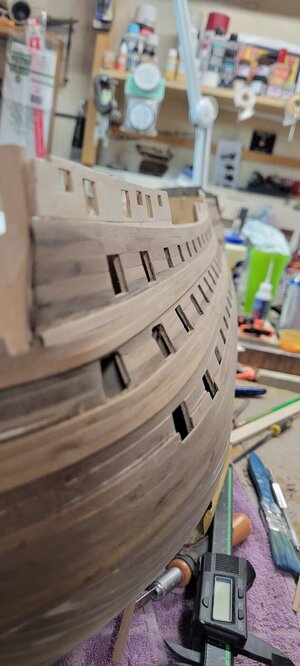
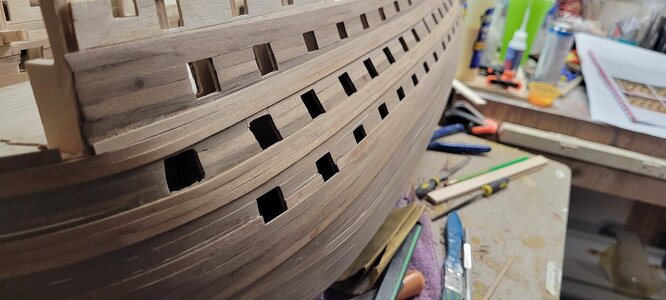
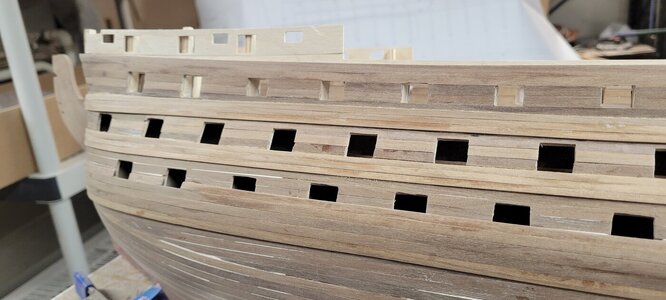
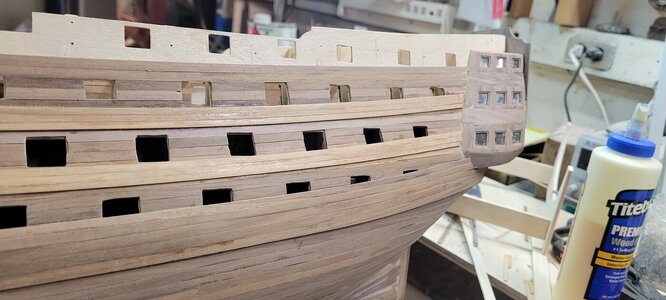
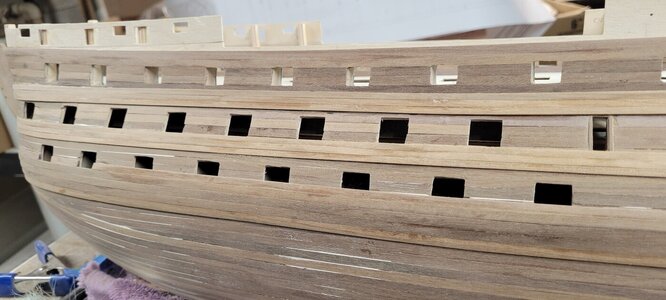
Well I took a stab at completing the wales on port side today. I am frustrated because I really thought I had lined up the bottom plank of the lower wale with the one on the starboard side and I ended up being off a bit. By the time I saw it, I was too far along and just couldn't face tearing it off. I know builder do that all the time, but man....
The hardest part is actually lining up the first wale on each of the three groups. After that they seem to just fall into place.
I suppose a little more sanding, perhaps some wood filler in the little cracks and they will be ready to go.
The hardest part is actually lining up the first wale on each of the three groups. After that they seem to just fall into place.
I suppose a little more sanding, perhaps some wood filler in the little cracks and they will be ready to go.


