H.M.S. Victory by Caldercraft - Build Log

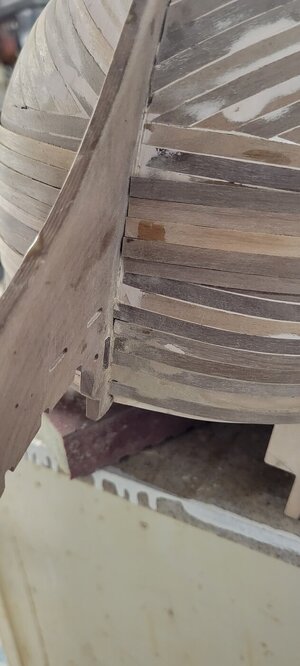
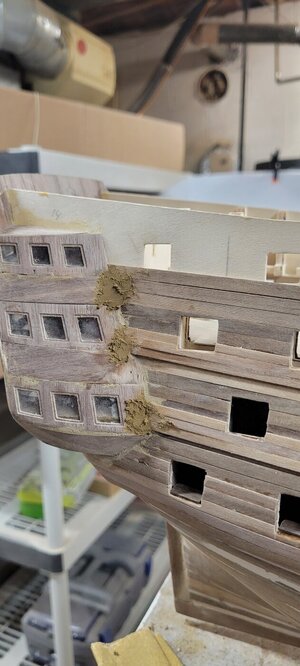
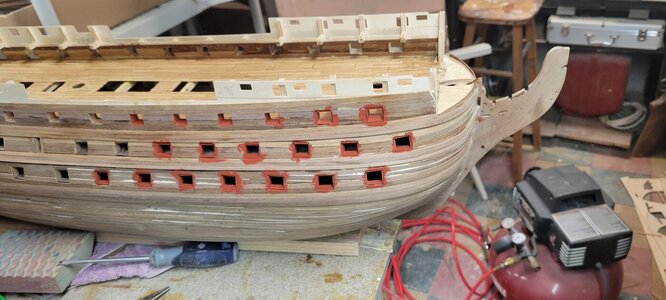
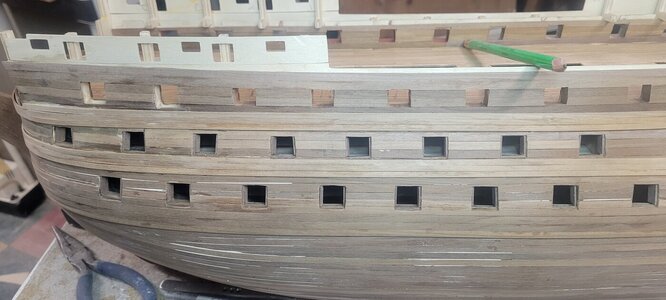
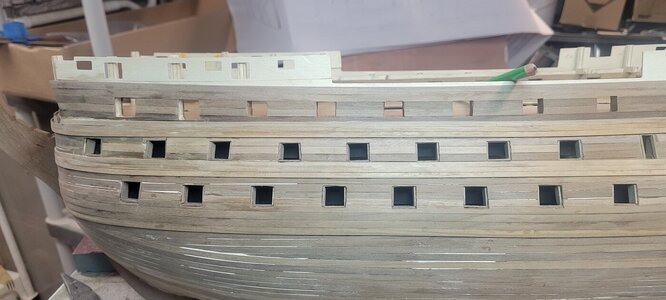
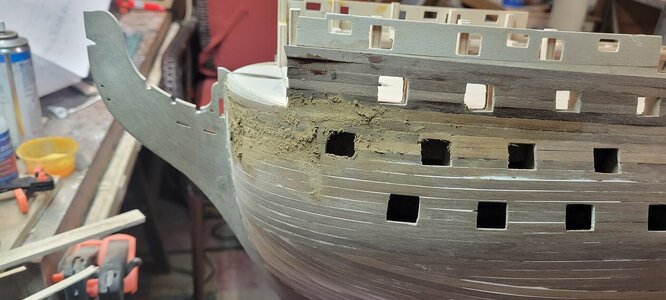
Earlier this morning, I applied some wood putty into areas that I want to smooth out.
The putty is pretty tough stuff and I'll have to put another coat on this week.

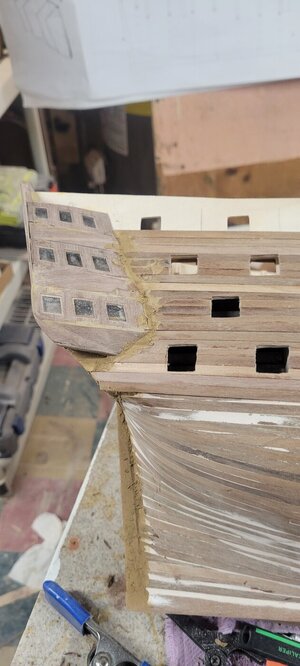
It looks terrible, but after it dried, I was able to sand a lot of it out. I know there other pieces that get installed on the quarter galleries, so I have some wiggle room with poor fitting planks. I think in the end I can use a flat exacto blade like a mini trowel and apply a final top coat of putty to completely smooth out the various fittings.
20240317_135026.jpg20240317_135043.jpg


20240317_135048.jpg

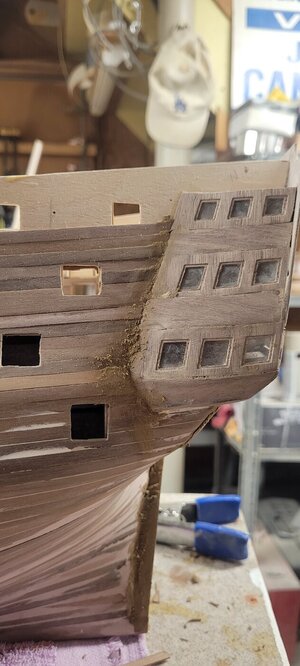
Off by a mm.....
20240317_185544.jpg

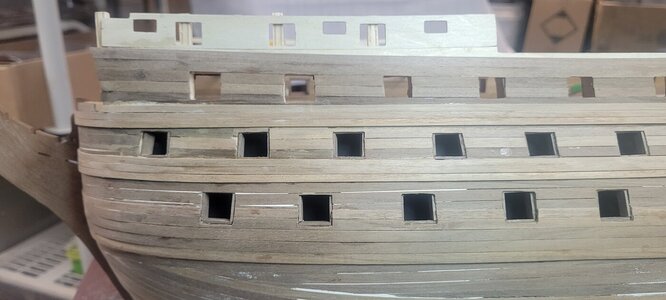
I short cut one of the wales, but I believe the panels that are to be installed for the side windows will fill this gap, otherwise, I will add stealers and smooth it all out. The windows are just dirty from all the sanding. I can get a q-tip inside through the back gallery and clean them before I finish the stern.
20240317_185611.jpg

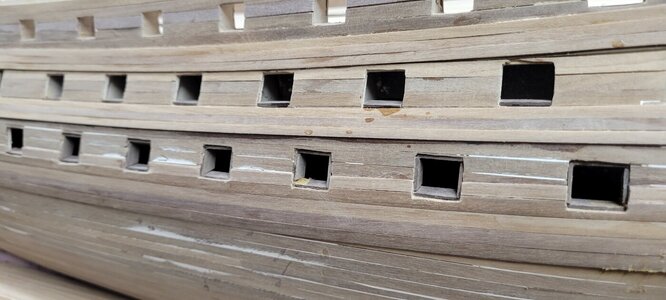
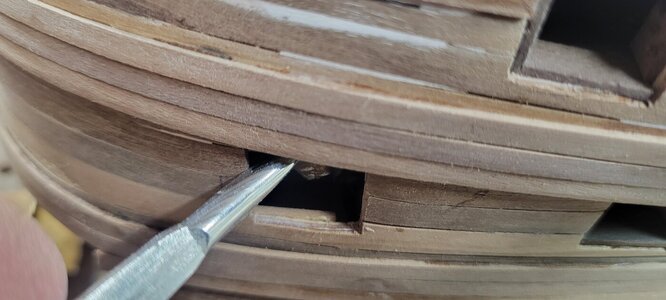
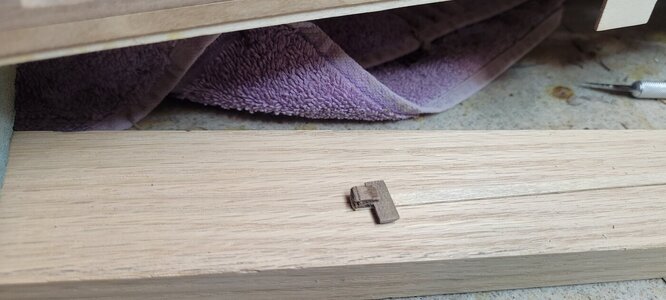
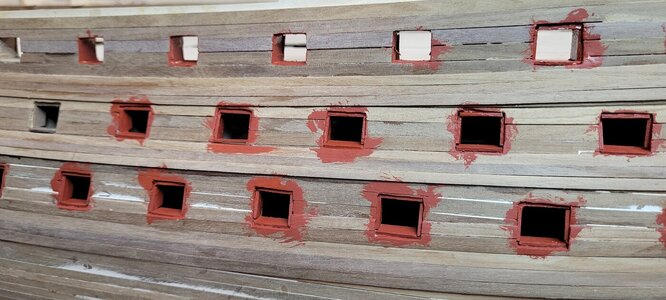
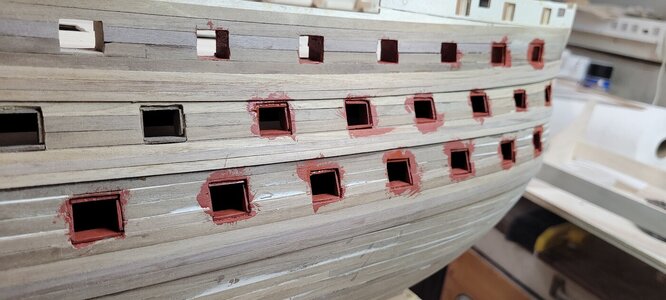
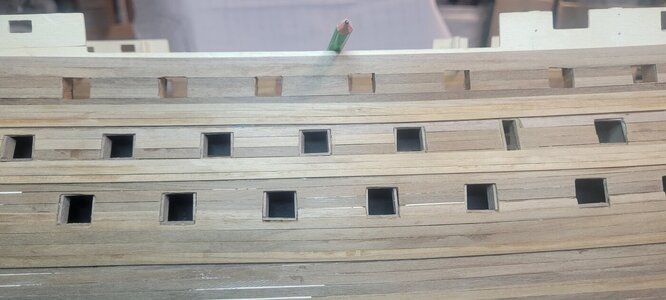
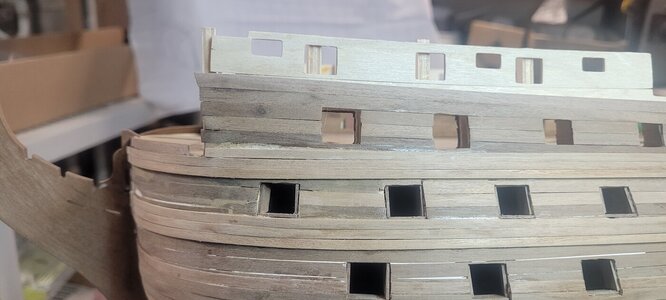
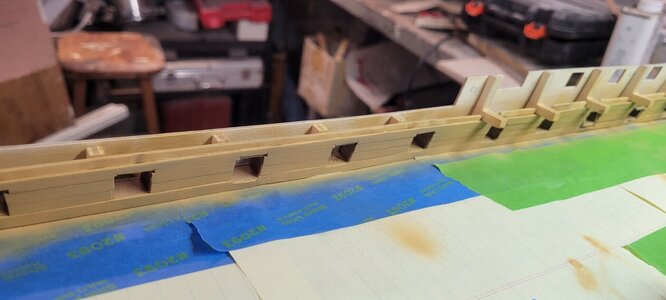
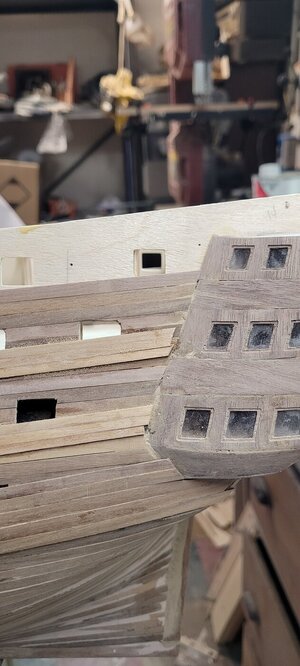
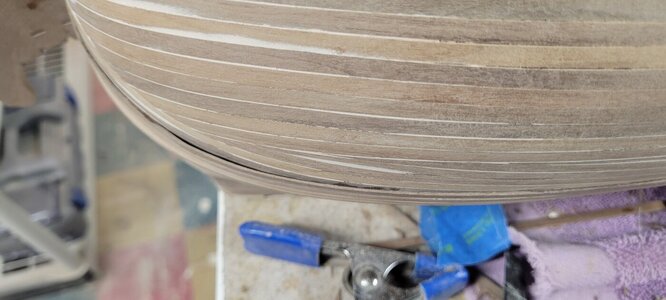
I took these photos of the wales from the bottom looking up to check for errors and bad fit.
I will have to do something to fill these voids before painting and/or installing the copper plates.
20240317_185732.jpg20240317_185737.jpg20240317_185800.jpg
 
Wow Chris. This is a phenomenal work rate. Your progress has been amazing.
I am enjoying the read and the photos. Please don’t stop.
I appreciate the kind words and taking the time to respond.

I started a build log on The Model Ship World, but for some reason I seem to concentrate on this forum first. I like the way it is set up and it seems much easier to manipulate photos.

Not sure if I am helping anyone, but I just know that I have spent hours looking at other builds and no matter their skill set, everyone always has something that has helped me!!!!!
 
I thought about painting the liners first, but I figure that no matter what I do, I'll get paint on them and have to touch them up again...

I know what you mean about the up time and down time using an airbrush. When I did the Titanic model, using a brush was just so bad. I saw many builders who only used brushes and it looks so bad up close. That was what I was afraid of, that the paints would look poor if I brushed them.

I suppose I will try both ways and see. The good thing is it's paint and I can always do again and again!
Good idea to experiment what works best for you, just a final word on pro's & cons. Some of the acrylics, or any heavy bodied paint, especially fast drying, will leave brush marks, try using an enamel (some of the better acrylics can work), at the right consistency, with a good brush if you do try it. (In the sign business, we'd roll or brush sheets of mdo with enamels, they'd level out looking as good as sprayed, same with brushing on this small scale). Good luck, coming along nicely.
 
Earlier this morning, I applied some wood putty into areas that I want to smooth out.
The putty is pretty tough stuff and I'll have to put another coat on this week.

It looks terrible, but after it dried, I was able to sand a lot of it out. I know there other pieces that get installed on the quarter galleries, so I have some wiggle room with poor fitting planks. I think in the end I can use a flat exacto blade like a mini trowel and apply a final top coat of putty to completely smooth out the various fittings.


View attachment 435666View attachment 435667


View attachment 435668

Off by a mm.....
View attachment 435669

I short cut one of the wales, but I believe the panels that are to be installed for the side windows will fill this gap, otherwise, I will add stealers and smooth it all out. The windows are just dirty from all the sanding. I can get a q-tip inside through the back gallery and clean them before I finish the stern.
View attachment 435670

I took these photos of the wales from the bottom looking up to check for errors and bad fit.
I will have to do something to fill these voids before painting and/or installing the copper plates.
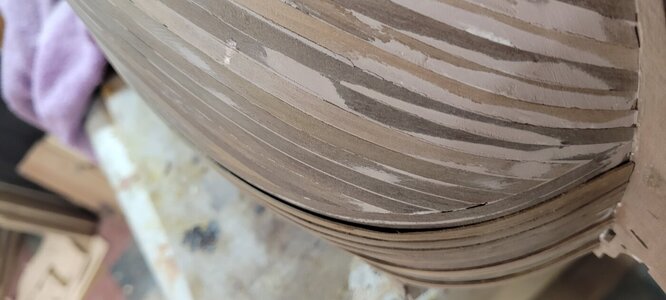
View attachment 435671View attachment 435672View attachment 435673
Good morning Chris. Wow, this is impressive. Re sanding your decks - have you tried scraping them rather. Jim showed me this technique and it works better than sanding as you can get into those small spaces etc. Those quarter deck cabins- Always a mission , however so far you are owning it. Cheers Grant
 
Earlier this morning, I applied some wood putty into areas that I want to smooth out.
The putty is pretty tough stuff and I'll have to put another coat on this week.

It looks terrible, but after it dried, I was able to sand a lot of it out. I know there other pieces that get installed on the quarter galleries, so I have some wiggle room with poor fitting planks. I think in the end I can use a flat exacto blade like a mini trowel and apply a final top coat of putty to completely smooth out the various fittings.


View attachment 435666View attachment 435667


View attachment 435668

Off by a mm.....
View attachment 435669

I short cut one of the wales, but I believe the panels that are to be installed for the side windows will fill this gap, otherwise, I will add stealers and smooth it all out. The windows are just dirty from all the sanding. I can get a q-tip inside through the back gallery and clean them before I finish the stern.
View attachment 435670

I took these photos of the wales from the bottom looking up to check for errors and bad fit.
I will have to do something to fill these voids before painting and/or installing the copper plates.
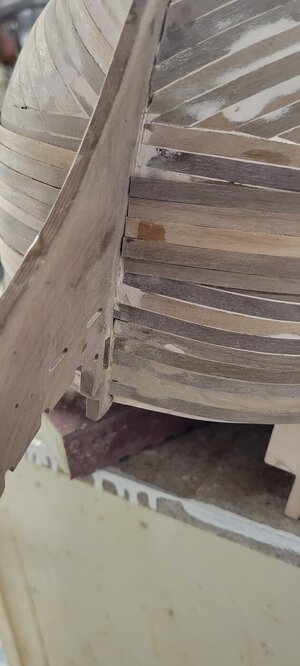
View attachment 435671View attachment 435672View attachment 435673
Such quick progress! Just a thought, (maybe too late anyway), looking at the wales, wish I'd tought of it for mine. If carefully measured to match the opening, then cut out with a sharp blade, the wale pieces removed over the ports can then be saved and glued on to the corresponding lid.
 
Such quick progress! Just a thought, (maybe too late anyway), looking at the wales, wish I'd tought of it for mine. If carefully measured to match the opening, then cut out with a sharp blade, the wale pieces removed over the ports can then be saved and glued on to the corresponding lid.
I thought about that today as I was cutting them out. But I take an attack from the top towards either side in thin slices, then cut down to whittle away at the wales to open up the ports. That's where the sore fingers come from!

I grabbed all the excess today and I'll set aside when it comes to making the gun ports.!!!!
 
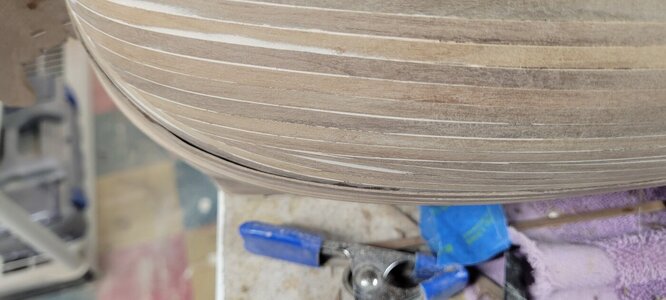
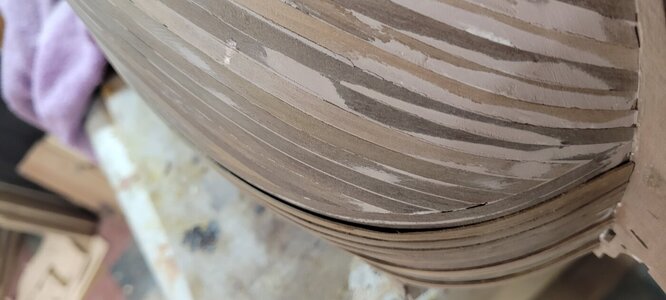
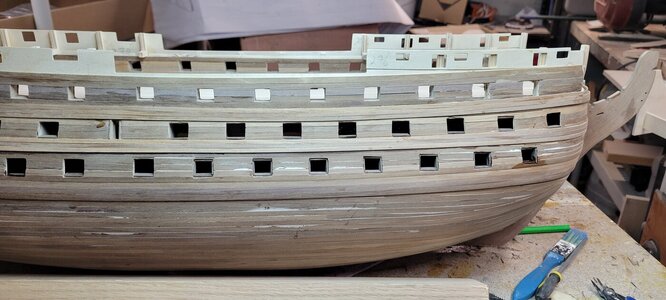
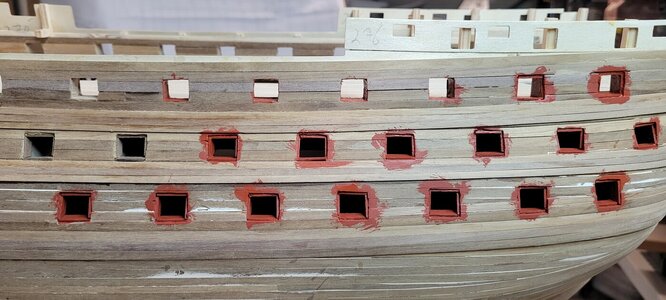
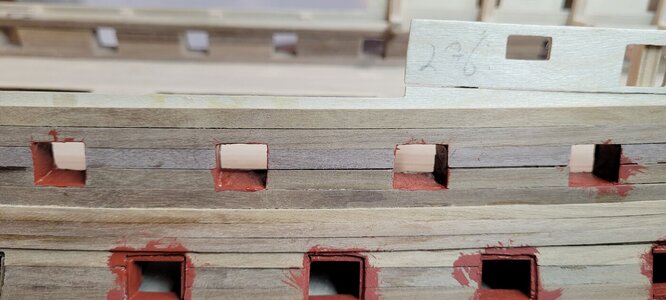
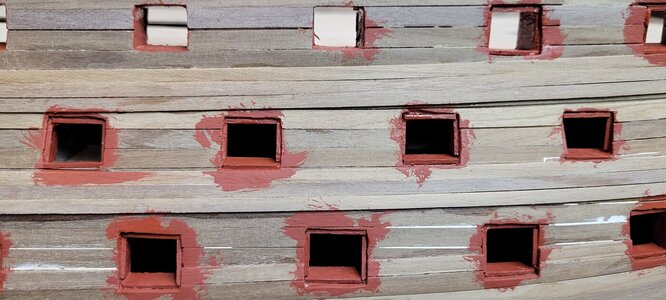
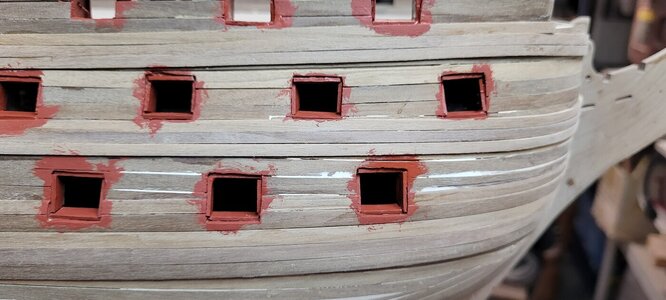
I finished the wales on both sides. Perhaps a small difference in height in the lower wale side to side, but otherwise fairly good.
Taking pictures, I do see that there is a gap on the underside of the lower wale due to my either not making sure they were glued tightly to the hull or not accommodating the bend/twist needed.

I added wood putty to these areas as well as some joint issues that were bothering me at the stern. I will sand and see how it goes.

20240317_185732.jpg20240317_185737.jpg20240317_185800.jpg


I started installing the gun port liners. They are difficult as they are tedious and there is a need to make sure the sills and headers are level with the water line.
That can be hard to eyeball due to the height we work at (not eye level with the port).

The first few I did, I used CA glue. While it attached the liners very quickly, it does tend to leave a bit of a residue mess. The following day, I went back to wood glue. I found that once I laid the piece in place, I would move on to the next opening. When I had attached that one, I was able to go back to the previous one and lightly tap it into a more level position. VERY LIGHTLY!!!!!

Again, the squareness of the gun ports is driving me crazy.
20240319_182257.jpg

Yeah....a little putty. Oops!
20240319_184404.jpg20240319_184417.jpg


When I went to do one of the most forward gun ports, I see that when sanding the hull, I must have sanded most of the walnut planking away, thus removing any chance of having something to attach the liner to.

I was able to attach a piece of 1st planking to the backside of the gun port template. I glued it pretty heavy. Once in, I couldn't figure out how to pull it in tightly. I have bent tweezers, they just couldn't get into the small hole. I needed like some small 'L' shaped thingy when I looked up and saw a paint can opener!

That worked!
20240320_113908.jpg

Like every other builder, I built my little liner holder for attaching the pieces. Without it, I do not see how this task can be done.
Now I didn't spend time making sure there was a 1mm gap to help. It seemed easy to slide the contraption into the port, hold it up to the spot where the liner needs to be and use my tweezers to hold it in place. So far, only 2 or 3 have fallen.

Ok, ok....maybe a few more than that!!!!!


20240320_113913.jpg
 
I did something similar under my port lids, since there's so little gluing surface as they are.
As a going concern, that would actually be a better thing to do before gluing those templates into place.

Honestly, little 5mm strips on the back side (bulwarks permitting!) that would make this a VERY NICE 2mm ledge.
That would be worth the extra time. Oh well!
 
Speaking of gun port frames, are they exposed or does the second planking cover them? I see some with a hatch door with an inset on the door and some without. I mean does the door rest against the gun port frame when it is closed. My instructions are vague. If the door does not have an inside frame to rest against, I think it would be weak.

Once again, we question our experienced members to answer. Thank You.

What did the gin say to the olive?

Bottom of the food chain, Huh.
Dale;
I am by no means an experienced member. I guess experienced in knowing just how intricate this model is!!!!!

My sense is that when the hatch doors are closed, they are flush with the hull, resting against the gun port frame LINING (much like a regular door lies against the stop on the inside of the door jam).

While I haven't reached that section yet, I believe you have to add planking to the hatches to make them align with the outer wales along the hull, so some have more planking than others. I think that's why the liners have to be installed 1mm in....?

I hope that helps?
Chris

...When Charles Dickens orders a gin, the barman asks, 'Olive or Twist'?
 
Speaking of gun port frames, are they exposed or does the second planking cover them? I see some with a hatch door with an inset on the door and some without. I mean does the door rest against the gun port frame when it is closed. My instructions are vague. If the door does not have an inside frame to rest against, I think it would be weak.

Once again, we question our experienced members to answer. Thank You.

What did the gin say to the olive?

Bottom of the food chain, Huh.
Yes, they're exposed enough to work as a stop. (Also notice the thickness of the lids, with the section of the wale on them when you make them).

ajaxnetphoto-2005-portsmouth-england-gunports-the-gunports-of-hms-J039G4.jpg
 
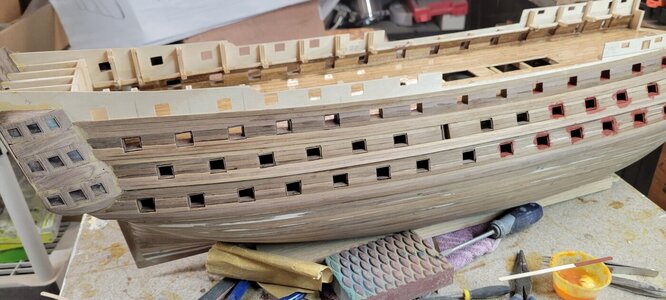
I finished all of the gun port liners on the starboard side.

I decided that I wanted to give them a coat of paint and then take pictures to see how they look and fit.
Honestly, I am not very happy right now. The five gun ports that do not have lids on the upper deck look great. They sanded up nicely and fit squarely.

The others are all over the board. Some are bad due to bad cutting on my side, perhaps rushing too much or assuming I would be able to fix and clean them up after.

However, after is here and I am going to have to think about what I need to clean and square them up. Ideally, I need a little teeny tiny caulking gun with a .01mm nozzle that I can squeeze some caulking into all the corners, seams and joints. That would work.

It's possible that when I apply the 2 colors to the hull, it will obscure some of the ill fittedness. I don't know.

I am going to try to use a wide, flat exacto blade and use it as a trowel using the wood filler (not the putty, that is too hard). Maybe I can squeeze it in, get some shape and then once dried, circle back with a sharp exacto knife and cut out the corners and shave the planking a bit to create a better edge.

So when you look, have pity!!!! I will fix it!!!!

I hope....

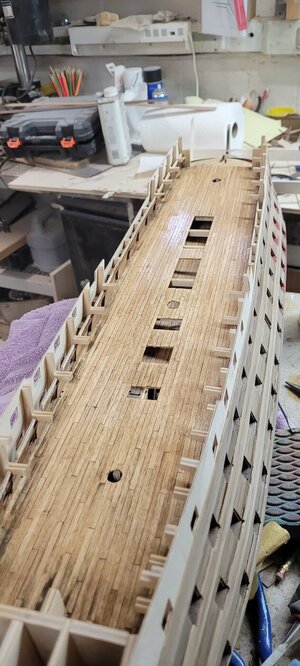
I also hit the whole boat with my air compressor. Man, she was dusty down below! I stuck the air nozzle down the foremast hole and dust came spraying out all the forward gun ports! After, I gave the upper gun deck a coat of matt finish. I'll let that dry, steel wool it and give it one more coat.

20240322_164349.jpg20240322_164353.jpg20240322_164355.jpg20240322_164358.jpg20240322_164400.jpg20240322_164403.jpg20240322_164942.jpg20240322_164952.jpg20240322_164958.jpg
 
I finished all of the gun port liners on the starboard side.

I decided that I wanted to give them a coat of paint and then take pictures to see how they look and fit.
Honestly, I am not very happy right now. The five gun ports that do not have lids on the upper deck look great. They sanded up nicely and fit squarely.

The others are all over the board. Some are bad due to bad cutting on my side, perhaps rushing too much or assuming I would be able to fix and clean them up after.

However, after is here and I am going to have to think about what I need to clean and square them up. Ideally, I need a little teeny tiny caulking gun with a .01mm nozzle that I can squeeze some caulking into all the corners, seams and joints. That would work.

It's possible that when I apply the 2 colors to the hull, it will obscure some of the ill fittedness. I don't know.

I am going to try to use a wide, flat exacto blade and use it as a trowel using the wood filler (not the putty, that is too hard). Maybe I can squeeze it in, get some shape and then once dried, circle back with a sharp exacto knife and cut out the corners and shave the planking a bit to create a better edge.

So when you look, have pity!!!! I will fix it!!!!

I hope....

I also hit the whole boat with my air compressor. Man, she was dusty down below! I stuck the air nozzle down the foremast hole and dust came spraying out all the forward gun ports! After, I gave the upper gun deck a coat of matt finish. I'll let that dry, steel wool it and give it one more coat.

View attachment 436771View attachment 436772View attachment 436773View attachment 436774View attachment 436775View attachment 436776View attachment 436777View attachment 436778View attachment 436779
You'll get it! (I used old credit cards , cut to size, makes a good trowel for tight spaces.)
 
Dale;
I am by no means an experienced member. I guess experienced in knowing just how intricate this model is!!!!!

My sense is that when the hatch doors are closed, they are flush with the hull, resting against the gun port frame LINING (much like a regular door lies against the stop on the inside of the door jam).

While I haven't reached that section yet, I believe you have to add planking to the hatches to make them align with the outer wales along the hull, so some have more planking than others. I think that's why the liners have to be installed 1mm in....?

I hope that helps?
Chris

...When Charles Dickens orders a gin, the barman asks, 'Olive or Twist'?
Thank you and I agree with your thought. There must be a frame to take the door against. But also, does the door have an inlay to cover the ID of the opening?

Oliver Twist has kicked in on Friday night. Guess I should ask David Copperfield a few questions.
 
I think I said earlier that I was doing the port side gun port liners, I meant STBD, today I took a more methodical approach to the port side.

I still went with installing the sill first. But then I installed the sides. When I'm done, I'll flip the boat over and install the header liners.

I also cut each piece individually, lining them up to the opening and then using my plier cutters to cut them and then sand into fitting.
I think that and going a bit slower has helped.

They still aren't the best, but I think that once I prime everything then paint them it should smooth them out?

20240324_140532.jpg20240324_140535.jpg20240324_140538.jpg20240324_140544.jpg20240324_140551.jpg
 
While I'm not ready to finish the interior gun ports (I have some trimming and cleaning up of the ports), I wanted to see how the paint applies using my airbrush.

First, probably the worst area I could try on. The angle for the brush is just brutal and once again the bulwark stubs get in the way.
But the paint does lay done nicely and should look good on areas with a free reign to spray.

One thing, I am using the Admiralty Paints from JoTika. They are incredibly thick. What do people usually thin them with?
Today, I used Tamiya thinner, but I have thinners for most of the other acrylic brands available in the US.

Just curious.

20240324_145154.jpg
 
Last edited:
Once thing, I am using the Admiralty Paints from JoTika. They are incredibly think. What do people usually thin them with?
Today, I used Tamiya thinner, but I have thinners for most of the acrylic brands available in the US.
Hi Chris,

I use Admiralty paints for my Vanguard and have found them to be good. I thin my acrylics with just water if using a brush, may require several coats. If using the airbrush I will also add some airbrush thinner or flow improver. I use Vallejo.
I also use Humbrol enamels and thin them more if using in the airbrush. I use Tamiya enamel thinner and airbrush thinner.

I am still learning when it comes to using an airbrush but have found that enamels and polyurethane sprays need to be more thoroughly cleaned out of the brush to prevent blockages and uneven spraying. I have developed a sequence of steps to clean the airbrush using turpentine, gauze, sponges and cotton tips after enamel use, which works well.

Your port side sills look great.

Happy painting

Michael
Appreciate the compliment Mike, very much!

I have never used enamel paints, the last boat I did was the Trumpeter Titanic and it required A LOT of painting. I used acrylic for it all. I do have Vellejo thinners, I plan on trying the paint with that and I also have AK thinners, which seem to be an 'O Positive' when it comes to competitor paints, AK seems to work well with everyone!

I've practiced with water as well as regular IPA (isopropyl alcohol....or was it the beer?), they don't seem to get the best results.

I will keep plugging along, and again, the kind words do mean a lot!
Chris
 
Back
Top