Thanks, guys!
-

Win a Free Custom Engraved Brass Coin!!!
As a way to introduce our brass coins to the community, we will raffle off a free coin during the month of August. Follow link ABOVE for instructions for entering.
-

PRE-ORDER SHIPS IN SCALE TODAY!
The beloved Ships in Scale Magazine is back and charting a new course for 2026!
Discover new skills, new techniques, and new inspirations in every issue.
NOTE THAT OUR FIRST ISSUE WILL BE JAN/FEB 2026
You are using an out of date browser. It may not display this or other websites correctly.
You should upgrade or use an alternative browser.
You should upgrade or use an alternative browser.
Hannah by DocBlake. 1:32 Scale - Scratch Built, Plank-on-Frame, Admiralty Style
- Joined
- Oct 23, 2018
- Messages
- 886
- Points
- 403

Hi Dave,
really nice start. If you built a piece like the after deadwood, you have to look that the grainage of timber goes in the right direction. You cut it by on piece and did the rest with a mill, with the grainage 90° in the wrong direction. I suggest to build it in the correct way. It's not a really complicated task and is a good practice for the later much more complicated pieces.
really nice start. If you built a piece like the after deadwood, you have to look that the grainage of timber goes in the right direction. You cut it by on piece and did the rest with a mill, with the grainage 90° in the wrong direction. I suggest to build it in the correct way. It's not a really complicated task and is a good practice for the later much more complicated pieces.
Thanks! I toyed with that Christian, but opted against it. After the frames are installed, not much of the deadwood shows at the stern. The bearding line is fairly far aft on this model. I would be a big job to remove the deadwood...I used TiteBond!
- Joined
- Oct 23, 2018
- Messages
- 886
- Points
- 403

Dave,
it was not my intention that you remove the deadwood. It was only a hint what you, if you want, can do better on your next model.
You did everything well, so no need to change a part.
it was not my intention that you remove the deadwood. It was only a hint what you, if you want, can do better on your next model.
You did everything well, so no need to change a part.
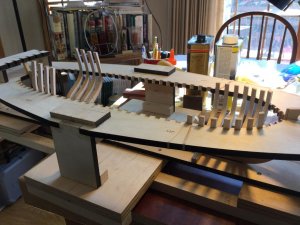
The jig is perfect, Mike! Great work! Not having to cut it out by hand saved a ton of time.
I know who made it... no wonder it is awesome...looking...jig.Awesome looking jig!!!
Amazing joinery skills - beautiful work!
Thanks, everyone!
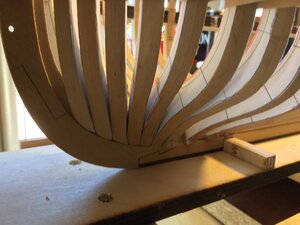
This model is based on Hahn's plans, but uses an upright jig, unlike Hahn's method. As drawn, the plans leave little extra length in the top timbers to ensure that they can be trimmed to the right height. After fitting the feet of the cant frames to the deadwood, the first three frames came out dangerously close to too short. I weighed my options and decided to remake frames #32, #33, and #34, leaving the top timbers 1/4" longer than the plans.


This model is based on Hahn's plans, but uses an upright jig, unlike Hahn's method. As drawn, the plans leave little extra length in the top timbers to ensure that they can be trimmed to the right height. After fitting the feet of the cant frames to the deadwood, the first three frames came out dangerously close to too short. I weighed my options and decided to remake frames #32, #33, and #34, leaving the top timbers 1/4" longer than the plans.


Kurt Konrath
Kurt Konrath
Great to see the progress on your build, keep it up and keep letting us know how its going
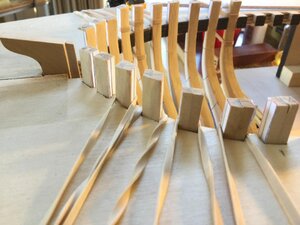
Great progress Dave.Looking at the picture,are the cant frames low because there should be a gap between their base due to the angle the planks fall into the Rabbet?The hull form in this area is similar to my Saint Philippe and the frames end well short of the bottom edge of the Rabbet
Kind Regards
Nigel
Kind Regards
Nigel
Hi Nigel!
The plans call for the cant frames to sit on the keel as in the photo. The rabbet gets "cut into" the feet of the frames after they're installed. It makes installing the cant frames much easier.
The plans call for the cant frames to sit on the keel as in the photo. The rabbet gets "cut into" the feet of the frames after they're installed. It makes installing the cant frames much easier.
first three frames came out dangerously close to too short.
Hi Dave!! I was noticing on your first picture that it looked like the forward frames were getting kinda short. It is looking good!! Question, since you are making good progress on those cant frames is it ok if I shelve making those edits for the "cant twist" on the drawings for now? My plate runs over!!! LOL.
No problem, Mike! I got this, thanks! I went back to the original plans in 1:48 and scaled up the cants by 150%. Worked great. I should have told you...Sorry!
NICE GOING DAVE!
- Joined
- Oct 23, 2018
- Messages
- 886
- Points
- 403

Dave,
I would remove the paper templates before glueing the frames on the hull. Make a small pencil line to mark the line for fairing the hull.
I think, to remove the templates and clean the frames will later be much more difficult.
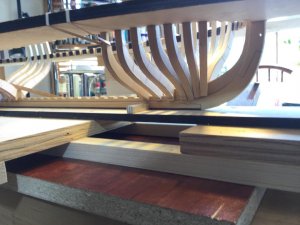
Your frameing is looking really nice. Such a second layer for the jig, I need for my Triton project.
I will remove the templates and add simulated bolts to the frames. Then two coats of poly on the fore and aft side of each frame before gluing them in place.


