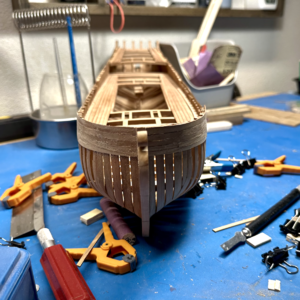
Hayling Hoy: POF kit [COMPLETED BUILD]

No, you're not grousing. These models are expensive to make. And if you have a vision for what you want, the costs multiply exponentially. I have full confidence that you are more than capable of detailing this model however you want. But, yes, it requires an ever-expanding investment of time, money and interest.


Pete
 
Disaster!
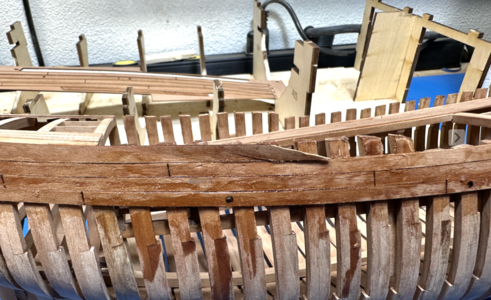
I don't know why I just blindly follow the instructions. Not only are they vague, sometimes they just lead to a terrible building strategy. Coupled with my lack of skill and impatience, I got a very poor result planking the first couple of strakes of the hull.

Planking
The instructions show installing the ceiling planks first and that there are 2 1x3 strips to complete the ceiling that includes some laser cut pieces. That doesn't work out. It needs at least 2 strips per side with one cut to shape.
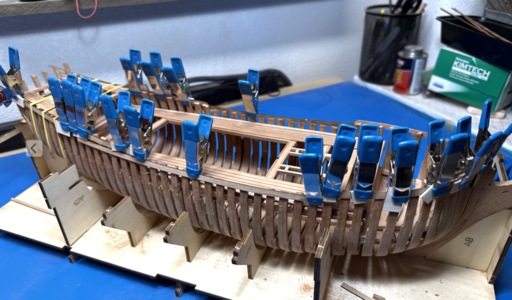
I decided to do the outer planking first instead. I started doing it, using the top of the frames midship as a guide. Here's why I said "disaster!". The distance between deck and top of frames for port and starboard are different distances. Here's where more care and not just blindly bumbling through the instructions would have paid off. Along with using the guides, I should have double/triple checked the distances between the top of frame and the guide where the same on both sides. Not taking this into account made a big difference, almost 5mm difference between the two sides (I am a scientist by trade and metric makes more sense to me when you are looking at relative distances). Mix in the confusion of trying to get alignment with the inboard planks, and you have a mess. Also, I rushed, what a mistake. I was making such good progress that I tried to bull through it. The top strakes and the first three full strakes had been committed before I realized how bad it really was. My clue on the misplaced strakes were the scupper holes on the third full run, they were just too low on the port relative to the deck. At least I paid attention to that.

Glue
To make it worse, this is the first time I've planked with Titebond Thick&Quick. I have been increasingly unhappy with this adhesive as I have gone through this model. It started with my glue-ups of the frames. Using the Dremel drum sander as a spindle sander was pretty tough. The grit kept getting charged with resinous dark goo that I couldn't get out with an eraser or crepe stick. I was flying through those drums. In retrospect, it was the gummy glue mixing with char that was sticking to the drum, coming from where the pieces were glued together. Of course the surface can't cut much after that, leading to a lot of frustration and many sanding drums.
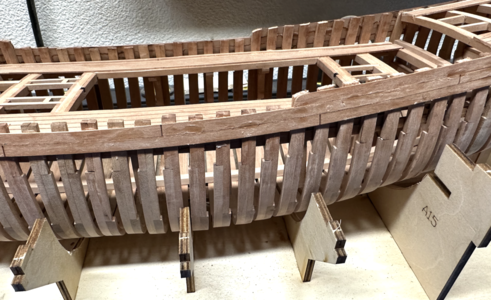
Then I noticed that my glued in half frames were a bit spongy with some lateral force applied. I started noticing it in other places as well. And extra glue was very boogery and difficult to remove, although it softens up with IPA faster that regular PVA glue. Finally, I did the planking. It was nice that the glue grabbed on quickly, especially in places where the clamping was more precarious. CA glue is nice like that two but has lots of drawbacks, least of which is screwing up a natural finish. But the glue that squeezed through ended up being very difficult to clean up with a brush and water or even IPA. It was sticking to everything. And it doesn't sand well, more likely to booger up.
1695138833718.png
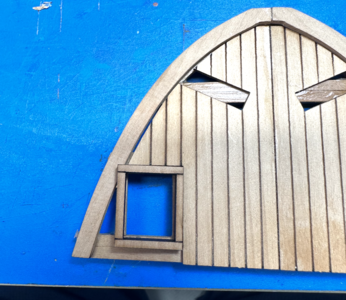
I still need to re-install the forecastle deck which I am dreading, especially getting the height right with the ceiling planking. I just had to hang up the model and move on to another that I've had on hold for a while. I was stuck in "thankless task" mode with that one, trying to get a fiberglass finish on a wooden planked hull (bondo putty, primer, sand bondo putty, primer, sand, etc...). But somehow all the sanding didn't seem so bad after the disaster that struck Hayling Hoy and the lack of a plan to address it. And the biggest disaster of all is that I felt like I had to cut some timbers to fit. I still have replacement frames from earlier in the build, but what I major hassle and difficult to sand back down in the end. I was in such a rush to make progress, now I am looking at weeks of recovery. And in taking off the strakes, they broke in places, especially at the simulated butt joints. And they were just too boogery from the glue, I would have been very luck to get any kind of consistent finish. So I left dry dock and went on to another job. For a while.1695140882539.png
 
Last edited:
A couple of days later, I was ready to give it a shot again. I got all the old planks off and cleaned up the gummy glue as much as possible. I'm ready to start again, but concerned my frames are now too short.
The first thing I considered in reinstalling the main deck. But it is just so integral to the ship now and many pieces have been custom fashioned to secure and support it. Just not practical.
Next thing to do is figure out how high the sides are really supposed to be midship. If I can work around that, careful placement of the planks and clever re-installation of the forecastle deck could do the rest. I broke out David Antscherl's plans (I'm not sure you can really do this model without his book and plans). I measured 10mm from the deck to below the cap pieces. Then I measured what I had. I had 12mm on one side and 7mm on the other. If I planked above the top of the frames, I might make it on the port side. I will probably have to put some tops on a few frames, but it would all be covered by the cap. The other side can be cut/sanded down a bit once it's securely planked. If I can reconstruct the strakes, I might be able to get past this and get it right to boot.
 
I decided the laser cutter was my best option. I was going to spile it myself but the pieces were quite curved from the first full strake and the first full strake has to be perfect for the fix to work.
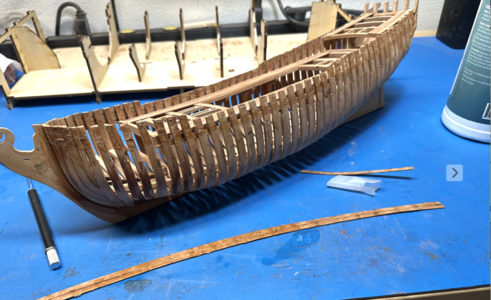
I cleaned up the recovered strakes from one side as best I could, see picture. That bottle on the right is isopropanol, the bigger bottle was appropriate, especially getting all the boogery glue of the face of the part.
1695140801292.png
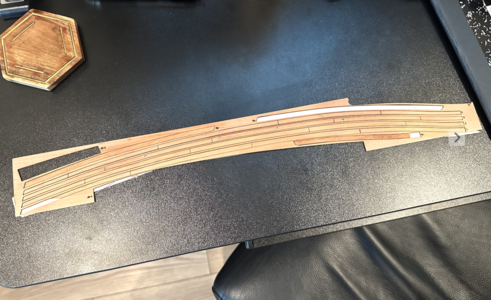
I put masking tape on one side of the parts carrier I had kept and loaded up the parts on the other side. This made it easier to work with and helped me put together broken pieces. The carrier's spaces for the parts are bigger than the part by the kerf, so I need parts to trace. I have some 1/32" cherry sheets for another project that I can use. I removed the partial strakes to 1. get the height right for sure and 2. to better match the wood. Those pieces have been returned to the carrier as well.
1695140989594.png
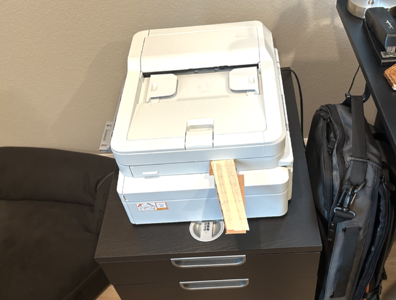
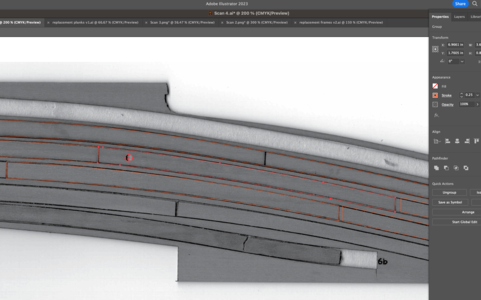
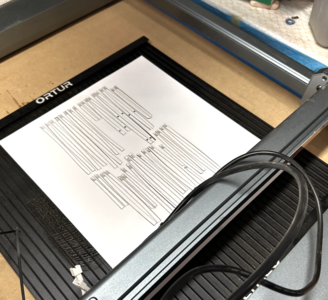
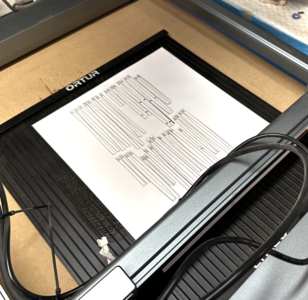
I put the sheet back together because I want to scan the parts and take them into Illustrator to build workable paths for the laser cutter. I stuck the carrier into my scanner bed. The admiral was dubious about the hygiene of this, but I talked her into it.
1695141186622.png
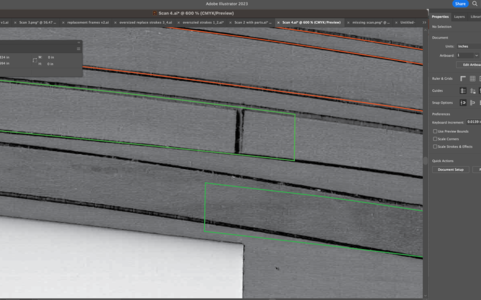
Once I had the scan in Illustrator, I built paths for each strake.
1695141284061.png
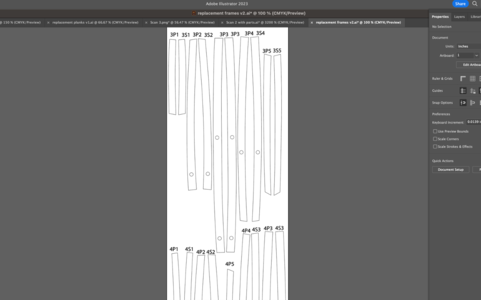
One consequence of using the cutter is that the gantry can't do the full length of the strake and neither can the scanner. That means each strake needs to be broken down a bit. I figured at the seams that were etched would be the best best. Finally, I traced everything, labelled everything, and put little tabs for each part to stay in the sheet. Here it is before it goes into Lightburn.
1695141443390.png
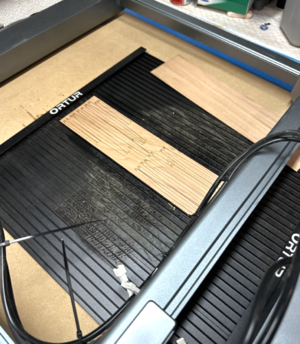
Next is to cut the sheet out in the shop.
1695147079022.png
The scary thing is, I have a decent jig saw. I just can't help myself.

On the road to recovery. At this rate, I might even make treenails. Temporary discouragement over. :D
 
其实可以联系厂商,索要这部分零件的CAD文件
Yes, asking for the CAD file might take less time. I wasn't sure I would get it. Plus it is kind of fun. Although I've already had lots of "fun" with this project so far making my own replacement parts. Next time I'll ask. Thanks!
 
I found a new problem. I broke down each strake into the individual planks. Well, it turns out the simulated plank butts don't actually line up with the frames. This is a big bummer. Now I have planks joining mid air and my half joke about treenailing isn't going to look right.
1695217418304.png
I decided the answer was to go back to my file and draw all pieces oversized.
1695217535842.png
I also recut all the piece I already made into a thin carstock to use as templates to get things in the right area. Also, a template for the scupper holes will be very helpful, provided they don't end up on frames.
1695217664741.png
 
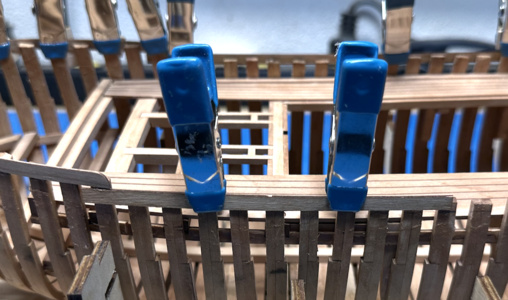
This time it's one strake at a time. Here's the first planks going in.
1695217939946.png

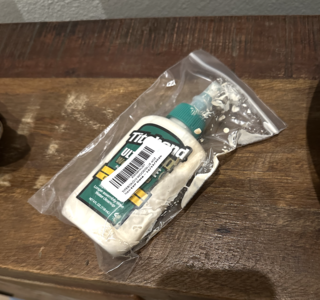
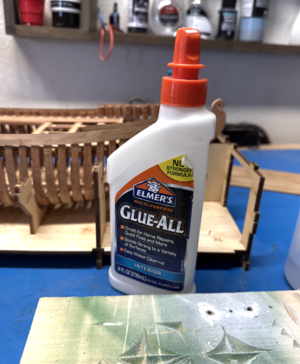
The lower strake is clipped in for alignment. It occurs to me that I should have been doing this one plank at a time from the start. I decided to move away from the Titebond Thick and Quick and back to Elmer's Glue All. I've had great times with the right Elmers. I ordered a small bottle of Titebond III through Amazon and got it last night. It blew up. I don't see Titebond in the cards.
1695218028103.png
 
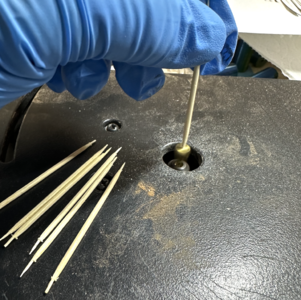
I wasn't kidding about treenails. And gluing one strake at a time with Elmers and letting it dry gives me time to get up to other trouble. I started cutting some with a strip of brass with a small hole drilled in it and put it in the Dremel already mounted to the routing table.
1695218260607.png
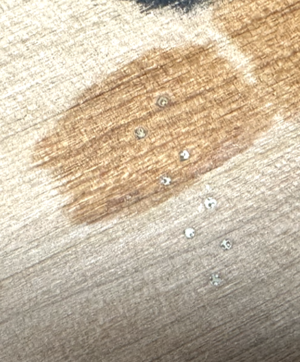
With a #71 wire drill bit, I'm getting a treenail size of <1.5". It's a little big but still looks pretty subtle. (Using a brass strip with a hole powered by a Dremel to make poor man's treenails was the idea of the late, great Hubert Sicard).
1695218777172.png
The darker spot used Danish oil. The bamboo doesn't look like a solid round as it has in the past.
I also looked at using ebony stain for the black parts like the rail caps. I don't know if it's going to be dark enough, even with two coats. I'll try a couple more coats. I don't like the job a brush does over that much area but masking off the model to airbrush seems fraught with potential problems. I have a good spray booth and I'm not bad with it, but man, I could see that go wrong quickly. Guess I'll cross that bridge when I come to it. I'm going to keep adding coats of stain to see if I can get there.
1695219074970.png
 
I ran into a new problem at the third full plank run. I can overlap at the frames with plenty of wiggle room to get in tight, but the range of frames I can attach to lead to poor staggering in butts between runs. The first couple of butts from the fore end are staggered by only two frames. It looks pretty dopey for all this work and setup/breakdown of the laser cutter.

I went back to the model and chose more ideal frames for the planks to meet, redrew, and went back to the laser cutter. I also went back to the full strakes and chopped them up into planks as etched on the kit pieces. I'll tape these together to use as templates. I am concerned about getting the scuppers right, but I cut all of them into cardstock.
1695658498189.png
1695658535501.png
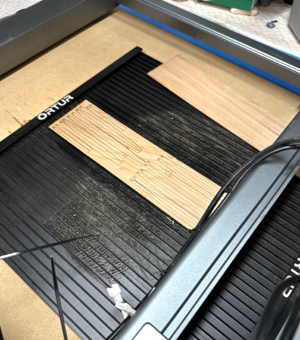
I am certainly getting my money's worth on the laser cutter, but burning through stock. For a model of this caliber, it might have been best to supply sheet stock and diagram the run of the planking and let the modeler spile the planks. It would have been done right the first time. The first fore plank definitely needs to spiled. But you do what you can with what you have. Thank goodness I bought some 1/32" cherry sheet stock for my hull building tutorial, plenty for all my misadventures. Although I would have had to have a lot of foresight and experience to get all the considerations right in advance. I think in the future, I might just lay out the planking on the frames, even with pre-cut pieces, to see if I'm in the ballpark.
 
I decided to use Titebond III that I got in the exploding bottle from Amazon. Longer work time, less gummy, takes a little more work to soften up with IPA. So I used it, put some in my silicon glue pot and put on some strakes with it. However, when it dried in the pot, it was a brown color. This isn't a big deal for darker cherry, but some of the sheet stock I have is lighter colored. And what if I wanted to use boxwood or holly?
So, after Weldbond, Aleene's,, Titebond Quick & Thick, and Titebond III, I went back to my roots. Elmer's Glue-All. It is strong, longer work time, sandable, and dries transparent and solid. I used most of a bottle on the last three models. I was hoping for something that grabbed faster to deal with awkward clamping and my lack of patience going on to the next step. But what works, works. And patience is the name of the game. Maybe some more traditional woodworking glue that dries clear would be good to try, but you got to stop somewhere.
1695659991106.png
 
I think I found a better solution to making the wales and the cap rails black. Black India Ink. I think it just looks better.
1695660102742.png
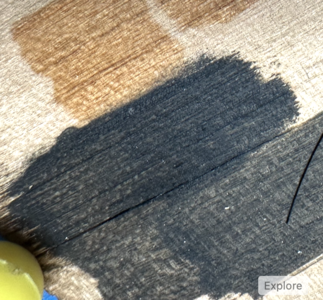
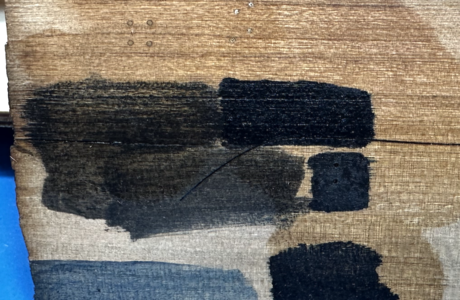
The Ebony stain is top left and the India ink is top right. I also wiped part of each patch with some Danish oil to see if it would run. The stain did a little but the ink didn't move at all. Also I tried some touchups with it to see if it looked weird with the ink, but it looked fine. I think I have a solution. Who needs ebony?
 
Good morning Glen. I don’t now how I missed your log so far but played some catch up this morning. I am interested in POF builds as I am inclined to give one a go for my next build so I have pulled up a chair. Awesome work so far and I enjoy going through your log this far. Cheers Grant
Thanks Grant! This model has some twists, but if you can live with some of the challenges introduced by the instructions, it seems like a good place to start with POF. I learned A LOT about frames and some on joinery. The rest has been fun too. And cutting my own replacement parts for frames gives me confidence that, in a few more years of modelling, I can tackle a scratch build. At least the frames. :D
 
More problems with the forecastle deck. I installed the glue-in carlings onto the beams for the forecastle as marked on the parts. But now with the waterway installed and then the deck as far away from the space as possible, there isn't enough room for the combing. Crap. The part of the model is pretty painful. But it's just a matter of moving those carlings closer to center and some surgery on the decking.
1695995219392.png
I've been considering redoing the decking. According to the Antscherl monogram, the decking consisted of a 12" kingplank and 11" planks tapered to size. The kit decking is about 5-6" to scale. My only apprehension is that there are some interestingly cut planks on the decking that look quite nice that I might have a lot of problems reproducing.But I think the poor fit of the planking midship makes a good argument to try it. This is becoming more of a practice situtation anyway, with the frames, the deck clamps, etc... Might as well get it all out there, right? But this deck is definitely going to need to be planks, the clamps and beams have been under the scalpel one too many times.
 
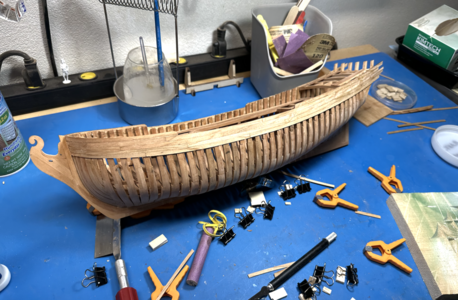
I finished the planking runs above the wales. Next, I plan to treenail/bolt as it is now and then add the finish. I think adding those fasteners is almost a must after the time I took to make sure it was done as right as I could. doing it now will make it easier than it would be with the wales installed.
I'm a little nervous with the wales. They are likely to have a lot of the same problems with other planking had but I won't have the same chances at custom fabrication, it's a pretty fiddlely thickness of stock. Plus, I am starting to wonder why no other blogs have mentioned issues with the plankings. Maybe I'm creating an issue. But I'm proud of the ones I've done here.
1695996187984.png
1695996249827.png
 
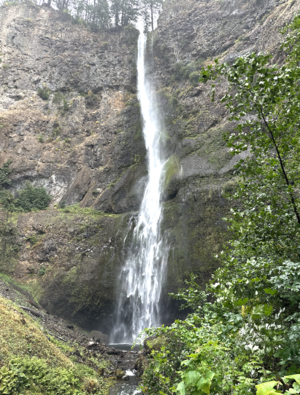
Took a few days off to Portland. We checked out a few beaches and lots of waterfalls as well.
1695996692535.png
Haystack Rock at Cannon Beach. "Goonies" fans might appreciate.
1695996885819.png
1695996916465.png
1695996957612.png
Not much of a scenic photographer, but the PNW is just so lush compared to Southern California. I love where I live but it's nice to connect with water and greenery from time to time.

Headed back today. I still have this weekend to spend a little time in the shop, so a nice little vacation indeed.
 
Took a few days off to Portland. We checked out a few beaches and lots of waterfalls as well.
View attachment 397395
Haystack Rock at Cannon Beach. "Goonies" fans might appreciate.
View attachment 397397
View attachment 397398
View attachment 397399
Not much of a scenic photographer, but the PNW is just so lush compared to Southern California. I love where I live but it's nice to connect with water and greenery from time to time.

Headed back today. I still have this weekend to spend a little time in the shop, so a nice little vacation indeed.
Been there. Loved it.
 
Back
Top