Hayling Hoy: POF kit [COMPLETED BUILD]

Hi Everyone,

I've been trying to work my way up through different skill level kits to get to, some day, be able to build my own plank-on-frame scratch model. Now there seems to be a number of nice POF kits in quality hardwood from China and I, perhaps foolishly, decided to cut the line. I had been looking at David Antscherl's book from Seawatch on Hayling Hoy from the 1760's. It was to be my first POF scratch build, some day. It seemed like a good choice, but the primer for the book I bought turned out to be "The Fully Framed" model series of 4 books plus an optional on rigging. So, out of reach for someone who has built 5 kits and struggled with a hybrid scratch/kit project for traditional building techniques on 20th work boats. Until I saw some of these POF kits.
The real issue is payoff. I have some beautiful models I built but they are mostly basswood and airbrushing. Somehow, it's not the same as a hardwood POF with frames showing. I couldn't start of with the Sovereign of the Seas but found Hayling Hoy offered by Dry Dock Models and Parts. The price was right too. I ordered my kit in cherry, perhaps my favorite wood.
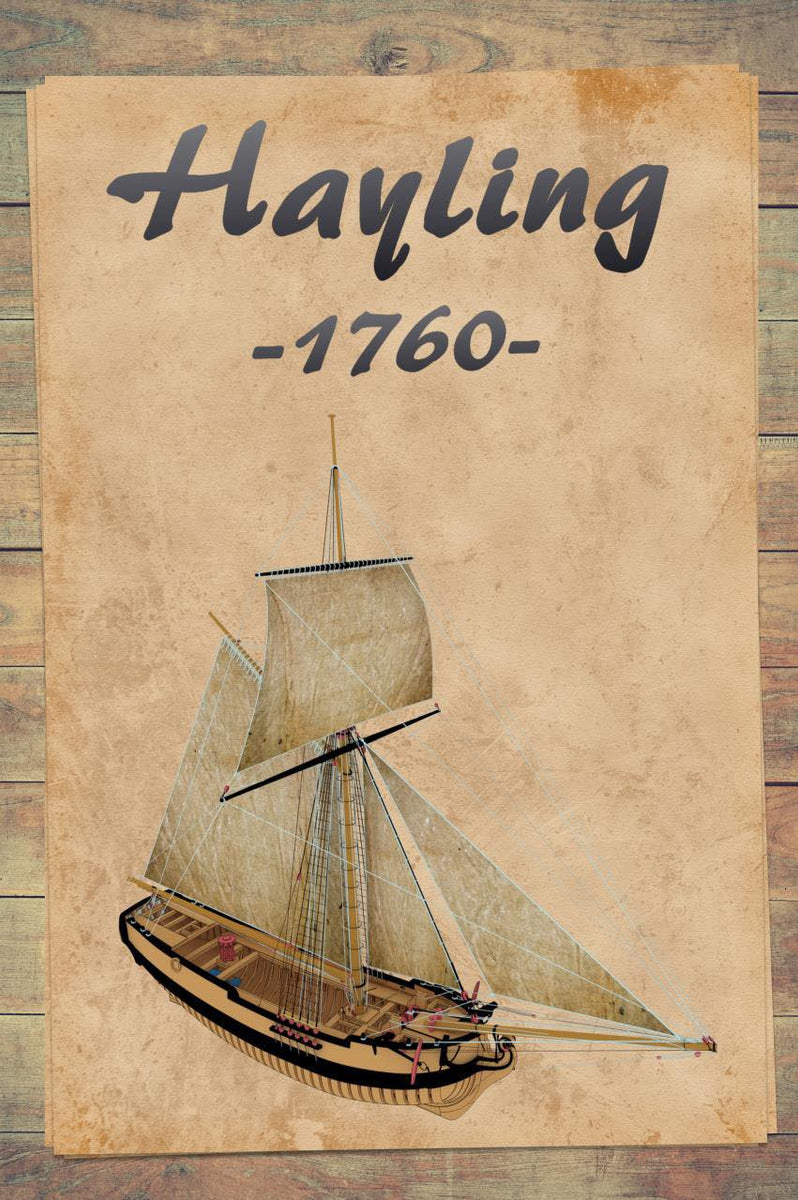
I got the kit and, as I suspected, it's not for beginners. The biggest challenge that I have gathered from these Chinese models are the instructions. This one has nice illustrations and a short couple of pages of instructions, but there is still plenty left to imagination and the broken English can be a little tough at times. But I have heard of another one of the POF kits where the instructions are nearly incomprehensible. I think this manufacturer tried to make up for a lack of proper grammar by including excellent illustrations. I'll take it.
So here it is. My expectations are sky high but my goals are low. If I can get to the fully assembled frame and have done a nice job with it, I will be happy. Anything past that is all gravy.
Hallo @glennb17
we wish you all the BEST and a HAPPY BIRTHDAY
Birthday-Cake
 
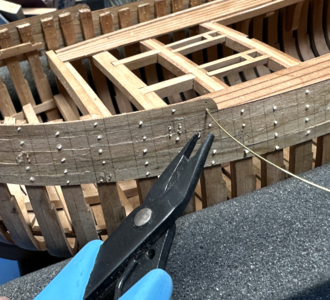
I laid out all the bolts and treenails in the planking above the wale and drilled them out with a #78 to simulate ~3/4" fasteners. I am assuming both types would be close in dimension. I used the @Tobias method for the treenails plus a little glue. Here's a picture of them going in.
1696168799642.png
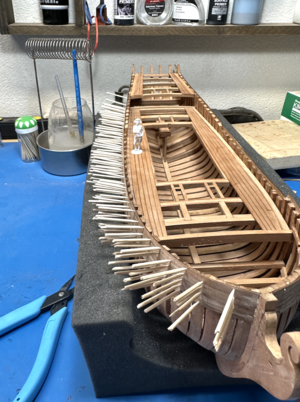
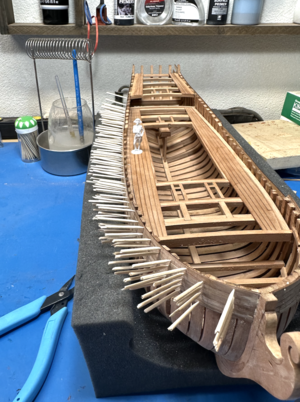
Instead of the Hayling, it is turning into the HMS Porcupine.
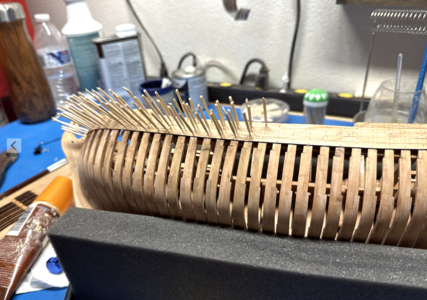
I plan to recycle all of those toothpicks for the next round.
 
Catching up my log a bit. Most of these steps aren't very controversial but thought I would add so that we don't end up with a completed model with no more steps.

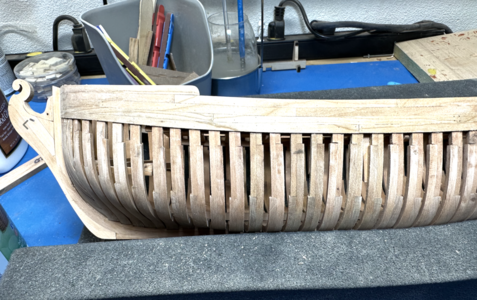
Completed planks above the wale. Everything is sanded and filed down. Leaving the brass bolts clean until just before finishing. Brass blackening isn't all that hardy to a lot of handling in my experience and a second blackening never comes out as well. Without the blackening and oil finish, the treenails and bolts are very hard to see. I think that's a good thing, I didn't overpower the look with planking chicken pox.
1696950440014.png

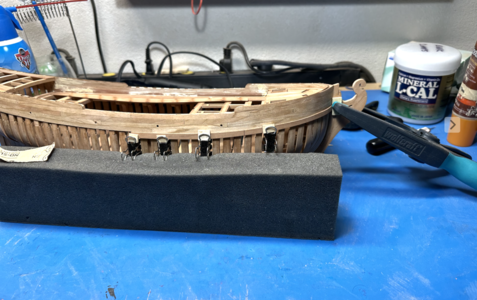
Got to bending the wales on. Using a clamp I get ordering info on from @Tobias, I liked the far reach of the clamp. He warned me it was very strong grip, so I am using small blocks to both clamp the wales in properly and to avoid marring the wood. The impressions the clamp left in the basswood blocks were quite deep, very strong clamps.
1696950694490.png
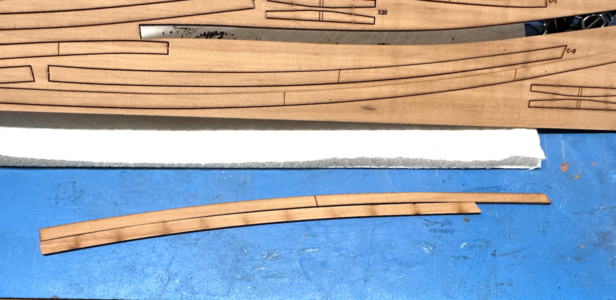
After it dried, I inked and installed to bow portion of the first run of the wale. I went to get the aft portion ready and ran into a problem. The pieces for the two sides aren't the same length. More troubling is that the length on the shorter one isn't sufficient to make it to the end.
1696951030802.png
I contacted Victor and found out there the sheet got mislabelled. One of the C2 pieces is actually the A2 piece. It's pretty easy to sort out by length which is which. Crisis averted. Victor said it was in the next version of the instructions but that it wasn't published yet.
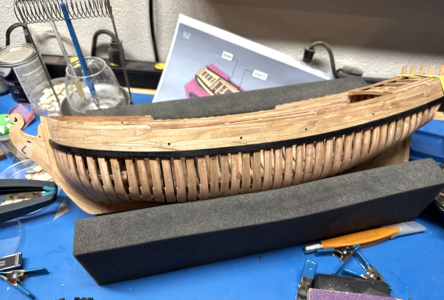
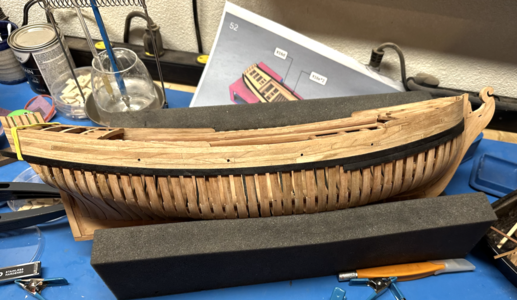
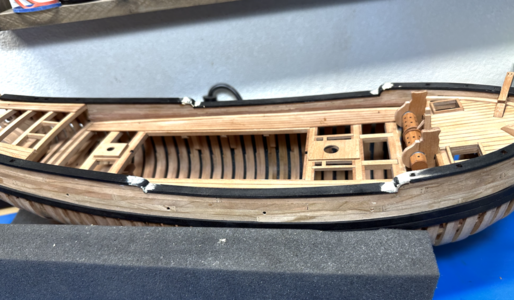
The aft piece needs no preshaping and is easy to install with the right clamps. I learned here that you can make som decent ones from binder clips and found that a small block with a lip lets you clamp and push up without marring. Here's a picture with everything inked and installed for the first run. Note that I finally installed the scuppers as well. I used the original piece as a template and adjusted between frames from there.
1696951361622.png
I think the India Ink gives a sharp look and it is more permanent than I thought in testing with solvents and glues.

I ran into a piece of bad luck. When I went to bend the fore portion of the second run of planking, the plank snapped, despite 10 minutes soaking. It was an unfortunate case of the grain running more into the plane of the wood, weakening it. I had scanned in the sheet in advance in case something went wrong, but I don't have the right thickness. Either way, installing the wales is on hold. Victor offered to provide a free replacement as part of their sales policy, but there's shipping and the time for shipping.
Here's what the other side looks like with the fore portion of the second run on the side that didn't snap.
1696951660343.png
I guess I'm sharing this pic because I'm excited about how crisp the ink looks.
 
Last edited:
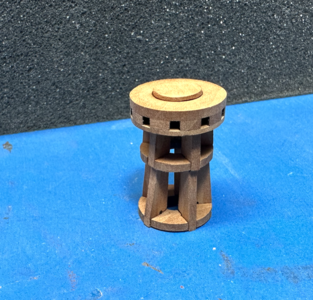
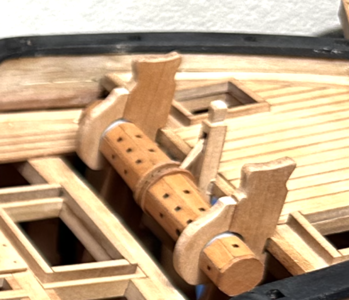
I put together the capstan and windlass. I think the capstan looks nice but didn't like the piece in the middle. It might have been better to cut a polygon (decagon) for the capstan portion, but not sure how to lay that out. The instructions show it as round. Also, the lower portion looks pretty hokey the way I did it. I should have looked further forward in the instructions to see how it was supposed to look. But in the end, I think it will look good. I don't think the kit comes with any bars, but I plan on fabricating them later.
1696951926203.png
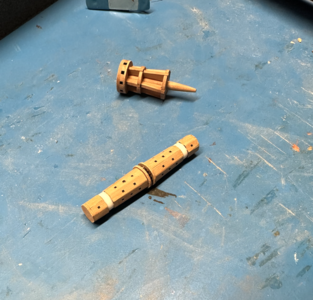
laminating the cherry onto the resin core for the windlass was a little painful and I found myself wishing I had done it from scratch. But it would have been very difficult to have laid out the octagon in the central portion as a taper in size and I have a pretty toy-like lathe and wouldn't have turned out anything good for the portions used to rotate it. Plus, I don't have a chisel the right size for the mortises in the windlass. So all and all, some superglue sticky fingers and a couple redos (there are some extra laminates) and it looks pretty alright. It is missing one of the laminates, but it's one without a mortise and easy to fabricate, in my case from one of the extra laminates.
1696952335354.png
 
I was a little bummed that my progress on the wales is stopped for 2-5 weeks, depending much on shipping. So I sat down and made a list of 1-3 hour tasks that still need to be completed. I came up with 101 steps to completion before rigging (I'm not making that number up). I think I will have plenty to do.

I plan to add combing for the cargo bay and ladders for some of the hatches along with testing the look of some bulkhead at the forecastle and quarter deck. Without rigging, I think I'm looking at another 3-4 mo to completion. I am a good starter but not always good about finishing. But wanting to see how all this looks with the finish should drive me for a while. Also, I am still chipping away at Nonsuch 30 to break things up a little. That model must have 1/8" thick primer on it to smooth out the hull. :D It's almost ready for a waterline and then on to the deck.
Lots to do in the shop, the way I like it. Keeps me out of trouble.
 
Hi the wales will be produced and shipped tomorrow, hopefully reach you ASAP
I was a little bummed that my progress on the wales is stopped for 2-5 weeks, depending much on shipping. So I sat down and made a list of 1-3 hour tasks that still need to be completed. I came up with 101 steps to completion before rigging (I'm not making that number up). I think I will have plenty to do.

I plan to add combing for the cargo bay and ladders for some of the hatches along with testing the look of some bulkhead at the forecastle and quarter deck. Without rigging, I think I'm looking at another 3-4 mo to completion. I am a good starter but not always good about finishing. But wanting to see how all this looks with the finish should drive me for a while. Also, I am still chipping away at Nonsuch 30 to break things up a little. That model must have 1/8" thick primer on it to smooth out the hull. :D It's almost ready for a waterline and then on to the deck.
Lots to do in the shop, the way I like it. Keeps me out of trouble.
 
Catheads:
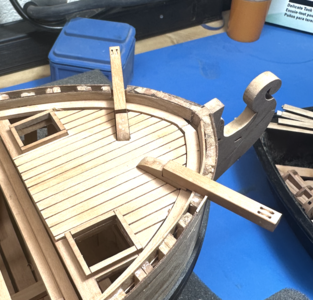
The illustrations for the kit call for part X17h for the catheads. Those parts don't exist. After reaching out and a little guesswork, parts X17a and X17b are assembled per cathead. They will update in the next version of the instructions. I drilled them out, chiselled some sheaves and fitted to the deck. Then I cut away at the bulkhead to lay them in properly. Bolts were added along with bolts for the sheaves.
1696982773894.png
 
The windlass is a mess. The mounting brackets are meant to reach the the bottom and join into each deck. However, there is a taller part of the last beam on the main deck that won't allow it to fit. Also, with all of the adjustments to the upper deck, it's not fitting great either. The deck below isn't too bad.I had some surgery to do again.
I removed the part of the last deck beam with some difficulty. The rest of still pretty sound. I added a combing/beam to the aft end of the forecastle. It looks like combing and fits the brackets perfectly. It's like it was supposed to be there and actually looks pretty consistent with the pictures of the completed model. I returned to the instructions to see if I missed something, but I didn't.
The carved post in the middle was also a real problem. it is also supposed to reach the bottom of the ship but the deck beam below doesn't allow it. It is so far off that I can't just join them, I can't cut that deep into the post and the beam. I truncated the piece and added a joint to the back of it to fit onto the forecastle combing piece I installed.
With the brackets and post in place, I test fit the windlass. For me, it's going to take a couple of drops of superglue to put the other sides of the brack on, no good way to get it on there on both sides without holding it. It worked fine, as much as I hate CA glue.
Now I have a new problem that wasn't apparent when I test fitted it. The white plastic is easy to see where the windlass is braced. I thought it would be tighter and those areas would be invisible. I know it's not me because there's no other way to assemble it to make it tighter. It's kind of a disaster. It's such a prominent feature and point of interest. I plan on priming it with a detail brush as best as I can and go back with some burnt sienna and umber oil paints to simulate wood, or at least tone it down a bit.
1697465905931.png
I probably should have thought many steps ahead on this. The tapered octagonal portion of the windlass is nice, but Antscherl makes it a straight octagonal and it is 100% wood. Just a lot of mortising. It might have looked a lot better. But still bamboozled by the braces. I added the bar for the ratchet. The central post is too high. There just wasn't a good way from the materials that came with the model to know because it was meant to be installed unmodified.
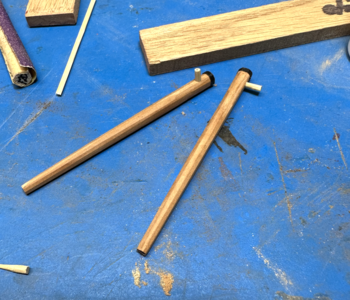
I planned on creating some hand spikes or something for this, but the mortises are very small. I'll think about it. Maybe with that detail and cleaning up the white plastic, it will look better.
 
Got the planksheer put together. The pieces are a bit oversized except for the bow. Unfortunately, the piece from the cathead aftward doesn't fit at all. I spiled the shape onto tape, taped onto paper, scanned, and drew a new piece with the timberhead mortises redistributed. I had to cut it from basswood, but with the ink it was nearly impossible to tell. After installation I used wood filler to make for nice, smooth transitions. I did a test of the model and the filler seamlessly takes up the ink and looks exactly the same as the wood. I needed it for gaps plus the basswood stock was 1/64" thicker. It is very hard to tell now. Here it is with the filler applied.
1697466453534.png
 
I plan to add a lot more detail to the pumps. They are very bare bones and mostly a placeholder in the instructions and on the parts sheets. I did my best octagonal with lots and lots of 7-10-7 scribing. It is unusual. There is a straight portion to the octagon above deck and the rest is tapered. I hope I did this right, it was a lot of work. Rather than just mounting the octagons as is and applying that weird looking brass part off the sheet, I drilled out the pump body on the top and for a toothpick spigot, also drilled out. After installation, the spigots could have been a little shorter. I'm trying to grab as much as I can from Antscherl's monograph to get the details of the pump handle and mount right. It is going to take cutting some pieces. Added an iron ban with an inked paper strip. I am definitely on an ink trip. It is just so much easier to do than paint and looks great, even on paper. Especially on paper.
1697466751375.png
 
Back
Top