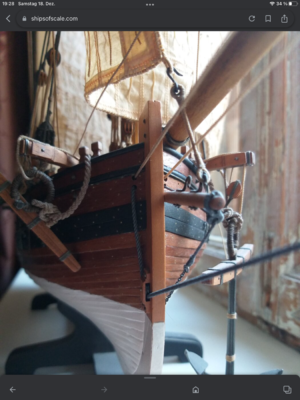
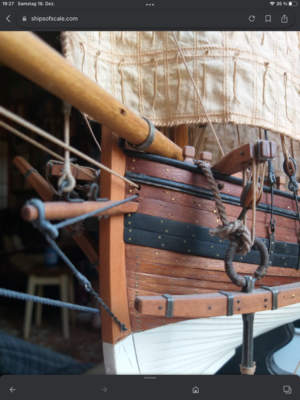
Thanks Paul, it's appreciatedLots of progress Glenn...and impressively done!
-

Win a Free Custom Engraved Brass Coin!!!
As a way to introduce our brass coins to the community, we will raffle off a free coin during the month of August. Follow link ABOVE for instructions for entering.
-

PRE-ORDER SHIPS IN SCALE TODAY!
The beloved Ships in Scale Magazine is back and charting a new course for 2026!
Discover new skills, new techniques, and new inspirations in every issue.
NOTE THAT OUR FIRST ISSUE WILL BE JAN/FEB 2026
You are using an out of date browser. It may not display this or other websites correctly.
You should upgrade or use an alternative browser.
You should upgrade or use an alternative browser.
Thank you very much Tobias. Yes, a little bump of pride when you upgrade with a little bit of homework and trial and error. I cut 6 of the handle holders and burned through 4 before it looked right. It was great fun.Hi Glenn
very nice and clean work, I like it when you replace parts from a kit with homemade parts. It gives the whole thing a personal touch.
Just catching up on your build log Glenn. Excellent work. 
Thank you, encouraging words. I'm having a lot of fun with it.Just catching up on your build log Glenn. Excellent work.
It's not in the instructions specifically, but there are brackets for the horse on the sheet of metal parts. I asked Victor.
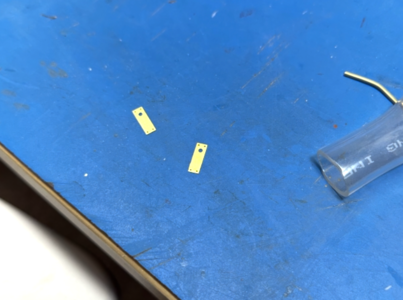
With them blackened, I installed the horse. I blackened the horse with Brass Black by wiping it on. First time I've tried it. The finish looked good to me. Hope that shape is close enough. I would have put a traveller on it, but don't plan to rig it. It is still easily removable, mounted by tension into the holes in the brackets.
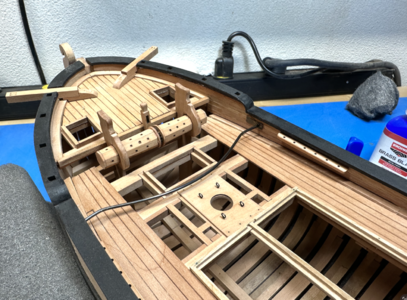
Slowly running out of things to do while I wait for the wale piece. I turned my attention to the anchors. They are resin (I think) and were a little bent. I tried to gently straighten one and it snapped. CA didn't work too nicely on it. I'll try priming and painting it. That takes several days (24 hr for primer to fully set), so I'll have to find other bits to get up to since I have time today.

With them blackened, I installed the horse. I blackened the horse with Brass Black by wiping it on. First time I've tried it. The finish looked good to me. Hope that shape is close enough. I would have put a traveller on it, but don't plan to rig it. It is still easily removable, mounted by tension into the holes in the brackets.

Slowly running out of things to do while I wait for the wale piece. I turned my attention to the anchors. They are resin (I think) and were a little bent. I tried to gently straighten one and it snapped. CA didn't work too nicely on it. I'll try priming and painting it. That takes several days (24 hr for primer to fully set), so I'll have to find other bits to get up to since I have time today.
In David Antscher's book, he installed a 3/4" thick molding under the planksheer. It was lighter in color. It looked like a great addition and so i set off to implement it. 3/4" at 1:48 is 1/64" and I don't have a thickness sander per say.I designed some pieces for the laser cutter using basswood for the color and tried 1/32", but it was too thick and looked poor. Today I took out a palm sander and ground down a 1/32" sheet to ~1/64" over a course of 30 minutes. It was a bit of an Ahab moment.
Here are some of the cut pieces going in. I can't take this trim fully forward until I install the head work, but i think it gives you a sense of where it's going.
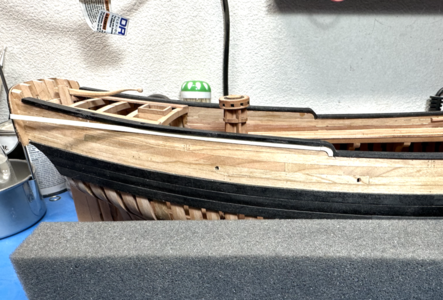
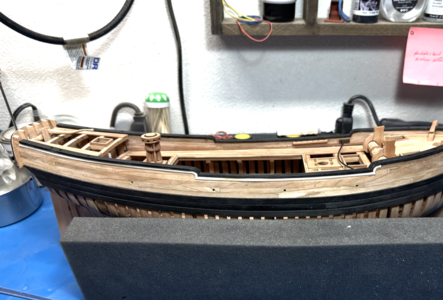
Here are some of the cut pieces going in. I can't take this trim fully forward until I install the head work, but i think it gives you a sense of where it's going.


Another stylistic fork in the road. I used brass for bolts on the planking with the intent of blackening them. I tried with Brass Black but it stained the wood. I was trying another product for some free standing brass and it looked really good. So I made some test brass bolts in a cherry scrap and used a detail brush to add some solution. No stains.
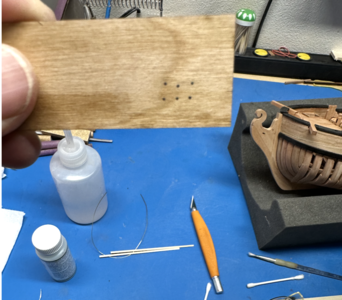
I already decided to leave the bolts shiny after the staining problem, but they look a little nicer blackened. Then again, there are a lot of them and it takes 2-4 drops of solution to finally blacken, and a little clean up to follow. Maybe my tardy wale is the deciding factor. TBD.

I already decided to leave the bolts shiny after the staining problem, but they look a little nicer blackened. Then again, there are a lot of them and it takes 2-4 drops of solution to finally blacken, and a little clean up to follow. Maybe my tardy wale is the deciding factor. TBD.
The lighter band is a very nice detail that sets off the rail...In David Antscher's book, he installed a 3/4" thick molding under the planksheer. It was lighter in color. It looked like a great addition and so i set off to implement it. 3/4" at 1:48 is 1/64" and I don't have a thickness sander per say.I designed some pieces for the laser cutter using basswood for the color and tried 1/32", but it was too thick and looked poor. Today I took out a palm sander and ground down a 1/32" sheet to ~1/64" over a course of 30 minutes. It was a bit of an Ahab moment.
Here are some of the cut pieces going in. I can't take this trim fully forward until I install the head work, but i think it gives you a sense of where it's going.
View attachment 403098
View attachment 403099
I once saw someone put a finish on the wood (poly or whatever) and then blacked the brass and there was minimal leaching of the black into the wood. I've never tried this myself, but it might be worth an experiment.
Sounds like it's worth a shot. I'll see what happens with Danish Oil, I think that''s were my finish is heading.I did have to buff out the brass with a #4 fine flat needle file to get the reactivity I wanted, probably the same with a finish on top as well.The lighter band is a very nice detail that sets off the rail...
I once saw someone put a finish on the wood (poly or whatever) and then blacked the brass and there was minimal leaching of the black into the wood. I've never tried this myself, but it might be worth an experiment.
Ok, of course I blackened the bolts. I went on to look at the work for the cheeks and my mind boggled (even DA said some of the pieces where the most challenging of the entire scratch build). So, blackening a few bolts seemed like a nice stall. Plus, I don't have the wale yet, so I couldn't finish anyway.
Here's the bolts. Blackened on the left, bright on the right (hard to see). It's subtle in person, but it's a detail that might add up with others to make the overall look better. Can't wait to see if the treenails show up with the oil finish.
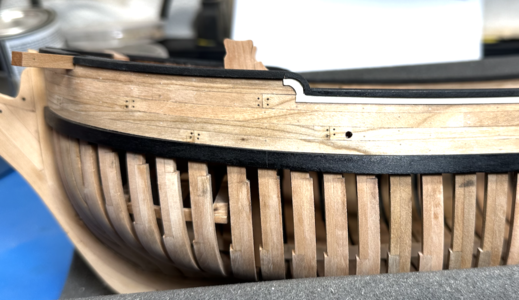
Here's the bolts. Blackened on the left, bright on the right (hard to see). It's subtle in person, but it's a detail that might add up with others to make the overall look better. Can't wait to see if the treenails show up with the oil finish.

DA's build has entry steps while the kit doesn't. I decided to add. It was, believe it or not, my first attempt at scrape molding.
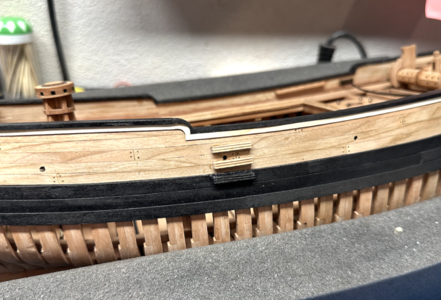
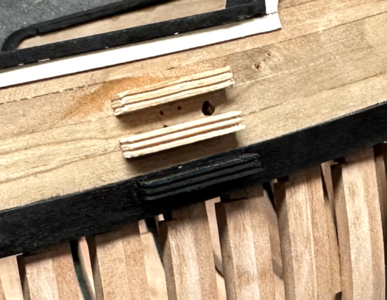
I realize it's unlikely there would be a scupper between steps, it's just a mismatch between kit and DA's plans. I thought matching the placement on the plans was important, it gives balance to the sides and there was just no getting around that scupper.
Finished the trim pieces now that I know where everything is going to go for cheek and cathead support. I think the build is better for the steps, surprised it wasn't in the kit, it's been nicely detailed so far.
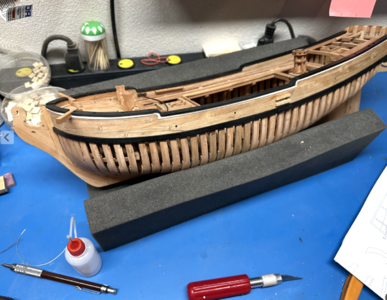

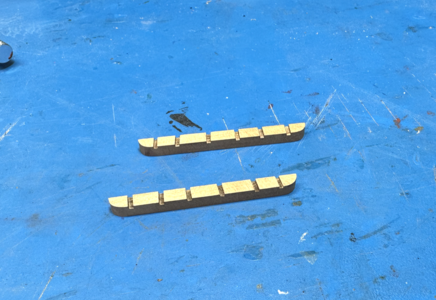
I decided to go with the channels from DA's book, they just look a lot better than the kit. I used the laser cutter (of course), scoring by engraving to get the right angles and widths. I hope the kit chainplates work well for this, I hate trying to cut brass strips. I think with the bolts from the book, it will look nice installed. Not sure I want to mount them yet without the wales fully installed on the port side. 3/16" cherry, very solid.

Good evening Glen. Wonderful progress. Cheers Grant
Decided to make some ladders, never done it before. I pulled out the laser cutter again.
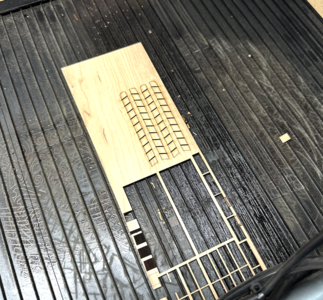
yada yada yada...
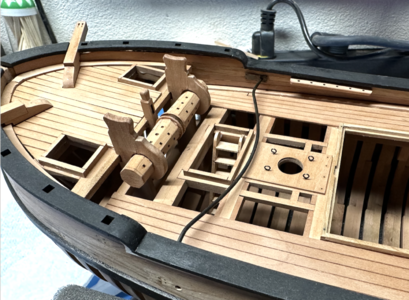
Kind of a ladder to nowhere because there isn't a deck below, but I think it looks ok for the way I have things set up. Mea culpa: I made two ladders and they were just barely too wide for the smaller hatches. I should have measured that width a 3rd time. But I'm happy, I got the experience and the main hatch ladder looks pretty proportional.

yada yada yada...

Kind of a ladder to nowhere because there isn't a deck below, but I think it looks ok for the way I have things set up. Mea culpa: I made two ladders and they were just barely too wide for the smaller hatches. I should have measured that width a 3rd time. But I'm happy, I got the experience and the main hatch ladder looks pretty proportional.
Thanks Grant, just plugging along. I'm close enough that I have a punch list now.Good evening Glen. Wonderful progress. Cheers Grant
I'm kind of stuck and would like to solicit some opinions.
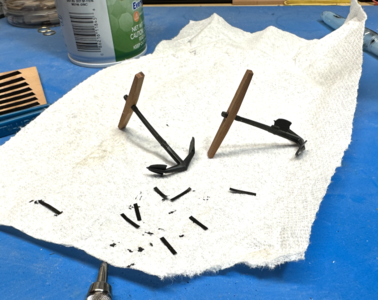
I started on the anchors for the project, shown below. There are some bands to go on the stock, iron done in paper and ink. The anchors themselves are resin and are a bit warped. I tried to straighten one out with gentle bending but it snapped. Show repaired here, both have been primed and painted, stock added.
Now here's my problem. There are no Hawse holes.
Antscherl's book specifically claims there are no Hawse holes and there were none put into the hawse timbers for either the model or scratch build. The model has no step to install them, but shows small holes randomly later. In fact, the model shows the anchor cables roved through the holes they made with the cable on the windlass.
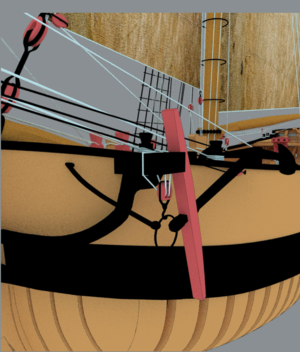
I checked up on as many drawings and paintings of Hoys as I could find for this time period and periods before and after, and never saw an anchor.
I was really hoping to include the anchor, make a stropped cathead block, wrap the ring on the anchor, and use some nice aftermarket rope I have as cable. But without somewhere to use the windlass to haul it out, it's not clear what to do. I reached out to Victor at Modelship Dockyard to see what he and the designer thing. He mentioned it being on the forecastle, but I didn't catch his meaning. Those guys are super helpful so I am hopeful. But please, lend me your knowledge and experience on this issue. I am tempted not to treat the anchors at all on the ship as Antscherl did, but it does seem like some nice details to forego, especially if I'm not going to fully mast and rig.
I started on the anchors for the project, shown below. There are some bands to go on the stock, iron done in paper and ink. The anchors themselves are resin and are a bit warped. I tried to straighten one out with gentle bending but it snapped. Show repaired here, both have been primed and painted, stock added.

Now here's my problem. There are no Hawse holes.
Antscherl's book specifically claims there are no Hawse holes and there were none put into the hawse timbers for either the model or scratch build. The model has no step to install them, but shows small holes randomly later. In fact, the model shows the anchor cables roved through the holes they made with the cable on the windlass.

I checked up on as many drawings and paintings of Hoys as I could find for this time period and periods before and after, and never saw an anchor.
I was really hoping to include the anchor, make a stropped cathead block, wrap the ring on the anchor, and use some nice aftermarket rope I have as cable. But without somewhere to use the windlass to haul it out, it's not clear what to do. I reached out to Victor at Modelship Dockyard to see what he and the designer thing. He mentioned it being on the forecastle, but I didn't catch his meaning. Those guys are super helpful so I am hopeful. But please, lend me your knowledge and experience on this issue. I am tempted not to treat the anchors at all on the ship as Antscherl did, but it does seem like some nice details to forego, especially if I'm not going to fully mast and rig.
Hello Glenn I was able to find the following.
Post in thread 'POF 1:48 Hayling Hoy 1760 by Modelship Dockyard'
https://shipsofscale.com/sosforums/...y-1760-by-modelship-dockyard.9728/post-244817
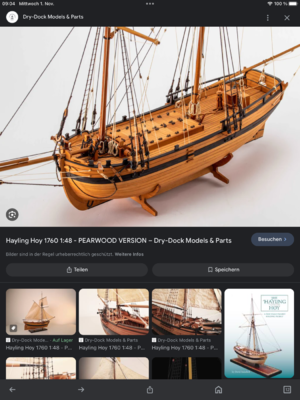
Post in thread 'POF 1:48 Hayling Hoy 1760 by Modelship Dockyard'
https://shipsofscale.com/sosforums/...y-1760-by-modelship-dockyard.9728/post-244817

Last edited:
I got in touch with Victor yesterday. His answer was to run the anchor rope over the forecastle. He shared their research on the topic.
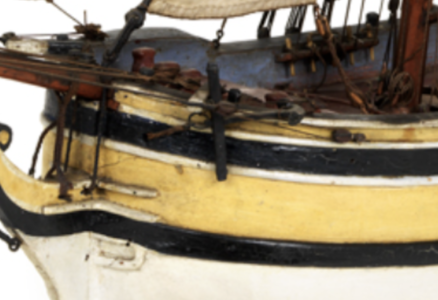
One model from NMM had the Hawse hole too low to be realistic for the height of the forecastle from lots of line drawings.
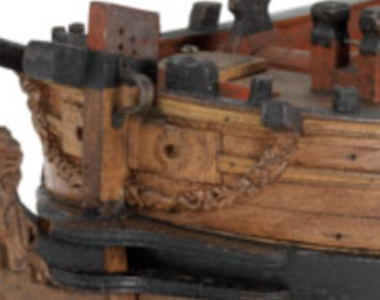
One had a Hawse hole that was in an ok position but wasn't supported in other lilne drawings. It also has that bracket against the bollard timber, there are similar fittings in the others.
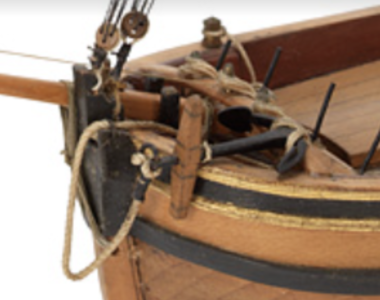
Here's one with the rope being rove through a bracket on the bollard timber or thereabouts, hard to see from the picture.
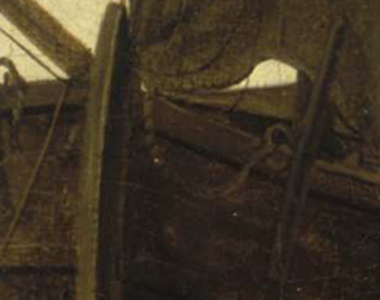
And finally, a painting with it just laid over the forecastle.
I have a hard time believing that it was allowed to wander around on the bow while the anchor got hauled out, but without more details or examples of that bracket at the bollard timbers, it's hard to add. The bow doesn't come together like the illustration and models for this Hoy, so it would be a lot of guess work.
Someone posted information to this thread on using a bracket near the catheads, I saw it in my notifications by email but it looks like it has since been deleted. I would be interested in seeing it again.
So their conclusion was to represent it more like the painting. It isn't satisfying to punt like that but it does avoid an apocryphal bracket, it's probably the best choice given the info avaiklable. Modelship Dockyard has obviously done a nice job researching a work boat that is typically poorly documented. The only reason there are as many images and drawings as there are is because of the long use of the craft in different periods, making information and designs scattered over decades.
Barring new information, it's over the forecastle.

One model from NMM had the Hawse hole too low to be realistic for the height of the forecastle from lots of line drawings.

One had a Hawse hole that was in an ok position but wasn't supported in other lilne drawings. It also has that bracket against the bollard timber, there are similar fittings in the others.

Here's one with the rope being rove through a bracket on the bollard timber or thereabouts, hard to see from the picture.

And finally, a painting with it just laid over the forecastle.
I have a hard time believing that it was allowed to wander around on the bow while the anchor got hauled out, but without more details or examples of that bracket at the bollard timbers, it's hard to add. The bow doesn't come together like the illustration and models for this Hoy, so it would be a lot of guess work.
Someone posted information to this thread on using a bracket near the catheads, I saw it in my notifications by email but it looks like it has since been deleted. I would be interested in seeing it again.
So their conclusion was to represent it more like the painting. It isn't satisfying to punt like that but it does avoid an apocryphal bracket, it's probably the best choice given the info avaiklable. Modelship Dockyard has obviously done a nice job researching a work boat that is typically poorly documented. The only reason there are as many images and drawings as there are is because of the long use of the craft in different periods, making information and designs scattered over decades.
Barring new information, it's over the forecastle.
My next multi-day step are the chains.
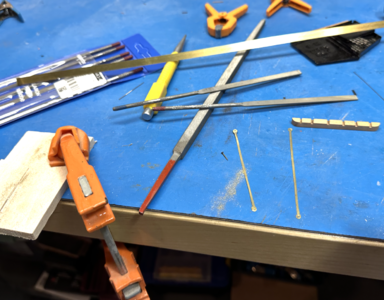
Since I am using the channels from the book, I have to fabricate the chains from scratch. The kit ones are too short. I am gaining a better appreciation of metal work, it's only been theoretical until now. Fortunately I have a jeweler's saw, a drill press, and lots of nice files. Still, I have to say, what a pain in the brass.
It seems I can make about 2 a day, 4 if there is extra time. I'll check back in once they are closer to done.


