OK ALL I AGREE WITH GILLES, NIGEL, MAARTAN will go for beveling latter on after frames are on the keel, nigel I will show you some of the small sanding devices that i have, ALL CHECK THE BUILDING LOG UPDATES. Don
-

Win a Free Custom Engraved Brass Coin!!!
As a way to introduce our brass coins to the community, we will raffle off a free coin during the month of August. Follow link ABOVE for instructions for entering.
-

PRE-ORDER SHIPS IN SCALE TODAY!
The beloved Ships in Scale Magazine is back and charting a new course for 2026!
Discover new skills, new techniques, and new inspirations in every issue.
NOTE THAT OUR FIRST ISSUE WILL BE JAN/FEB 2026
You are using an out of date browser. It may not display this or other websites correctly.
You should upgrade or use an alternative browser.
You should upgrade or use an alternative browser.
Help - Building frames for ship built from plans
- Thread starter Gilles Korent
- Start date
- Watchers 8
Would it be possible to glue a pattern to the forward face of the forward half of the frame and glue a pattern to the aft face of the aft half of the frame? Then the two halves can be glued together, leaving paper only on the two exposed surfaces where it can easily be removed later. If the outer edges of the frames are tapered to follow the lines of planks then cut the inner portion of both frame halves and glue them together before cutting the tapered outer surfaces.
I have never assembled such frames, so I apologize if this suggestion is not practical for any reason.
Good luck & Happy Modelling!
Steven
I have never assembled such frames, so I apologize if this suggestion is not practical for any reason.
Good luck & Happy Modelling!
Steven
If you are open to different approaches to scratch building frames, Bob Hunt, LauckStreetShipyard.com, has a wonderful focused practicum for frame building using the HMS Roebuck Harold Hahn plans. It provides a great review of technique. However, you may well be past where this practicum would help. Bob has also published in booklet form various aspects of scratchbuilding to include framing techniques that may also help.
Last edited:
Hello,
Please, we need your help...
One of our fellow modelers is having a dilemma building frames for his model.
The construction of his frame is the traditional 2-layer frame.
To familiarize yourself with his project, here is the building log: https://shipsofscale.com/sosforums/threads/le-rochefort.3325/page-23
He is using the method most commonly used: paper pattern for each part of the frames glued to lumber. The patterns are then cut out and prepared for assembly.
The problem is the following:
Once individual parts are cut and ready for assembly, the paper pattern is still glued to the part. As the frame is built in 2 layers, the layers need to be glued together. Leaving the paper sandwiched between the 2 layers is not a wise practice. So how do you assemble the 2 layers, and most importantly, how do you line up the parts of the top layers over the bottom layer?
Here is how I personally build my frames: https://shipsofscale.com/sosforums/threads/le-rochefort.3325/page-18#post-87714
We are looking for advice: the most important part of the problem being how do you make sure the 2 layers line up once the paper pattern has been removed from the joint area between the two layers?
Your input is much appreciated.
Thank you.
G.
The dilemma as I understand from the posts is the paper pattern glued to the frame and how to get good fit with the paper pattern still in the way. I think you feel you need to retain the pattern to continue to help you with a good fit of the parts? My approach is to first have two copies of the pattern...one for initial cutting and shaping, and one for final fitting. Glue one copy to your wood stock with rubber cement which will allow for easy removal of the paper. Carefully cut out the parts to the pattern and sand to close tolerance. Remove the first paper pattern from the stock. Use the second clean copy of the pattern to help in continuing to shape the parts while dry fitting for final fit. Once satisfied with the fit glue up the parts then continue to use the second pattern for final shaping. You should have a well formed part ready to install on the keel at this point.
Now...after digesting everyone's thoughts if you are still have problems, or we missed your concern, restate your question so we can refocus on what you are trying to do.
Last edited:
- Joined
- Feb 18, 2019
- Messages
- 717
- Points
- 353

Would it be possible to glue a pattern to the forward face of the forward half of the frame and glue a pattern to the aft face of the aft half of the frame? Then the two halves can be glued together, leaving paper only on the two exposed surfaces where it can easily be removed later. If the outer edges of the frames are tapered to follow the lines of planks then cut the inner portion of both frame halves and glue them together before cutting the tapered outer surfaces.
I have never assembled such frames, so I apologize if this suggestion is not practical for any reason.
Good luck & Happy Modelling!
Steven
If you are open to different approaches to scratch building frames, Bob Hunt, LauckStreetShipyard.com, has a wonderful focused practicum for frame building using the HMS Roebuck Harold Hahn plans. It provides a great review of technique. However, you may well be past where this practicum would help. Bob has also published in booklet form various aspects of scratchbuilding to include framing techniques that may also help.
The dilemma as I understand from the posts is the paper pattern glued to the frame and how to get good fit with the paper pattern still in the way. I think you feel you need to retain the pattern to continue to help you with a good fit of the parts? My approach is to first have two copies of the pattern...one for initial cutting aNd shaping, and one for final fitting. Glue one copy to your wood stock with rubber cement which will allow for easy removal of the paper. Carefully cut out the parts to the pattern and sand to close tolerance. Remove the remaking paper pattern from the stock. Use the second clean copy of the pattern to help in continuing to shape the parts while dry fitting for final fit. Once satisfied with the fit glue up the parts then continue to use the pattern for final shaping. You should have a well formed part ready to install on the keel at this point.
Now...after digesting everyone's thoughts if you are still have problems, or we missed your concern, restate your question so we can refocus on what you are trying to do.
Thank you for your input. Much appreciated.
G.
- Joined
- Oct 23, 2018
- Messages
- 886
- Points
- 403

Why it is useful to glue the pattern on both sides? If you do the finetuning on the model, you have to remove all pattern before and glue the hull together. David Antscherl describes this way. The big difference is that French ships have double frames and don't use cant frames. But the building method should work for both types of frameing.
If you use the pattern in front of the 0-frame on the back side and after the 0-frame on the fore side, it is easy to "prebevel" the inside of the frames before the installation, which makes the bevelling on the assembled hull easier.
If you use the pattern in front of the 0-frame on the back side and after the 0-frame on the fore side, it is easy to "prebevel" the inside of the frames before the installation, which makes the bevelling on the assembled hull easier.
WOW MUCH TO ABSORB, LOTS TO ABSORB, AND AS GILLES SAID THANK YOU FOR YOUR INPUT, just taking a break today having some problems THAT I HAVE NOT HAD IN A FEW YEARS DO NOT KNOW WHY UNLESS IT IS BECAUSE OF THIS VIRUS STUFF BUT I TRY TO AVOID THE NEWS AND EVEN COMMENTS ON THIS FORUM I HAVE BEEN SUPER HYPER TODAY BAD CAN NOT STAY AND DO MORE THEN 10 minutes then on to something else MY DAUGHTER PICKED MY OLD PILLS THAT I USED TO TAK AND THEY WILL HELP, so please guys bear with me for today, now back to rearanging my work room. Don
Maybe I'm naive or not reading correctly, but why aren't they clued to the outside of the frames (either side) No sandwich of paper.So before anyone else misinterpret my reply, here is what the original question (and context) was:
"Once individual parts are cut and ready for assembly, the paper pattern is still glued to the part. As the frame is built in 2 layers, the layers need to be glued together. Leaving the paper sandwiched between the 2 layers is not a wise practice. So how do you assemble the 2 layers, and most importantly, how do you line up the parts of the top layers over the bottom layer?
GO JUMP....
- Joined
- Feb 18, 2019
- Messages
- 717
- Points
- 353

Maybe I'm naive or not reading correctly, but why aren't they clued to the outside of the frames (either side) No sandwich of paper.
Thank you @stuglo
That is exactly what was being done.
The question is:
How do you make sure the patterns on one side match or are lined-up with the pattern on the other side? Basically, How do you line-up the 2 sides?
Important note:
To get the full context of the original question, I would suggest reading the modeler's log from at least this point on:
https://shipsofscale.com/sosforums/threads/le-rochefort.3325/page-24#post-92730
This link will eventually take you to the latest post in the log. It is quite a bit to read for anyone willing, but if the question was not clear, it should help understand it better.
Kindest regards.
G.
From the horizontal tops- or bottoms if your building in the Hahn styleThank you @stuglo
That is exactly what was being done.
The question is:
How do you make sure the patterns on one side match or are lined-up with the pattern on the other side? Basically, How do you line-up the 2 sides?
- Joined
- Feb 18, 2019
- Messages
- 717
- Points
- 353

From the horizontal tops- or bottoms if your building in the Hahn style
Not sure what you mean by that.
Although the Hahn method is not entirely used, the method actually is not important.
What we have is:
1) Frame built in 2 layers.
2) One layer has frame pattern glued on it: top layer or bottom layer is irrelevant.
3) The other layer does not have patterns.
What we want to do is to have the same frame pattern or outline on both layers once the layers are assembled to form a complete frame.
Question:
How do you achieve alignment of the patterns on both sides of the frame to achieve beveling prior to installation on the keel?
Thank you.
G
GILLES EXACTLY. Don
Could you cut 1 of the frames to exact pattern, then glue it to a deliberately over-sized second half and the trim to proper size?
Hi STEVEN MY GOOD FRIEND, I tried that it did not work for me. Don
I made 2 paper patterns, one for each side(layer). Cut at each top (and vertical cut bottom for even more accuracy) and align with patterns covering outer sides . Just remember the direction of the frames changes half way (at least in the ones I've seen)Not sure what you mean by that.
Although the Hahn method is not entirely used, the method actually is not important.
What we have is:
1) Frame built in 2 layers.
2) One layer has frame pattern glued on it: top layer or bottom layer is irrelevant.
3) The other layer does not have patterns.
What we want to do is to have the same frame pattern or outline on both layers once the layers are assembled to form a complete frame.
Question:
How do you achieve alignment of the patterns on both sides of the frame to achieve beveling prior to installation on the keel?
Thank you.
G
Is it practical to shape the taper before installation on the model? The taper on any frames away from midship vary considerably from keel to gunnel. Some articles I have read suggest sanding, or filing, the tapers after all the frames are firmly in place. I have not built this type of ship, so I don't know if what I have read is practical, or not. Based on the difficulties you are experiencing, it might be worth a try. Perhaps mount a few test frames on a scrap piece of wood like the keel and try tapering in place. This way all frames can be cut without any taper, the patterns should be sized for the larger face of the frames; aft side of frames forward of midship and forward side of frames aft of midship.Not sure what you mean by that.
Although the Hahn method is not entirely used, the method actually is not important.
What we have is:
1) Frame built in 2 layers.
2) One layer has frame pattern glued on it: top layer or bottom layer is irrelevant.
3) The other layer does not have patterns.
What we want to do is to have the same frame pattern or outline on both layers once the layers are assembled to form a complete frame.
Question:
How do you achieve alignment of the patterns on both sides of the frame to achieve beveling prior to installation on the keel?
Thank you.
G
Best wishes.
Steven
- Joined
- Feb 18, 2019
- Messages
- 717
- Points
- 353

I made 2 paper patterns, one for each side(layer). Cut at each top (and vertical cut bottom for even more accuracy) and align with patterns covering outer sides . Just remember the direction of the frames changes half way (at least in the ones I've seen)
Thank you.
- Joined
- Feb 18, 2019
- Messages
- 717
- Points
- 353

Is it practical to shape the taper before installation on the model? The taper on any frames away from midship vary considerably from keel to gunnel. Some articles I have read suggest sanding, or filing, the tapers after all the frames are firmly in place. I have not built this type of ship, so I don't know if what I have read is practical, or not. Based on the difficulties you are experiencing, it might be worth a try. Perhaps mount a few test frames on a scrap piece of wood like the keel and try tapering in place. This way all frames can be cut without any taper, the patterns should be sized for the larger face of the frames; aft side of frames forward of midship and forward side of frames aft of midship.
Best wishes.
Steven
Thank you.
- Joined
- Aug 2, 2019
- Messages
- 211
- Points
- 278

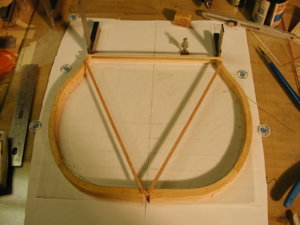
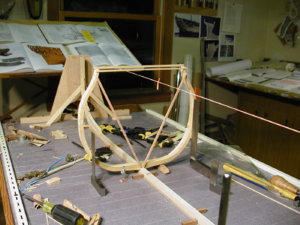
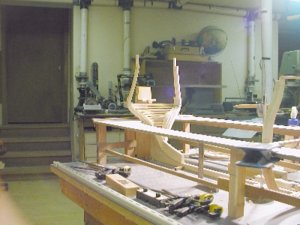
Hi GIlles. If its ok thought I add a thought or two. Hope this may be of some help to those that are building frames. This is not to say that my way is best but it is the way I like making frames be it for british or french ship. If the frames are going in to a jig and the pieces are glued to a drawing and then installed in to the jig why do you need to keep the paper template glued to the frame blank in order to help you taper the frames. If the frame blanks are not going in to a jig but being installed on the keel and held in place by squares and blocks glued in between the two full frame pieces why would you still have the paper templates on the frame blank to help taper the frames. Once the frames are all mounted then you can sand down the taper on the frame all at once. I have used the Hahn method and find it to use a whole lot of wood which is wasted. When I built Richard which was a French ship I used Hahn's way but didn't really like all the waste. Easier but I only put one paper template on the frame with nothing on the other side. Once the frame was cut out within a 1/16 to a 1/32 to the line on the template I removed it making sure the the piece of wood had at the top of frame and on the floors was marked with a center line to help center it on the keel and square it up. Then I would sand all the frames to their shape.
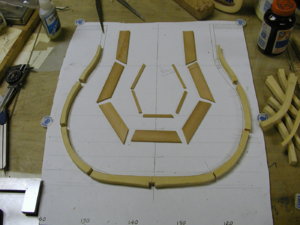
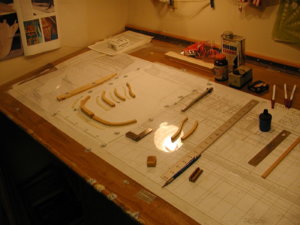
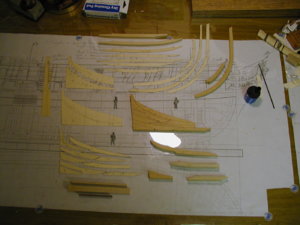
Now when I stated building Alfred cut all the pieces of the frame out and then glued them together. It took me a lot longer but didn't waste much wood making them. I still cut the pieces close to the line but left enough for finishing them. In this case I taped a paper template of the frame down on top of a piece of glass and then rubber cement the pieces to the template making sure that the joints all was good and tight with wood glue in the joints. The surface of the bottom pieces was cleaned up and the second layer was glued down on the top of the bottom frame also making sure that the joints were tight and added wood glue. The amount of taper of the frame was added to the top and bottom pieces so when sanded the taper would come out right. My feelings is that the frames are a lot more accurate. Some thing else I do is my water line templates to help me sand down my frames with out worry of going to far.
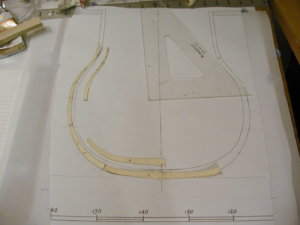
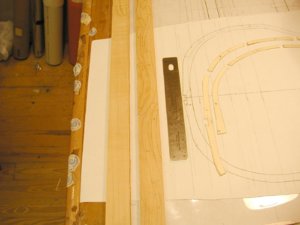
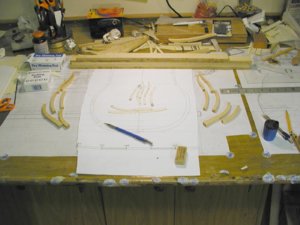
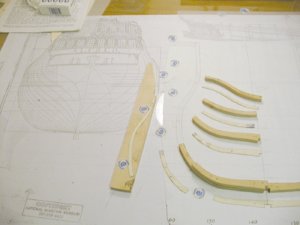
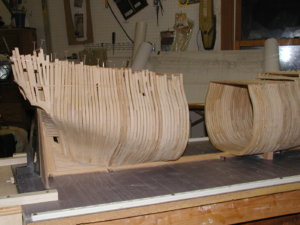
I am adding some photos so you can see what I am taking about. I do hope this is some help to others and is just my way. Any question is more then welcome
- Joined
- Feb 18, 2019
- Messages
- 717
- Points
- 353

Hi Gary,
Always nice to hear from you my friend.
That is great. Thank you.
Looking for different ways to get the lines on both sides of the frame and maybe some sort of consensus in case beveling is done before installation into the building jig, using paper guide lines of both sides.
Hope you are well.
G.
Always nice to hear from you my friend.
That is great. Thank you.
Looking for different ways to get the lines on both sides of the frame and maybe some sort of consensus in case beveling is done before installation into the building jig, using paper guide lines of both sides.
Hope you are well.
G.


