HM Cutter Lady Nelson 1803 - Scale 1:64, Victory Models by Glbarlow [COMPLETED BUILD]

Nelson Build - Planking-1781.jpg
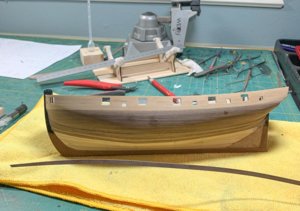
A good start with a new way (for me, how did I ever build 8 models before this). I know I have 4 more planks in the top half to go and where they need to be tapered.

The planning and marking took most of the morning, then there was the Super Bowl so work stopped and beer was consumed.

More to follow.
 
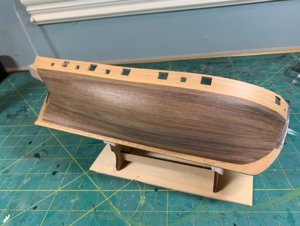
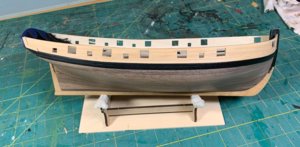
So here’s where I am - starboard complete. I’m pleased with the result. The ship has one coat of water based Matte poly just to keep it clean and tight, it will be sanded before being painted later.
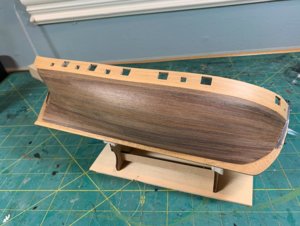
Nelson Build - Planking-1800.jpg

To be clear, I take no credit for this method. I researched a new way of planking that fit my style of working (fast, without battens and without pins, using CA) and found it in Chuck Passaro’s method. I followed the .pdf he has posted on Model Ship World at Lining Off your hull for planking.pdf I’ve learned there is some tension between the two sites, but I’m not part of that. I enjoy reading and sharing on both. There are also some videos including a recording of Chuck at a workshop - in that video he does things much simpler maybe less precise than in the .pdf that get the same result, I used those, no french curves for me. As it is it took me several days to get this small ship planked.

I’ve always done something similar with measuring and determining where to begin tapering, but it was a lot more ad-hoc. That part of my process has worked, I’m built some nice ships doing it. What is really different and game-changing for me is his plank bending method. I’m not going to go through it all in detail, you can read the .pdf, but I want to share a bit of it in hopes that a beginner might be inspired enough to learn more. The headline is no soaking and no twisting to fit.
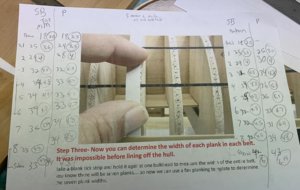
Nelson Build - Planking-1776.jpg

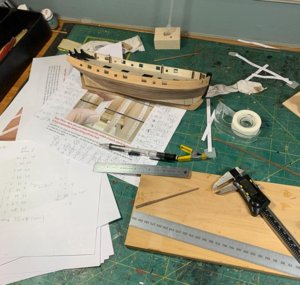
First there is taking the time to do the planning - using tick strips (I just stuck a few on here for the photo) to take measurements at each bulkhead, counting the number of strips at the widest point and converting that to the ships hull at bow and stern. Chuck used fan strip, I prefer a calculator. If its seven 4mm strips at midships, using the tick strips to get distance I determined it has to become 2.5mm at the bow. This is tedious work, but worth it. Because it was here I learned my first error in my old ways. I was starting the taper too soon, I learned through measuring in detail that I didn’t need to taper (on this particular hull, it will obviously vary) until midway between bulkhead 2 and 3, and not at all to the stern. That got me a much more even and consistent look.
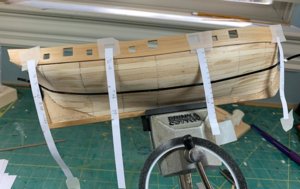
Nelson Build - Planking-1774.jpg

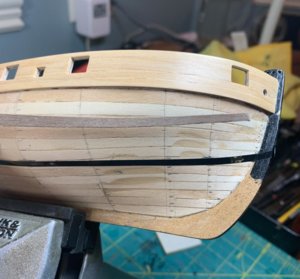
Dividing the hull in half and determining the “line” I wanted the planks to follow (3 or 4 bands for a bigger model) allowed me to be more precise and get a cleaner look instead of ad-hoc figuring it out as I went.
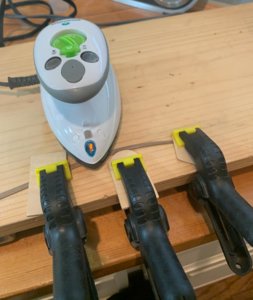
Nelson Build - Planking-1783.jpg

All well and good, but here’s the fun part - quick and easy “bending the wrong way” using my personal plank bending station. Consisting of a raised board three clamps, three pieces of thin wood - two for preventing clamp marks and one to set the point of the curve, and one inexpensive steam travel iron.
Nelson Build - Planking-1780.jpg

Placing the strip on the hull at the beginning of the taper point and bending it to the bow with my fingers (no glue) produces a curve, the apex of that curve is the bending point. Mark it and put that center on the middle of the clamp then gently pull down and clamp on both sides. I broke only one plank, the strip wood had more elasticity than I would have thought. I DID NOT soak the strips in water. I put my finger in water and ran it over the wood then “ironed” the strip for several seconds. Let it cool for a minute and you have a curved plank.
Nelson Build - Planking-1797.jpg

I then just kept track of my measurements, I did redo them a few times on the lower half, 4mm planks aren’t a perfect fit so I ripped two to 3mm each to fill the gap (and not have one super skinny). It still was a lot easier adjusting for the final pieces. Most importantly the planks, while it looks odd in a two dimensional photo, fit flush to the hull and its double curve by adding the downward bend in the tapered plank. Again, no soaking, no bending no twisting. I used drops of CA, first gluing it tight at the bow, then just 1-2 bulkheads at a time. I had roughed up the 1st planking with 100 grit sandpaper to help with adherence.

The message is plan the work, do the work, take your time, make adjustments when needed, don't force wood to be something it's not, help it learn to be a hull plank and not a strip of wood.

Here I will admit my major error, or the error the instructions led me to do - that’s attaching the sternpost when I built the frame. It would all be so much easier at the stern to not install that until after the second planking. It wasn’t a show-stopper, it just made fitting the lower band of planks harder since they had to be cut to fit precisely at the stern post. On my next model I’ll not install the sternpost until after all the planking is done. I knew that…it was one of those things I forgot in my three year layoff.

I hope I'm adding some value here and that someday it will help a beginning builder. The Lady Nelson isn't a sexy build, but it requires all the basics necessary for any model no matter is Nelson or Cochrane sailed on it or not.

On to the next step…
 

Attachments

  • Nelson Build - Planking-1800.jpg
    Nelson Build - Planking-1800.jpg
    132.9 KB · Views: 26
Planking is messy stuff, I'm almost there on my little ship. For anyone that doubts planks can be curved and bent the wrong way without soaking - here's proof. Nothing more than a hot travel iron involved in the bending of this wood.
Nelson Build - Planking-1803.jpg
I'm learning I have to trust the measurements and the ability to bend more. The overlap point that I used to use as where to start the tapering doesn't always apply, if there is a conflict from that traditional approach I used through all my prior models and the measurements taken at every bulkhead - I know now to go with the measurements and bend the plank to fit. It also may seem counter-intuitive to bend the plank down to go up on the hull, but it works.

PS: the upper band has preliminary light sanding, the lower band none - hence the temporary uneven look.
PS2: I really wish I hadn't put the sternpost on with the frame, the planking would be sooo much easier...This is what happens when you blindly follow instructions
 
Last edited:
Yes - it is also my experience, that some types of planks can be bent also without steaming or watering - because the timber in new kits is not completely dry - still has some moisture content - problematic are the very old kits in which the stripes were cut 30 years ago - these are often completely dry and break also very fast.
Your planking is Looking very good Thumbsup
Thank you for replying.

Rubbing water on the plank and steam from the iron also supplies moisture that the heat of the iron then removes This method is new to me and I have to admit I’m fascinated by how well it works
 
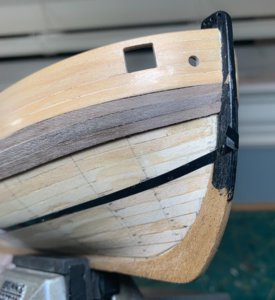
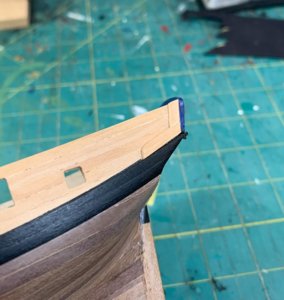
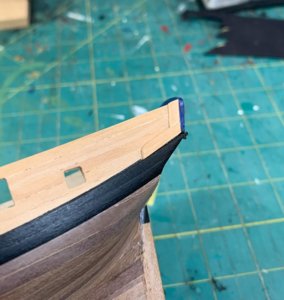
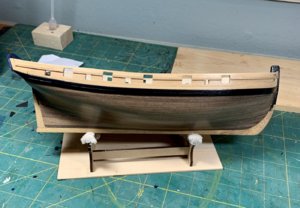
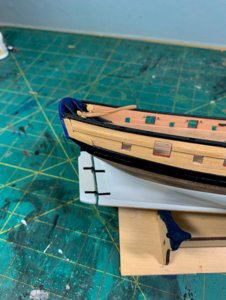
I had originally planned to use some ebony on the wales, but what I had would just have overwhelmed this little model and the wood supplier I contacted didn’t really come through, so I went with two strips of 3mm walnut that came with the kit. My only really (small) challenge was matching up the top of the wale perfectly with the bottom edge of the boxwood upper planks keeping the boxwood separate from the walnut below.

Nelson Build - Planking-61.jpg

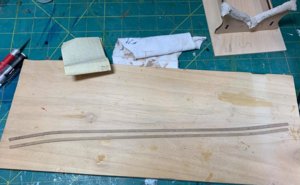
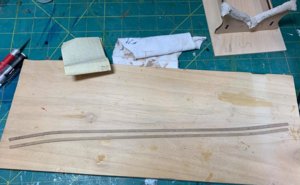
Of course I now never want to miss a chance to bend wood so I added the appropriate curves to the wood for the wales. Mine flare up a bit more at the stern than the plans, I wanted it to meet my modified stern at the right places.

Nelson Build - Planking-62.jpg

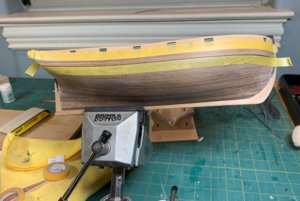
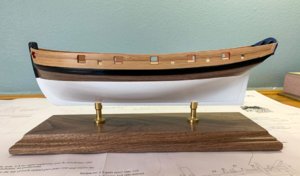
Once glued and sanded it was time to paint. I’m sure many modelers know of Tamiya masking tape, this stuff is perfect for us. Installed correctly it prevents any leak or bleed over and makes painting so much easier on a task like the wales. I also like to put a plug in for Admiralty Paints. The Dull Black looks great and takes only two coats for complete coverage.

Nelson Build - Planking-78.jpg

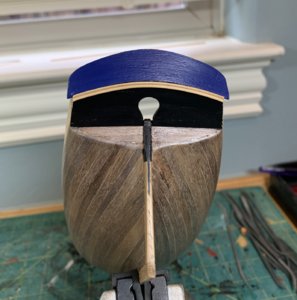
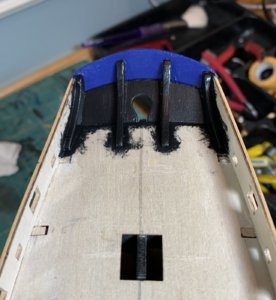
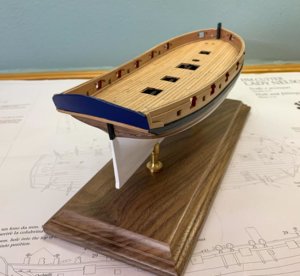
Having used boxwood above the wales the kit supplied stern facia wasn’t going to work, plus the whole 2 mm parts sheet is of very poor quality walnut, I may be making more parts later. I opted for this simple design. This is a generic cutter, fancy just doesn’t work for me, plus I’m not good at carving and so far haven’t invested in a scroll saw….

Nelson Build - Planking-63.jpg

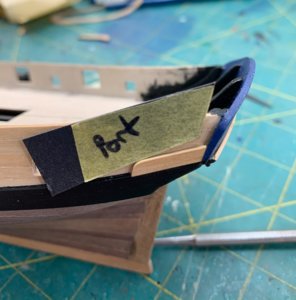
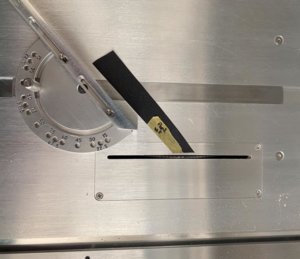
To get the right angles I fitted a piece of Tamiya tape then cut it to fit the wale and stern lines, port and starboard are just a tiny bit different so I did both sides. I lifted the tape and placed it on card stock, then cut that out with my trusty #11 blade and metal ruler. I extended the line on the card stock (on the second attempt, hence the different photos) and used that to line up the perfect angle on my Byrnes saw.

Nelson Build - Planking-64.jpg

I like the clean simple look of the final result.

Nelson Build - Planking-65.jpg

I have one more thin moulding strip to add between the gun ports (also boxwood, not the kit supplied walnut) and then its time to move inside the ship for deck and bulwark planking. Painting the white stuff below the water line comes later.

I’ll appreciate my log as notes to myself one day :-/
 

Attachments

  • Nelson Build - Planking-61.jpg
    Nelson Build - Planking-61.jpg
    115.3 KB · Views: 16
  • Nelson Build - Planking-64.jpg
    Nelson Build - Planking-64.jpg
    116.4 KB · Views: 14
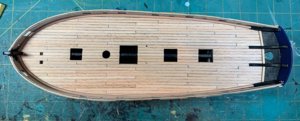
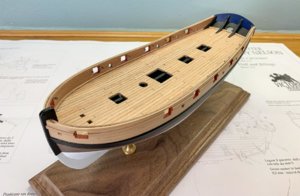
So here's the completed deck.

I followed my own 3 butt pattern in laying the planks. I elected to use the kit deck wood and save my remaining holly. I added the basswood end pieces at the stern since the wood looked odd just terminating at the stern. I fashioned the my own "waterways" by shaping a 2x3mm swiss pear strip and using my new plank bending station to shape it and added an angled overlay at the stern. It will be less noticeable when I complete the inner bulwarks with more Swiss Pear 1x3s. I'm finishing the deck with Matte Poly but using Satin Poly on the hull, no reason other than I like it.

Nelson Build-1840.jpg
 
Here are some progress photos.

Nelson Progress-1848.jpg
Nelson Progress-1850.jpg

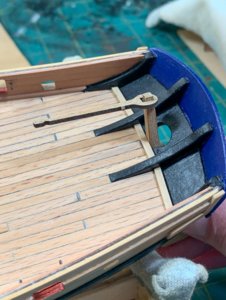
The kit supplied tiller was pretty ugly so I made my own. Just two pieces of cherry parts scrap from my Fair American build glued together, one horizontal to one vertical. No plan, I just filed and sanded until I had something I liked. It looked even better after some buffing and satin poly. So what if its the only cherry wood on the boat…so far.

Nelson Progress-1853.jpg
Nelson Progress-1855.jpg
Nelson Progress-1856.jpg
Nelson Progress-1858.jpg
Nelson Progress-1859.jpg

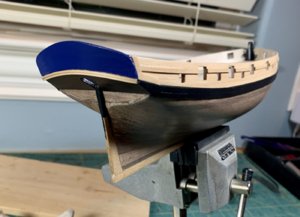
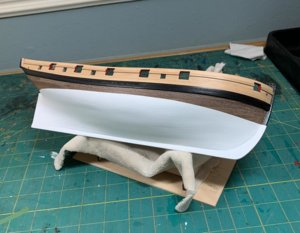
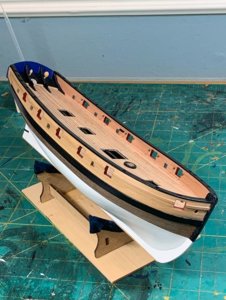
Swiss Pear for inner bulwarks. Matte Poly for interior, Satin Poly for exterior of hull. Admiralty White Matte paint for hull - about 6 coats to get it deep and pure looking.

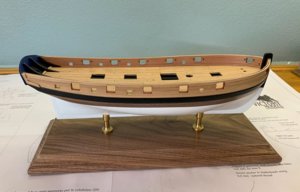
Nothing historic about it, but it wasn’t a real ship anyway, so why not boxwood, walnut, swiss pear and kit deck material to go with black white, and a little Admiralty Red Ochre in the ports and French Blue trim. Haven’t decided on deck furniture paint yet.

Checked fit and level of final mount, its back off into the working cradle. Cap rails and stern rail are up next.
 
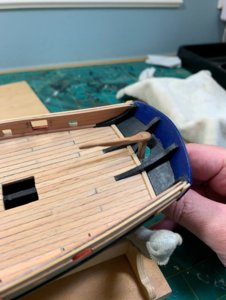
A few updates: I completed the cap rail and a few other hull finishings, but not without one minor problem that turned into a two hour fix.

Nelson Build-1867.jpg

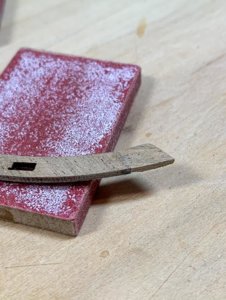
For some silly reason I put the edge of the cap rail up to my sander to add a 15 degree angle to the leading edge, something I could easily do with my sanding block. The wood in this kit is very brittle, the front 15mm of the cap rail was snapped off and devoured by the sander. So I had to use the plans, cut a template with tracing paper and card stock, manufacture the missing piece from the same parts board the cap rail came from then glue and sand it into shape. Now that its on the ship and painted you’d never know - other than the two hours it derailed my day into recovering from a one second bad decision. Oh well.

Nelson Build-1884.jpgNelson Build-1885.jpg

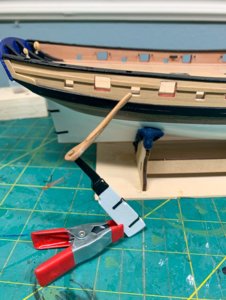
I turned my attention to the rudder. While etched brass fittings are provided, they never work for me, they seem to heavy and are a poor fit. I use black card stock cut to 2mm width and blackened brass eyelets, the eyelet removed on the rudder and bent to a hook to hang in the eyelets on the hull side. It’s a simple method than gives a better look in my opinion. I had also added a false keep to the bottom using a boxwood strip, one because its a nice look and two it happens to give a better fit of the hull to the mounting board.

Nelson Build-1883.jpg

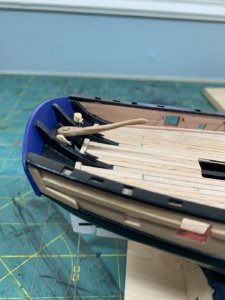
With the hull now completed I’m rigging the blocks that attach directly to the deck and hull plus drill the holes for eyelets used later for stays and rigging while I have a lot of room to work before moving on to the deck furniture. I still have a collection of Warner Blocks, enough for this model and a few more. I had to order these from a guy named Warner by postal mail to an address in rural Utah, no email and no online ordering. My last order was 8 years ago, I have no idea if the gentleman is still around. I have a blank order form, maybe I should send it for some more and see what happens… His blocks are exceptional and a major upgrade from kit junk, two can been seen attached at the stern.
Nelson Build-1877.jpg

Nelson Build-1881.jpg

Back to the deck furniture. The Nelson is a basic model, I knew that going in. I wasn’t expecting the parts boards to be so brittle but I can deal with that by being careful (and not putting them up against the sander but I digress).

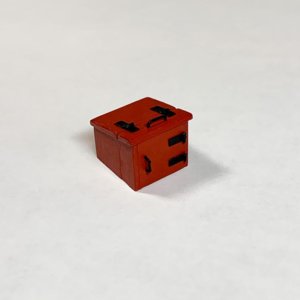
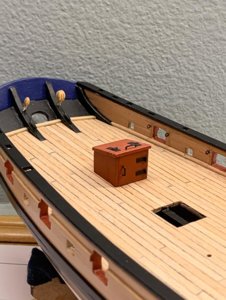
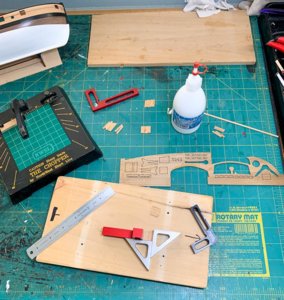
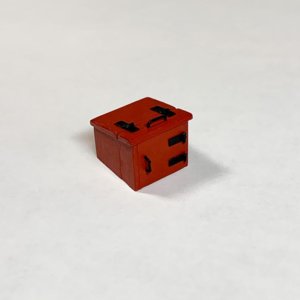
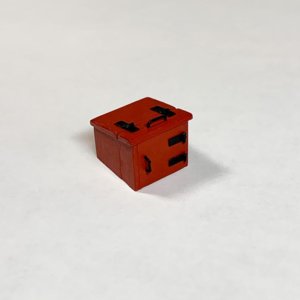
However I looked at the companionway and decided it was too basic and too boring so I took a single strip of 4mm boxwood, a little 24 gauge wire, and some black card stock and scratch built my own companionway.

Nelson Build-1873.jpg

Using the parts board only for a start on the measurements I constructed the 6 pieces by cutting and gluing the strip wood side by side in to rough shapes, then used my Byrnes saw to get them to precise sizes. No surprise, for 6 pieces (the top is two) the measurements have to be very precise to get a square box with a slanted roof to work. My metal squares are purpose built to square up the parts while gluing them together.

Cutting wire to 2mm lengths for the hinges is no picnic - snip…where did it go…catch in my hand…it rolls off the bench never to be seen again..my bare feet will find it later….

I did the top in two pieces to show, by sanding and gluing a strip of black card stock between the two, separation the way the companionway would open fo access. One lesson learned is I wish I had left that card stock piece unpainted but it still shows up well enough, that and rounding the edges between the two parts a little.

Practically the front door may have been a two separate swing open from the middle style, but at this small scale that would have been too much “weight” in my opinion with the hinges and handles on a 14x14mm square. As it is I could have made the hinge straps 1mm instead of the 2mm they are - imagine trying to cut and find 1mm wire…

Anyway I’m pretty happy with the result and will now move on to rigging out the hull before the rest of the deck furniture is added.
 

Attachments

  • Nelson Build-1877.jpg
    Nelson Build-1877.jpg
    43.8 KB · Views: 9
  • Nelson Build-1877.jpg
    Nelson Build-1877.jpg
    43.8 KB · Views: 9
Back
Top