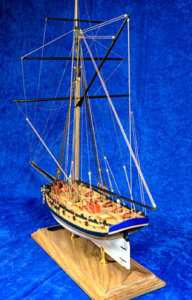
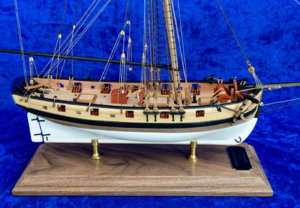
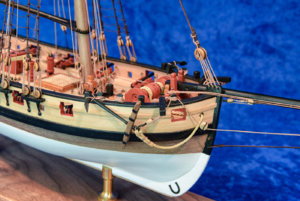
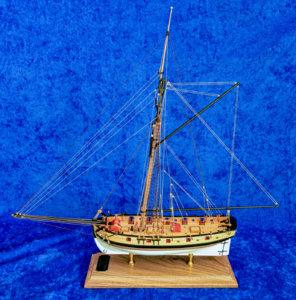
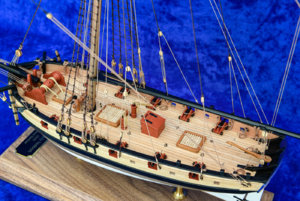
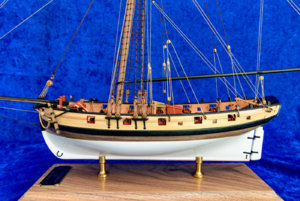
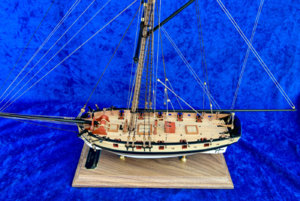
HM Cutter Lady Nelson 1803 - Scale 1:64, Victory Models by Glbarlow [COMPLETED BUILD]

Dear Glenn

Without a VPN, it is impossible to access MSW's site from China. I thought that was perfectly clear - apologies. In other words, MSW does not allow domains from China to access their site. If I had wanted to use VPN (which is against the law in China), it would give me a domain outside of China which MSW would allow. I wish you everything of the best with the HMS Speedy.
Thanks for the explanation.
 
I hope to continue being a contributor to other logs and forums here and respect everyone’s personal choices (though I don’t know what a VPN has to do with MSW). I hope you understand mine.
Hello Glenn, whether you decide to present your build log here or elsewhere, it is your decision and will respect it. :)
 
Agreed Glenn - and apologies for the incorrect spelling of your name. And I really mean it when I say that I wish you all the luck with a Speedy. It is a beautiful ship and with the skills that you have amply demonstrated in this log, you should create a beautiful model.
 
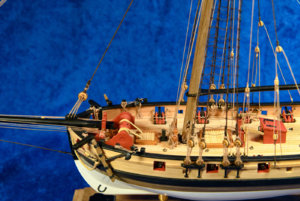
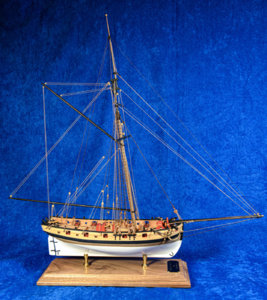
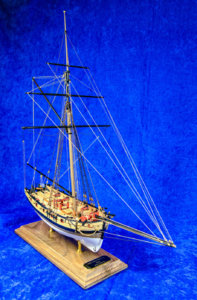
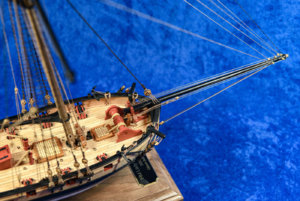
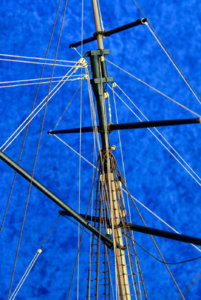
My back to basics kit after a multi-year layoff from modeling is finished. It's semi-scratch built as most of the kit walnut was replaced and the deck furniture scratch built (other than the winch). I added a good deal of rigging, likely not historically accurate, but it wasn't a real ship so... I enjoyed using Chuck's Passaro's blocks and ropes throughout the model. It was fun, took just 3 months, and energized me to take up modeling again. It was coincidence that with recent events I had lots of home time to build.

Nelson Final 2-1792.jpgNelson Final 2-1793.jpgNelson Final 2-1795.jpgNelson Final 2-1796.jpgNelson Final 2-1799.jpgNelson Final 2-1801.jpgNelson Final 2-1805.jpgNelson Final 2-1806.jpgNelson Final 2-1807.jpgNelson Final 2-1808.jpgNelson Final 2-1809.jpgNelson Final 2-1810.jpg

My log is done.
 
Last edited:
Great model Glenn and very nice build log! You are very accurate builder! Pitty, we will not be able to see your next build log here.
Thank you. The designers of my next two models are exclusively on MSW, I can get their help and comments there as needed. And no offense, but in three months I’ve had very little interaction (other than discussing VPNs) on my log. It could be because it’s a boring model, log, or builder I suppose, but a big part of sharing a build is exchanging comments. Again, no offense, but it’s just to quiet here.

I will continue as a member. I’ll be watching Genaro’s build of Cheerful for sure. I wish everyone the best here in SOS.
 
Last edited:
Thank you for the comments, I appreciate them. I may have to retake the photos, they are all very yellow for some reason.
 
Thank you. The designers of my next two models are exclusively on MSW, I can get their help and comments there as needed. And no offense, but in three months I’ve had very little interaction (other than discussing VPNs) on my log. It could be because it’s a boring model, log, or builder I suppose, but a big part of sharing a build is exchanging comments. Again, no offense, but it’s just to quiet here.

I will continue as a member. I’ll be watching Genaro’s build of Cheerful for sure. I wish everyone the best here in SOS.
I'm quite flattered Glenn. Thank you. You did wonderful job on rigging in no time. If mine ends up half as good as yours I'll be pleased. Assembled today Chuck's serving machine, works quite well :)
 
My back to basics kit after a multi-year layoff from modeling is finished. It's semi-scratch built as most of the kit walnut was replaced and the deck furniture scratch built (other than the winch). I added a good deal of rigging, likely not historically accurate, but it wasn't a real ship so... I enjoyed using Chuck's Passaro's blocks and ropes throughout the model. It was fun, took just 3 months, and energized me to take up modeling again. It was coincidence that with recent events I had lots of home time to build.

.View attachment 145865

View attachment 145866

View attachment 145867

View attachment 145868

View attachment 145869

View attachment 145870

View attachment 145871

View attachment 145872

View attachment 145873
My log is done.
You may want to post your nice finished model in the Completed models topic ,Donnie also can add them to the Gallery if you want it


Congratulations for this great model - Hope to see also your next project....
 
So here I am, writing a build log again, though it is the first time on Ships of Scale.

I started all my ship builds with a purpose; I learned the process with the AVS practicum, developed technique and accuracy with the Granado, painted with exotic woods to achieve color differentiation with the fully framed Fair American, achieved historical accuracy with Pegasus with plans from the Maritime museum, built a “74” with Vanguard. After 8 models I was done, finishing the last in 2017.

Ultimately though I missed the building part so I recently purchased the Lady Nelson. It’s a small ship but the process is the same, it’s a nice model to spend some time building, without spending a LONG time building it.

My detailed build logs for the Fair American, Pegasus, and Granado were lost due to system crash on Model Ship World, though my more abbreviated Vanguard log is still there. Sadly I wasn’t smart enough to keep offline copies. So, in the hopes of providing some entertainment, help with building, or demonstrating how not to do so depending on your viewpoint, here’s my log for the Amati Lady Nelson. Donnie has always been supportive, so I decided to place the log here.

The kit, despite being a small cutter, is another well designed Victory model series designed by Chris Watton. The material, parts, plans, and wood are all of good quality. I only build from kits by Amati or Caldercraft, I am confident I’ll have a good start when I open the box. [Post Log Edit: I have since discovered Vanguard Models and Syren Ship Models, which are the makers of my next 3 models]


View attachment 129679
I’ve reached the point where I’m far more dependent on the plans than instructions. That’s good in this case because the plans are well done and the instructions are surprisingly brief. I’m not sure a beginning modeler would get what they need with them, so then the importance of a website like Ships of Scale to be able to seek additional help.

Without being overly critical the MDF in my kit is a bit soft and the walnut laser cut part sheets are too brittle, I’ve already broken and repaired a few parts despite being careful in removing them from the various walnut sheets. I still recommend the kit, maybe my wasn’t stored in the best place at the store I purchased it from. It doesn’t deter my confidence in the Amati Victory series models.
View attachment 129680
I have a kit and now a job to do, who says retirement is boring. More to follow. I hope you'll follow my log and find some use from itView attachment 129677
I am new at this and just received plans for the Lady Nelson. So I am very interested in your build.
 
Just recording progress at this point, if anyone has any questions please feel free to reply.

View attachment 140889

Since the last update I’ve added the channels and deadeyes and made the transition to the cutter’s final home. A step I always take prior to beginning rigging as I need the ship steady and looking like it will look on my shelf. I prepare for this step at the very beginning as is noted in my earliest posts by drilling the 2mm hole in the keel and matching it up to brass wire and pedestals on a 12 inch walnut display board. This always pays off in making the mounting so much easier. I’ll confess the 3mm keel had me a little concerned, I always used threaded bars for the extra grip. I see no need for the elaborate nuts and bolts built into the keel I see some modelers use, I haven’t had one come off the base yet. However this time I couldn’t find something threaded so small so I had to use smooth brass. I need'nt have been concerned, the JB Weld Clear epoxy mix I used, properly applied and allowed to cure has melded the boat, wire, pedestals and board into a single entity. The big challenge is to make sure the boat is level on the stand before it sets. I have a number of line and small levels to match the boat, board, and surface its sitting on are all equally level. I should have taken a photo, but I’m sure its clear.

View attachment 140890

Weird angle in this photo. The cannons are now mounted and the rigging has begun. I’m only adding breech ropes for this model, the small 4 pounders are just too little for me to rig and have any semblance of scale. I learned the trick of using an awl to split the rope and create a loop with white glue from my Cheerful instructions, it works great at simulating the seizing. I know the breeching lines are going to be shorter than they should, I also didn't add the necessary eye bolt to the carriage though in retrospect I maybe wish I had, oh well. NOTE: Only the forward three on the starboard side are done, the others are temporarily pulled tight to be out of the way and to allow the seizing to dry on the cannon until I get to them.

View attachment 140891

So my work area converts to my rigging box. I’m using Warner blocks and Syren Ship Company rope. Probably the last time for the Warner blocks, though far superior to the junk blocks in kits the Syren product is another level better. The only problem is I work in millimeters and all the Syren Stuff is Imperial. Why the US hasn’t converted is beyond me, 3mm makes so much more since than 3/32.

After rigging the cannon its time to make the main mast, yards and boom. The bow sprit is already done and rigged but will be the near last thing I install - cutters have long bowsprits and not a lot of rigging to hold them.
 
Back
Top