THX Uwe. This show exactly what I meant with the way the anchor buoy was used for an easy location tracker for the position of the anchor.Planset review - THE SHIP’S LONGBOAT 1680-1780" / "LA CHALOUPE DES VAISSEAUX de 1680-1780" by Jean Claude Lemineur
This is a copy of the report of my Rochefort visit in which I showed the model..........in the following post you can find the planset review I made Unfortunately only one photo of the LA CHALOUPE DES VAISSEAUX de 1680-1780 / THE SHIP’S LONGBOAT 1680-1780 built in scale 1:24 by Henri Defresne...shipsofscale.com
-

Win a Free Custom Engraved Brass Coin!!!
As a way to introduce our brass coins to the community, we will raffle off a free coin during the month of August. Follow link ABOVE for instructions for entering.
-

PRE-ORDER SHIPS IN SCALE TODAY!
The beloved Ships in Scale Magazine is back and charting a new course for 2026!
Discover new skills, new techniques, and new inspirations in every issue.
NOTE THAT OUR FIRST ISSUE WILL BE JAN/FEB 2026
- Home
- Forums
- Ships of Scale Group Builds and Projects
- HMS Alert 1777 1:48 PoF Group Build
- HMS Alert 1777 1:48 Group Build Logs
You are using an out of date browser. It may not display this or other websites correctly.
You should upgrade or use an alternative browser.
You should upgrade or use an alternative browser.
Thx to Uwe I made the anchor ring thicker than in the AotS drawings.
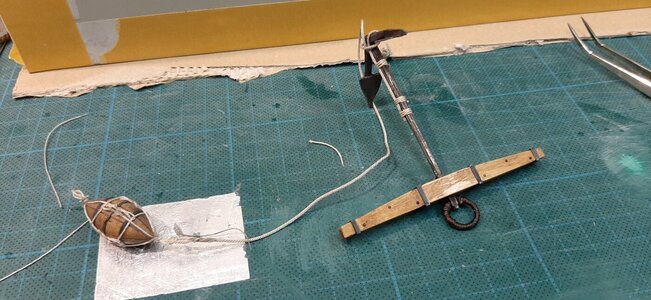
I ruined my anchor and partly cut of an anchor hand.
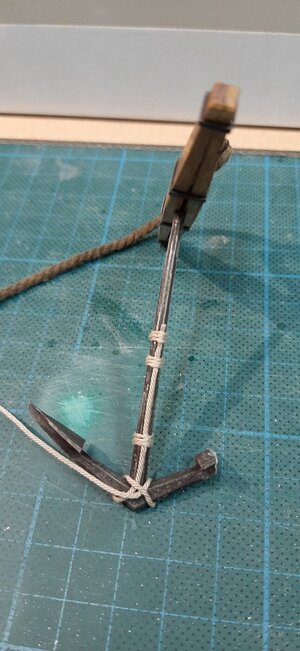
The supplied white cotton anchor cable I drenched in a mixture of bitumen and turpentine.
Before fitting it to the anchor ring.
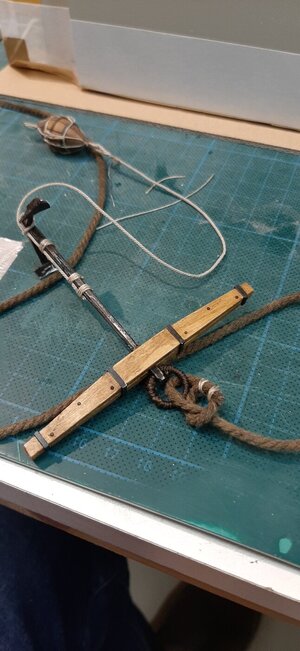
The anchor is now finished for submersion into the sea.
For a sea we need a sea bed, in this case some fine sand.
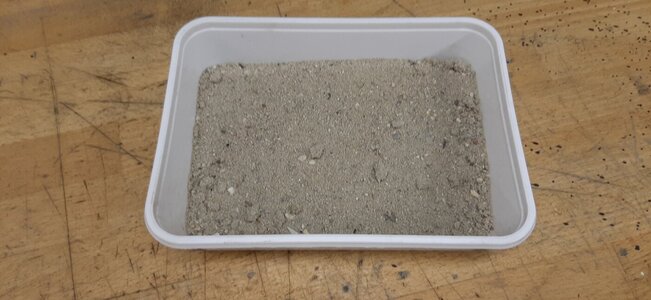
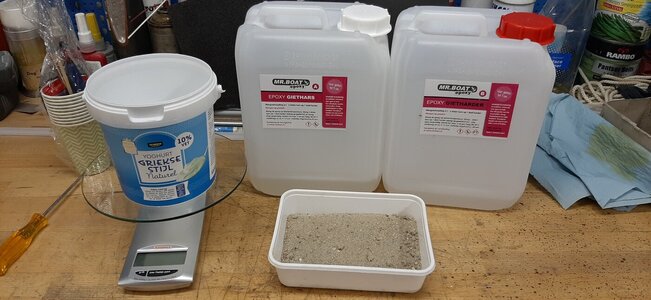
The sand I mix with resin, in this case a weight ratio mixed clear resin for pours up to 3 cm.
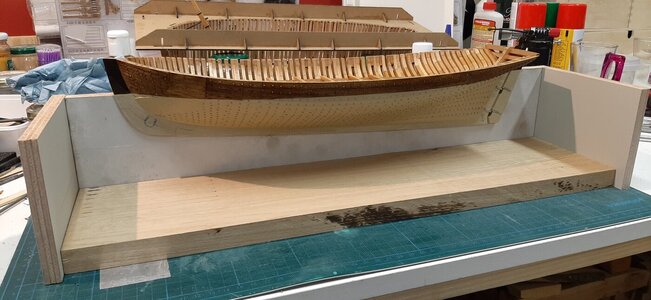
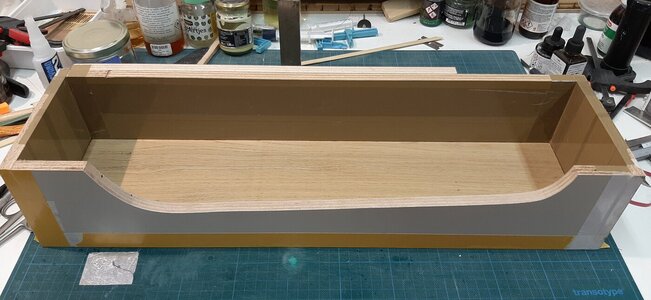
The ship will be in dock first, here it is made of an oak base with plywood walls.
After mixing I pour some 5mm thick layer of a resin sand mixture into my dock. After settling the sand goes to the bottom creating a nice sandy sea bottom. The polution of the sand with some fine wood particles etc I left in as we also see this at the sea bottom.
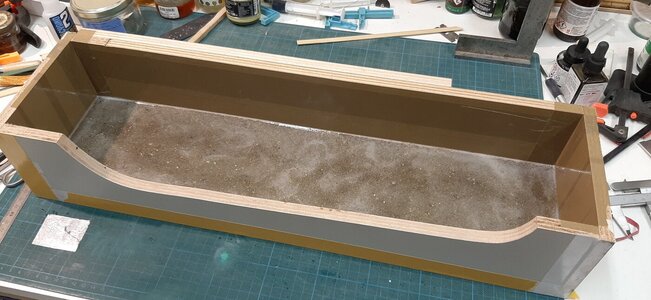
After settling you burn of the air bubbles with a torch and you get a nice sandy sea bottom.
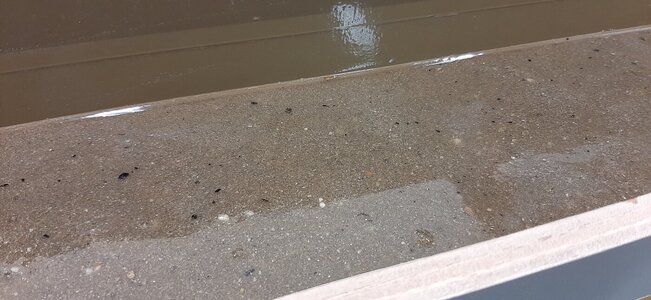
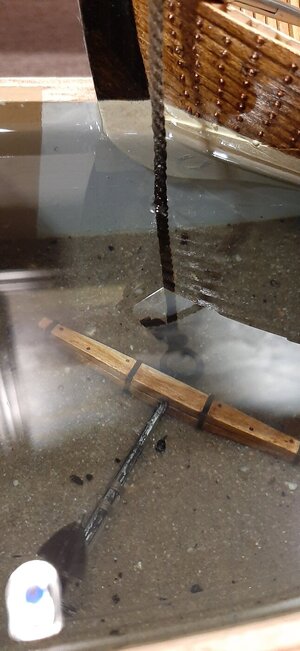
This looks like a perfect anchoring ground.
 away.
away.
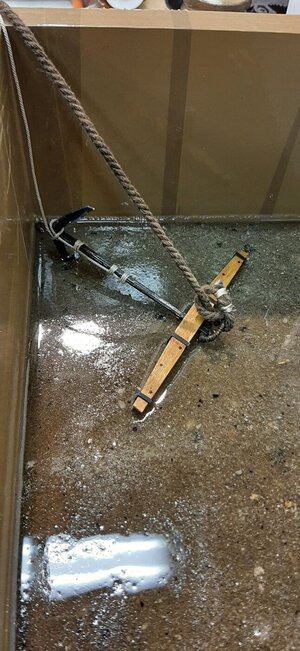

I ruined my anchor and partly cut of an anchor hand.

The supplied white cotton anchor cable I drenched in a mixture of bitumen and turpentine.
Before fitting it to the anchor ring.

The anchor is now finished for submersion into the sea.
For a sea we need a sea bed, in this case some fine sand.

The sand I mix with resin, in this case a weight ratio mixed clear resin for pours up to 3 cm.

The ship will be in dock first, here it is made of an oak base with plywood walls.

After mixing I pour some 5mm thick layer of a resin sand mixture into my dock. After settling the sand goes to the bottom creating a nice sandy sea bottom. The polution of the sand with some fine wood particles etc I left in as we also see this at the sea bottom.

After settling you burn of the air bubbles with a torch and you get a nice sandy sea bottom.

This looks like a perfect anchoring ground.
 away.
away.
Last edited:
Really impressive Maarten, it's great that you do a step by step explanation since I haven't seen anything like that before.
Your creativity goes above and beyond, Mon Amie! It sounds like your brain has always been at work. I am really amazed by your build, the way it turns into unpredictable (for us) ways. 
So good to see all the steps you take.Thx to Uwe I made the anchor ring thicker than in the AotS drawings.
View attachment 270265
I ruined my anchor and partly cut of an anchor hand.
View attachment 270271
The supplied white cotton anchor cable I drenched in a mixture of bitumen and turpentine.
Before fitting it to the anchor ring.
View attachment 270272
The anchor is now finished for submersion into the sea.
For a sea we need a sea bed, in this case some fine sand.
View attachment 270267
The sand I mix with resin, in this case a weight ratio mixed clear resin for pours up to 3 cm.
View attachment 270268
The ship will be in dock first, here it is made of an oak base with plywood walls.
View attachment 270266
After mixing I pour some 5mm thick layer of a resin sand mixture into my dock. After settling the sand goes to the bottom creating a nice sandy sea bottom. The polution of the sand with some fine wood particles etc I left in as we also see this at the sea bottom.
View attachment 270269
After settling you burn of the air bubbles with a torch and you get a nice sandy sea bottom.
View attachment 270270
This looks like a perfect anchoring ground.
away.
View attachment 270273
@Steef66 Don't be so sure that you see what Maarten is planning ... knowing Maarten, "You ain't seen nothing yet ..."
Always a new surprise. Like a Magician who pulls a new rabbit out of the hat every time. So he keeps us all on our toes with his great ideas.

Last edited:
Great idea and a very good start for this diorama presentation.
You are not using the typical anchor hitch knot, but a different and simlier one...... any reason for this?
because the anchor was lighter for the Alert?
You are not using the typical anchor hitch knot, but a different and simlier one...... any reason for this?
because the anchor was lighter for the Alert?
Hi Uwe,Great idea and a very good start for this diorama presentation.
You are not using the typical anchor hitch knot, but a different and simlier one...... any reason for this?
because the anchor was lighter for the Alert?
I used the knot as in the AotS book. Normally there are two loops around the main cable, here only one. Maybe it has to do with the weight of the anchor but I am not sure.
Today it is just booring pouring.  .
.
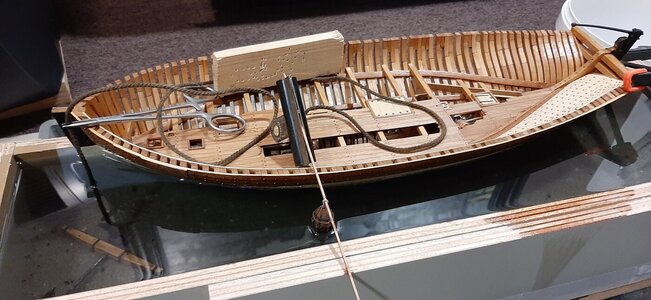
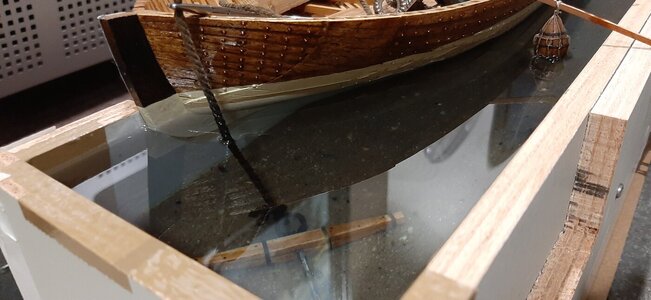
To seal the ship against the mould I use tapestry tape. I tape the mould as well as the keel of the ship.
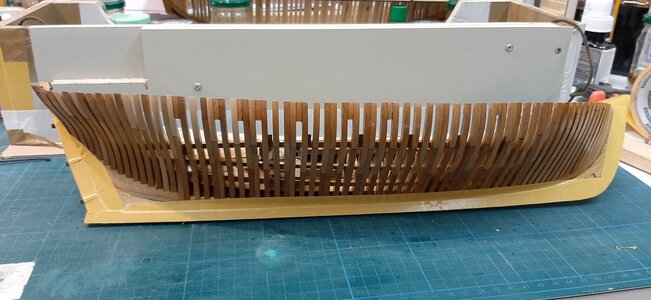
And taped the ship in place.
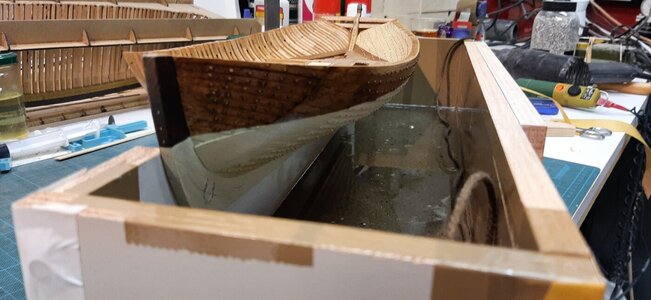
Now with a quick curing epoxy I seal the joints to avoid leakage.
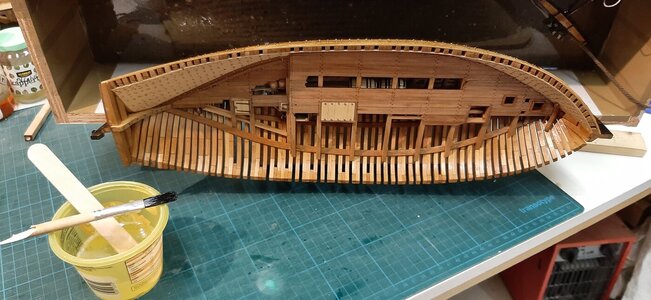
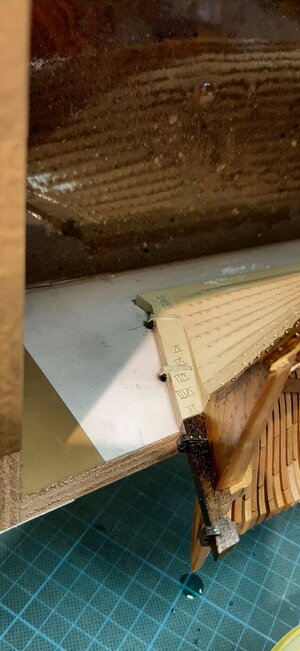
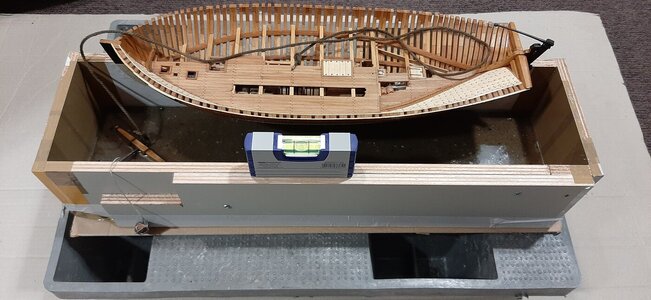
I set the mould level.
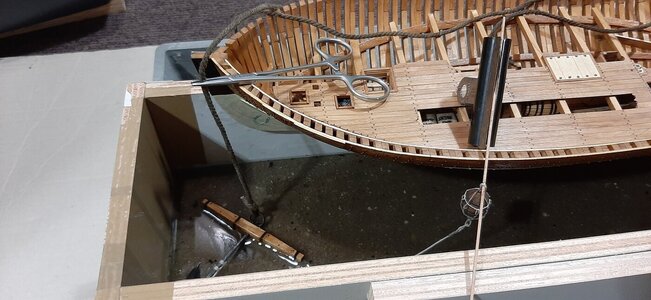
Fit the anchor cable and buoy in their correct spot.
In this case I use deep pour epoxy for an 8 cm pouring. 5 ltr in one pour. I colour it with 1 drop of cyan alcohol ink.
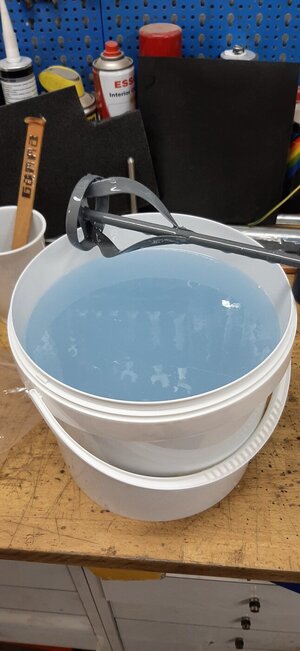
Leave ot now for 7 days to fully harden before I can release it from the mould. Hopefully it will not start to leak, this epoxy is a thin as water so ne leakage at all is nearly impossible. Time will tell. Most probably I will get some airbubles around the cotton rope as it releases air when the epoxy heats up during its reaction.
To seal the ship against the mould I use tapestry tape. I tape the mould as well as the keel of the ship.

And taped the ship in place.

Now with a quick curing epoxy I seal the joints to avoid leakage.


I set the mould level.

Fit the anchor cable and buoy in their correct spot.

In this case I use deep pour epoxy for an 8 cm pouring. 5 ltr in one pour. I colour it with 1 drop of cyan alcohol ink.

Leave ot now for 7 days to fully harden before I can release it from the mould. Hopefully it will not start to leak, this epoxy is a thin as water so ne leakage at all is nearly impossible. Time will tell. Most probably I will get some airbubles around the cotton rope as it releases air when the epoxy heats up during its reaction.


- Joined
- Sep 3, 2021
- Messages
- 5,177
- Points
- 738

Slowly I am coming to the realization that there must be an awful lot of professional builders on this website. What I'm observing here with numerous builds is just flabbergasting. Superb!Today it is just booring pouring..
To seal the ship against the mould I use tapestry tape. I tape the mould as well as the keel of the ship.
View attachment 270417
And taped the ship in place.
View attachment 270418
Now with a quick curing epoxy I seal the joints to avoid leakage.
View attachment 270419
View attachment 270420
I set the mould level.
View attachment 270421
Fit the anchor cable and buoy in their correct spot.
View attachment 270422
In this case I use deep pour epoxy for an 8 cm pouring. 5 ltr in one pour. I colour it with 1 drop of cyan alcohol ink.
View attachment 270423
Leave ot now for 7 days to fully harden before I can release it from the mould. Hopefully it will not start to leak, this epoxy is a thin as water so ne leakage at all is nearly impossible. Time will tell. Most probably I will get some airbubles around the cotton rope as it releases air when the epoxy heats up during its reaction.
View attachment 270425
View attachment 270424
View attachment 270426
- Joined
- Aug 8, 2019
- Messages
- 5,536
- Points
- 738

Great work. Love it
About the anchor rope. You used the inside clinch. (Rope ends on the inside of the eye) David Steel mentioned it. This clinch is stronger than the outside clinch. The inside clinch is also used for buntlines on the foot of the sail. A very common way to knot the anchor.
About the anchor rope. You used the inside clinch. (Rope ends on the inside of the eye) David Steel mentioned it. This clinch is stronger than the outside clinch. The inside clinch is also used for buntlines on the foot of the sail. A very common way to knot the anchor.
Thx Stephan for clearing this issue. Already was afraid I poured in the wrong knotGreat work. Love it
About the anchor rope. You used the inside clinch. (Rope ends on the inside of the eye) David Steel mentioned it. This clinch is stronger than the outside clinch. The inside clinch is also used for buntlines on the foot of the sail. A very common way to knot the anchor.
- Joined
- Aug 8, 2019
- Messages
- 5,536
- Points
- 738

You can always look it up in Ashley's book of knots around page 300 you can find a lot of knots used on ships. He mentioning them all. I know this knot because I searched for it before. And opening the pdf I got the right page in front. It is knot 1845Already was afraid I poured in the wrong knot
- Joined
- Jan 9, 2020
- Messages
- 10,556
- Points
- 938

Unreal.

 I just marvel at the level of confidence that Maarten must have. Here you build an exquisite model, cut it, and then mold the whole construction with all its inherent pitfalls. @RDN1965 Johan mentioned "professional". I am sure that professional builders can learn a lot here.
That is really 'out of the box' with that epoxy in the box.Today it is just booring pouring..
To seal the ship against the mould I use tapestry tape. I tape the mould as well as the keel of the ship.
View attachment 270417
And taped the ship in place.
View attachment 270418
Now with a quick curing epoxy I seal the joints to avoid leakage.
View attachment 270419
View attachment 270420
I set the mould level.
View attachment 270421
Fit the anchor cable and buoy in their correct spot.
View attachment 270422
In this case I use deep pour epoxy for an 8 cm pouring. 5 ltr in one pour. I colour it with 1 drop of cyan alcohol ink.
View attachment 270423
Leave ot now for 7 days to fully harden before I can release it from the mould. Hopefully it will not start to leak, this epoxy is a thin as water so ne leakage at all is nearly impossible. Time will tell. Most probably I will get some airbubles around the cotton rope as it releases air when the epoxy heats up during its reaction.
View attachment 270425
View attachment 270424
View attachment 270426
Regards. Peter
Hi Maarten!
Has the casting resin become very warm? Years ago, I melted through a 2 mm thick ABS plastic hull with it when I poured 1/2 liter of casting resin as ballast and for niveling.
Do you have a release agent on the ship or basin to get a smooth surface? I think I see "Tesapack brown" (a packaging tape, very smooth)?
Best regards
Thomas


