-

Win a Free Custom Engraved Brass Coin!!!
As a way to introduce our brass coins to the community, we will raffle off a free coin during the month of August. Follow link ABOVE for instructions for entering.
-

PRE-ORDER SHIPS IN SCALE TODAY!
The beloved Ships in Scale Magazine is back and charting a new course for 2026!
Discover new skills, new techniques, and new inspirations in every issue.
NOTE THAT OUR FIRST ISSUE WILL BE JAN/FEB 2026
- Home
- Forums
- Ships of Scale Group Builds and Projects
- HMS Alert 1777 1:48 PoF Group Build
- HMS Alert 1777 1:48 Group Build Logs
You are using an out of date browser. It may not display this or other websites correctly.
You should upgrade or use an alternative browser.
You should upgrade or use an alternative browser.
Very good work - the result with the "burned" nails is looking very good
Thx again for all viewers comments and likes.
After preparing the coamings it is time for the gratings.
These are made from lasered parts.
The thinner ones for the grate and the thicker part for the edges of the grate.
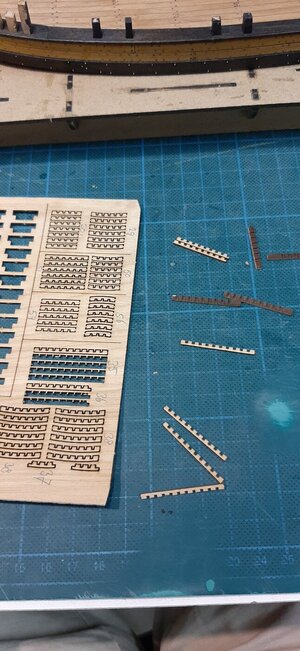
To make them fit snug the grate parts should be slightly sanded.
The material is very brittle so it is unavoidable that some minor edges will flinter off during sanding.
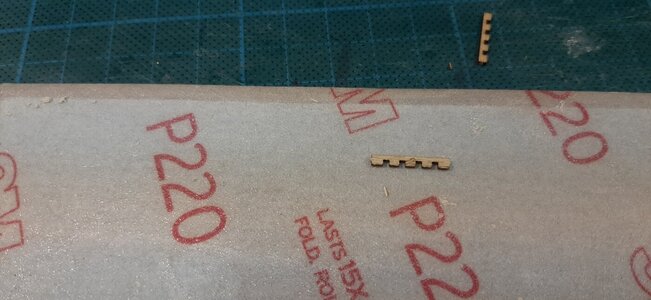
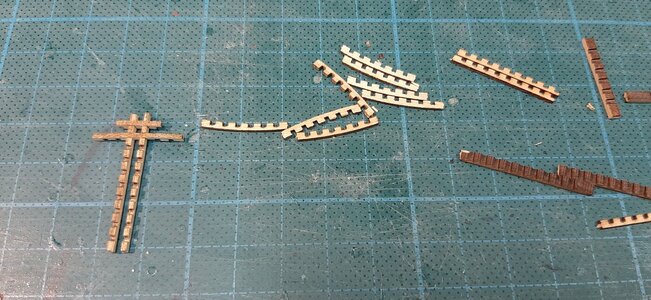
After putting the inner grate together I submerge them in schellack and use the schellack as glue.
Also the coaming received a layer of schellack.
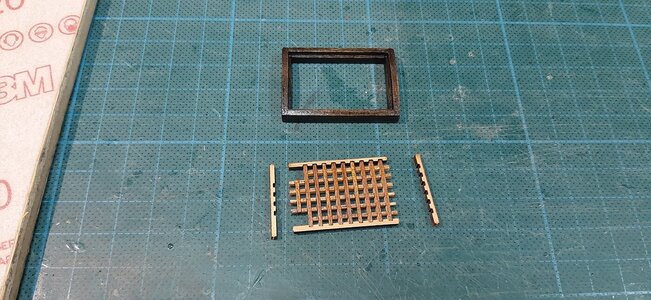
The edges of the grate I fitted with CA after which the grate is sanded into shape with the correct curvature to follow the coaming.
The coaming I finally sanded with steel wool to remove the gloss of the schellack.
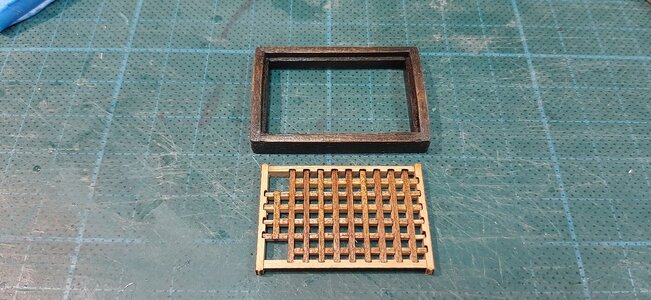
After shaping the grate it fits into the coaming perfectly.
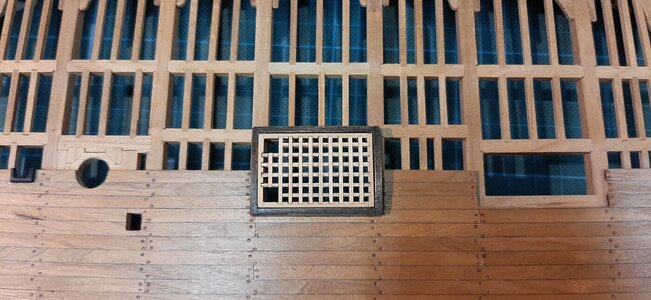
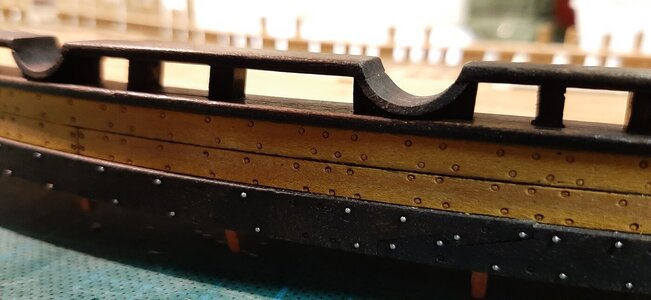
Now it gets its final treatment with Clou resulting in a matt finish in a nice contrast to the satin of the coaming. A simuation of nails is made with a heated needle creating the final result of the first hatch.
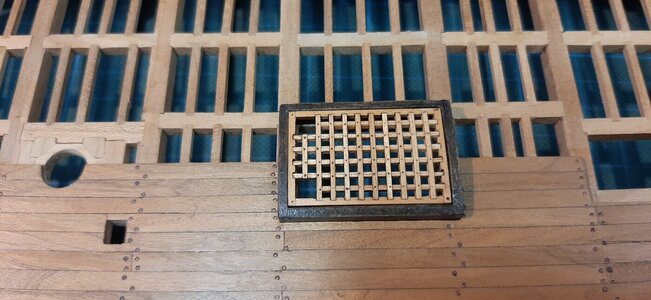
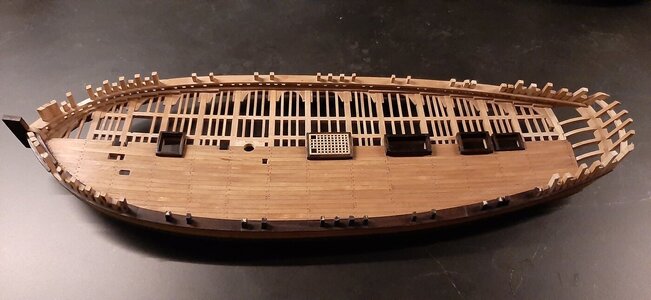
After preparing the coamings it is time for the gratings.
These are made from lasered parts.
The thinner ones for the grate and the thicker part for the edges of the grate.

To make them fit snug the grate parts should be slightly sanded.
The material is very brittle so it is unavoidable that some minor edges will flinter off during sanding.


After putting the inner grate together I submerge them in schellack and use the schellack as glue.
Also the coaming received a layer of schellack.

The edges of the grate I fitted with CA after which the grate is sanded into shape with the correct curvature to follow the coaming.
The coaming I finally sanded with steel wool to remove the gloss of the schellack.

After shaping the grate it fits into the coaming perfectly.

Now it gets its final treatment with Clou resulting in a matt finish in a nice contrast to the satin of the coaming. A simuation of nails is made with a heated needle creating the final result of the first hatch.


I like your "needle-nails" of the grating very much
Can you please shortly show us the "needle"?
Can you please shortly show us the "needle"?
Hi Heinrich,Just superb! Super-look on those gratings, Maarten! I can't wait to give the Clou a go on the Oak.
I love working with Clou, it dries in seconds and gives a veri nice matt look.
I will try to build up the tension.I like your "needle-nails" of the grating very much
Can you please shortly show us the "needle"?
Tada, here it is a very special standard needle. Sorry it is not more then that
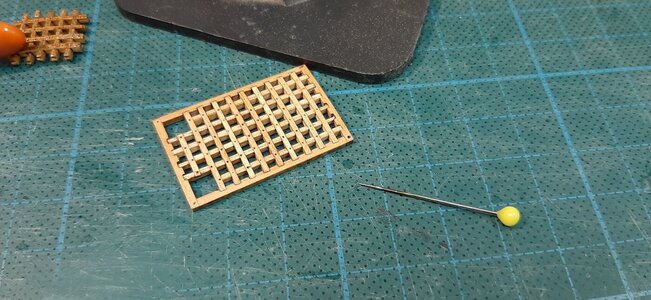
I heat it red glowing hot with a torch and then put it directly on the wood. You can imagine that the difficulty is to position it right. I think I will add one on my treenail soldering torch.
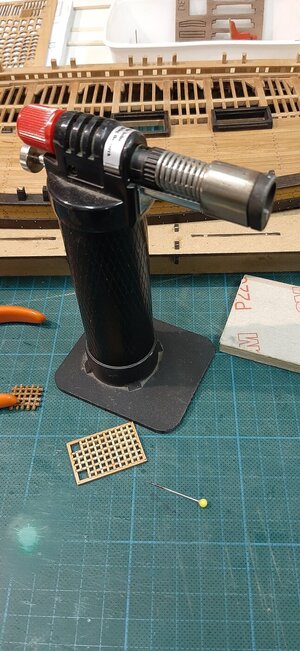
Slow progress on the gratings.
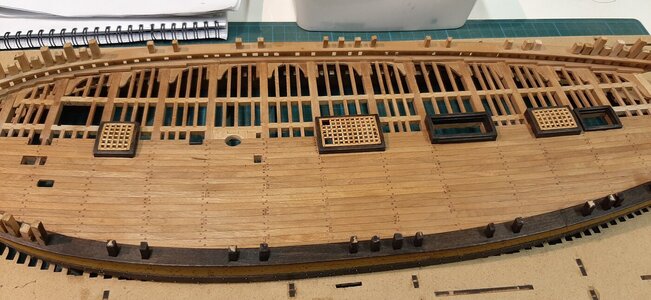
Hi Maarten.
The model looks very very good. I love the finishing touch with the needle-nails. All those small details just make a model look superb.
The model looks very very good. I love the finishing touch with the needle-nails. All those small details just make a model look superb.

The last work on the hatches. The gratings are all finished so on to the companion way into the rear quarters.
The parts except for the planks are cnc milled, the planks are lasered.
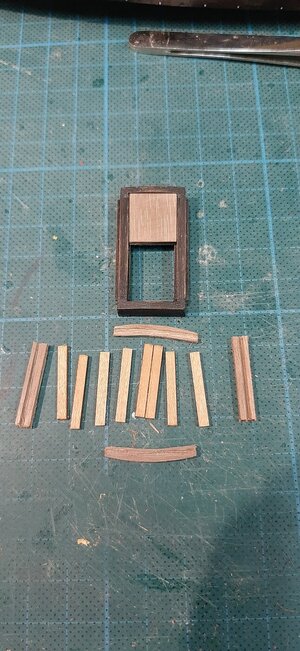
The lasered planks are slightly tapered due to the lasering process, here you can use that as the hatch of the companion way is slightly curved. Glueing the planks together you automatically create this curved shape.
In the solid insert in the companion way I have carved scratches to simulate planks.
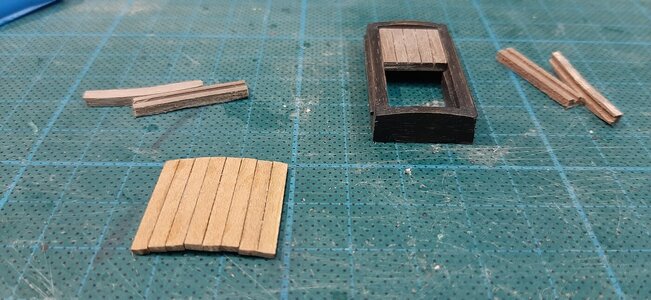
For the side of the hatch I have made two planks from rest material to cover the sides.
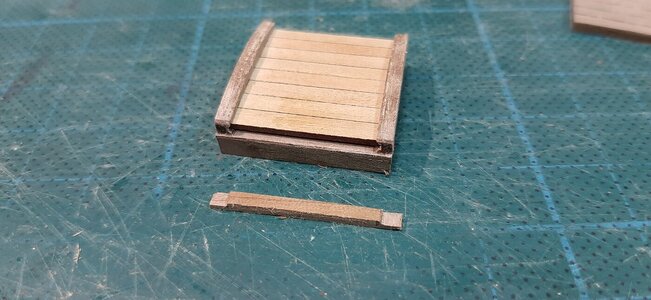
The hatch I have painted with shellack and slightly polished it with steel wool to give it just a little bit of gloss. From 0,6 mm annealed steel wire I made a handle for the hatch.
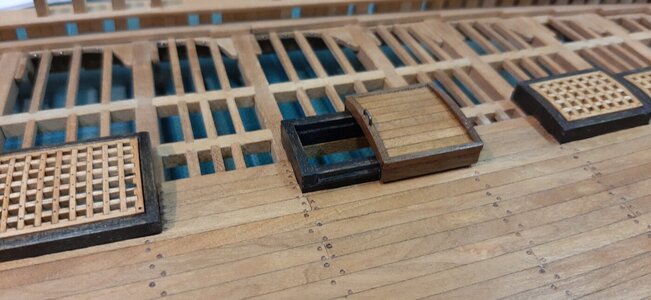
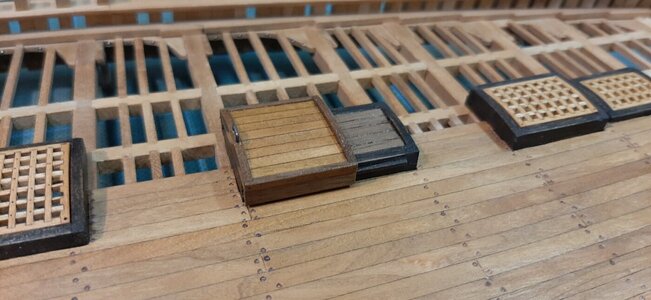
Now all hatches are finished I will remove then again, they are just snug fit. Next will be the top of the bullwarks.
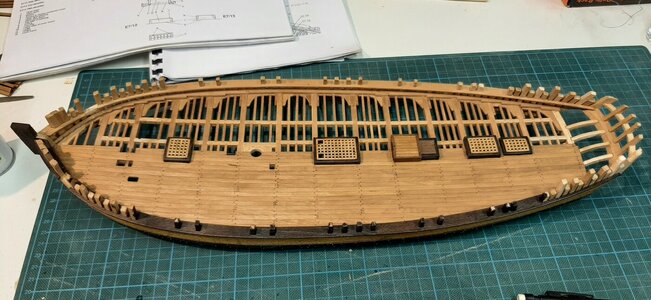
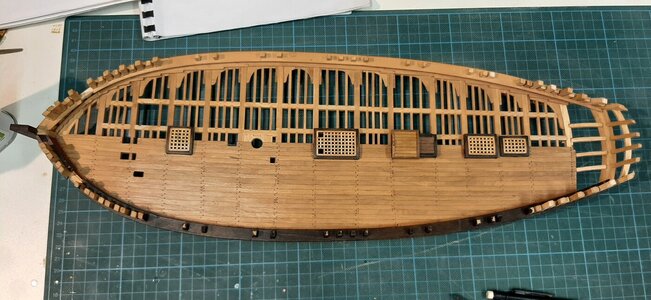
The parts except for the planks are cnc milled, the planks are lasered.

The lasered planks are slightly tapered due to the lasering process, here you can use that as the hatch of the companion way is slightly curved. Glueing the planks together you automatically create this curved shape.
In the solid insert in the companion way I have carved scratches to simulate planks.

For the side of the hatch I have made two planks from rest material to cover the sides.

The hatch I have painted with shellack and slightly polished it with steel wool to give it just a little bit of gloss. From 0,6 mm annealed steel wire I made a handle for the hatch.


Now all hatches are finished I will remove then again, they are just snug fit. Next will be the top of the bullwarks.


Always a joy to see your work my friend!
Thx gents for your comments and likes.
Allthough I am now just using kit parts the work on this kit is really fun.
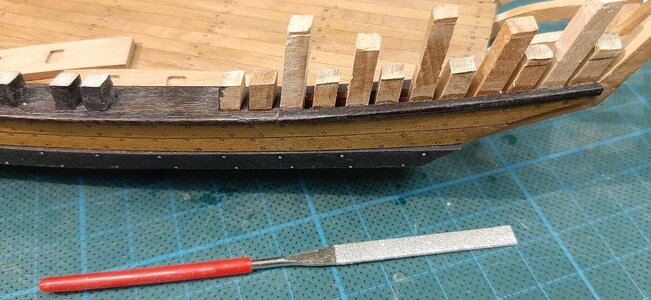
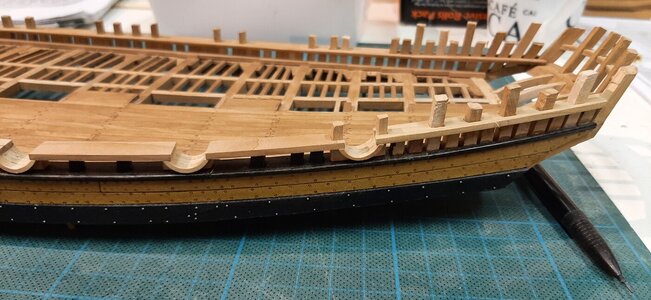
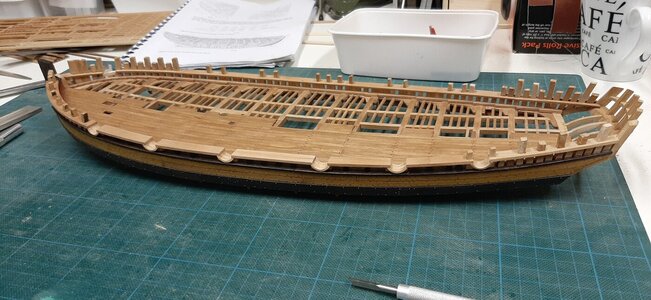
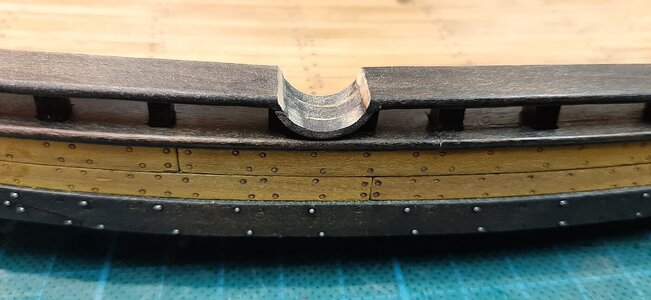
The bullwarks are now in progress and made of cnc milled parts which are oversized enough to create a perfect fit.
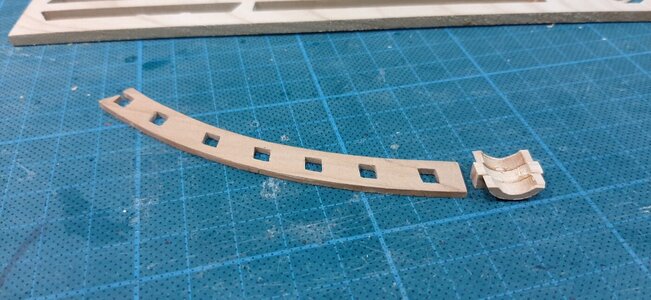
Again I will fit all parts roughly before finall finishing and fitting. After a lot of filing and fitting the first one fits.
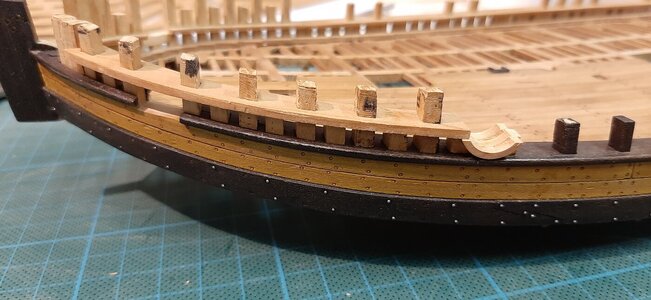
I use the gun port bottom inserts for determining the proper height of the bullwark.
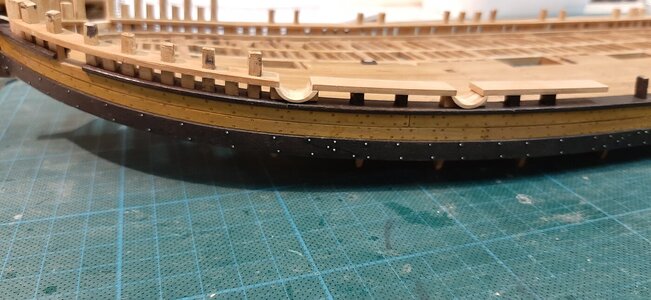
One to go and the PS side can be fine tuned and finished.
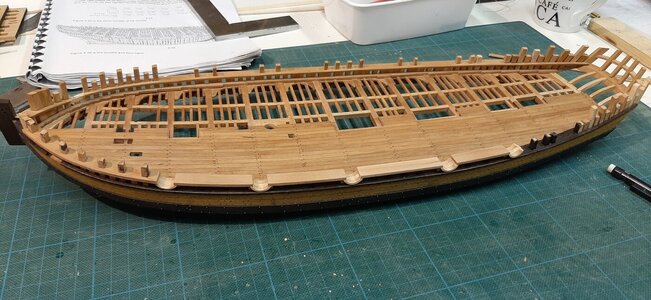
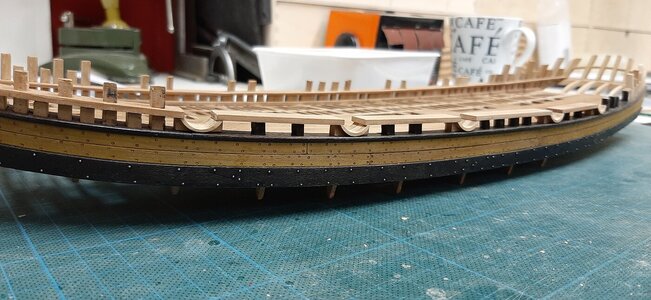
Allthough I am now just using kit parts the work on this kit is really fun.
The bullwarks are now in progress and made of cnc milled parts which are oversized enough to create a perfect fit.

Again I will fit all parts roughly before finall finishing and fitting. After a lot of filing and fitting the first one fits.

I use the gun port bottom inserts for determining the proper height of the bullwark.

One to go and the PS side can be fine tuned and finished.


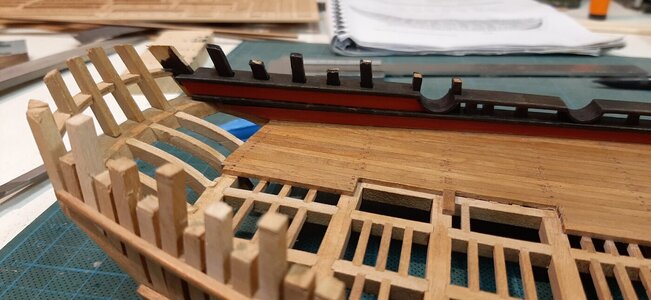
Next is my scratch build addition. The forward and aft bullwarks are planked inside and outside.
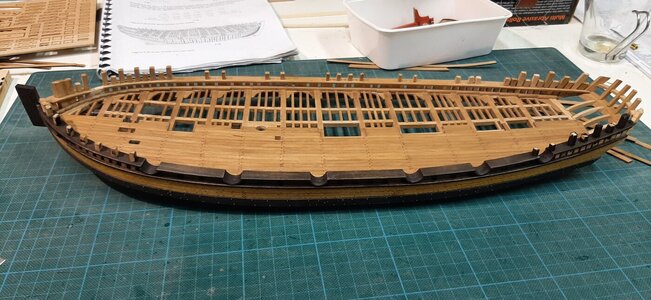
The forward side.
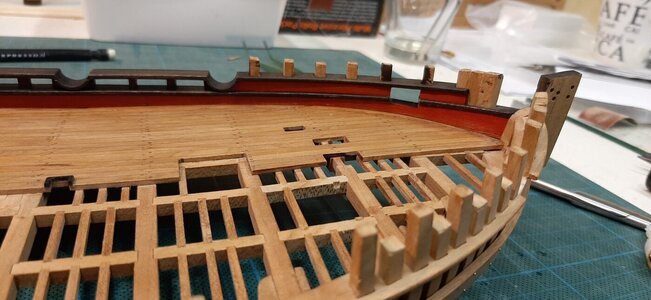
And the aft side.
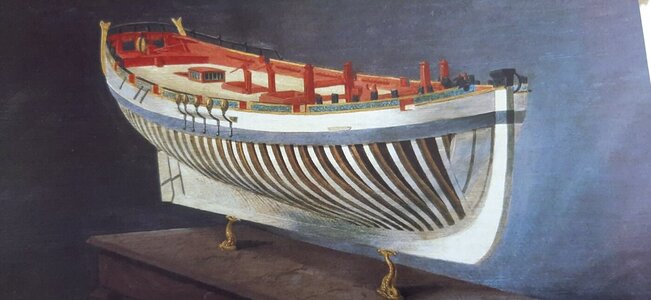
For the outside I am inspired by the contemporary painting of Alert with the painted friezes.
To do this I use a technique of transfering a print to wood.
I use a hobby lacquer and put a layer on the plank and let it dry.
I prepared fitting friezes and put a thick layer of lacquer on the printed surface.
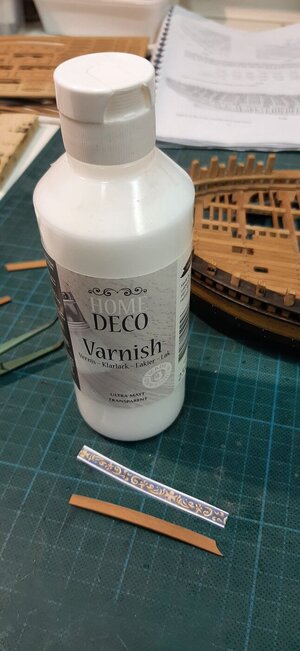
Put a layer of lacquer on the wood also and glue the image on top of the wood.
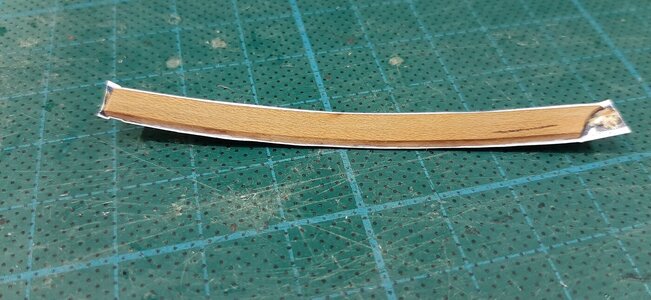
Let the glue dry, you see the backside of the paper.
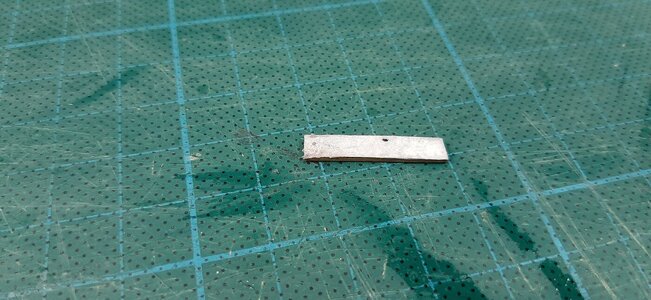
When dry you wet the paper and carefully start rubbing it away using plentyfull water.
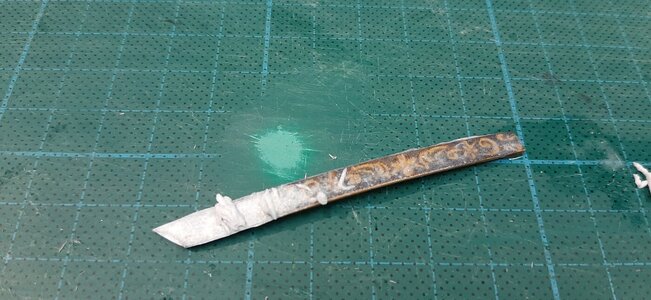
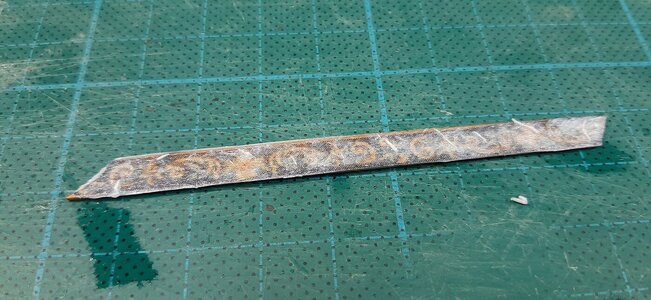
When the paper is rubbed away the image becomes visible.
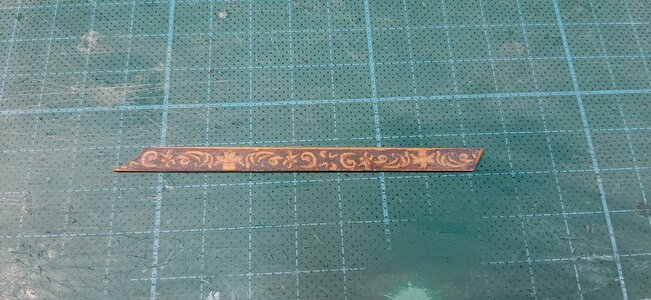
Now cover it with lacquer, I use multiple layers of schellack.
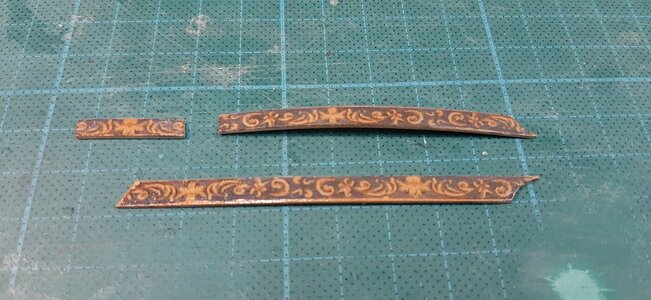
My first idea was to highlight accents with oil paint put I don t think that is needed.
The friezes are fitted.
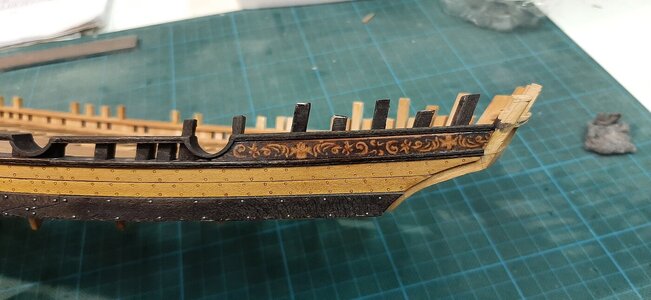
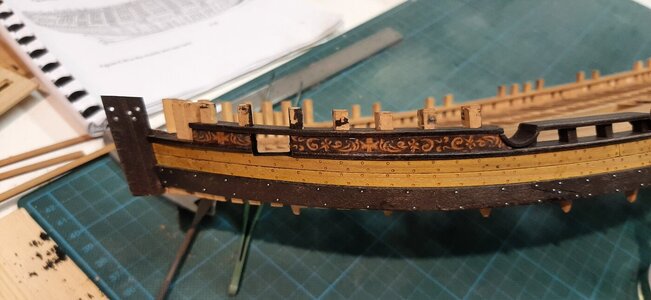
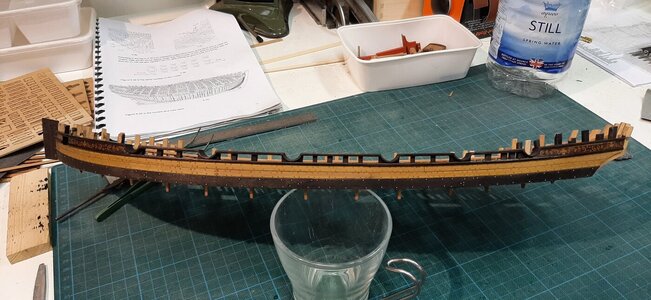
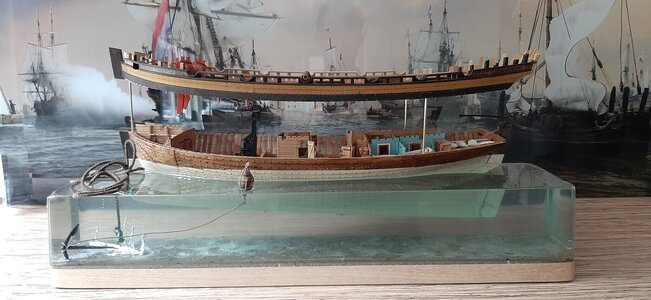
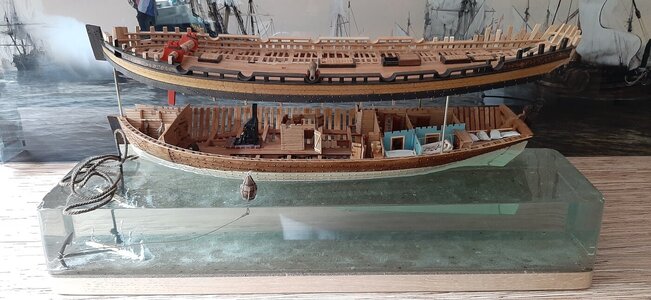
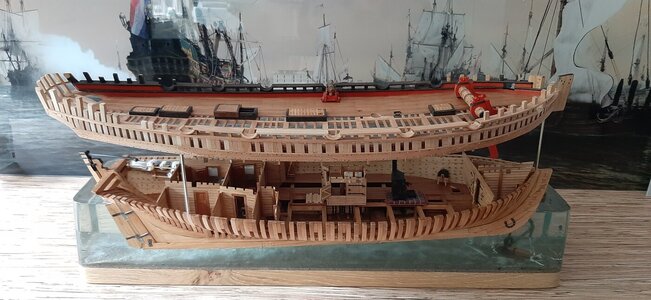
And an overview.
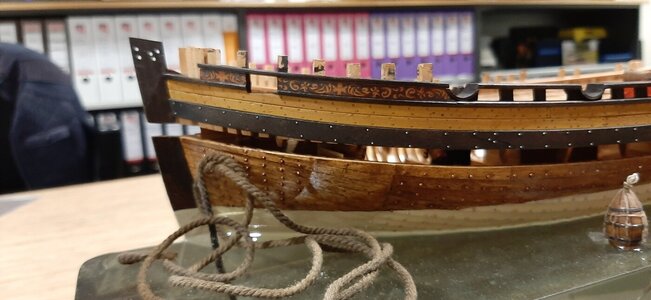
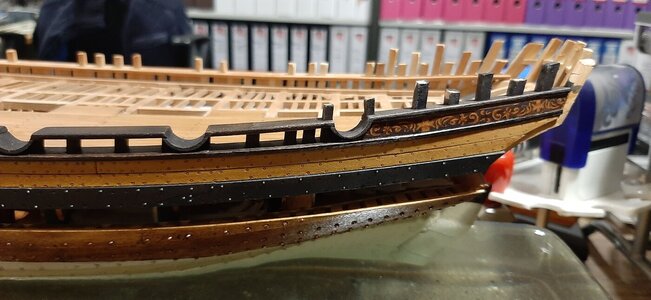
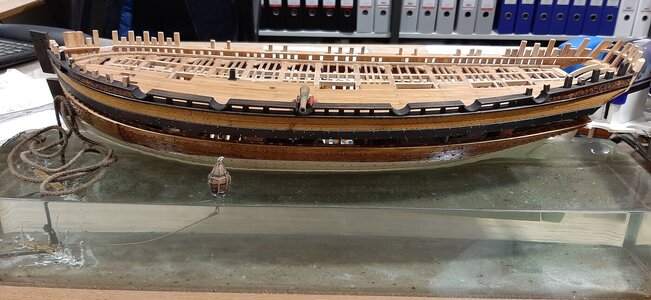
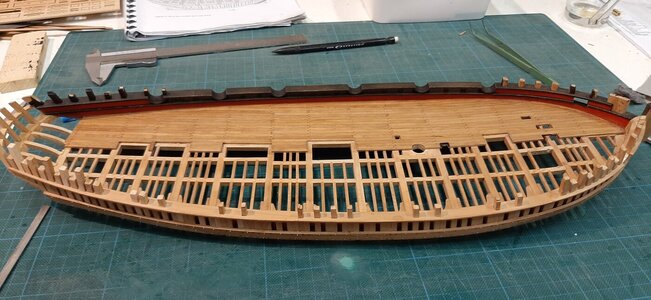

The forward side.

And the aft side.

For the outside I am inspired by the contemporary painting of Alert with the painted friezes.

To do this I use a technique of transfering a print to wood.
I use a hobby lacquer and put a layer on the plank and let it dry.
I prepared fitting friezes and put a thick layer of lacquer on the printed surface.

Put a layer of lacquer on the wood also and glue the image on top of the wood.

Let the glue dry, you see the backside of the paper.

When dry you wet the paper and carefully start rubbing it away using plentyfull water.


When the paper is rubbed away the image becomes visible.

Now cover it with lacquer, I use multiple layers of schellack.

My first idea was to highlight accents with oil paint put I don t think that is needed.
The friezes are fitted.


And an overview.


Last edited:
- Joined
- Apr 20, 2020
- Messages
- 6,234
- Points
- 738


Wow, looks marvelousNext is my scratch build addition. The forward and aft bullwarks are planked inside and outside.
View attachment 324091
The forward side.
View attachment 324092
And the aft side.
View attachment 324093
For the outside I am inspired by the contemporary painting of Alert with the painted friezes.
View attachment 324095
To do this I use a technique of transfering a print to wood.
I use a hobby lacquer and put a layer on the plank and let it dry.
I prepared fitting friezes and put a thick layer of lacquer on the printed surface.
View attachment 324096
Put a layer of lacquer on the wood also and glue the image on top of the wood.
View attachment 324097
Let the glue dry, you see the backside of the paper.
View attachment 324108
When dry you wet the paper and carefully start rubbing it away using plentyfull water.
View attachment 324100
View attachment 324098
When the paper is rubbed away the image becomes visible.
View attachment 324099
Now cover it with lacquer, I use multiple layers of schellack.
View attachment 324101
My first idea was to highlight accets with oil paint put I don t think that is needed.
The friezes are fitted.
View attachment 324102
View attachment 324103
View attachment 324104
And an overview.
View attachment 324105
View attachment 324106
View attachment 324107
View attachment 324094


Great idea with the decoration - I have to keep this method in my mind....
That looks very nice, Maarten. Interesting technique to transfer the painting.
Regards, Peter
Regards, Peter


