HMS Blandford 1:48 POF Modelship Dockyard [COMPLETED BUILD]

Hi Ken,

Just catching up with your build. It looks amazing, that's a lot of pieces to place so neatly! What type of wood is used for the framing? It looks really nice the way you have finished it, what type of stain/varnish did you use? Usually I avoid the CA glue because I find that stain doesn't take if it gets onto places where it shouldn't be (I can be a messy worker at times!) but then again, it is so much faster to use.

We will try to drop by sometime and say hello but the weather we have been having has been so rubbish we haven't ventured out to the Red rocks on our bikes for a while. Hopefully, the weather will improve.

Dom
Hi Dom, Thanks. Hopefully when the weather improves you’ll get a chance to pop by, there’s always tea at the ready, you’d be welcome. The wood is all pear, I used a spirit stain and Ronseal satin poly varnish, I find that this combo always works well. I too don’t overly like cyno for the reason you state that’s why I stained and varnished the wood before I glued the batons so that I could wipe any cyno away and not get marking issues. Nice idea for dust prevention, I ended up using my spray booth extractor and a vac on my bench but using a sanding drum still throws dust up into the air, you wouldn’t believe just how much dust is created shaping the ribs, the outdoor solution was the only real option for me. Ken
 
Last edited:
I ordered this kit a month ago and it was shipped 3.5 weeks ago but still not arrived; how long did you wait to get your one from China to the UK Ken?
Hi Ian, I didn’t get my kit direct from the factory it had been pre ordered by someone else so I’m afraid that I can’t help. One thing though I did find Modelship Dockyard very helpful, I’ve needed to contact them on three occasions about how to do things and each time I got a satisfactory reply within a day.
 
Hello and welcome again. I’ve finished my Wappen Von Hamburg log and can now give my full attention to Blandford. Although I haven’t been posting updates of my progress I have still been building, it’s coming along apace and I’m quite behind with my log so have much to catch up on, but bit at a time.

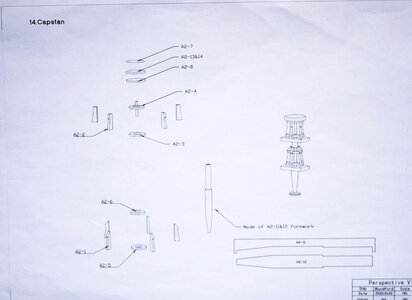
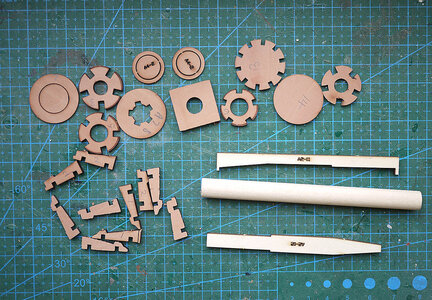
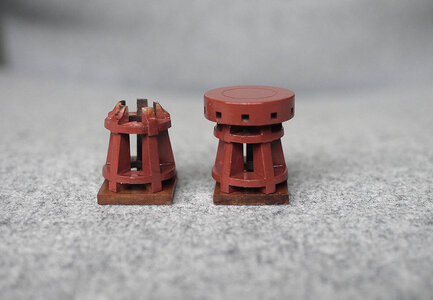
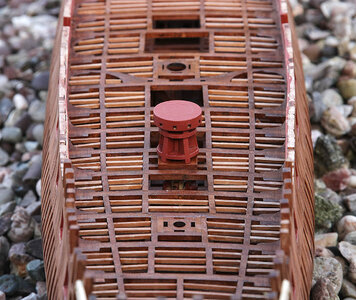
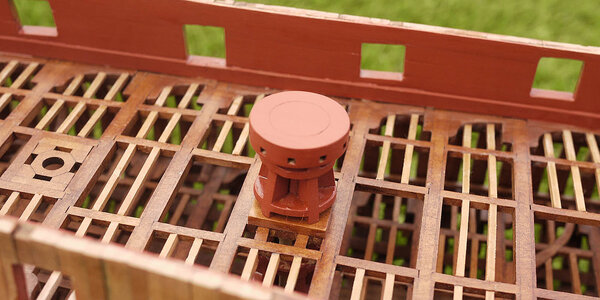
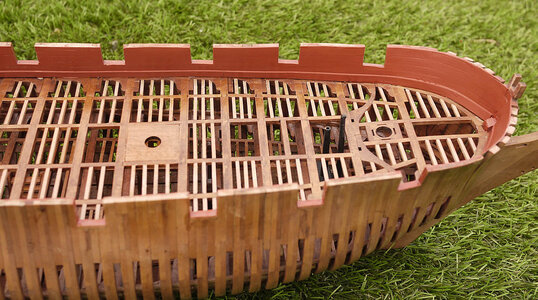
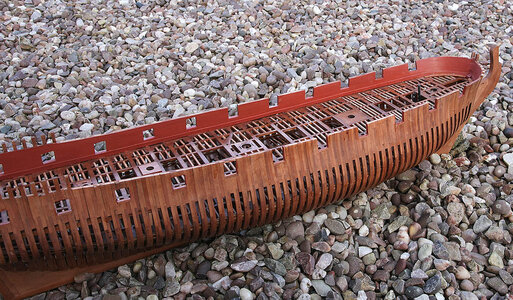
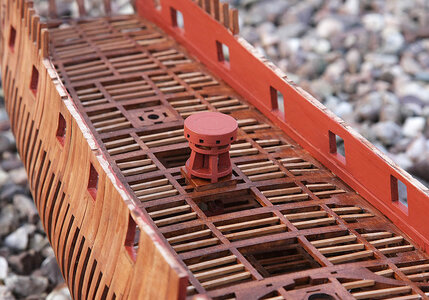
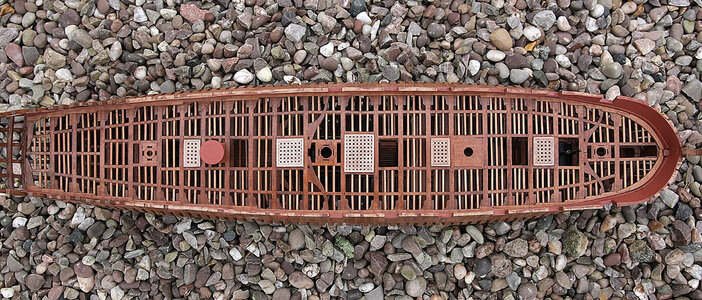
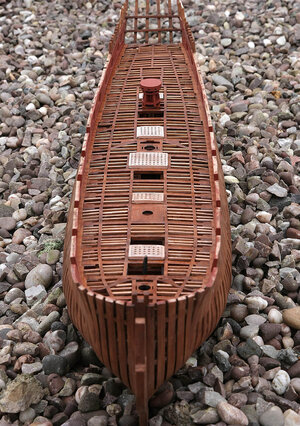
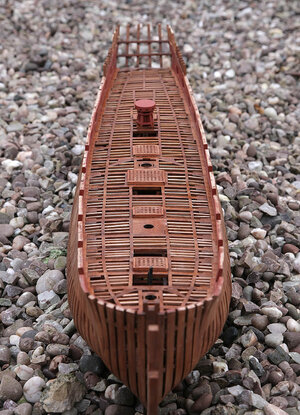
The next stage of the instructions was to make up and fit the capstan. It was quite a nice part and went together well, but it should have been made up and partially fitted at the same time as the lower deck as now it couldn’t be fitted correctly. I had to cut it in half, pass the lower half through one of the larger hatches complete with its base, slide it along before I could fix it in place, it was pretty tricky but ok in the end. I then had to make up a different spindle as I couldn’t now fit the original, all ok in the end, just incorrect sequence in the instructions. You’ll notice in the photos that the inner hull planking had been done by the time I got around to taking a picture, I’ll show and explain in my next post.


307.jpg

309.jpg

308.jpg

328.jpg
 
I ordered this kit a month ago and it was shipped 3.5 weeks ago but still not arrived; how long did you wait to get your one from China to the UK Ken?
Hi Ian it took my kit about a month to get here to sunny Yorkshire but that was in the summer when postal traffic was not as silly as it is at this time of year
I also managed to avoid any customs charges
Hope you get yours soon it is well worth the wait
Andy
 
Hello and welcome again. I’ve finished my Wappen Von Hamburg log and can now give my full attention to Blandford. Although I haven’t been posting updates of my progress I have still been building, it’s coming along apace and I’m quite behind with my log so have much to catch up on, but bit at a time.

The next stage of the instructions was to make up and fit the capstan. It was quite a nice part and went together well, but it should have been made up and partially fitted at the same time as the lower deck as now it couldn’t be fitted correctly. I had to cut it in half, pass the lower half through one of the larger hatches complete with its base, slide it along before I could fix it in place, it was pretty tricky but ok in the end. I then had to make up a different spindle as I couldn’t now fit the original, all ok in the end, just incorrect sequence in the instructions. You’ll notice in the photos that the inner hull planking had been done by the time I got around to taking a picture, I’ll show and explain in my next post.


View attachment 413016

View attachment 413020

View attachment 413017

View attachment 413019
Sorry Ken, missed that one. Should of alerted you to the fact the capstan needed to be fitted before you closed up the main deck (You probably don't look at it now, but it was in my build log.) lt looks like you've sorted it anyway
 
Hello once more, and thanks to those who are following my build and contributing with comments and likes, it does make a difference.

Today’s update is the fitting of the internal planking, this is where the lack of any realistic build guide starts to show, a pity because everything else about the model is very good, I’ll explain.

I’m sceptical about computer designed pre shaped planking, if the hull is even the slightest bit out, (easily done on this type of build) from the computed version the pre shaped planks are unlikely to fit snugly against each other. Fortunately this wasn’t an issue as they eventually went together quite well, but I would still have preferred plain planks to make up myself because if you make a mistake and need to remove a pre shaped one unless you have spare pear wood to make another your in trouble.

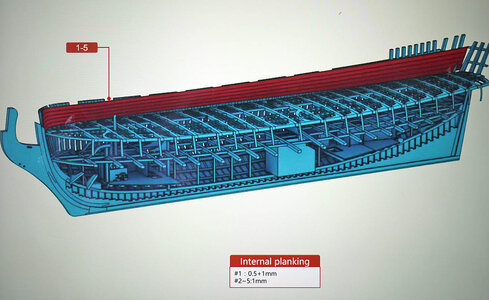
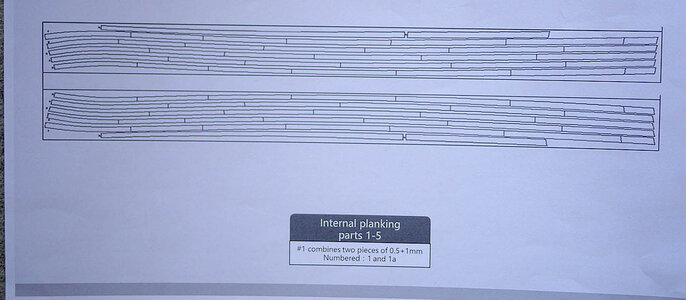
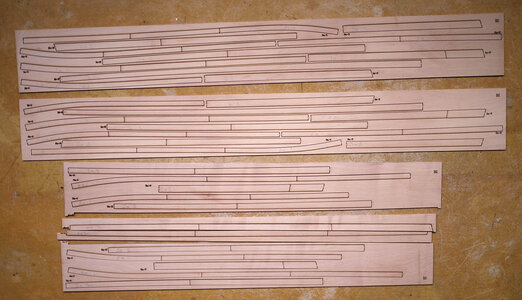
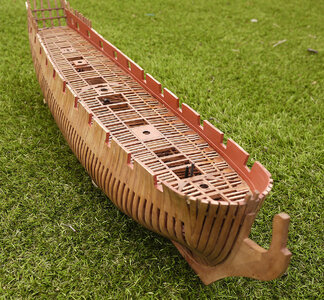
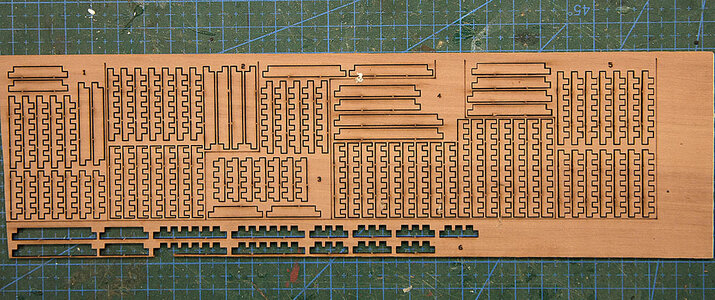
My first issue was identifying the planks to use from over a hundred supplied for the inner and outer hull. I’ve shown the only reference to this part of the build, a computer generated picture which isn’t very helpful and a sheet from the instructions showing two pear sheets that the planks are taken from. I couldn’t find any sheet which resembled the ones shown and thought that they were missing. I contacted Modelship Dockyard and received a reply the same day telling me the sheet numbers that I would find the parts on. I’ve shown a picture of these sheets, there are four not two and they don’t look anything like those shown in the instructions, but at least I’ve got them. There are forty four planks, each numbered differently, some port, some starboard but nothing indicating which number went where. After a short ponder it became obvious and the sequence of fitting once understood was fairly simple and it built up fairly quickly with an acceptable result. The only area that caused any slight difficulty was where the bow flared outwards but this section won’t be seen as it’s under the poop deck. I sanded, sealed the painted using Caldercraft red acrylic. A satisfactory outcome.

These are the only reference on how to do the planking

305.jpg

305a.jpg

These are the actual planks

306.jpg

The results

318.jpg

319.jpg

320.jpg


326.jpg

327.jpg
 
Last edited:
Fantastic job Ken. Like you l found this part of the build very confusing with the lack of instructions. Also l had problems with the finish l used not allowing good adhesion with the planks, especially at the bow. They also fell a bit short at the stern on both sides, about 8 mm, although they followed the line of the counter timbers. Your planking is extremely well done and looks great
 
Fantastic job Ken. Like you l found this part of the build very confusing with the lack of instructions. Also l had problems with the finish l used not allowing good adhesion with the planks, especially at the bow. They also fell a bit short at the stern on both sides, about 8 mm, although they followed the line of the counter timbers. Your planking is extremely well done and looks great
Hi Keith, Thanks, As I mentioned I’m a little ahead with the build and I’m finding things more and more confusing, lots of thought needed to to make decent progress
 
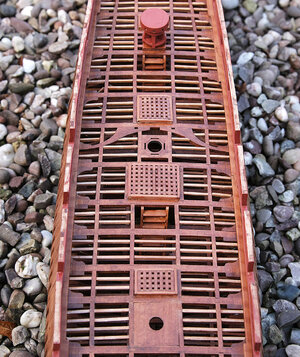
Good morning, again welcome. Today’s post is catching up with the progress I’ve made. I fitted the waterways, these comprised of eight strips in total, each with a scarf joint that fitted quite well and were shaped to take in the planking ends.

Next were the hatches and ladders, these were the usual slot together honeycomb type that were a very good fit, but cleaning up the char was a real pain. When fitted I oiled them along with the waterways and was happy with the results. I’d tested Danish oil earlier and hadn’t been very impressed with the finish, however because of the good opinion of its use by more experienced builders I tried again, I realised that several very thin coats produced a finish that I’d hoped for,( I’d only used one thick coat previously) so for the rest of the build, planking, hull. keel etc its no more stain and varnish but just an oiled finish.

329.jpg

331.jpg

332.jpg

335.jpg

337.jpg
 
Good morning, again welcome. Today’s post is catching up with the progress I’ve made. I fitted the waterways, these comprised of eight strips in total, each with a scarf joint that fitted quite well and were shaped to take in the planking ends.

Next were the hatches and ladders, these were the usual slot together honeycomb type that were a very good fit, but cleaning up the char was a real pain. When fitted I oiled them along with the waterways and was happy with the results. I’d tested Danish oil earlier and hadn’t been very impressed with the finish, however because of the good opinion of its use by more experienced builders I tried again, I realised that several very thin coats produced a finish that I’d hoped for,( I’d only used one thick coat previously) so for the rest of the build, planking, hull. keel etc its no more stain and varnish but just an oiled finish.

View attachment 413469

View attachment 413470

View attachment 413471

View attachment 413472

View attachment 413473
Looking good I will be starting mine soon I hope it turns out half as good as yours
 
Hi Ken,

Just catching up with your build. It looks amazing, that's a lot of pieces to place so neatly! What type of wood is used for the framing? It looks really nice the way you have finished it, what type of stain/varnish did you use? Usually I avoid the CA glue because I find that stain doesn't take if it gets onto places where it shouldn't be (I can be a messy worker at times!) but then again, it is so much faster to use.

We will try to drop by sometime and say hello but the weather we have been having has been so rubbish we haven't ventured out to the Red rocks on our bikes for a while. Hopefully, the weather will improve.

Dom
The whole kit is Swiss pear wood.
Hi Ian, I didn’t get my kit direct from the factory it had been pre ordered by someone else so I’m afraid that I can’t help. One thing though I did find Modelship Dockyard very helpful, I’ve needed to contact them on three occasions about how to do things and each time I got a satisfactory reply within a day.
Thanks Ken; it actually arrived today :)
 
Ken,

I've read through your complete build log over the last few days. Superb work and excellent photography. This, along with your detailed narrative to explain the pictures will be invaluable to any model builder. Thank you for taking the time to share! I am considering this as a next build. If the wife gives the OK, I may order the kit, since it has produced such a nice model.

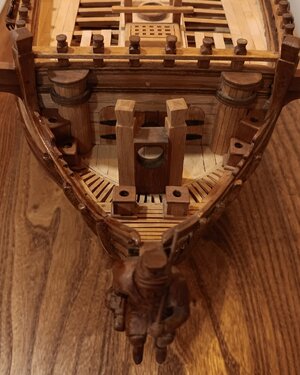
Finally, I too use Danish oil for finishing. WATCO, here in the US, has three shades (clear, light walnut and dark walnut), which I used to "paint", hoping to make different elements pop or stand out. I've only used Pear and Alder but as you see below, the various shades "color" a nice picture, without using paint, which I feel covers the wonderful wood grain.

I look forward to watching your future progress!
bow.jpg
 
@DradNSW: Nice information about Watco Danish oils. Did the Bow figure originally boxwood? Or more simply what was the original wood for everything? I'm trying to see the depth of the clear vs light vs dark walnut oil. Thanks for posting.
 
@DradNSW: Nice information about Watco Danish oils. Did the Bow figure originally boxwood? Or more simply what was the original wood for everything? I'm trying to see the depth of the clear vs light vs dark walnut oil. Thanks for posting.
Loracs,
I replied with multiple pictures in a PM, so we don't detract from Kens awesome build log.
 
Back
Top