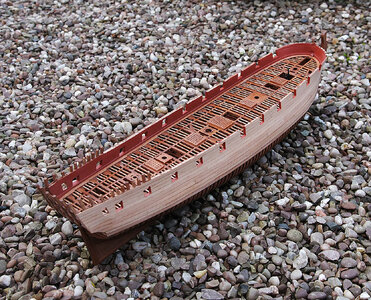
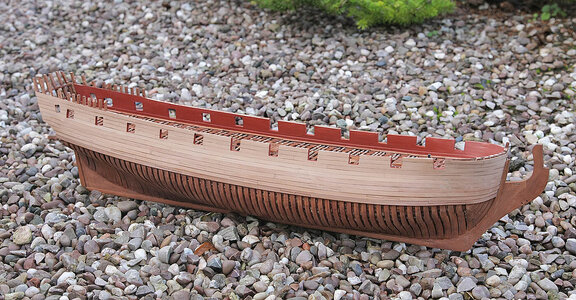
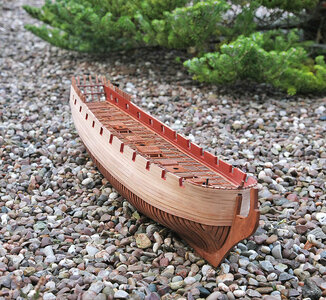
HMS Blandford 1:48 POF Modelship Dockyard [COMPLETED BUILD]

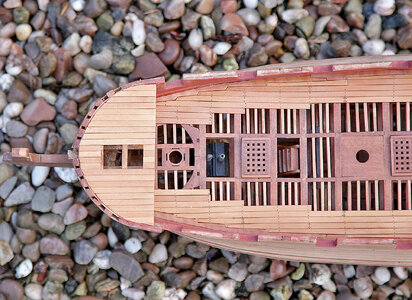
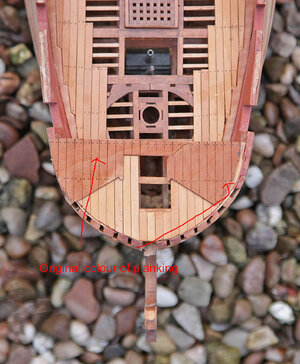
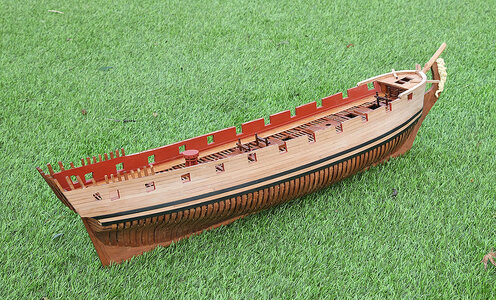
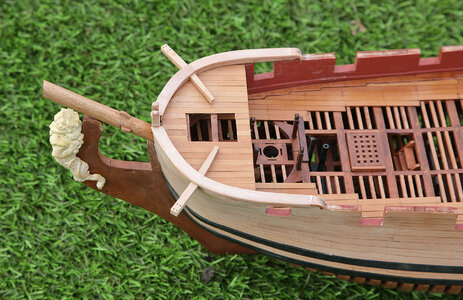
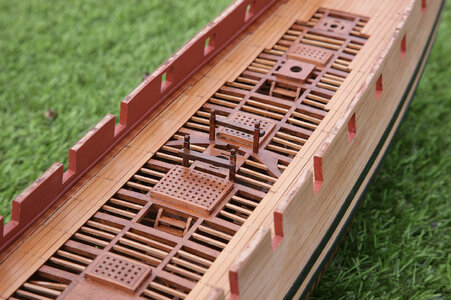
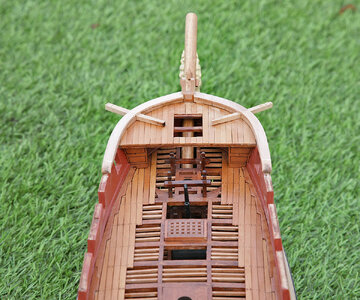
Good morning, again welcome. Today’s post is catching up with the progress I’ve made. I fitted the waterways, these comprised of eight strips in total, each with a scarf joint that fitted quite well and were shaped to take in the planking ends.

Next were the hatches and ladders, these were the usual slot together honeycomb type that were a very good fit, but cleaning up the char was a real pain. When fitted I oiled them along with the waterways and was happy with the results. I’d tested Danish oil earlier and hadn’t been very impressed with the finish, however because of the good opinion of its use by more experienced builders I tried again, I realised that several very thin coats produced a finish that I’d hoped for,( I’d only used one thick coat previously) so for the rest of the build, planking, hull. keel etc its no more stain and varnish but just an oiled finish.

View attachment 413469

View attachment 413470

View attachment 413471

View attachment 413472

View attachment 413473

Looks wonderful Ken !!!Okay:)

 
Ken,

I've read through your complete build log over the last few days. Superb work and excellent photography. This, along with your detailed narrative to explain the pictures will be invaluable to any model builder. Thank you for taking the time to share! I am considering this as a next build. If the wife gives the OK, I may order the kit, since it has produced such a nice model.

Finally, I too use Danish oil for finishing. WATCO, here in the US, has three shades (clear, light walnut and dark walnut), which I used to "paint", hoping to make different elements pop or stand out. I've only used Pear and Alder but as you see below, the various shades "color" a nice picture, without using paint, which I feel covers the wonderful wood grain.

I look forward to watching your future progress!
View attachment 413672
Hi Brad, Thank you for your very complimentary and informative reply. It’s comments like this that make the effort of doing a log worth while. The very clean, precise work on the section of your model that you’ve shown speaks volumes for your obvious modell skills. Ken
 
Hello everyone and welcome. It feels a bit repetative in thanking you yet again for your responses to my log but they’re so encouraging that I feel that I must.

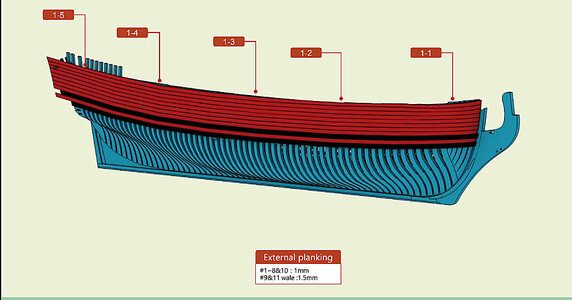
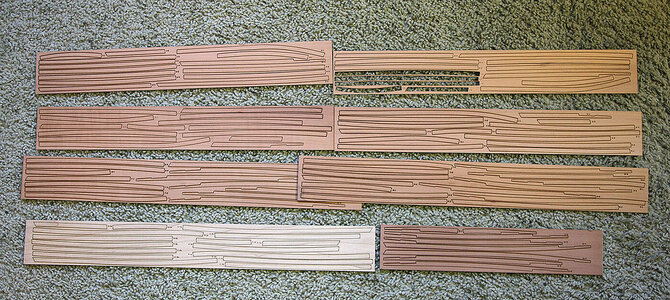
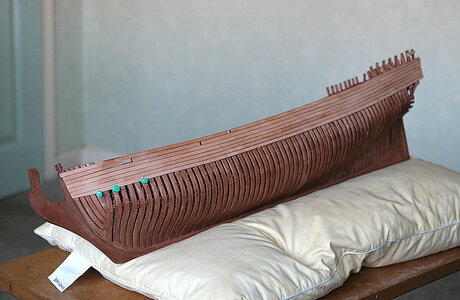
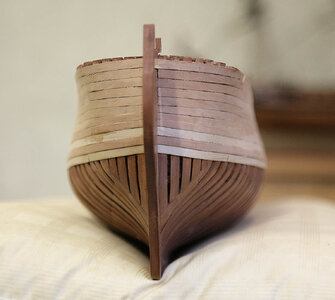
Today I’m still in catch up mode, this time it is the completion of the hull planking. I’ve shown the instructions that you get from the online manual, not much but having worked out the numbering system used on the inner planking I had no issue following their fit sequence. Start at the top No 1 plank, No 1.1 at the bow then, 1.2 .3.4 etc. working back, the only difference being the wales which are doubled up, fitting .5mm plank first. All the planks are pre shaped and I had the same concerns that I had with the inner planking, but again they fitted well. I only needed to slightly taper the lower three planks to prevent them twisting at the bow, only one plank was left with a very slight gap, hardly noticeable, there is also a slight depression near the bow but fortunately this will be covered by the anchor billboard so I’ll rate this part of the build a success. I cut out and painted the port openings to finish off. A word of warning to anyone building this, there are about a hundred planks all very similar so before you start number them all because the sheets are a bit frail after about half the planks are removed they fall apart and the planks become detached.


338a.jpg

339.jpg

340.jpg

Before sanding and fitting the wale which are scarf jointed

341.jpg

343.jpg

344.jpg

345.jpg
 
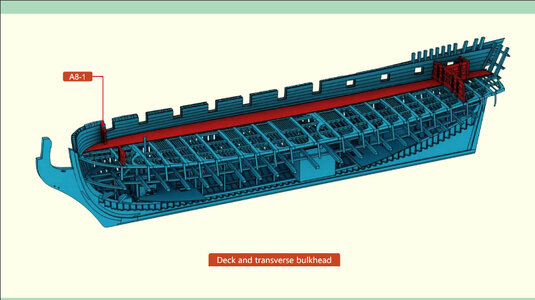
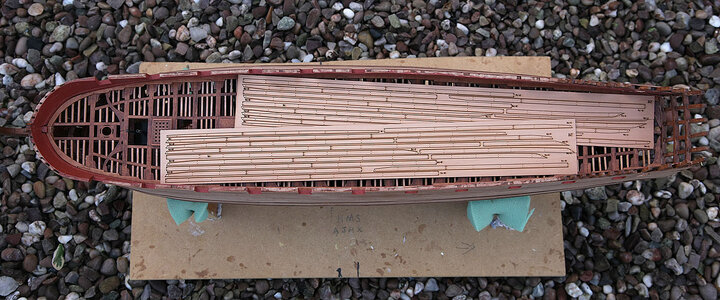
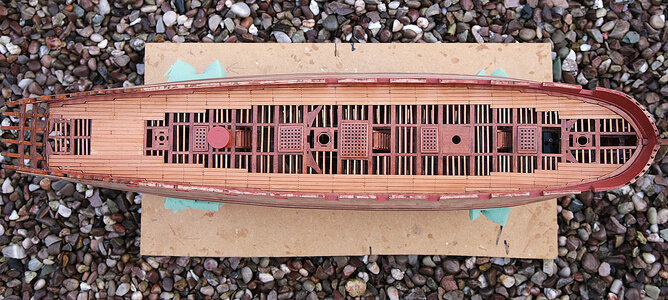
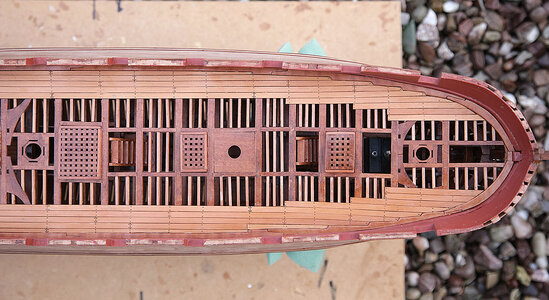
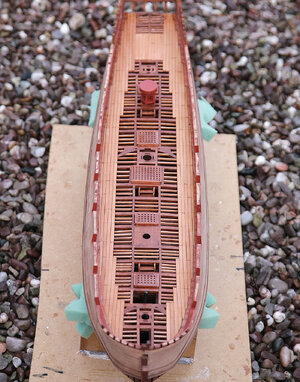
Hello again. Today I’m still in catch up mode, this time showing the deck planking. Yet again although there are several pre shaped planks, each numbered but there was no clue as to where they fitted. Each plank was shaped different with their ends tapered to fit into the waterways, both port and starboard, I’ve shown the only reference to deck planking. Again I contacted Modelship Dockyard who quickly replied as to the sequence. I’m now going to have a bit of a rant, each plank has treenails laser burnt into them, and they don’t look anything like authentic and look tacky. Modellers at this level of build I’m certain would much prefer to do their own treenails using their preferred method, and make them much more subtle. As they are if you need to slightly adjust the plank the laser nails will be out of line and look wrong, or if like me you wanted to lay the planks in a different pattern you have a problem as the nails aren’t spaced uniformly. That moan out of the way, I started laying the planks, the outer two were pretty obvious and with a little sanding they fitted quite well. I decided that rather than just have straight sections of planking on each side I wanted to stagger the planks in sections that would emphasise the beams and battens in a more presentable way, I think that the pattern worked out quite well, but it was fun and games trying to lay it out without glue at first to see what worked, it was like playing “pick up sticks” move one and they all just fell out of place. I had to cut up the planks re sizing them, sand their ends to shape for the waterways, this is where the burnt in nails caused a problem, I also used some scrap for planks I did managed to place most problem planks where they might not be seen, under the quarter deck, canons, ships wheel etc. I ended up with a deck that I had wanted and like the way it looks. Happy boy.

347a.jpg

348.jpg

349.jpg

351.jpg352.jpg
 
Hi Ken,

I have been following your build log with great interest. What an awesome build!

To avoid the burnt-in nails, would it be possible to lay the planks upside down on the other side of the ship?

--
Jøran
Hi Jean, Thanks for your thumbs up on the build. Yes I had thought of that swapping port planks for starboard but to no avail as the they are burnt right through, a pity.
 
You made the best out of the situation - the problem was defintely, that the waterway planks were already fixed - when they would be adjusted and appr-. 1 cm fore the treenailing of the planking would be appr. over the deck beams, where they should be
Good work my friend
 
Hello again. Today I’m still in catch up mode, this time showing the deck planking. Yet again although there are several pre shaped planks, each numbered but there was no clue as to where they fitted. Each plank was shaped different with their ends tapered to fit into the waterways, both port and starboard, I’ve shown the only reference to deck planking. Again I contacted Modelship Dockyard who quickly replied as to the sequence. I’m now going to have a bit of a rant, each plank has treenails laser burnt into them, and they don’t look anything like authentic and look tacky. Modellers at this level of build I’m certain would much prefer to do their own treenails using their preferred method, and make them much more subtle. As they are if you need to slightly adjust the plank the laser nails will be out of line and look wrong, or if like me you wanted to lay the planks in a different pattern you have a problem as the nails aren’t spaced uniformly. That moan out of the way, I started laying the planks, the outer two were pretty obvious and with a little sanding they fitted quite well. I decided that rather than just have straight sections of planking on each side I wanted to stagger the planks in sections that would emphasise the beams and battens in a more presentable way, I think that the pattern worked out quite well, but it was fun and games trying to lay it out without glue at first to see what worked, it was like playing “pick up sticks” move one and they all just fell out of place. I had to cut up the planks re sizing them, sand their ends to shape for the waterways, this is where the burnt in nails caused a problem, I also used some scrap for planks I did managed to place most problem planks where they might not be seen, under the quarter deck, canons, ships wheel etc. I ended up with a deck that I had wanted and like the way it looks. Happy boy.

View attachment 413999

View attachment 414000

View attachment 414001

View attachment 414002View attachment 414003
Hi Ken.
It's all looking good. I agree with you about the tree nails, but not only that I had a devil of a job getting them to sit over an actual beam and in a lot of cases I had to re-drill them and darken the hole with a black acrylic pen. Like Jøran I thought of reversing sides and them upside down, but the ones that came in my kit had too many burn and scorch marks and would have taken a mountain of sanding. In the end I just let the guns disguise the bad ones.

Cheers JJ..
 
You made the best out of the situation - the problem was defintely, that the waterway planks were already fixed - when they would be adjusted and appr-. 1 cm fore the treenailing of the planking would be appr. over the deck beams, where they should be
Good work my friend
That also seemed like a solution, I tried it, but the curve at the bow made it very difficult and would probably have had to be remade. JJ..
 
That also seemed like a solution, I tried it, but the curve at the bow made it very difficult and would probably have had to be remade. JJ..
yes remaking of the waterway from scratch - the form etc. of the notches / teeth would be the same "only" the outside with connection towards the framing has to be adjusted - just an idea for others
 
You made the best out of the situation - the problem was defintely, that the waterway planks were already fixed - when they would be adjusted and appr-. 1 cm fore the treenailing of the planking would be appr. over the deck beams, where they should be
Good work my friend
Hi Ewe, I think that I just about got away with it. The parts that are pre cut are so accurate that if you adjust them the slightest it then has a knock on effect for the following parts. Scratch making the waterways would mean having a stock of the correct thickness pear at hand and for me a better set of tools, the way I work that isn’t the case, it would have been so much simpler just not to have them laser burnt in the first place, it wasn’t necessary
 
Hi Ken.
It's all looking good. I agree with you about the tree nails, but not only that I had a devil of a job getting them to sit over an actual beam and in a lot of cases I had to re-drill them and darken the hole with a black acrylic pen. Like Jøran I thought of reversing sides and them upside down, but the ones that came in my kit had too many burn and scorch marks and would have taken a mountain of sanding. In the end I just let the guns disguise the bad ones.

Cheers JJ..
Hi Jack, I’m sorry but I’m glad that you had a similar issue, now I know that it wasn’t just me.
 
Oy! When the manufacturer gives the builder help they neither need nor want. Sounds like you'd have been better off with accurate plans and/or patterns and an ample supply of stock.
Typically for you, you have adapted nicely!
 
Hello again. Today I’m still in catch up mode, this time showing the deck planking. Yet again although there are several pre shaped planks, each numbered but there was no clue as to where they fitted. Each plank was shaped different with their ends tapered to fit into the waterways, both port and starboard, I’ve shown the only reference to deck planking. Again I contacted Modelship Dockyard who quickly replied as to the sequence. I’m now going to have a bit of a rant, each plank has treenails laser burnt into them, and they don’t look anything like authentic and look tacky. Modellers at this level of build I’m certain would much prefer to do their own treenails using their preferred method, and make them much more subtle. As they are if you need to slightly adjust the plank the laser nails will be out of line and look wrong, or if like me you wanted to lay the planks in a different pattern you have a problem as the nails aren’t spaced uniformly. That moan out of the way, I started laying the planks, the outer two were pretty obvious and with a little sanding they fitted quite well. I decided that rather than just have straight sections of planking on each side I wanted to stagger the planks in sections that would emphasise the beams and battens in a more presentable way, I think that the pattern worked out quite well, but it was fun and games trying to lay it out without glue at first to see what worked, it was like playing “pick up sticks” move one and they all just fell out of place. I had to cut up the planks re sizing them, sand their ends to shape for the waterways, this is where the burnt in nails caused a problem, I also used some scrap for planks I did managed to place most problem planks where they might not be seen, under the quarter deck, canons, ships wheel etc. I ended up with a deck that I had wanted and like the way it looks. Happy boy.

View attachment 413999

View attachment 414000

View attachment 414001

View attachment 414002View attachment 414003
Good morning Ken. I have played some catch up here. Wow so much achieved, some planking and deck work. I also like the red bulkwarks .Yep it is strange how with precut decking the treenails don’t line up with the frames…Personally I don’t see this as a deviation from your beautiful build. Cheers Grant .
 
Hello and thanks for being here. Today I’ll bring you bang up to date, some of the photos I took this morning.

Things I’ve done, I fitted the forecastle beams, and its deck as well as the bulkhead. The deck was a pre made piece with etched planking, it fitted well but it seemed a different textured pear from the other planking and when after fitting and oiled it turned a muddy brown colour, completely at odds with the other planking. It was so bad that I ripped it out, cut new planks from scrap and re made the deck, when oiled they matched the deck planking perfectly, a redo worth the effort. I made up the raised bow part and fitted the capping, a surprising amount of work doing this, fourteen parts alone. I made cut outs for the davits which are shown dry fitted, I re-made the knights head for a better fit and prepared the stub bowsprit. The Lion figurehead didn’t fit the prow which was too wide, others have tapered the prow but I didn’t trust myself to do that neatly, instead I widened the recess in the lion by about a mm. each side, it then slid over the prow nicely without any sign that it had been altered. I have painted the wales, it’s probably a bit early in the build to do this but I just wanted it to look nice on my bench. Finally I made up and fitted the bitts, these were a bit awkward as they were made to pass through the upper deck and then fixed to the lower deck, I don’t see how this could have been done unless they had been built into the beam yokes when they were being made up, I adapted the supplied ones and unless you looked closely you wouldn’t know. That’s it, a lot of work done and now that some of the detailing has been done I think it’s starting to look pretty good, to me anyway.

354.jpg

355.jpg

358.jpg

360.jpg

359.jpg

361.jpg
 
Hello and thanks for being here. Today I’ll bring you bang up to date, some of the photos I took this morning.

Things I’ve done, I fitted the forecastle beams, and its deck as well as the bulkhead. The deck was a pre made piece with etched planking, it fitted well but it seemed a different textured pear from the other planking and when after fitting and oiled it turned a muddy brown colour, completely at odds with the other planking. It was so bad that I ripped it out, cut new planks from scrap and re made the deck, when oiled they matched the deck planking perfectly, a redo worth the effort. I made up the raised bow part and fitted the capping, a surprising amount of work doing this, fourteen parts alone. I made cut outs for the davits which are shown dry fitted, I re-made the knights head for a better fit and prepared the stub bowsprit. The Lion figurehead didn’t fit the prow which was too wide, others have tapered the prow but I didn’t trust myself to do that neatly, instead I widened the recess in the lion by about a mm. each side, it then slid over the prow nicely without any sign that it had been altered. I have painted the wales, it’s probably a bit early in the build to do this but I just wanted it to look nice on my bench. Finally I made up and fitted the bitts, these were a bit awkward as they were made to pass through the upper deck and then fixed to the lower deck, I don’t see how this could have been done unless they had been built into the beam yokes when they were being made up, I adapted the supplied ones and unless you looked closely you wouldn’t know. That’s it, a lot of work done and now that some of the detailing has been done I think it’s starting to look pretty good, to me anyway.

View attachment 414173

View attachment 414174

View attachment 414175

View attachment 414177

View attachment 414180

View attachment 414178
Looks absolutely beautiful Ken. A great build
 
Hello and thanks for being here. Today I’ll bring you bang up to date, some of the photos I took this morning.

Things I’ve done, I fitted the forecastle beams, and its deck as well as the bulkhead. The deck was a pre made piece with etched planking, it fitted well but it seemed a different textured pear from the other planking and when after fitting and oiled it turned a muddy brown colour, completely at odds with the other planking. It was so bad that I ripped it out, cut new planks from scrap and re made the deck, when oiled they matched the deck planking perfectly, a redo worth the effort. I made up the raised bow part and fitted the capping, a surprising amount of work doing this, fourteen parts alone. I made cut outs for the davits which are shown dry fitted, I re-made the knights head for a better fit and prepared the stub bowsprit. The Lion figurehead didn’t fit the prow which was too wide, others have tapered the prow but I didn’t trust myself to do that neatly, instead I widened the recess in the lion by about a mm. each side, it then slid over the prow nicely without any sign that it had been altered. I have painted the wales, it’s probably a bit early in the build to do this but I just wanted it to look nice on my bench. Finally I made up and fitted the bitts, these were a bit awkward as they were made to pass through the upper deck and then fixed to the lower deck, I don’t see how this could have been done unless they had been built into the beam yokes when they were being made up, I adapted the supplied ones and unless you looked closely you wouldn’t know. That’s it, a lot of work done and now that some of the detailing has been done I think it’s starting to look pretty good, to me anyway.

View attachment 414173

View attachment 414174

View attachment 414175

View attachment 414177

View attachment 414180

View attachment 414178
Good to see that you changed the ‘plank-etched sheets’ for normal planking, Ken. In most cases the 'flame structures' of those sheets are strengthened once you have treated them. The flames visually takes it over from the planks. A well-done re-do!
Regards, Peter
 
Good to see that you changed the ‘plank-etched sheets’ for normal planking, Ken. In most cases the 'flame structures' of those sheets are strengthened once you have treated them. The flames visually takes it over from the planks. A well-done re-do!
Regards, Peter
Thanks Peter, The original looked so bad, the decision to not re do was not really an option
 
Back
Top