HMS Blandford 1:48 POF Modelship Dockyard [COMPLETED BUILD]

That’s a lot of material for a lot of hours building pleasure, Ken. A interesting and good looking kit.
Regards, Peter
Hi Peter, Your right when you say lots of material, 63 ribs, 15 pieces to each rib = 945 pieces just for the ribs alone. Yes very good quality and because its a new type of build, very interesting. Ken
 
Last edited:
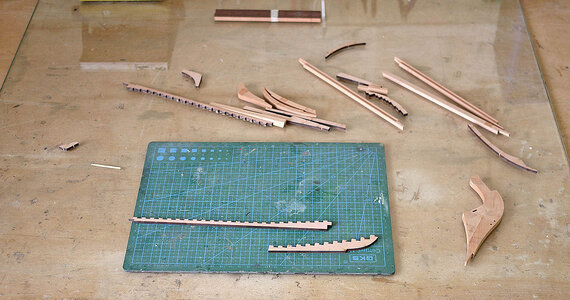
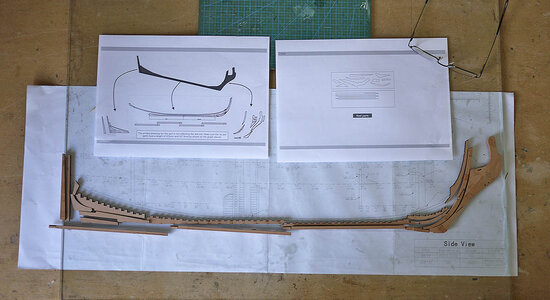
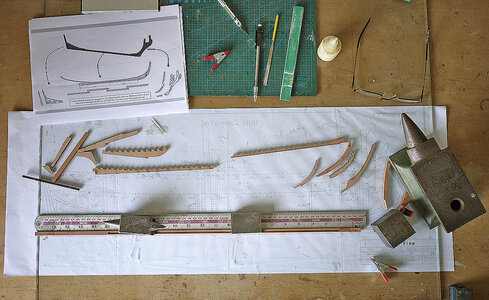
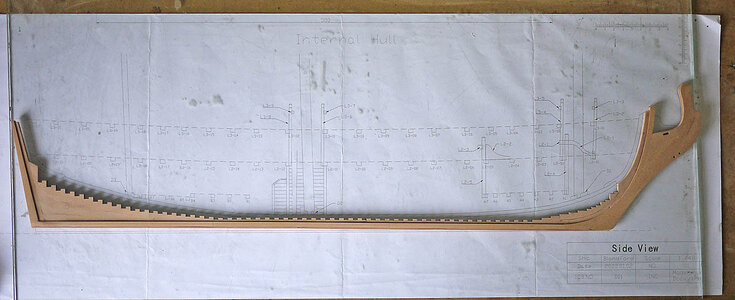
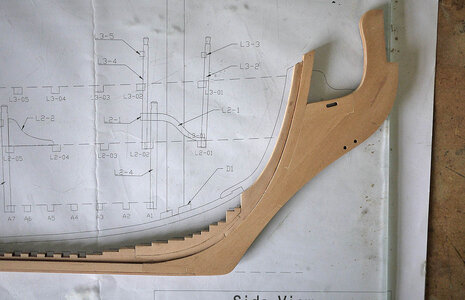
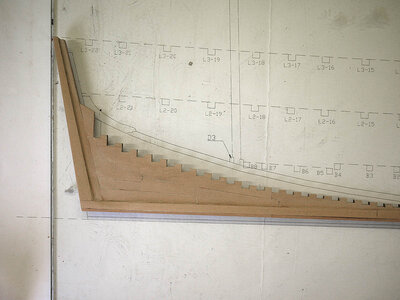
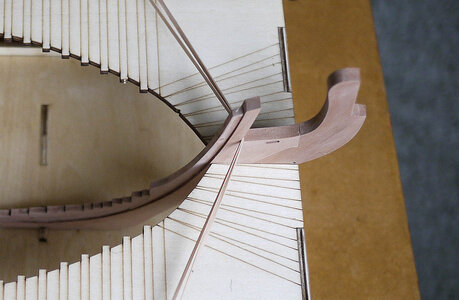
Hello and welcome again. Now I’m into the build proper, the keel. There is a 1:1 side view plan so there was never going be a build problem with this part. I have a large sheet of plate glass on my bench, I find that it’s a good flat and easy to clean surface. I put the plan under the glass so that I didn’t get glue on it, and then worked over the glass. There were twenty four pieces to the keel, these were wrapped separately so no hunting for them. The stepped rib locator parts were laser cut and the rest were CNC cut. Once again the quality was evident, I don’t know how they got such a smooth finish to the edge surfaces but the only thing that I needed to do was to square the corners that the CNC can’t do. A dry assembly showed all parts were a perfect flush fit. I glued up the prow and the stern deadwood sections first, then the keel making sure that it was straight, then when the glue had grabbed put them all together. The stepped part is narrower and this then slotted into a groove that had been cut into the keel, strips were then added to the underside of the keel that strengthened it even further. When set I cleaned up the char from the laser cut parts and sanded the rest with a fine grained paper which left a perfect surface finish. As you can see it went together rather well with only some very minor gaps that really can’t be noticed, placing it into the jig I was pleased to see that it was a perfect fit.

I’ve never worked with pear wood before, only walnut which seems to be the normal wood supplied with kits, it makes me sneeze a lot, but now I won’t be able to go back. What a revelation, it’s so nice to work with, a lovely colour, tight grained; sands to a nice smooth finish and smells ahhh!

027.jpg

028.jpg

029.jpg

032.jpg

033.jpg

034.jpg

035.jpg
 
Last edited:
This is already a great start of your new building log - I am sitting here and will visit your workshop every day you are posting an update
And I have a small "jag" (1:24 or 1:18) - hope such one is also ok
Hi Ewe, Thanks for your interest in my build, good to have you along. I noticed that BMT has a Jag badge as his picture, obviously an enthusiast, therefore that sign which is in my garage.I too run a Jag so appreciated it's significance, great minds think alike. Ken
 
Hello and welcome again. Now I’m into the build proper, the keel. There is a 1:1 side view plan so there was never going be a build problem with this part. I have a large sheet of plate glass on my bench, I find that it’s a good flat and easy to clean surface. I put the plan under the glass so that I didn’t get glue on it, and then worked over the glass. There were twenty four pieces to the keel, these were wrapped separately so no hunting for them. The stepped rib locator parts were laser cut and the rest were CNC cut. Once again the quality was evident, I don’t how they got such a smooth finish to the edge surfaces but the only thing that I needed to do was to square the corners that the CNC can’t do. A dry assembly showed all parts were a perfect flush fit. I glued up the prow and the stern deadwood sections first, then the keel making sure that it was straight, then when the glue had grabbed put them all together. The stepped part is narrower and this then slotted into a groove that had been cut into the keel, strips were then added to the underside of the keel that strengthened it even further. When set I cleaned up the char from the laser cut parts and sanded the rest with a fine grained paper which left a perfect surface finish. As you can see it went together rather well with only some very minor gaps that really can’t be noticed, placing it into the jig I was pleased to see that it was a perfect fit.

I’ve never worked with pear wood before, only walnut which seems to be the normal wood supplied with kits, it makes me sneeze a lot, but now I won’t be able to go back. What a revelation, it’s so nice to work with, a lovely colour, tight grained; sands to a nice smooth finish and smells ahhh!

View attachment 395197

View attachment 395198

View attachment 395199

View attachment 395200

View attachment 395201

View attachment 395202

View attachment 395203
Good morning Ken. Wow, I’m away for a few days and 3 pages of catch up on your new build. I’m excited for you. :D. I have my chair pulled up and will follow this with interest. A beautiful display of Models, Ken, you have skills for sure. We clearly enjoy similar ships as for my next model (still some time away) I am thinking of the Amerigo Vespucci or if my skills have improved a little a POF Blandford. Brilliant work on the Stem, stern deadwood and Keel. Cheers Grant
 
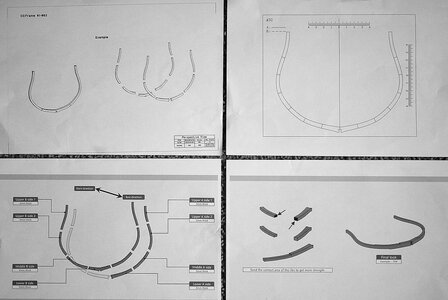
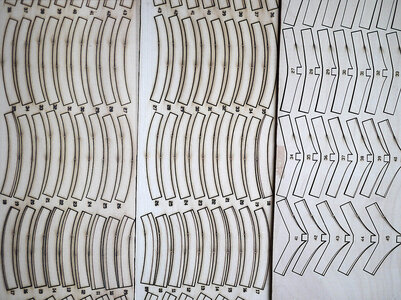
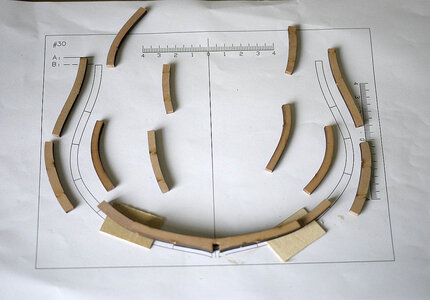
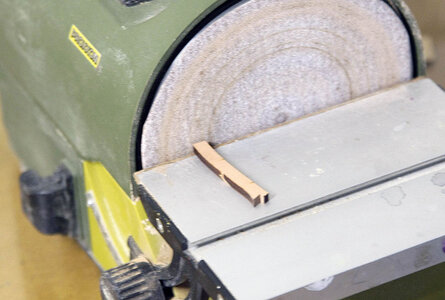
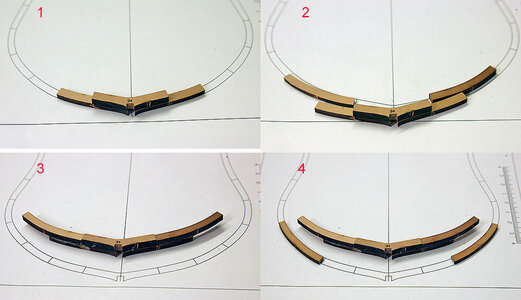
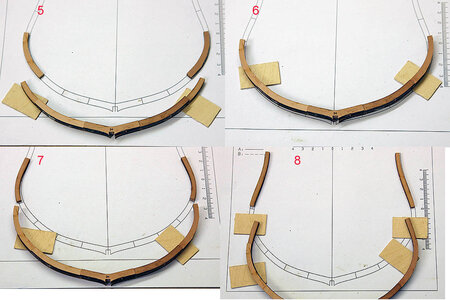
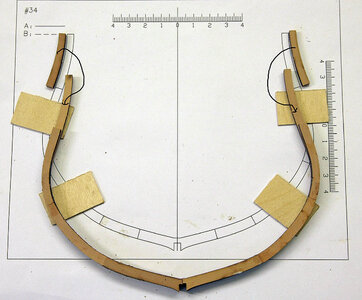
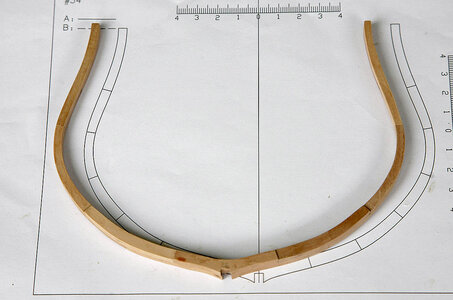
Hello and once again thanks for all your likes. Now I’m on to one of the main features of this model, the ribs, 63 of them, there are 15 pieces to each rib which makes 945 rib pieces! So I’d better get started. Each rib has its separate plan which you assemble over, there are sixteen sheets of rib pieces of various thicknesses, and each sheet has one part of each rib, clearly numbered in sequence so you take one piece from each sheet. They were mostly cleanly cut through and removed easily except for one of the thicker sheets which hadn’t cut to the full depth, the removal of pieces from which proved very difficult and if not careful the edges would easily splinter. The parts although not individually numbered are easily identified by laying them over the plan, they are very accurate so you shouldn't mistake them. I cleaned off the char just from the butting edges using my Proxxon sander to keep those edges square, I have a foot switch for this which makes it easier to control the speed, you really don’t want to remove any wood, just the char. I had chosen for my first rib one from the middle as this has no offset to follow the curvature of the hull and would be the easiest to do. At first there was a lot of head scratching, although it was shown in the manual I just couldn’t get my head around the build sequence, the parts are laid stepped, there isn’t a flat area on the rib but once I’d figured it out it became easy to assemble. It’s the type of thing that once understood you look at the manual and say to yourself, “ now why couldn’t I have seen it that way at first “ It took about half an hour to fit together that first rib but subsequent ribs now only take about ten minutes once they’d been cut out.
The slot at the base of the rib that fits onto the keel has a step inside that matches the keel so this needs to be set accurately otherwise it may not sit at the correct height and you may get inconsistent heights on your ribs. A small ply jig is supplied that you build the lower part of the rib on, this ensures that the step inside is set correctly, at first this seemed to me as unnecessary but after my first rib needed correcting to sit properly I realised that this although simple was a good idea. I cleaned off the char from the edges, gave it a good sanding and YEA! I have made my first rib, only 62 to go.


036.jpg

037.jpg

038.jpg

049.jpg

0053.jpg

050.jpg

051.jpg

052.jpg

052a.jpg
 
Last edited:
Very clean and accurate work - the first frame is looking already very good :cool:
Hi Ewe, the idea of the spacers and squaring of the char were from tips of yours, it proves that members do actually take note of what you put out there. Ken
 
Last edited:
Hi Ken, are their sanding lines on your frame parts to show where to fair to? I cant see them in your pics. JJ.
Hi Jack, Yes there are sanding lines but these are on the frames that are more to the bow and stern. I’ve chose to start at the centre of the hull as there is no taper and these will be the easiest to get right, by the time I get to the tapered parts I’ll then be more familiar with making them up, that’s the theory anyway. By the way Jack, I love your version of this kit, way beyond what I hope to achieve. Ken
 
Last edited:
Take your time and enjoy the process. This IS the build (POF) and will be the thing that gives you the greatest delight when it turns out (at least that's what I experienced)!
Paul, Telling me to take my time is like telling a small child that he can’t play with his toys at Christmas, anyway I don’t get the pleasure of causing pain to people throughout the day. Ken
 
Hi Jack, Yes there are sanding lines but these are on the frames that are more to the bow and stern. I’ve chose to start at the centre of the hull as there is no taper and these will be the easiest to get right, by the time I get to the tapered parts I’ll then be more familiar with making them up, that’s the theory anyway. By the way Jack, I love your version of this kit, way beyond what I hope to achieve. Ken
Hi Ken, Sorry I jumped in too soon, the reason was when I started building the frames I inadvertently made one inside out! All the pieces will fit with the lines in the middle, and worried you had done the same, then I noticed the frame number. Fools rush in as they say.

Cheers JJ..
 
Hi Ken, Sorry I jumped in too soon, the reason was when I started building the frames I inadvertently made one inside out! All the pieces will fit with the lines in the middle, and worried you had done the same, then I noticed the frame number. Fools rush in as they say.

Cheers JJ..
Hi Jack, Please jump in any time, I really need someone looking over my shoulder as I’m in a strange place with this build, I’m enjoying it but feel like I’m in the dark.
 
Back
Top