HMS Blandford 1:48 POF Modelship Dockyard [COMPLETED BUILD]

Hello and welcome. There seems to be quite a little community following me now on this build and all commenting and giving likes, thanks everybody, appreciated.
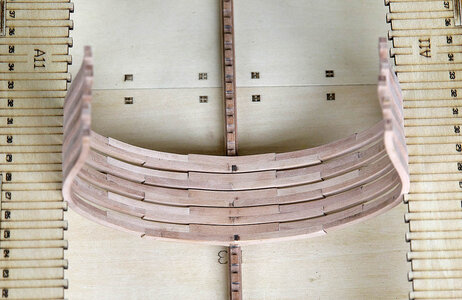
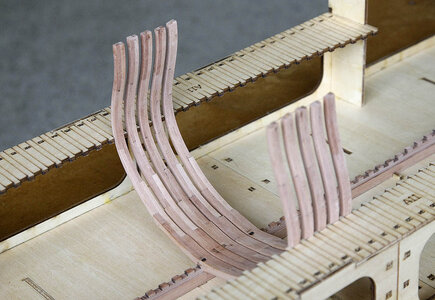
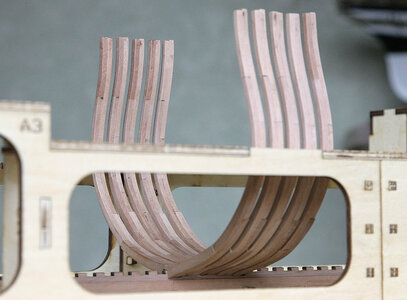
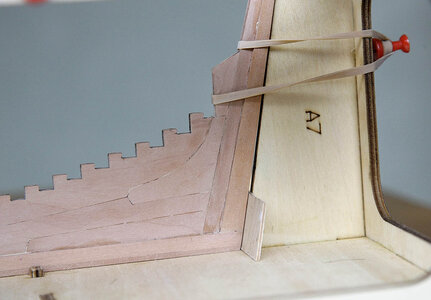
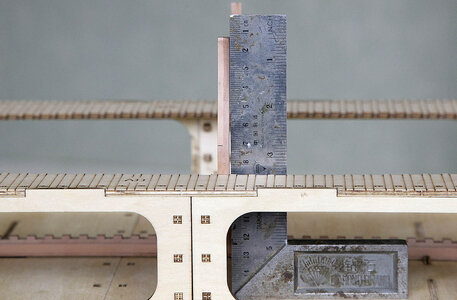
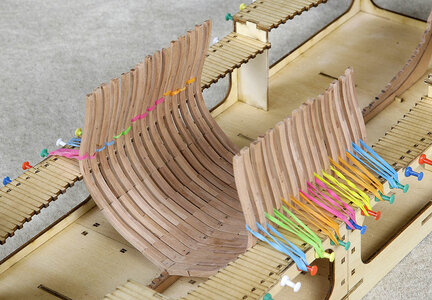
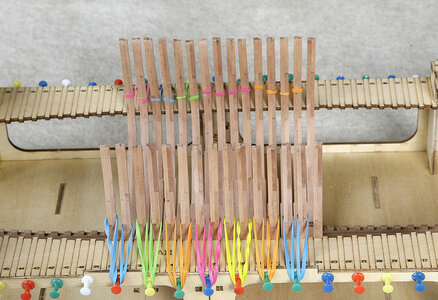
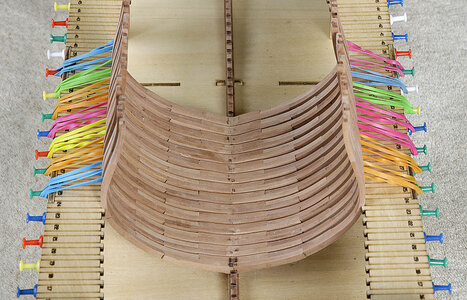
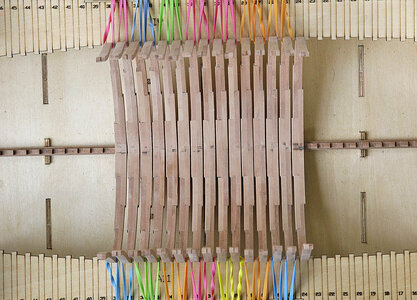
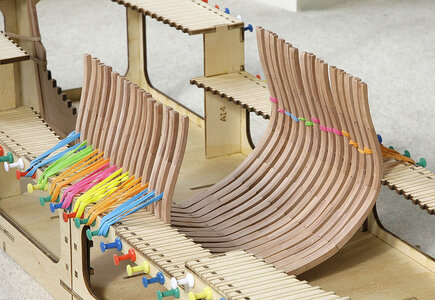
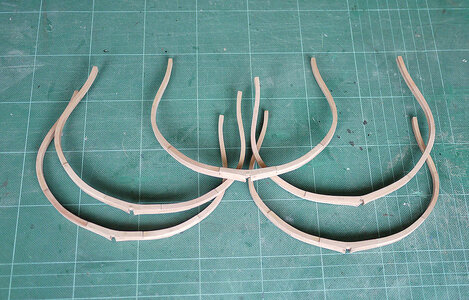
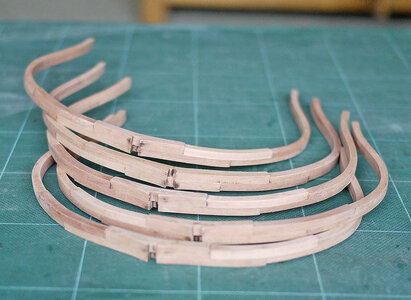
All is still good with the kit and I can feel that I’m progressing, so today’s episode continues with the ribs. I dry fitted my first rib into the keel, it fitted snugly but I did notice that it wasn’t at 90 degrees, probably only a couple out but it was noticeable, putting a 1mm spacer behind the sternpost moved the keel just enough forward to bring the rib perfectly vertical and subsequent ribs are also at 90 degrees. Given the amount of pieces used in making up the keel I think that only 1mm out is more than acceptable so no issues there. I’ve made up and dry fitted another four ribs, as I mentioned earlier, after the first rib the rest became easier.

Most builders of POF kits comment on the char removal as a downside, I found that the method I adopted was quick, less than ten minutes per rib, easy and created little dust which Mrs Ken appreciated, I’ll do a post on it tomorrow.
053.jpg

054.jpg

055.jpg

056.jpg

057.jpg

045.jpg

046.jpg
 
Last edited:
Good morning Ken. Wow, I’m away for a few days and 3 pages of catch up on your new build. I’m excited for you. :D. I have my chair pulled up and will follow this with interest. A beautiful display of Models, Ken, you have skills for sure. We clearly enjoy similar ships as for my next model (still some time away) I am thinking of the Amerigo Vespucci or if my skills have improved a little a POF Blandford. Brilliant work on the Stem, stern deadwood and Keel. Cheers Grant
Hi ,Thanks, I really don’t think that your skills need improving at all, you’re selling yourself short, your builds are excellent already and a pleasure to see. With the commitment you make you would be able to successfully build any kit that you wanted. Ken
 
Hi all! Hi Ken! I really like how your model turns out! And earlier, you made magnificent ships, and with the current project, I think and am confident that you will cope, there will be another magnificent ship. Or the best! I don't know. I am sure that all together, both you and all other model builders, will be able to solve all the issues. They will help you understand an unclear situation. I'm just looking at the build logs of other ship builders for now. I have very little experience. So be it, but I want to support you, if I may? You've got off to a great start and are going great. Captain, head ahead!
 
Hi all! Hi Ken! I really like how your model turns out! And earlier, you made magnificent ships, and with the current project, I think and am confident that you will cope, there will be another magnificent ship. Or the best! I don't know. I am sure that all together, both you and all other model builders, will be able to solve all the issues. They will help you understand an unclear situation. I'm just looking at the build logs of other ship builders for now. I have very little experience. So be it, but I want to support you, if I may? You've got off to a great start and are going great. Captain, head ahead!
Hi, Thanks very much for you supportive comment and all those likes. Yes I think with the help that’s on offer I’ll get through this build with some sanity left, my last build, HMS Ajax was very problematic and if I got through that I think I should be ok with this One. Ken
 
Hi, Thanks very much for you supportive comment and all those likes. Yes I think with the help that’s on offer I’ll get through this build with some sanity left, my last build, HMS Ajax was very problematic and if I got through that I think I should be ok with this One. Ken
I am absolutely confident that you can do it! excellently!! success! and joy!
 
I would like to add: there are problems, or there always are! Our life is one big problem, but if we solve problems, then we are alive! And then we should praise ourselves for solving problems. is not it?
 
Hello and welcome to my build log. I must say that I’m surprised but pleased to see so many of you showing an interest and giving your likes and kind comments.

Before I start I’ll mention my criteria for the build. Those that have followed me already know this, I enjoy building models of all kinds but boats are my favourite, I am not an expert on historic and accurate detail of boats and I do not want to go down that route, I just want to make a model from what is supplied in the kit and make a good example of the subject that I can be proud to display and have fun along the way, so no super detailing here, you should look at Jack Jagers version of this kit for that, he even has rats in the bilges.

So off we go. I have made up the build cradle. This is made up from very good quality 3mm ply sheet, the parts were laser cut and were easily detached, you can see from the pics how comprehensively they are marked up, every detail you could imagine. There was only a completed view of the cradle in the instructions with no guide as to its assembly, there were quite a number of parts but after a short scratch of the head it was fairly easy to figure out. It went together without a problem, after a light file of the laser burn everything slotted together perfectly, nice and snug, no loose or tight spots, the fit could not have been better. One feature that I liked was that at critical joints there was a doubler that was pegged into place pulling the pieces securely together, a nice thoughtful touch, this has made up into a very sturdy structure. Thinking that this was going to be my workplace for some time I gave it a coat of Danish Oil to keep it pristine looking.

My thoughts are that if the rest of the kit is as accurate as this I’m in for a treat. I’ve started the keel but that’s for my next post. Ken

View attachment 395059

View attachment 395060

View attachment 395061

View attachment 395062
Hi Ken. Sorry, just caught up with your build log. Wasn't expecting such a quick start and what a great start it is. Lovely clear photos and great commentary. l can tell you now, you will not be disappointed with this kit. The quality of the pearwood and accuracy of the laser cutting are beyond reproach. The engraved figure head and stern gallery pieces are CNC carved boxwood. All materials are great to work with but you will find the instructions leave a lot to be desired. l suggest you study them closely and keep at least 2 or 3 steps infront of the actual build. Good luck. l'm sure you will do this kit justice
 
Hi Dirk, Thanks, also for the tip, although I think you may have to prompt me again closer to me needing to do it, I haven't looked ahead beyond the ribs yet. Ken
You will have to do this otherwise the lion figurehead will not fit over the head. l think the cut out is 5 mm. but it is not necessary until you fit the figurehead, which is a long way off. Congrats on you work and progress on the ribs. Looking great Thumbsup
 
You will have to do this otherwise the lion figurehead will not fit over the head. l think the cut out is 5 mm. but it is not necessary until you fit the figurehead, which is a long way off. Congrats on you work and progress on the ribs. Looking great Thumbsup
Hi Keith, Thanks, I knew you would be there keeping an eye out for me, it’s good knowing that someone has trodden the path before and if necessary will feel my pain. Ken
 
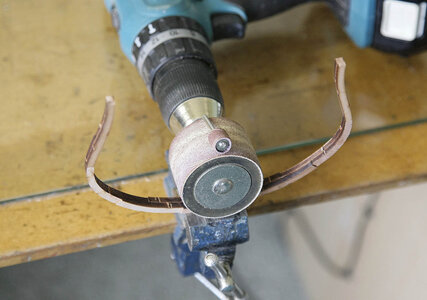
Hello and again thank you all for you for being here. Today I promised that I would show you how I removed the char from my ribs, this is no magic bullet but it works quite well for me.

Instead of using a small Dremel type sanding drum at high speed I tried using a large sanding drum at low speed. I used a fine/medium grit drum, about two inches in diameter in a low powered drill, I set the speed to just a little faster than an electric screwdriver and used that, I found that the larger drum better fit the curve of the rib, at this slow speed it was less aggressive and removed the char more slowly so was more controllable, yet it was quicker because more area was sanded by the larger drum at any time and best of all because of the low speed the char dust wasn’t thrown up into the air like with a high speed Dremel but it just fell to the bench like it does when hand sanding. I only sanded the rib part that was clamped in the vice, moving it around regularly so had no breakage issues. I know we all have are preferred methods of doing things but this worked for me and is worth a thought.

The rib production line is working well and acceptable progress is being made with no problems so far.


058.jpg

059.jpg

060.jpg

061.jpg

062.jpg

063.jpg
 
Last edited:
Hello and again thank you all for you for being here. Today I promised that I would show you how I removed the char from my ribs, this is no magic bullet but it works quite well for me.

Instead of using a small Dremel type sanding drum at high speed I tried using a large sanding drum at low speed. I used a fine/medium grit drum, about two inches in diameter in a low powered drill, I set the speed to just a little faster than an electric screwdriver and used that, I found that the larger drum better fit the curve of the rib, at this slow speed it was less aggressive and removed the char more slowly so was more controllable, yet it was quicker because more area was sanded by the larger drum at any time and best of all because of the low speed the char dust wasn’t thrown up into the air like with a high speed Dremel but it just fell to the bench like it does when hand sanding. I only sanded the rib part that was clamped in the vice, moving it around regularly so had no breakage issues. I know we all have are preferred methods of doing things but this worked for me and is worth a thought.

The rib production line is working well and acceptable progress is being made with no problems so far.


View attachment 395721

View attachment 395722

View attachment 395723

View attachment 395724

View attachment 395725

View attachment 395726
Looking great Ken. Excellent progress. You will soon have to start fairing the ribs
 
Looking great Ken. Excellent progress. You will soon have to start fairing the ribs
Hi Keith. Yes I’ve just started my first, again the same as my first rib I’m having to go slowly as it can easily get a bit confusing, I’m sure that I’ll get into the swing of it though. Ken
 
Back
Top