Looks great Mike. I went to High school in Wamego, KS. Alittle rual community 15 Miles E. of Manhattan,KS. A Long time ago.
-

Win a Free Custom Engraved Brass Coin!!!
As a way to introduce our brass coins to the community, we will raffle off a free coin during the month of August. Follow link ABOVE for instructions for entering.
-

PRE-ORDER SHIPS IN SCALE TODAY!
The beloved Ships in Scale Magazine is back and charting a new course for 2026!
Discover new skills, new techniques, and new inspirations in every issue.
NOTE THAT OUR FIRST ISSUE WILL BE JAN/FEB 2026
- Home
- Forums
- Ships of Scale Group Builds and Projects
- Group Build Archives
- Blandford Cross Section PoF Group Build
You are using an out of date browser. It may not display this or other websites correctly.
You should upgrade or use an alternative browser.
You should upgrade or use an alternative browser.
Prototype HMS Blandford Cross Section Prototype by Mike 41 [COMPLETED BUILD]
- Status
- Not open for further replies.
- Joined
- Aug 10, 2017
- Messages
- 1,706
- Points
- 538

Hi Mike,
We were in Wamego last year, it is a very picturesque town. We went through the wizard of oz. museum and spent some time in the park. The tulips were in bloom and they have a lot of them. It’s a lovely place to visit.
Mike
We were in Wamego last year, it is a very picturesque town. We went through the wizard of oz. museum and spent some time in the park. The tulips were in bloom and they have a lot of them. It’s a lovely place to visit.
Mike
- Joined
- Aug 10, 2017
- Messages
- 1,706
- Points
- 538

Canons:
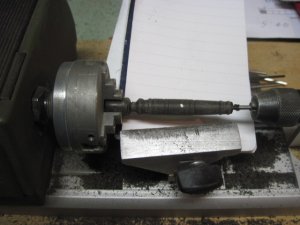
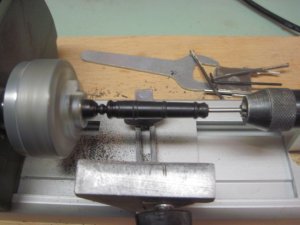
The canons can be turned from brass or wood. I like to use ebony, it is easy to turn and takes a nice polish. I use bloodwood for the carriages and yellow heart for the quoins.
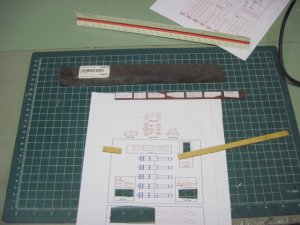
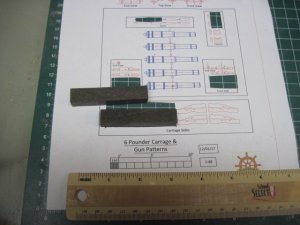
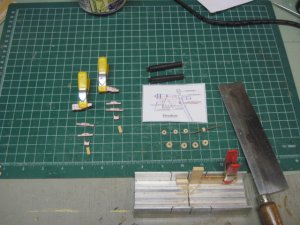
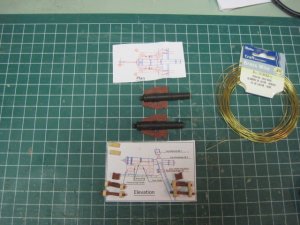
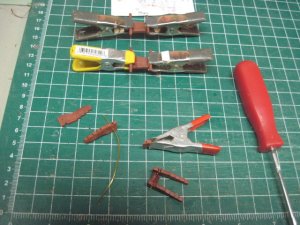
Photo 6403 shows the material used for the canons, I am building the two-gun option with the guns on the starboard side and open framing on the port side.
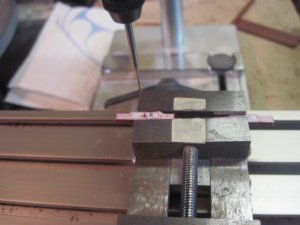
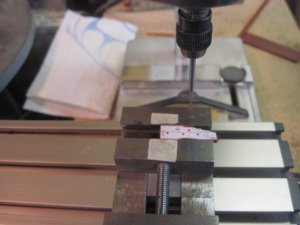
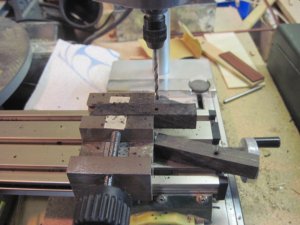
I started with the carriages Photos 6404 – 6406 shows the holes being drilled for the eyebolts, it is easier to do this when the parts are first cut out.
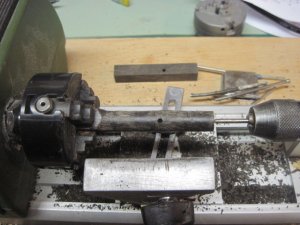
Photos 6407 - 6415 shows the stock cut to length with an extra half inch on the ball end of the guns, Photo 6408 shows the holes for the trunnions being drilled, it is easier to drill the holes when the stock is square.
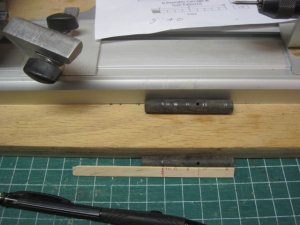
The next photos show the gun being turned, I take all the measurements from the center of the trunnion using a ‘walking stick’ to transfer the dimensions to the turning.
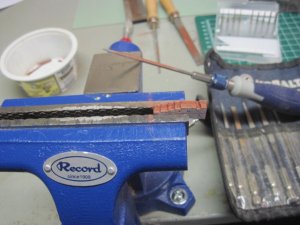
The trucks are made from dowel rods. Photo 6414 shows the parts ready to be assembled. Photo 6421 – 6426 shows the rigging for the guns.


- Joined
- Aug 10, 2017
- Messages
- 1,706
- Points
- 538

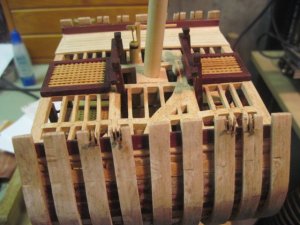
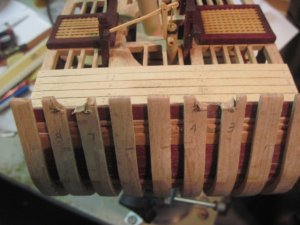
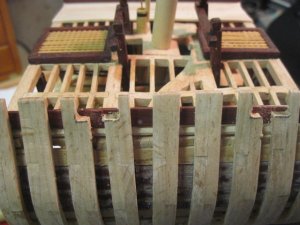
Photo 6416 – 6420 shows the frames being notched for the guns this could have been done when the top of the frames was trimmed but it helps to have the Spirketting in place first.
This concludes Part 5 of the build. Part 6 will be the exterior of the model, we are getting close to finishing the project.
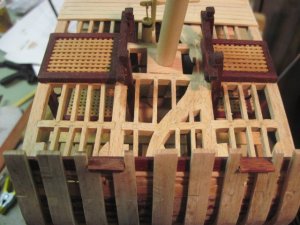
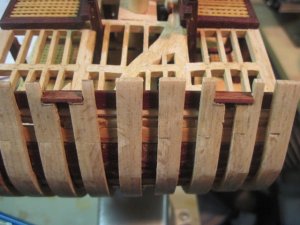
This concludes Part 5 of the build. Part 6 will be the exterior of the model, we are getting close to finishing the project.


Great progress,Mike! You’re inspiring me to make some on my own build. I’m still working on placing simulated bolts in the frames and rough fairing them before glue up. I’m getting close,though.
- Joined
- Aug 10, 2017
- Messages
- 1,706
- Points
- 538

Hi Dave,Great progress,Mike! You’re inspiring me to make some on my own build. I’m still working on placing simulated bolts in the frames and rough fairing them before glue up. I’m getting close,though.
Thanks, the bolts in the frames were made from brass, I would recommend 18 gauge brass wire for the simulated bolts.
Mike
Hi Mike,
I notice that you have used treenails in many of the items you are installing on the top deck. I do recall you saying that you were doing this to illustrate the difference in the brass nails used on the frames and keelson. My question, however, is should I be treenailing the planking and framing I am doing on the lower deck? When I started my rebuild I have been using bamboo treenails in place of the brass nails.
I notice that you have used treenails in many of the items you are installing on the top deck. I do recall you saying that you were doing this to illustrate the difference in the brass nails used on the frames and keelson. My question, however, is should I be treenailing the planking and framing I am doing on the lower deck? When I started my rebuild I have been using bamboo treenails in place of the brass nails.
- Joined
- Aug 10, 2017
- Messages
- 1,706
- Points
- 538

Hi Mike,
Continue using treenails for the planking, the only places you should use brass is to indicate bolts in the frames and in the keelson and other places that bolts are used. This is an opinion and may not be true in all cases. Some builders like the look of brass treenails in the decking and they are easier to use. You are doing an excellent job on your model.
Mike
Hi Mike,
I am finishing up my framing of the lower deck. When my right angle attachment arrives I will drill holes for the brass pins to install the pillars, and attach the well. On the plans it shows that the elm tree pump tubing and the chain pump tubing all extrend below deck into the well. Are these items unimportant to the build or did I miss something.
I am finishing up my framing of the lower deck. When my right angle attachment arrives I will drill holes for the brass pins to install the pillars, and attach the well. On the plans it shows that the elm tree pump tubing and the chain pump tubing all extrend below deck into the well. Are these items unimportant to the build or did I miss something.
- Joined
- Aug 10, 2017
- Messages
- 1,706
- Points
- 538

Hi Mike,Hi Mike,
I am finishing up my framing of the lower deck. When my right angle attachment arrives I will drill holes for the brass pins to install the pillars, and attach the well. On the plans it shows that the elm tree pump tubing and the chain pump tubing all extrend below deck into the well. Are these items unimportant to the build or did I miss something.
You need to download the Part 5 drawings. When I got to this point in the build I realized it would be difficult to install the lower pump assembly and it would not be seen when the model was finished so I cut them off at the deck. Things like this happen when the build is started before the drawings are finished. Even if we had left one side of the well open it would be difficult to see the details of the pumps. When I built my Pandora I spent three weeks on the stove and pantry area and the only way to see it is in the build photos lol, live and learn. That would be a good area for a cross section.
Mike
Hi Mike,
Thanks Mike I did down load part five that's why I brought that up. I did notice that you did not go down very far with the elm tree pump and was wondering what was up. I may build those parts anyway just for the experience. I'll just wait and see.
I did finish the framing of the lower deck so I'll keep busy sanding until my Dremel attachment arrives. I'm looking forward to the build you and Zoly are working on. It should be a real challenge.
Hello Guys,by the time I get there to build the Blandford cross section I will have a few logs to follow and figure out all the hard steps .
Zoltan
Zoltan
Hi Zoly,
I'm waiting with anticipation for your build log. You always have great ideas to do stuff.
I'm waiting with anticipation for your build log. You always have great ideas to do stuff.
looks good mike I like the ebony Cannons
TO MIKE 41, Hi Mike can you give me the link to download the revisions to part 5 that Donnie has put up, THANKS Don
I got it. THANKS Don
Hi Mike,
How did you cut the materiel for your gratings? What did you use?
How did you cut the materiel for your gratings? What did you use?
- Status
- Not open for further replies.


