Prototype HMS Blandford Cross Section Prototype by Mike 41 [COMPLETED BUILD]

Status
Not open for further replies.
Hi Mike,
I have another question concerning the hanging knees.
The parts in the section "LOWER DECK KNEES" labeled LDHK 1 - 6. Are they just templates for how the tops of thee hanging knees should be shaped, or are they separate parts to be fitted above the hanging knees?
 
Hi Mike,
The framing plan is a top view looking down on the hanging knees and shows a rounded edge on the aft side of the knees, the pattern drawing shows a side view or the hanging knees and probably should a hidden line where the curve starts my bad. After you have cutout the hanging knees place them on the plan and mark where the curve starts, it is a 90-degree radius using the thickness of the knees.
These drawings are being processed by Donnie for the labeling changes, after that is finished we can make the drawing changes. When you are checking your own work sometimes you see what you want to see not what is on the drawing, I must be getting too old for this stuff.
Mike
 
NO WAY MIKE, you are still a youngster and a GREAT TALANT THIS IS A WONDERFULL PROJECT AND THE GROUP BUILD IS THE BEST I HAVE SEEN, IF YOU THINK YOU HAVE A LOT OF QUESTIONS JUST WAIT UNTIL I START MY BUILD SOON HAVE RECEIVED MY MATERIAL THAT I ORDEREED FORM DAVE AT THE LUBERYARD BOXWOOD FOR THE KEEL< AND NATURAL PEAR WOOD FOR THE FRAMES, will start soon. KEEP IT GOING MIKE WONDERFULL EVERYONE WORKING TOGETHER ON THIS ONE THE MODEL SHOULD BE A GREAT ONE PLENTY OF HELP WIT THIS. AND HAVE A GREAT NEW YEARS YOU AND YOURS AND MAY GOD GIVE US A BETTER ONE Don
 
Hi Mike,
I agree with Don You have done a great job and shown great patients with all the questions you havee fielded while trying to finish a model yourself. I pretty much did what you have just said and installed hanging knees #'s 2 & 5 using that top view as a template. It just seemed like the thing to do. I'm moving right along. Thanks again.
 
Happy New Year! It’s too cold for outside activities in Kansas but my shop is warm, I started working on the main deck.

Main Deck Framing:
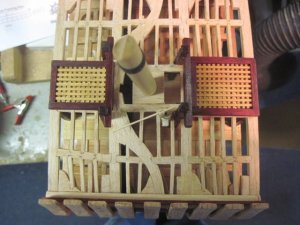
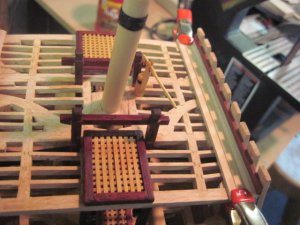
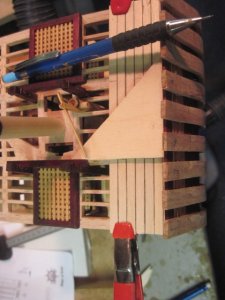
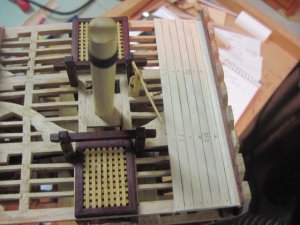
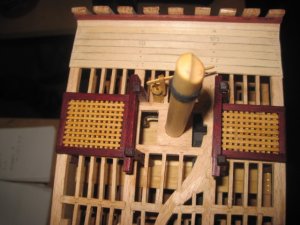
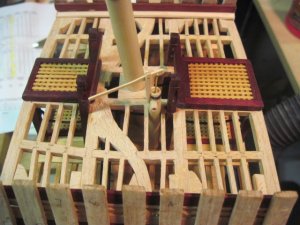
The main deck framing is like the lower deck framing, the main exception is the Main Jeer and Topsail Sheet Bitts supported by lower deck. Photos 6343 – 6358 shows the installation of the frames around the main mast.

IMG_6343.JPGIMG_6344.JPGIMG_6345.JPGIMG_6346.JPGIMG_6347.JPGIMG_6349.JPGIMG_6350.JPGIMG_6351.JPGIMG_6352.JPGIMG_6353.JPGIMG_6354.JPGIMG_6355.JPGIMG_6356.JPGIMG_6357.JPGIMG_6358.JPG
 
Last edited by a moderator:
Main Jeer and Topsail Sheet Bitts:

By using an unusual color wood for the bitts, they will add a nice contrast and not blend in with the framing, this is just a personal preference. Photos 6338 through 6342 shows how I built the bitts, directly under the crosspiece there are sheaves, since there is no rigging I simulated theses by drilling a pair of holes and remove a small amount of wood between the hole as shown in photo 6342. Photos 6362 – 6371 shows the installation.

IMG_6338.JPGIMG_6339.JPGIMG_6340.JPGIMG_6341.JPGIMG_6342.JPGIMG_6362.JPGIMG_6363.JPGIMG_6364.JPGIMG_6365.JPGIMG_6366.JPGIMG_6367.JPGIMG_6368.JPGIMG_6369.JPGIMG_6370.JPGIMG_6371.JPG
 
Last edited by a moderator:
Main Mast:
The main mast is detailed on a drawing along with the deck beams and consists of a dowel rod turned to the dimensions shown on the drawing. Photo 6365 shows the mast in place it is not glued so it can be removed for access to drill holes in the Spirketting for the gun rigging bolts.

IMG_6365.JPG
 
Last edited by a moderator:
Hatch Gratings:
For the main and after hatches I used bloodwood for the frame and boxwood for the grating. The construction and assembly are shown on photos 6372 – 6380, lap joints were cut in the frames with the table saw producing a nice clean joint.

IMG_6372.JPGIMG_6373.JPGIMG_6374.JPGIMG_6375.JPGIMG_6376.JPGIMG_6377.JPGIMG_6378.JPGIMG_6379.JPGIMG_6380.JPG
 
Last edited by a moderator:
Waterways and Spirketting:
The waterways and Spirketting were added as shown in photo 6377.

IMG_6377.JPG
 
Last edited by a moderator:
Great job,Mike! Are you cutting all the mortises for the deck framing by hand or are you using a mill? A mini tutorial on cutting those joints by hand would be really helpful, especially to those of us who haven’t scratch built a deck before.
 
Mike, I hate to be "that guy", but on the Main Mast Detail on the Part 5 (Part-5-Deck-Beams-Mast.pdf file) release of drawings I have a question....

The mast diameter is shown as 1-1/8", but measures out to be 1-1/16". Which one is correct?

Sorry,

Andy
 
Elm Tree Pumps:
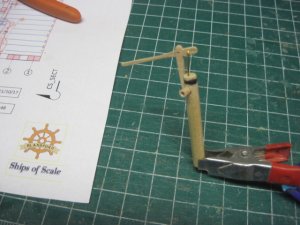
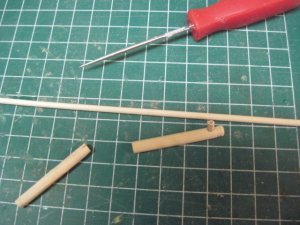
These pumps are detailed on the drawing and the photos 6381 – 6384 show the assembly of the pump, if you are building the four–gun version you will need two pumps.
Mike, I hate to be "that guy", but on the Main Mast Detail on the Part 5 (Part-5-Deck-Beams-Mast.pdf file) release of drawings I have a question....

The mast diameter is shown as 1-1/8", but measures out to be 1-1/16". Which one is correct?

Sorry,

Andy
Hi Andy, The mast diameter is 1 1/8".
MikeIMG_6381.JPGIMG_6382.JPGIMG_6383.JPGIMG_6384.JPG
 
Last edited:
DocBlake said:
Great job,Mike! Are you cutting all the mortises for the deck framing by hand or are you using a mill? A mini tutorial on cutting those joints by hand would be really helpful, especially to those of us who haven’t scratch built a deck before.
Hi Dave,
I cut the mortises by hand, it is easy to do in Beachwood, mark the depth and with a sharp knife or chisel make the end cuts first then the top cut and remove the waste. With a little practice it doesn’t take long to do.

Mike
 
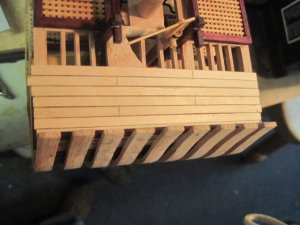
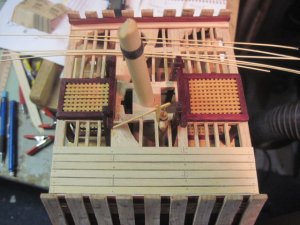
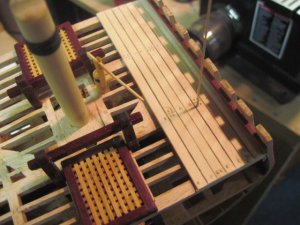
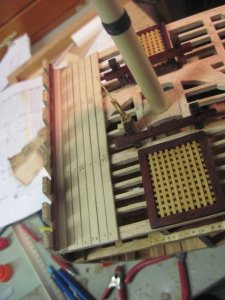
Main Deck Planking:
There are two principal options for the main deck layout, the first shows the deck fully planked with four guns shown, the second is half planked with two guns installed. The first option covers all the nice framing details but does show two more guns.
I used a modified version of option two, the planking only needs to be wide enough to support the rear wheels on the cannons. I used six planks using a three-plank shift for the trenails pattern as shown in the photos 6385 – 6392. I used basswood for the planking and bamboo for the trenails.IMG_6385.JPGIMG_6386.JPGIMG_6387.JPGIMG_6388.JPGIMG_6389.JPGIMG_6390.JPGIMG_6391.JPGIMG_6392.JPG
 
YOU BET IT IS GREAT WORK, FANTASTIC AND QUICK TOO, for me it will probally be a LONGER TERM BUILD NOT TO LONG ONCE I GET STARTED AND FOCAS MY MIND ON THIS AND WITH SO MANY PARTICIPANTS GET QUESTIONS ANSWERED,,,,,,,, I JUST NOTICED IN YOUR THREAD YO SAID IN KANSAS, WHERE IN KANSAS, I LIVE IN CONWAY SPRINGS, KANSAS IT IS 20 miles SOUTH WEST OF WITICHA, neighbors I hope.Don
 
Thanks Don,
I live in Kansas City.
Mike
 
DocBlake said:
Great work, Mike!
Thanks Dave,
This project has been a lot of fun, l have learned a great deal about group builds.
Mike
 
Status
Not open for further replies.
Back
Top