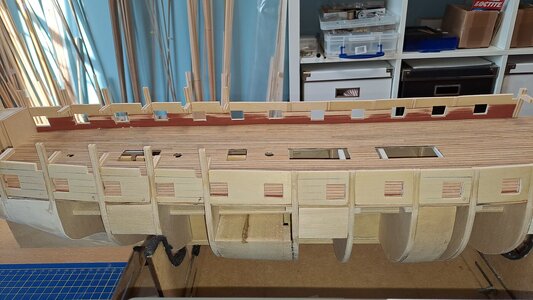
HMS Diana by Caldercraft

And now the Gun Ports:
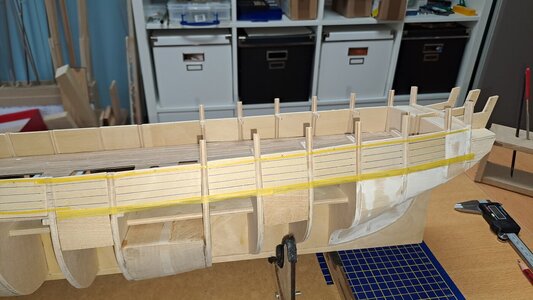
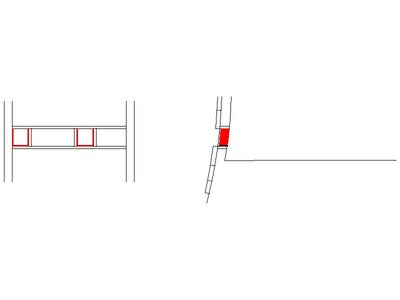
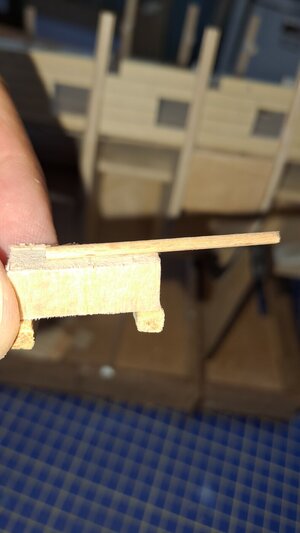
Be aware that the dimensions on sheet 1 are the inner space (13 x 11 mm). The Gun Ports should be 16 mm long and 14 mm wide. Because you have to install a frame using strips of 1 x 6 mm on the inside to fill the gaps between external and internal wall strips...See picture off the Hull!

Having said this: I am going to install a 3mm thick Plywood plate between the Bulkheads...
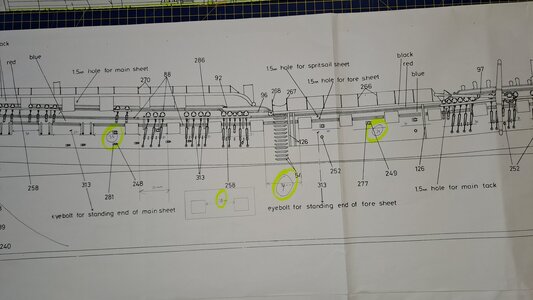
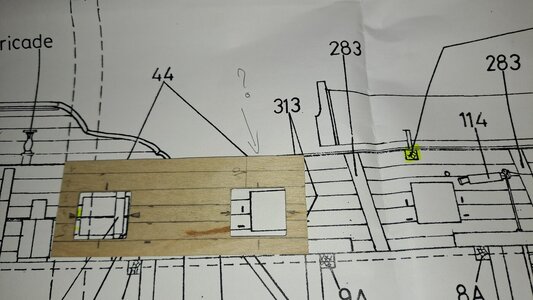
As shown in the photo, I then paste the drawing with the gunports and draw the opening of the gunports...knowing that I still have to adjust the dimensions. In my opinion, this offers many advantages: it is easy to indicate the correct position of the Gunports and before gluing the plywood, I can more easily mill or cut the Gun Port openings....

Your opinions ?????

Marc

View attachment 462312

View attachment 462313

View attachment 462314

View attachment 462315

View attachment 462316

View attachment 462317

View attachment 462318
Your log and details are very helpful and will be a great resource for me when I start my Diana.

Your approach to the gunport has me confused. If the opening is to be 13x11 and lined by 1mm strips, I would create openings of 15x13. Why are you planning openings of 16x14? Is this extra 0.5mm either side for accounting of error or variation in timber thickness.

Loving your work Marc

Michael
 
Hello Michael,

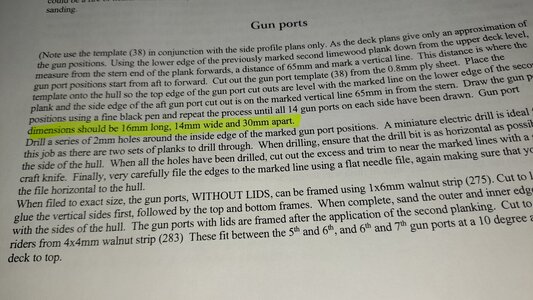
Concerning the openings of 16 x 14 mm, I would like to refer to the instruction manual: see photo.
On the one hand there must be room for the Gun Ports Lids and on the other hand there must indeed be some room for variations.
That is why you have to be careful where you are going to make the holes for the Gun Ports.
The photo above where I glued part of sheet 1 is not accurate so you should only use it as a guideline.

If you were to make the holes according to the drawing (sheet 1), you would end up by removing parts of the Bulkheads...and that is not the intention (I suppose).
You actually need to use the template from the Main Deck to obtain the holes of 16 x 14 and a distance of 30 mm between the openings.
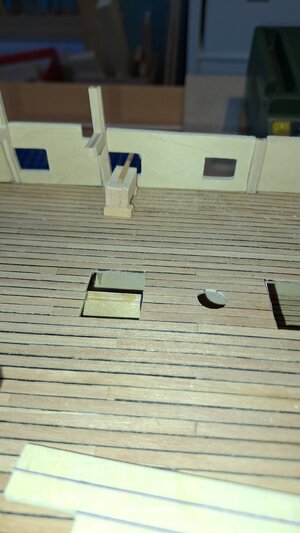
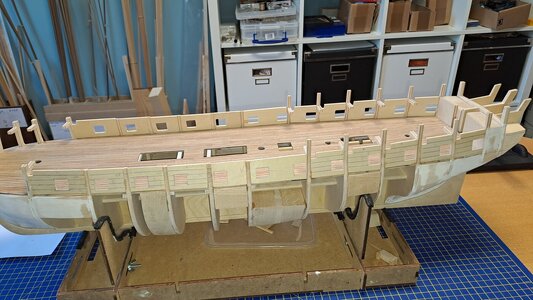
That is why I have now very painstakingly drawn 6 mm wide lines on the Plywood on the outside of the planking...
And now I have to try to accurately determine the starting line and the height to determine the openings of the gun ports...

Diana81.jpg

Diana82.jpg
 
Does the template account for the stops inside the frames and on the lower sill? Not sure this would apply in your case but when I have built POB I built the gun ports with overly long upper and lower sills between the bulkheads then the sides that would be frames if POF. The lower sill and sides then give a base for the three stops, one on top of the lower sill and the two on the sides of what would be acting as frames. There was typically no stop under the upper sill as some kits incorrectly show. The stops were only about 1.5" thick (in red below.) The below is the basic idea, but can be modified to meet the needs of any individual model.
Allan
Port sills and stops for POB.JPG
 
Does the template account for the stops inside the frames and on the lower sill? Not sure this would apply in your case but when I have built POB I built the gun ports with overly long upper and lower sills between the bulkheads then the sides that would be frames if POF. The lower sill and sides then give a base for the three stops, one on top of the lower sill and the two on the sides of what would be acting as frames. There was typically no stop under the upper sill as some kits incorrectly show. The stops were only about 1.5" thick (in red below.) The below is the basic idea, but can be modified to meet the needs of any individual model.
Allan
View attachment 462539
Hello Allan,

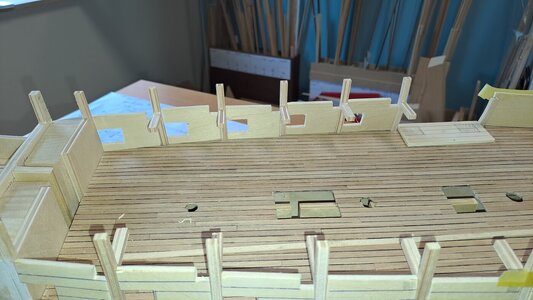
I applied this methode for the Constitution. The drawings were very accurate compared with the one for the Diana so it was easier to build the frame you are referring....
But I consider the methode below...
 
Surprise surprise !

As mentioned, I prefer to provide the Gun Ports first and then build the 1st Planking underneath. For this I use the supplied template and as stated in the instruction book: Gun Port dimensions should be 16 mm long, 14 mm wide and 30 mm apart!
Forget it! The 30 mm apart does not match the plans and I am slowly getting tired of it. Rarely see the plan...
In any case, I decided to follow the plan when making the Gun Ports: after all, there must be sufficient space for the ladder on the hull and the poles on the hull, for example...

I have studied the plans very thoroughly....but it is all confusing. Or am I mistaken?

Diana83.jpg

Diana86.jpg

Diana88.jpg

Diana91.jpg
 
Hi Marc
I like the way you are doing the gun ports, I'm taking notes for when I start mine.
As I haven't studied the plans and instructions it's difficult to comment on the correct spacing but I would probably take the sizes from the plans.
Tony
 
The contemporary drawings might help you to confirm the locations for the ports and the three fenders. They definitely do not match the kit drawings
The original contract gives the port dimensions as well.

UPPER DECK….. Height from the Upper Side of the Plank of the Upper Deck, to the Upper Side of the Quarter Deck Beams, at the Middle of the Beam, Afore
6 ft 2 ins, Abaft 6 ft 11 ins height of the Waste from the Upper Side of the Plank of the Deck at the Lowest Place 5 ft 2 ins height of the upper side of the lower port sill from the upper side of the plank of the upper deck 1 ft 9 ins, Ports deep 2 ft 3 ½ ins, fore & aft 2 ft 3 ½ ins (10.9mmX 10.9mm at 1:64) Beams to round 7 ins, Plank thick 3 ins height from the upper side of the Plank of the upper Deck to the upper side of the fore Castle Beam at the middle of the Beam afore 5 ft 10 ins abaft 5 ft 10 ins.

QUARTER DECK… Beams to round 6 ins, Plank thick 2½ ins height from the plank of the Quarterdeck to the upper side of the port sill 18 ins. Ports deep 2 ft, fore & aft 2 ft (9.5mmX9.5mm) the Quarterdeck to be continued in Length so far forward as that the foremost Beam may receive a Tenon in the underside from the Head of the Main Jeer Bitts.

On thing I found to be odd to me is that the original plans that I have researched show no entry steps on the Enterprize or her sister ships. They are shown on the contemporary plans of the HMS Hind 1785, Slade's Coventry 1757 class 28s and the Enterprize paintings by Joseph Marshall so I am betting Enterprize had entry steps as well.
Allan
 
Last edited:
As always, Marc, I am impressed with your methodical approach to assembling your models. No wonder, they look great at any stage of your build.
A word of caution, however, at some point, better early than late, you would have to decide whether you follow the kit plans or contemporary drawings! It is obvious, at least for this kit, that there are many discrepancies between the kit and contemporary drawings. If you follow the contemporary drawings, you are at risk that all other parts will not match as they are suitable for the kit drawings. There is nothing wrong with bashing the kit but... where is the line where you continue following the kit drawings (if any)???

Maybe it is time for scratch build? I know that Allan is a big proponent of scratch-builds. ;)
 
To Tony,

I try to document as many problems as possible that I encounter via the log. Hopefully I can help you with that (and others off course ;) )...
PS:
Another problem is the 2 front Gun Ports... If you follow the instructions in the manual, i.e. the stated distances, you will drill into the Bulkheads themselves! And the entire structure is in danger. So I'm going to move the front Gun Ports forward a bit to avoid this. To follow later.
I'm going to check everything again and then glue it.
I think it's best to stick to the plans knowing there will certainly be more contradictions...:mad:

To Allan and Jim:
Jim guessed it very well: I am indeed planning to build the next ship from scratch...and strive for the perfection of Mustafa (Mtbediz: nick name in this forum)... That's why I built the Constitution and now the Diana to gain even more experiences ..and the more problems the better?
Concerning the Kit:
If I want to avoid even bigger problems, it seems wisest to stick to the Kit's plans: everything is tailored to this (well... everything?)...

Thank you very much for your advice...Thumbs-UpThumbs-UpThumbs-UpThumbs-UpThumbs-UpThumbs-UpThumbs-UpThumbs-UpThumbs-UpThumbs-UpThumbs-Up
 
If I want to avoid even bigger problems, it seems wisest to stick to the Kit's plans: everything is tailored to this (well... everything?)...
I think It is a smart decision, I would stick to the kit's designed plans when it comes to the structured parts like the hull but would bash all the deck furniture, definitely guns and fittings, masts, and rigging, which is also a good candidate, IMHO.
 
Hi Fly
In response to your question I was a kit builder growing up then stopped completely in the early sixties. But when I took up the hobby again about 1980 I have been scratch building other than two kits about 20 years ago which I bashed. Going to scratch early on as an adult was economics in my case as it was a choice of feed our young family or buy a kit. It is much easier today for scratch and even kit bashing with us having the information so easily available. Back before the internet (good grief I am old) it was the library and book store.
Allan
 
Last edited:
Hi Fly
In response to your question I was a kit builder growing up then stopped completely in the early sixties. But when I took up the hobby again about 1980 I have been scratch building other than two kits about 20 years ago which I bashed. Going to scratch early on as an adult was economics in my case as it was a choice of feed our young family or buy a kit. It is much easier today for scratch and even kit bashing with us having the information so easily available. Back before the internet (good grief I am old) it was the library and book store.
Allan
Dear Allan,

I'm impressed.

I am indeed planning to start from scratch. For example, plans are available from the Model Shipways USF CONFEDERACY...
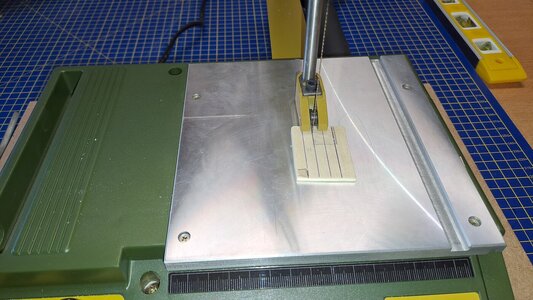
In the meantime, I am systematically purchasing a tool that I think I need, such as recently the Proxxon jigsaw... slowly but surely.
And, I especially try to think out of the box and look for methods that make the work easier but without compromising the quality...
PS
My first name is Marc ;)

PS2
I'm proud to present you my newest invention: the first Belgian 24 pounder GUN ROTFROTFROTFROTFROTFROTFROTFROTFROTFROTFROTF
Work in progress and I'm very very satisfied with the method I applied: it goes very very smoothly and accurate!!!!!!!!!!!!!!!!!!!!!!!!!!!!!!!!!!!!!


Diana92.jpg

Diana94.jpg

Diana95.jpg

Diana96.jpg
 
I understand you, Marc. After a certain stage, building a model from a kit no longer satisfies the model maker. Moreover, the effort spent to correct the errors caused by the production of the kit can sometimes be more difficult and frustrating than building a model from scratch. Most of the time, the materials provided with the kit are of poor quality, which turns people off from making models. I experienced the same thing.

I support your idea of producing a model from scratch, you will really enjoy this job much more because you will have complete control.

The essential basic machines you will need to build from scratch are; sander, circular saw, jigsaw (which you already bought). In addition, a lathe and milling machine that will help you do things more precise and faster.
 
Last edited:
The essential basic machines you will need to build from scratch are; sander, circular saw, jigsaw (which you already bought). In addition, a lathe and milling machine that will help you do things more smoothly and faster.
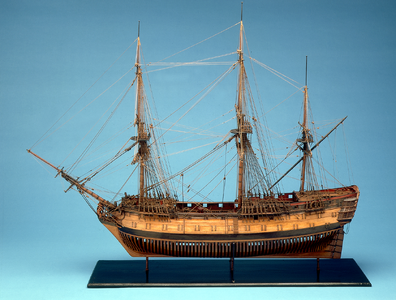
I agree Mustafa, these are all great to have and I feel lucky to have them but none of them are essential. The photo below was built without any of the tools you mentioned as there was no electricity available at the time in England (1775) :) Anchor (Interestingly in doing a quick search Britain began using electricity in the 1880s with the installation of the first public electricity generator in Godalming, Surrey in 1881,) Keep in mind that many find the words "fast" and "shipmodeling" are oxymoronic.
Allan

PS: Marc, based on my own experience I would add a thickness sander. I have used mine for about 15 years or more, whereas I have only had a mill for about 3 years. Both are great to have but the thickness sander was and still is far more useful for me.

1722966472891.png
 
Last edited:
PS2
I'm proud to present you my newest invention: the first Belgian 24 pounder GUN ROTFROTFROTFROTFROTFROTFROTFROTFROTFROTFROTF
Work in progress and I'm very very satisfied with the method I applied: it goes very very smoothly and accurate!!!!!!!!!!!!!!!!!!!!!!!!!!!!!!!!!!!!!

ROTF ROTF ROTF ROTF ROTF ROTF Precision first!
 
agree Mustafa, these are all great to have and I feel lucky to have them but none of them are essential. The photo below was built without any of the tools you mentioned as there was no electricity available at the
Wow, they were very patient people. The idea of building a model from scratch without any machinery seemed really scary to me. Thank goodness we have electricity and machines today. :)
 
Back
Top