because I did not install them until now !Good morning, sorry, I don't see the water channel covers under the keel. Why?
-

Win a Free Custom Engraved Brass Coin!!!
As a way to introduce our brass coins to the community, we will raffle off a free coin during the month of August. Follow link ABOVE for instructions for entering.
-

PRE-ORDER SHIPS IN SCALE TODAY!
The beloved Ships in Scale Magazine is back and charting a new course for 2026!
Discover new skills, new techniques, and new inspirations in every issue.
NOTE THAT OUR FIRST ISSUE WILL BE JAN/FEB 2026
You are using an out of date browser. It may not display this or other websites correctly.
You should upgrade or use an alternative browser.
You should upgrade or use an alternative browser.
HMS GRANADO (1742) - midship section - POF by CAF in 1:48 - by Uwe
- Joined
- Oct 17, 2020
- Messages
- 1,691
- Points
- 488

Thank youperché non li ho installati fino ad ora!
Looks very, very good, excellent work. Jetzt schießen wir aber.
Hi Uwe,
That construction looks ridged enough to really fire that mortar. I see some pyro experimenting on the horizon.
Ps it seems the chinese boxwood is a different one then the european. In China they mainly have buxus microphylla where the european boxwood is buxus sempervirens. Do you notice differences in the wood or is the wood equal?
In the pictures it really looks sublime, but this is ofcourse also due too your work
The Chinese boxwood looks great, and I prefer it to Cherry wood which is supplied in the full hull Granado.
- Joined
- Aug 8, 2019
- Messages
- 5,585
- Points
- 738

@Maarten I can tel you the difference between Chinese and European boxwood. There is not much difference between them, but when you put them next to eachother, you will notice they are different. The chinese is less solid. Feels light when you hold it. I got here a few pieces and use them only for straight cut things. Like the spool holder on my serving tool. The Europeanen version is better for carving. It is a better quality. More solid. But still the Chinese boxwood is okay to use. You can order it on Aliexpress, look for knife handle.
Due to the fact, that I am in contact with Tom from CAF, I can make here in our forum an anouncement, when I get the info of a re-editionI'm catching up with this, too.
This wood looks gorgeous and of course Your buildings skills are just adding to the beauty of the wood.
This is a very interesting model, i may keep an eye out for when it's available again.
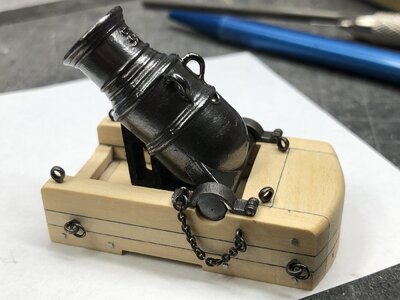
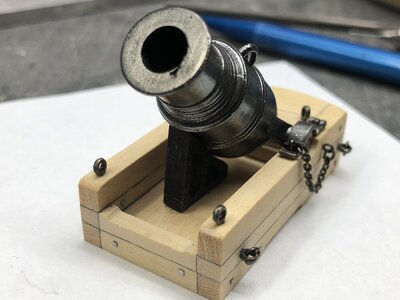
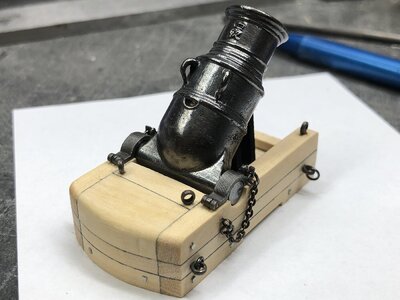
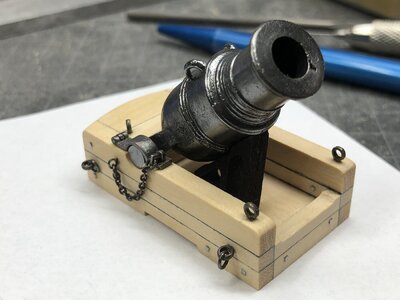
Hallo,Gosch! That looks really good, metal has been blackened so nicely. What did you use for blackening?
I like this type also very much, often it comes out like blue-steel - I am using most often (and also here) the material from Ballistol - usually used by gunsmiths
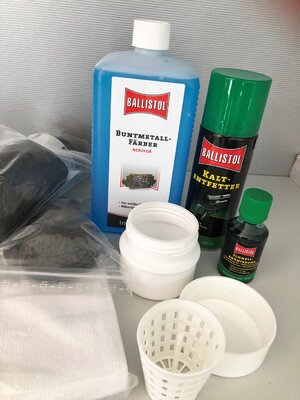
We made once already the research and found out, that this blackening fluids are not available directly from Ballistol in Northern America ....

BALLISTOL
WAS MAN PFLEGT, BLEIBT GUT! - Gute Pflege zahlt sich aus – das gilt sowohl für die Reinigung, Schutz und Pflege mit BALLISTOL-Produkten für Mensch....
 ballistol.de
The european boxwood is much better for carving, than this one. The density of european is higher.Hi Uwe,
That construction looks ridged enough to really fire that mortar. I see some pyro experimenting on the horizon.
Ps it seems the chinese boxwood is a different one then the european. In China they mainly have buxus microphylla where the european boxwood is buxus sempervirens. Do you notice differences in the wood or is the wood equal?
In the pictures it really looks sublime, but this is ofcourse also due too your work
But for structures like the wooden wall elements of the Granado this kind of wood is beautiful to work with. You get a very smooth and closed surface, very sharp and accurate edges and still the small section model is getting really heavy compared to other woods. and also very stiff.
I can really recommend this type of wood, although I like pear and Elsbeere very much by the colour.....
Not to produce here a misunderstanding: This chinese boxwood will be much better for carving than any cherry or pear wood, but the european is even better.
Many Thanks to @Steef66 for the additional information
The Chinese boxwood is off course much more expensive by the raw material in comparison with Cherry, and I guess also the cnc milling will take more time, because it is much harder.The Chinese boxwood looks great, and I prefer it to Cherry wood which is supplied in the full hull Granado.
So with this the full hull model would be more expensive for the customer - but where a demand is, there will be also a market ...
Hallo Radek,Hi Uwe!
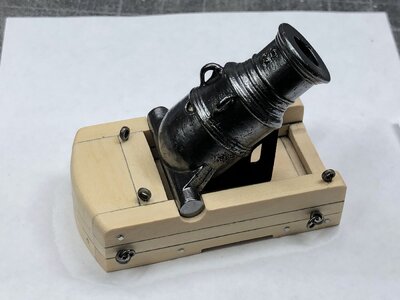
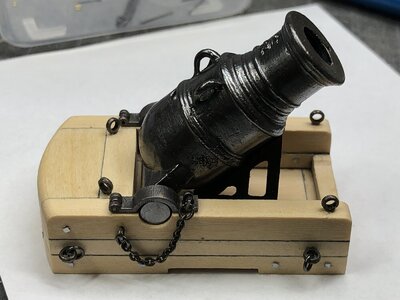
Will you leave the mortar so shiny or do you dim it?
Radek
the shiny surface is mainly caused by the lights in my workshop - in reality it is looking better similat to real muzzles, which you can see at museums
But maybe, if necessary there will be the possibility with grafite powder or simialr.....
Many Thanks for your interest
working further on the mortar pit .....
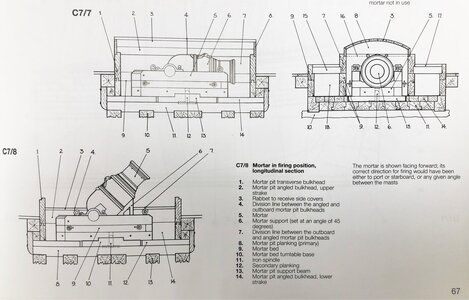
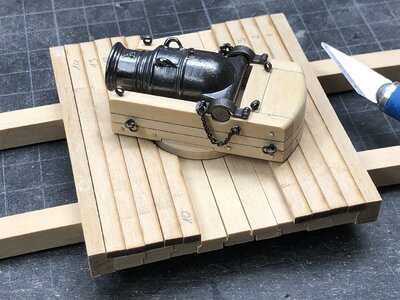
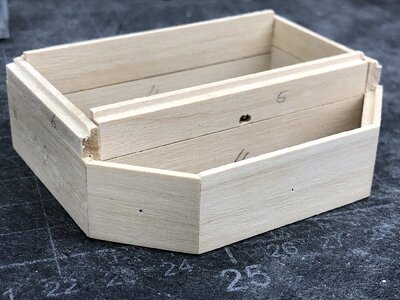
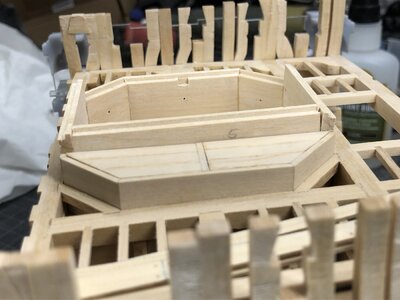
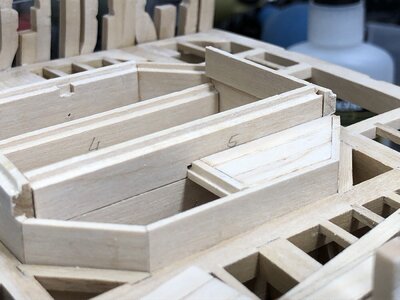
inside of the pit bulkhead octagon several removable boards have to be installed, which will be later on the base for the removable roofs. These are on the long side the 2 times part "4", 2 time "5" and at the short side on exach side the "6". The two roofs will lay on the top of parts 5 and 6 - and you can see, that there is a small step, that the top is not at the same level. This is caused by a small mistake in the kit, the parts "4" are 2mm too high. Tom from Caf was already informed by myself, so he will adjust this in the next batch of kits
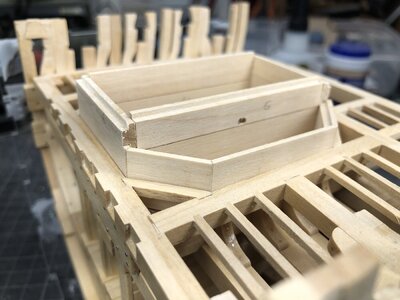
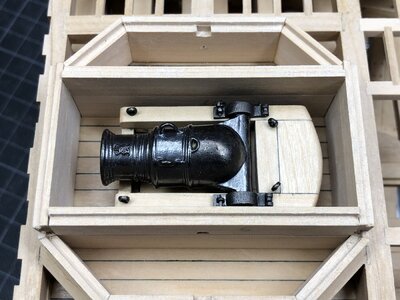
Here you can see the mortar sitting inside the pit "non active" -> for "ready for action" the elements inside the pit have to be removed, so that the mortar can rotate
In the following you can see, that the elements "4" are already shortened by the 2mm, also the side covers on one side are prepared
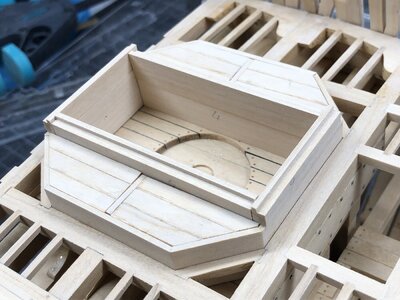
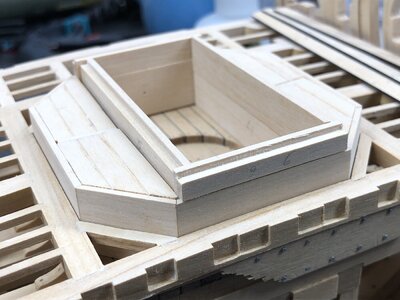
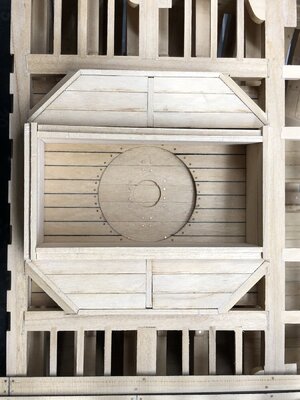
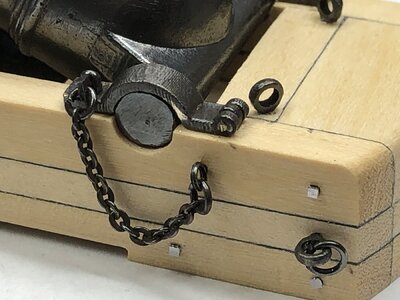
the side covers received the eyelets for lifting
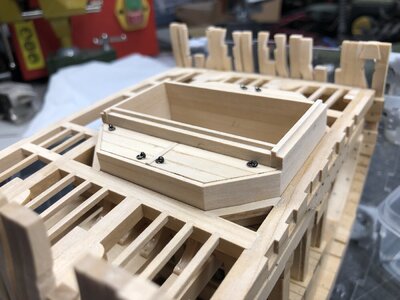
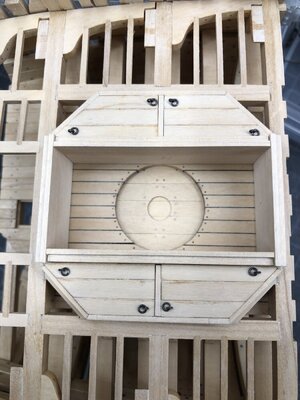
Many Thanks for your interest ---- to be continued .....

inside of the pit bulkhead octagon several removable boards have to be installed, which will be later on the base for the removable roofs. These are on the long side the 2 times part "4", 2 time "5" and at the short side on exach side the "6". The two roofs will lay on the top of parts 5 and 6 - and you can see, that there is a small step, that the top is not at the same level. This is caused by a small mistake in the kit, the parts "4" are 2mm too high. Tom from Caf was already informed by myself, so he will adjust this in the next batch of kits


Here you can see the mortar sitting inside the pit "non active" -> for "ready for action" the elements inside the pit have to be removed, so that the mortar can rotate

In the following you can see, that the elements "4" are already shortened by the 2mm, also the side covers on one side are prepared


the side covers received the eyelets for lifting


Many Thanks for your interest ---- to be continued .....
- Joined
- Oct 17, 2020
- Messages
- 1,691
- Points
- 488

Hello Uwek, is this the offending area? Thank youworking further on the mortar pit .....
View attachment 288213
inside of the pit bulkhead octagon several removable boards have to be installed, which will be later on the base for the removable roofs. These are on the long side the 2 times part "4", 2 time "5" and at the short side on exach side the "6". The two roofs will lay on the top of parts 5 and 6 - and you can see, that there is a small step, that the top is not at the same level. This is caused by a small mistake in the kit, the parts "4" are 2mm too high. Tom from Caf was already informed by myself, so he will adjust this in the next batch of kits
View attachment 288203
View attachment 288204
Here you can see the mortar sitting inside the pit "non active" -> for "ready for action" the elements inside the pit have to be removed, so that the mortar can rotate
View attachment 288205
In the following you can see, that the elements "4" are already shortened by the 2mm, also the side covers on one side are prepared
View attachment 288206
View attachment 288207
View attachment 288208
View attachment 288209
View attachment 288210
the side covers received the eyelets for lifting
View attachment 288212
View attachment 288211
Many Thanks for your interest ---- to be continued .....
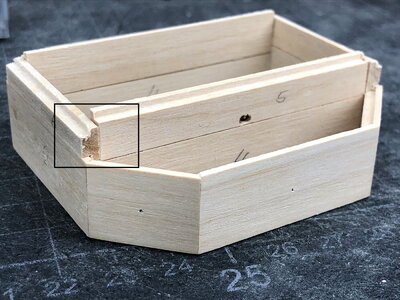
Yes - the red marked difference of 2mmHello Uwek, is this the offending area? Thank you
these 2mm (red marks) have to be removed from the part 4 (and not 5) along the length - from the bottom
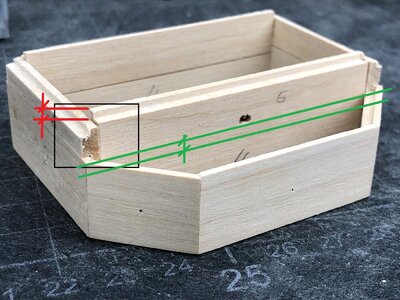
once more here in green the area which have to be removed - here it will be also clear why at part 4 and not 5, the notch for the small carling for the covers have to move down, so, that they are on the same level (blue marks)
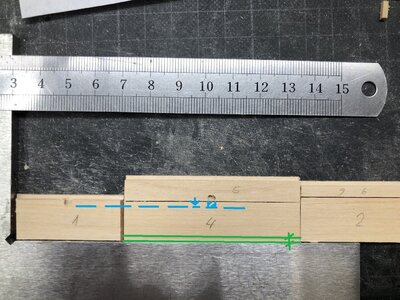
as mentioned already, easy to correct, it is only necessary to know and understand - the new kits will be already corrected
- Joined
- Oct 17, 2020
- Messages
- 1,691
- Points
- 488

Thanks for your answerYes - the red marked difference of 2mm
these 2mm (red marks) have to be removed from the part 4 (and not 5) along the length - from the bottom
View attachment 288219
once more here in green the area which have to be removed - here it will be also clear why at part 4 and not 5, the notch for the small carling for the covers have to move down, so, that they are on the same level (blue marks)
View attachment 288220
as mentioned already, easy to correct, it is only necessary to know and understand - the new kits will be already corrected

