-

Win a Free Custom Engraved Brass Coin!!!
As a way to introduce our brass coins to the community, we will raffle off a free coin during the month of August. Follow link ABOVE for instructions for entering.
-

PRE-ORDER SHIPS IN SCALE TODAY!
The beloved Ships in Scale Magazine is back and charting a new course for 2026!
Discover new skills, new techniques, and new inspirations in every issue.
NOTE THAT OUR FIRST ISSUE WILL BE JAN/FEB 2026
You are using an out of date browser. It may not display this or other websites correctly.
You should upgrade or use an alternative browser.
You should upgrade or use an alternative browser.
HMS GRANADO (1742) - midship section - POF by CAF in 1:48 - by Uwe
- Joined
- Dec 9, 2019
- Messages
- 970
- Points
- 403

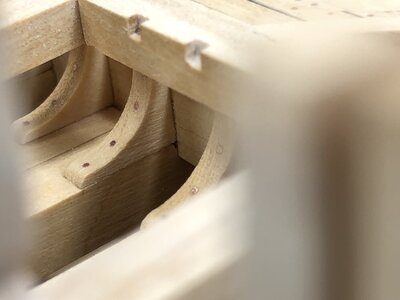
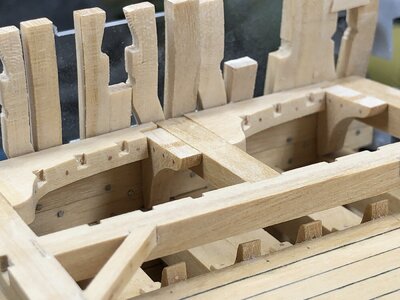
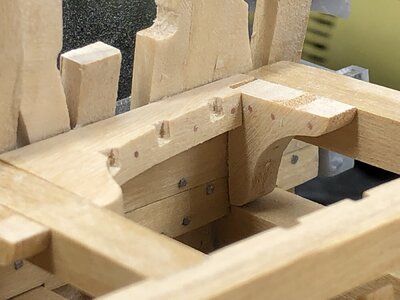
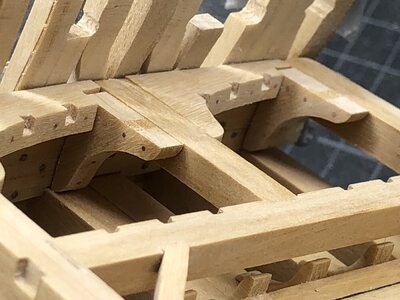
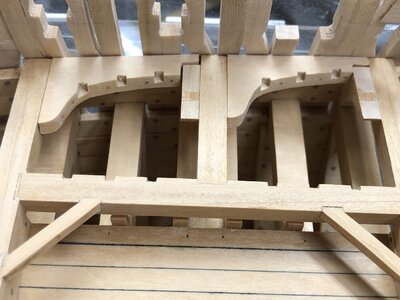
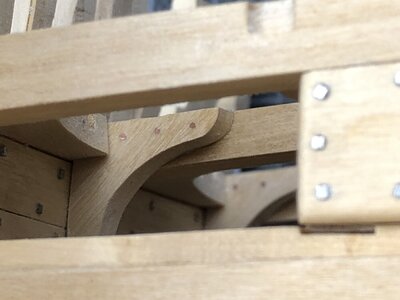
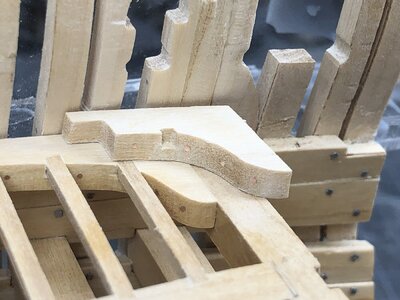
Witaj UwekKolejnymi krokami roboczymi były brakujące mniejsze belki oraz wiszące i leżące kolana usztywniające konstrukcję
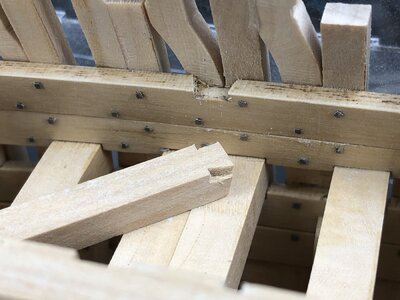
Na pozostałych belkach zapomniałem zrobić zdjęcie połączenia belek typu fishtail
View attachment 285562
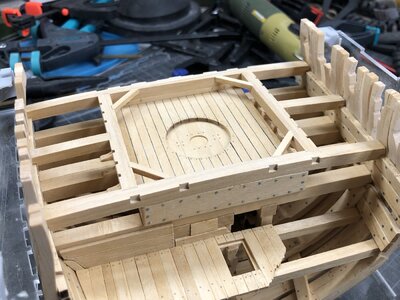
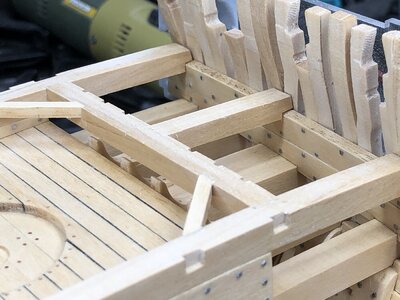
Montaż krótszych belek i usztywnień komórki
View attachment 285563
View attachment 285564
View attachment 285566
View attachment 285565
zaczynając od kolan
View attachment 285567
View attachment 285568
View attachment 285570
View attachment 285571
View attachment 285569
Świetna robota na belkach wygląda super
Pozdrawiam Mirek
Hello Uwek
Great job on the beams looks great
Regards Mirek
Great close up photos . Nicely done!The next working steps were the missing smaller beam(s) and the hanging and laying knees stiffening the structure
On the other beams I forgot to make a photo of the fishtail connection of the beams
View attachment 285562
Installation of the shorter beams and the stiffeners of the cell
View attachment 285563
View attachment 285564
View attachment 285566
View attachment 285565
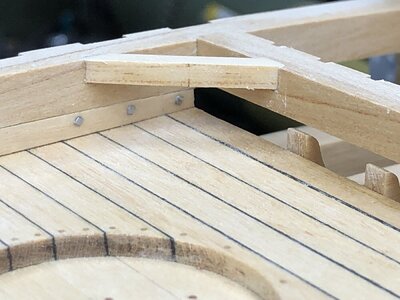
starting with the knees
View attachment 285567
View attachment 285568
View attachment 285570
View attachment 285571
View attachment 285569
Many thanks for your kind words and all the likes received
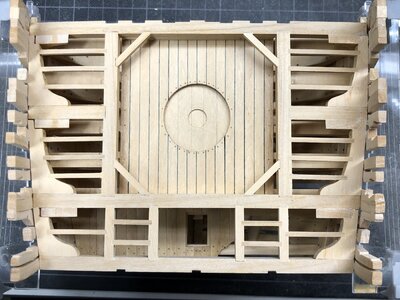
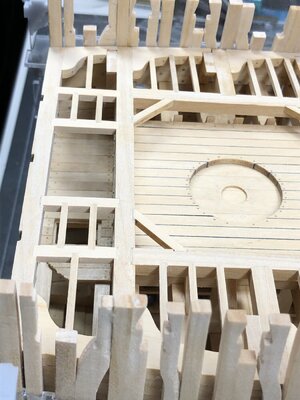
also the carlings were installed in the meantime
The left side will not be planked, so I filled also the small gaps at the joints of the knees
the right side will be planked, so need to make this additional work
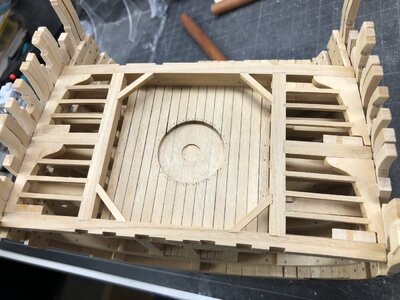
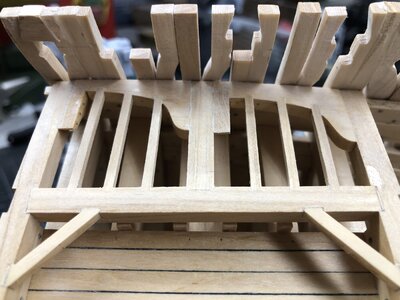
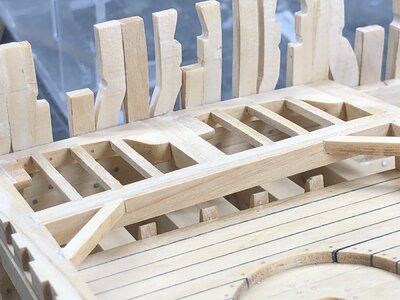
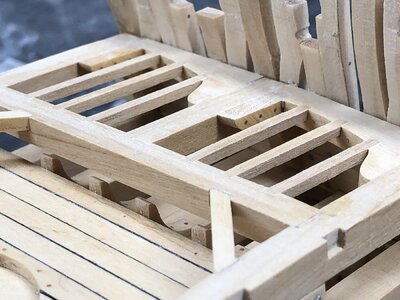
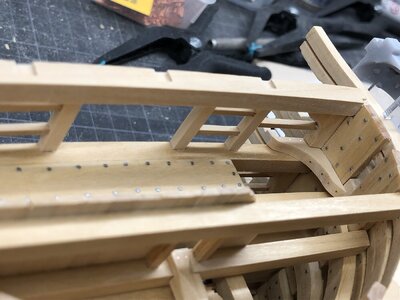
when fixing the carlings with glue, please be aware, that some rest of glue could be pressed out at the notches - usually not visible but......
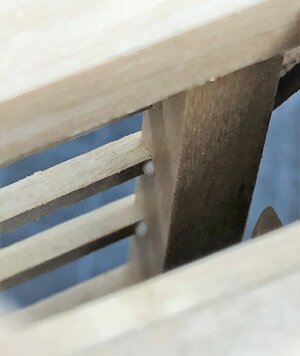
in the following photo you can see such drops - so please check and remove the glue drops
beams with knees and carlings around the mortar pit are prepared
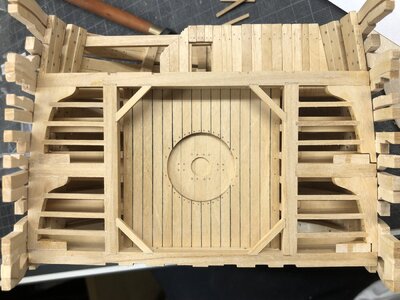
and also the third beam with knees etc. .....
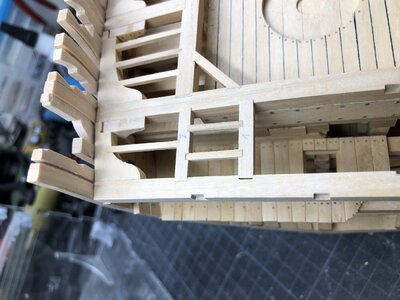
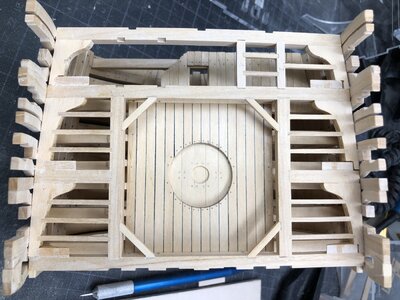
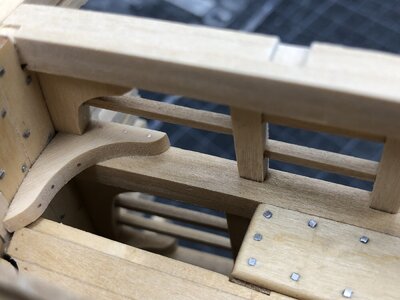
in the opening in the center a ladder and hatch has to be installed - under this you can recognize the hatch to the coal-hole
left side will get deck-planking - the right side not, so beams knees and carlings will be visible
Many Thanks for your interest .... to be continued .....
also the carlings were installed in the meantime
The left side will not be planked, so I filled also the small gaps at the joints of the knees
the right side will be planked, so need to make this additional work


when fixing the carlings with glue, please be aware, that some rest of glue could be pressed out at the notches - usually not visible but......
in the following photo you can see such drops - so please check and remove the glue drops

beams with knees and carlings around the mortar pit are prepared

and also the third beam with knees etc. .....


in the opening in the center a ladder and hatch has to be installed - under this you can recognize the hatch to the coal-hole
left side will get deck-planking - the right side not, so beams knees and carlings will be visible


Many Thanks for your interest .... to be continued .....
Fantastic work on this kit Uwe.
The already mentioned nibbling on tge planks, the fish tail fittings on the beams, the wonderful framing. All just perfect.
Btw how did you make the nibbling, just by scroll saw?
The already mentioned nibbling on tge planks, the fish tail fittings on the beams, the wonderful framing. All just perfect.
Btw how did you make the nibbling, just by scroll saw?
Hello Uwe, as always, excellent and great presentation of your work.
Yes, correctBtw how did you make the nibbling, just by scroll saw?
By Hand with different sizes of small chisel- i have a set Made by a russian manufacturerBeautiful work! What milling tool are you using to make the cuts in the beam and knees, I need to look into getting one, Thankyou Paul
To all: many thanks for your interest
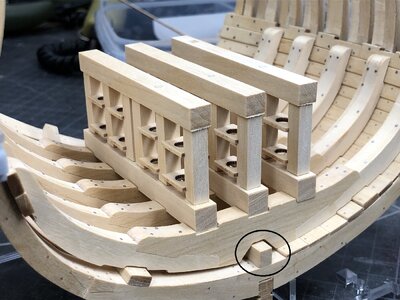
The next step was building the mortar pit with the 8 bulkheads.
Here CAF is providing some plywood elements in form of an octagon in order to make a template for correct installation of the bulkhead elements.
BTW: The small holes in the center of each element are the prepared installation points for the 8 eyelets, which will be necessary for the tackling of the mortar - when the bulkheads form the octagon pit, there will be no chance to drill the holes from inside
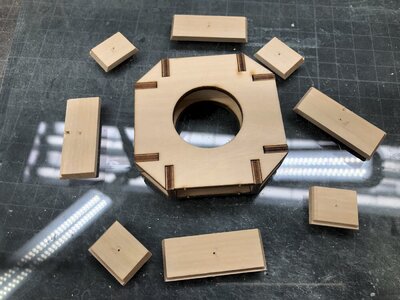
First of all, I thought, that it would be better to install the bulkheads directly in situ towards the beams
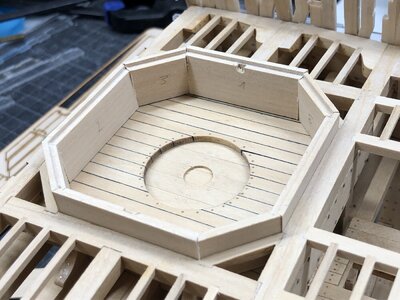
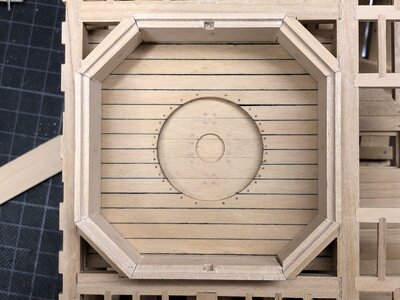
But I recognized, that it will be not easy to get all elements vertical - only a small difference in the angle and you will recognized this at the contact joints
so I used the plywood elements and fixed the elements of the bulkhead with leaning agianst the plywood octagon - and realized it - the result is very good and is fitting extremly good between the beams
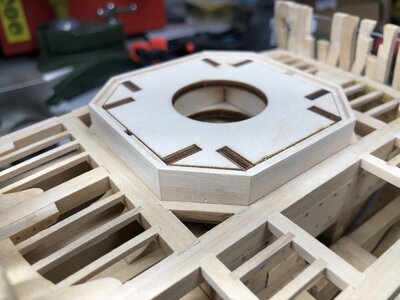
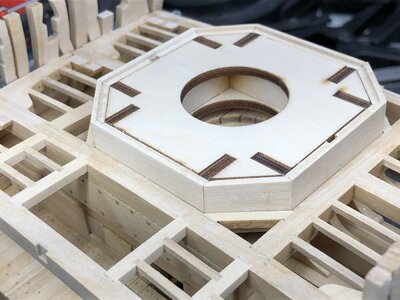
important is only to use the glue only at the joints between the bulkheads, otherwise you will have problems to remove the template
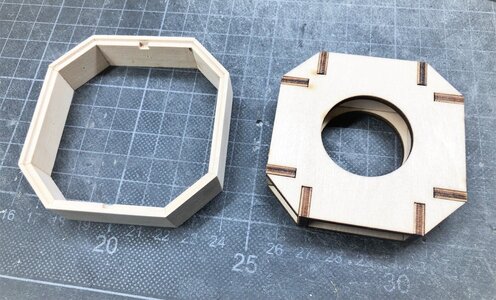
So based on my experience with this plywood template - USE IT !!!!!
Here CAF is providing some plywood elements in form of an octagon in order to make a template for correct installation of the bulkhead elements.
BTW: The small holes in the center of each element are the prepared installation points for the 8 eyelets, which will be necessary for the tackling of the mortar - when the bulkheads form the octagon pit, there will be no chance to drill the holes from inside

First of all, I thought, that it would be better to install the bulkheads directly in situ towards the beams


But I recognized, that it will be not easy to get all elements vertical - only a small difference in the angle and you will recognized this at the contact joints
so I used the plywood elements and fixed the elements of the bulkhead with leaning agianst the plywood octagon - and realized it - the result is very good and is fitting extremly good between the beams


important is only to use the glue only at the joints between the bulkheads, otherwise you will have problems to remove the template

So based on my experience with this plywood template - USE IT !!!!!
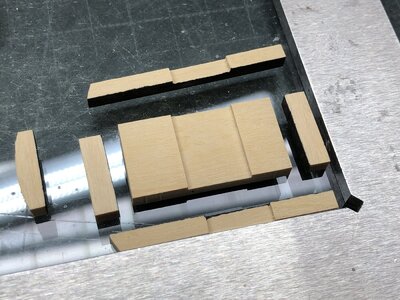
Before finalization of the mortar pit, I should build the mortar by itself. Not that the mortar is later on not fitting into the pit
The basic elements ready for glue - you can see, that I painted here the connecting surfaces with black ecoline colour - I wanted to show the different joints.
In reality there was off course no caulking between the elements
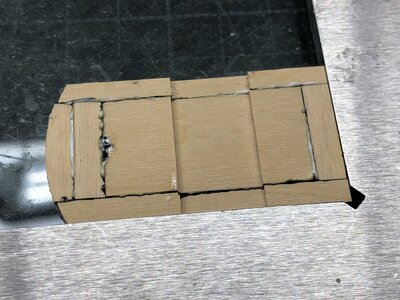
some more elements added - you can see already the diverse bolts
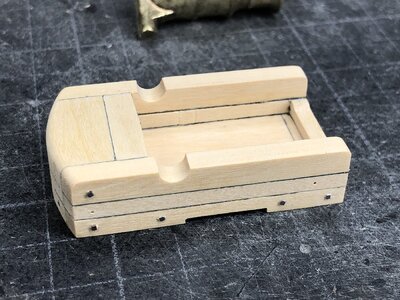
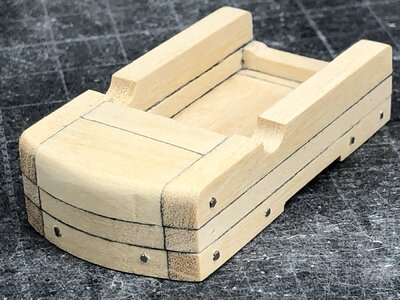
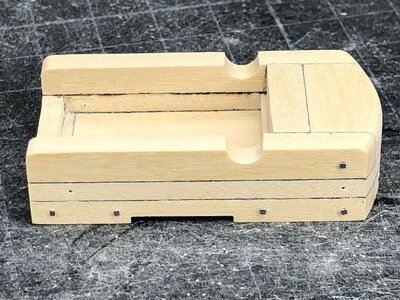
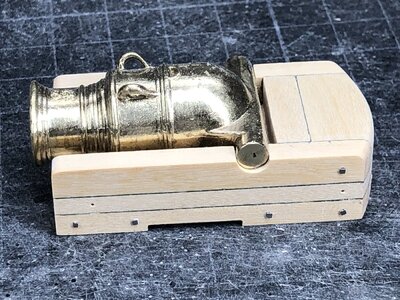
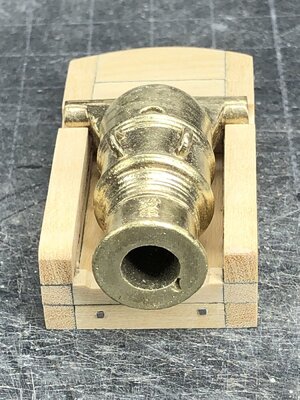
The basic elements ready for glue - you can see, that I painted here the connecting surfaces with black ecoline colour - I wanted to show the different joints.
In reality there was off course no caulking between the elements


some more elements added - you can see already the diverse bolts


Looks very good, sauber und präzise.
Hello, Mon Ami, I love how the timber looks, I mean the sharp edges and presentations with grains. Is this a Chinese boxwood?
Hallo my friend,Hello, Mon Ami, I love how the timber looks, I mean the sharp edges and presentations with grains. Is this a Chinese boxwood?
Yes - the wood of the complete kit is made by this chinese boxwood - very hard and you can sand it very accurately
It is pleasure to work with - the only "problem" is the fact, that you produce very fine dust with sanding - so the dust is everywhere -> after finishing the model the complete workshop will need a cleaning from the dust.........
But the wood is great
No I know how the workshop by Stefan alias @George I is looking like - and he is building a complete ship of the line model in boxwood
Royal George 1714 1:48
Hallo geschätzte Modellbauergemeinde! Ich bin ein Modellbauer aus Österreich, und besuche öfters die Modellbaurunde um Willi Meischl in Wien. Mein großes Ziel ist es die Royal George 1714 (nach dem Hanover Modell) zu bauen. Bauart: Navy Board Model Maßstab: 1:48 Holz: Buchsbaum Mit freundlichen...
shipsofscale.com
Many Thanks to all for the comments and all the likes received
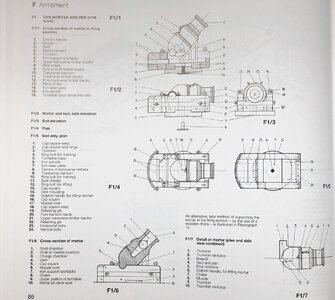
In the meantime the eyebolts were prepared and installed
the four on the top are for the lifting actions of the complete mortar with bed
the four on the sides are for the tackling and turning of the mortar
the wooden triangle is the support for a 45° angle of the muzzle - due to the fact, that this was originally made out of iron I decided to remove the inner parts
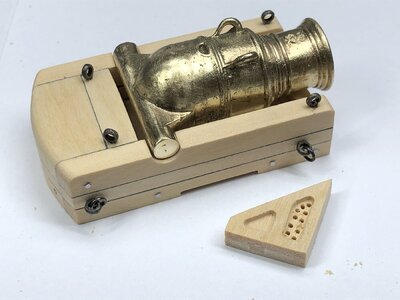
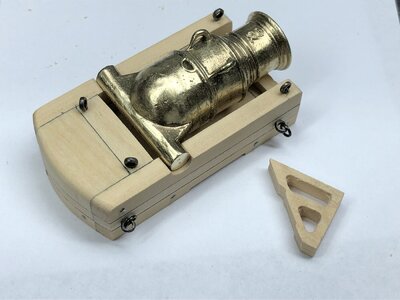
and painted the "iron" support black
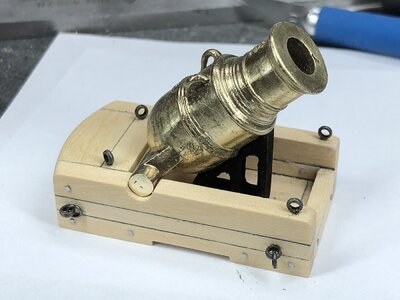
these are the rest of the iron parts, with cap square, the chain with retaining gib
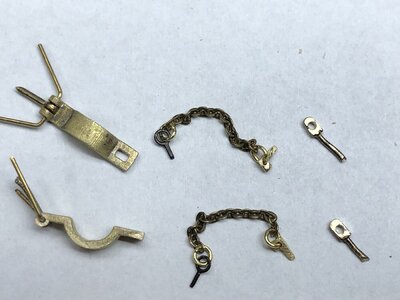
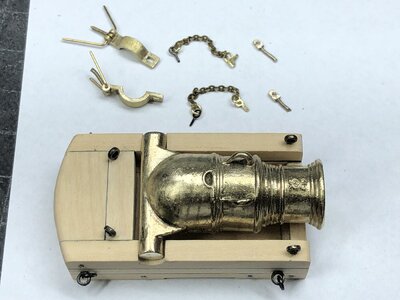
Tomorrow I will show you the result blackened and installed

In the meantime the eyebolts were prepared and installed
the four on the top are for the lifting actions of the complete mortar with bed
the four on the sides are for the tackling and turning of the mortar
the wooden triangle is the support for a 45° angle of the muzzle - due to the fact, that this was originally made out of iron I decided to remove the inner parts


and painted the "iron" support black

these are the rest of the iron parts, with cap square, the chain with retaining gib


Tomorrow I will show you the result blackened and installed
When you guys produce quality like this it is like.......I’m never going to post a picture of my build ever again....! Truely just magnificent.Many Thanks to all for the comments and all the likes received
View attachment 287674
In the meantime the eyebolts were prepared and installed
the four on the top are for the lifting actions of the complete mortar with bed
the four on the sides are for the tackling and turning of the mortar
the wooden triangle is the support for a 45° angle of the muzzle - due to the fact, that this was originally made out of iron I decided to remove the inner parts
View attachment 287669
View attachment 287670
and painted the "iron" support black
View attachment 287671
these are the rest of the iron parts, with cap square, the chain with retaining gib
View attachment 287673
View attachment 287672
Tomorrow I will show you the result blackened and installed

The mortar looks very inpressive and makes you want to fire a test shot.
Hallo friends,
many thanks for your comments and the Likes received - I will show the blackened mortar in short time
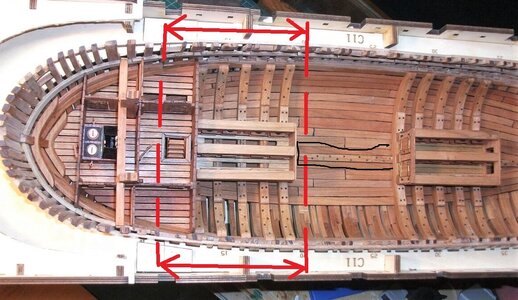
But for now, I would like to show you a photo of the full hull CAF model of the HMS GRANADO actual shown in the building log by @Adiefenbach where I marked the area of the section model, so you can get a good feeling where we are in the vessel
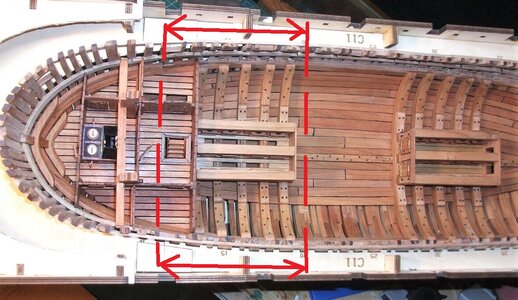
Enjoy and take a look, and if you are building either the section model or the full hull model, please start a building log - it would be very interesting to see the work of others, in order to help and assist each other
many thanks for your comments and the Likes received - I will show the blackened mortar in short time
But for now, I would like to show you a photo of the full hull CAF model of the HMS GRANADO actual shown in the building log by @Adiefenbach where I marked the area of the section model, so you can get a good feeling where we are in the vessel

Enjoy and take a look, and if you are building either the section model or the full hull model, please start a building log - it would be very interesting to see the work of others, in order to help and assist each other
CAF HMS Granado 1:48 POF
Hope all had a Happy Thanksgiving and survived the holiday. Have been working on Part One of this CAF Granado kit for a while now. Part Two is waiting in the wings. Have completed all of the main ribs and have been impressed by the quality of the rib design and of the jig for assembly...
shipsofscale.com
- Joined
- Oct 17, 2020
- Messages
- 1,691
- Points
- 488

Buongiorno, mi dispiace, non vedo le coperture del canale dell'acqua sotto la chiglia. Come mai?Ciao amici,
grazie mille per i tuoi commenti e i Mi piace ricevuti - Ti mostrerò la malta annerita in breve tempo
Ma per ora, vorrei mostrarvi una foto del modello CAF a scafo completo dell'HMS GRANADO attuale mostrato nel registro di costruzione di @Adiefenbach dove ho segnato l'area del modello della sezione, così puoi avere una buona sensazione di dove siamo nella nave
[ALLEGARE=completo]287857[/ALLEGARE]
Divertiti e dai un'occhiata, e se stai costruendo il modello di sezione o il modello di scafo completo, per favore avvia un registro di costruzione: sarebbe molto interessante vedere il lavoro degli altri, al fine di aiutarsi e aiutarsi a vicenda
CAF HMS Granado 1:48 POF
Hope all had a Happy Thanksgiving and survived the holiday. Have been working on Part One of this CAF Granado kit for a while now. Part Two is waiting in the wings. Have completed all of the main ribs and have been impressed by the quality of the rib design and of the jig for assembly...shipsofscale.com
Last edited:


