-

Win a Free Custom Engraved Brass Coin!!!
As a way to introduce our brass coins to the community, we will raffle off a free coin during the month of August. Follow link ABOVE for instructions for entering.
-

PRE-ORDER SHIPS IN SCALE TODAY!
The beloved Ships in Scale Magazine is back and charting a new course for 2026!
Discover new skills, new techniques, and new inspirations in every issue.
NOTE THAT OUR FIRST ISSUE WILL BE JAN/FEB 2026
You are using an out of date browser. It may not display this or other websites correctly.
You should upgrade or use an alternative browser.
You should upgrade or use an alternative browser.
HMS GRANADO - full hull - POF kit by CAF in 1:48 - by Uwe
Clou is the thing to do. 
Are you sanding with steelwool afterwards?
Are you sanding with steelwool afterwards?
Considering that CLOU Schnellschleifgrund is just the sanding sealer the result is outstanding! Shall I go with Schnellschleifgrund CLOU? 
It is impossible to obtain it in the US.
It is impossible to obtain it in the US.
- Joined
- Jan 9, 2020
- Messages
- 10,566
- Points
- 938

Jim, see my post in my build log about the CLOU. Maybe there is a way.Considering that CLOU Schnellschleifgrund is just the sanding sealer the result is outstanding! How can I go with Schnellschleifgrund CLOU?
It is impossible to obtain it in the US.
link to that post, please?Jim, see my post in my build log about the CLOU. Maybe there is a way.
Sorry @Uwek for the spamMy last post in my build log of the WB.
I believe it is flammable and cannot be shipped by regular post. A special post by UPS could cost 10 times the cost of the product itself
Many Thanks for all your kind words and all the likes received
@Maarten : yes, a slight final "sanding" with steelwool is making the surface very smooth and brings a final touch
With the finished internal planking the riders of the mortar beds can be adjusted to the form of the planking
the photos are showing the dryfit before starting the final adjustments of the riders
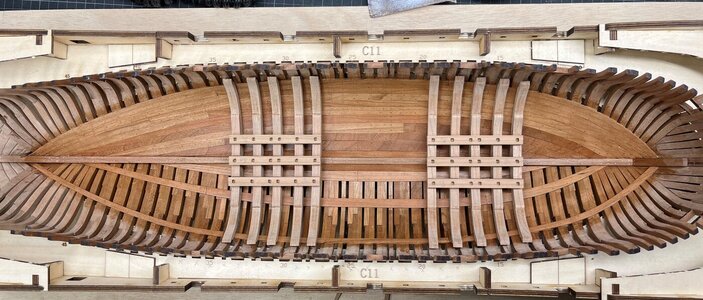
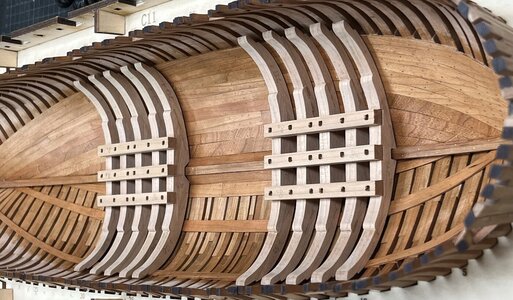
Many Thanks for your interest
@Maarten : yes, a slight final "sanding" with steelwool is making the surface very smooth and brings a final touch
With the finished internal planking the riders of the mortar beds can be adjusted to the form of the planking
the photos are showing the dryfit before starting the final adjustments of the riders


Many Thanks for your interest
Hi Uwe
Very nice colour and very clean work, not a glue stain in sight.
Kind Regards
Nigel
Very nice colour and very clean work, not a glue stain in sight.
Kind Regards
Nigel
The necessary installation of bolts etc. I like to make before these elements are finally installed inside the ship.
For myself I realized, that I can do such works much more accurate outside with the single element in hand, than already fixed
So here the "bolting" of the riders is done - followed by the shown pattern of bolts in Goodwins Anatomy book about the HMS Granado
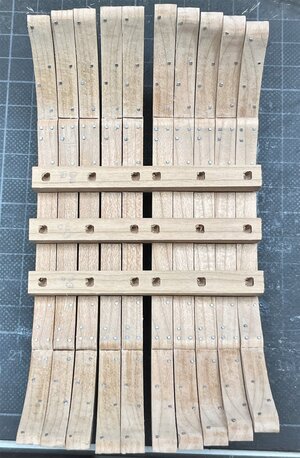
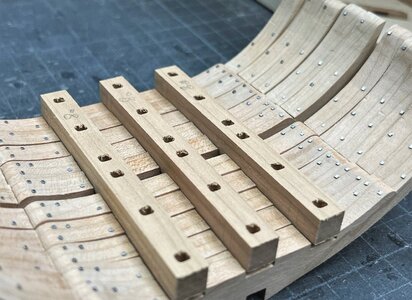
For myself I realized, that I can do such works much more accurate outside with the single element in hand, than already fixed
So here the "bolting" of the riders is done - followed by the shown pattern of bolts in Goodwins Anatomy book about the HMS Granado


Hallo Ted,Very nice Uwe!
Like the square 'bolts' - may I ask what do you use?
Ted
many thanks for your interest - These "square bolts" I used first time at the section model I made before - see this and the following posts
HMS GRANADO (1742) - midship section - POF by CAF in 1:48 - by Uwe
The frames are prepared with all the visible nails now we have to make the riders for the mortar base. These heavy stiffeners were necessary to take over the weight of the shell room with mortar and also the extreme forces of the bomb during firing all together 5 riders are under the mortar -...
shipsofscale.com
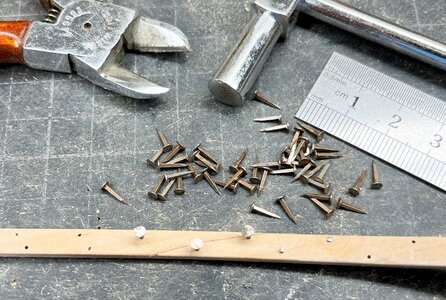
these are shoe tacks or nails with square shank 0,8mm
copied from the section building log:
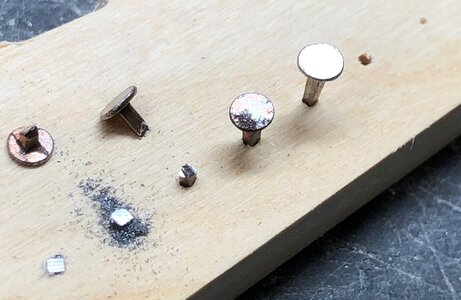
From right to left:
1) small dott with a scriber
2) drilled hole of 0,8mm maybe 5mm deep
3) nail / tuck of 0,8mm square installed
4) nail driven with small hammer
5) nail head cut maybe 1 or 2mm above the timber
6) filing down with a needlefile
7) finished square bolt
and an actual photo I made yesterday
Most clever. Who would have thought.
After the installation of most of the inner planking I was once more able to check and finally mark the heights and locations of the beam-clamps with the help of the temporary templates available in the kit.
In addition I checked the height also with the distance towards the lower sills of the gunports. This is in my opinion the most important measure, which has to be correct, because an error will be immediately visible when the guns (standing on deck planking, which are laying on beams installed on these clamps) are not fitting to the gunports.
Who cares if the hold is 2 or 4mm higher ..... especially if I plan to separate the deck from the hull along the wales
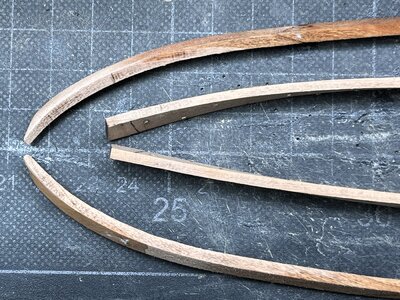
the bended ends of the 3mm thick clamps for the mortar bed beams
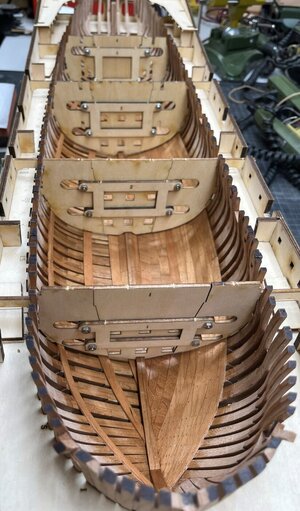
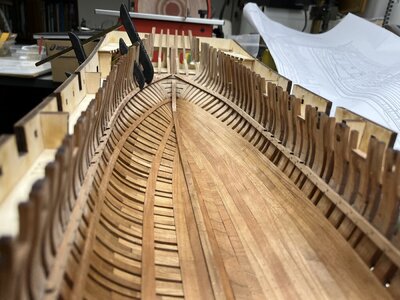
The first row is installed, bolts are simulated with square shank nails
The fore view direction towards the bow
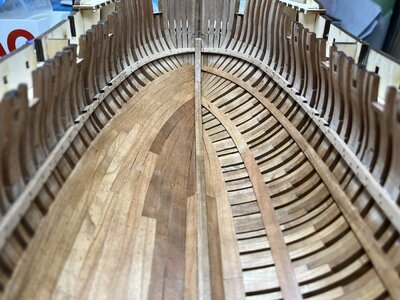
and the other direction aft towards the stern
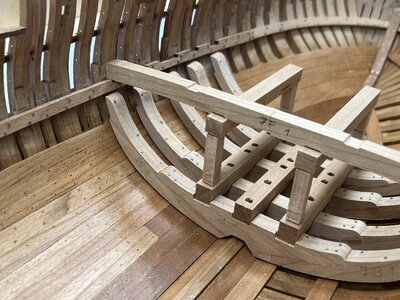
I was very happy with my last check, when I dryfitted the riders, the baoll rack pillars and the mortar bed beams - everything is fitting well, so that I can sum up, that the fixed clamps for these beams are definitely in the correct height
Now the second and third row under the first installed band of the clamps have to be prepared .....
Many Thanks for the interest ....... see you soon in this topic
In addition I checked the height also with the distance towards the lower sills of the gunports. This is in my opinion the most important measure, which has to be correct, because an error will be immediately visible when the guns (standing on deck planking, which are laying on beams installed on these clamps) are not fitting to the gunports.
Who cares if the hold is 2 or 4mm higher ..... especially if I plan to separate the deck from the hull along the wales

the bended ends of the 3mm thick clamps for the mortar bed beams

The first row is installed, bolts are simulated with square shank nails
The fore view direction towards the bow

and the other direction aft towards the stern

I was very happy with my last check, when I dryfitted the riders, the baoll rack pillars and the mortar bed beams - everything is fitting well, so that I can sum up, that the fixed clamps for these beams are definitely in the correct height

Now the second and third row under the first installed band of the clamps have to be prepared .....
Many Thanks for the interest ....... see you soon in this topic
These are serious deck clamps Uwe. That must have cost a lot of steam and heat.
great work Uwe, I am always enthusiastic.


