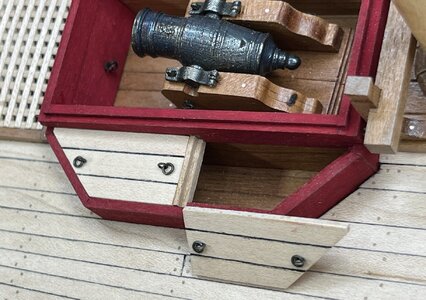
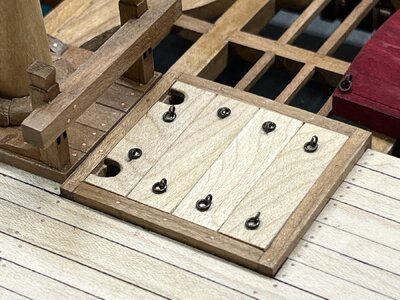
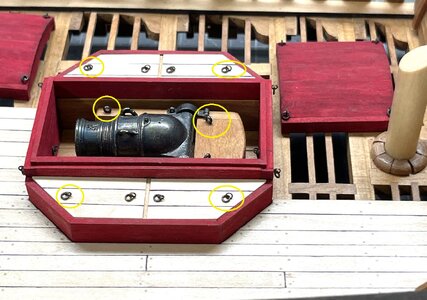
HMS GRANADO - full hull - POF kit by CAF in 1:48 - by Uwe

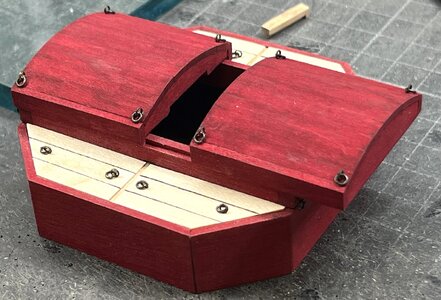
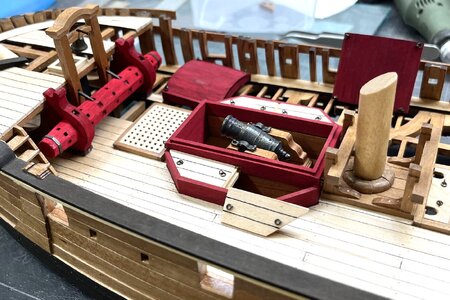
In the meantime the cover elements were also final sanded and painted red (information to @Dubz Modelling World : I am still think about this wall - and I am pretty sure, that I will reduce it like I showed in post #1.604 to a minimum - I still do not know if I will imitate some nailing )
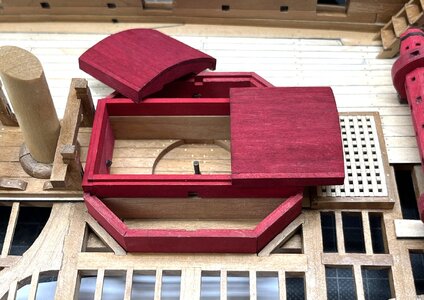
IMG_5115.JPG

I have to make some photos with pure natural light - the red is not so pinky like sometimes in the photos
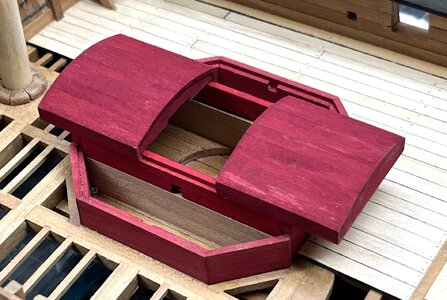
IMG_5116.JPG

On this photo the red color is shown more like real

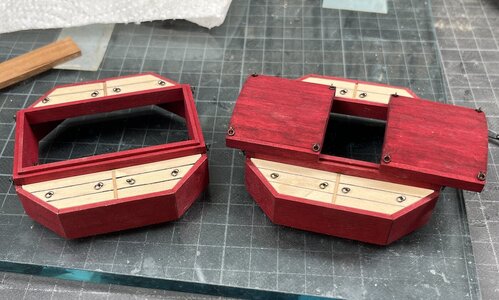
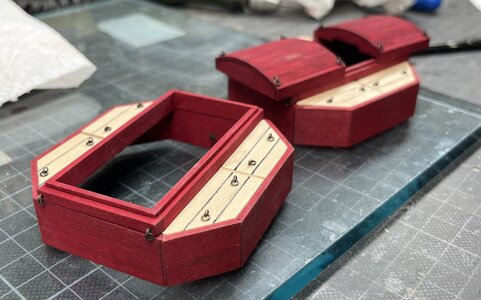
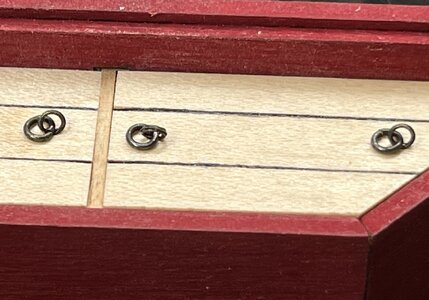
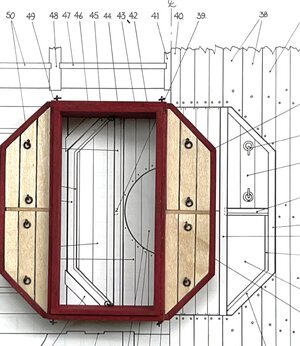
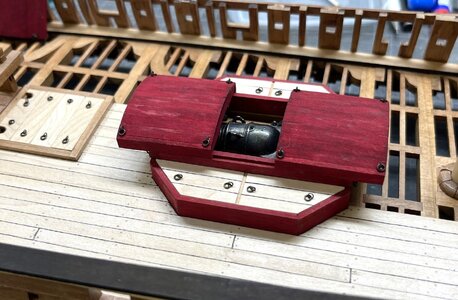
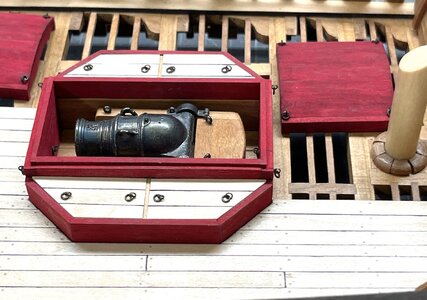
Here now added are these four board covers and all necessary eyebolts
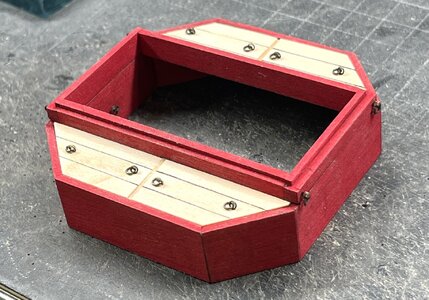
IMG_5140.jpg

IMG_5141.jpg

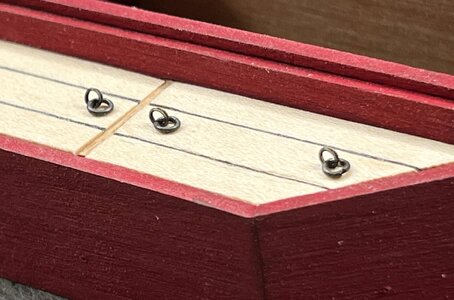
Here the joints are also "caulked" to protect against sea-water -
also here :
nailing or no nailing? that is the question

IMG_5142.jpg

IMG_5143.jpg

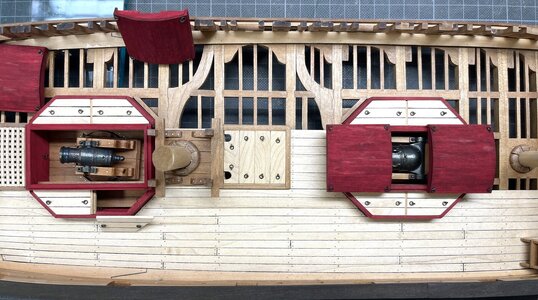
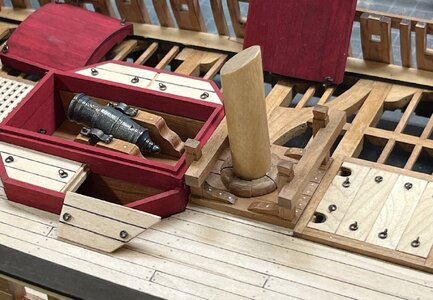
The complete arrangement

IMG_5144.jpg

IMG_5145.jpg

IMG_5146.jpg

Like mentioned earlier - everything is removable and can be dismantled to show the mortars "ready for Action"

Many Thanks for your interest in my building log and my work .... to be continued
 
In the meantime the cover elements were also final sanded and painted red (information to @Dubz Modelling World : I am still think about this wall - and I am pretty sure, that I will reduce it like I showed in post #1.604 to a minimum - I still do not know if I will imitate some nailing )

View attachment 456805

I have to make some photos with pure natural light - the red is not so pinky like sometimes in the photos

View attachment 456806

On this photo the red color is shown more like real

Here now added are these four board covers and all necessary eyebolts
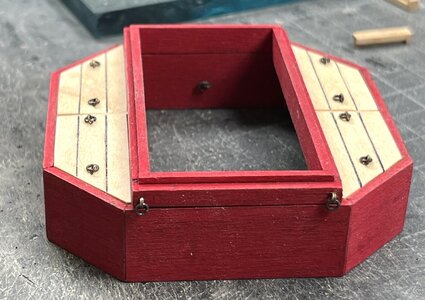
View attachment 456807

View attachment 456808

Here the joints are also "caulked" to protect against sea-water -
also here :
nailing or no nailing? that is the question
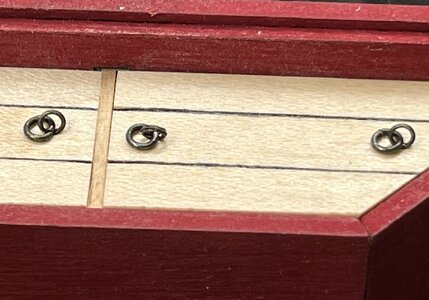
View attachment 456809

View attachment 456810

The complete arrangement

View attachment 456811

View attachment 456812

View attachment 456813

Like mentioned earlier - everything is removable and can be dismantled to show the mortars "ready for Action"

Many Thanks for your interest in my building log and my work .... to be continued
They are looking very nice, Uwe. You opted for the caulking detail, so my option would be to ad also the treenail details.
Regards, Peter
 
I like the overall appearance, mon ami. It could be possibly too much with nails, but tiny holes would be just right, IMHO). However, I hope you don't mind, the eyebolt's head is kind of out of scale, the same size (at least what it seems to be) as the ring itself. Maybe it is just macro reveals, and it looks OK on the model itself, but it just caught my attention.

1719838899977.jpeg
 
It could be possibly too much with nails, but tiny holes would be just right, IMHO).
Yes - I make maybe the "nailing" with only some pushed holes with a marking pin / scriber

the eyebolt's head is kind of out of scale, the same size (at least what it seems to be) as the ring itself.
Do you mean the ring or the eyebolt? too big or too small?

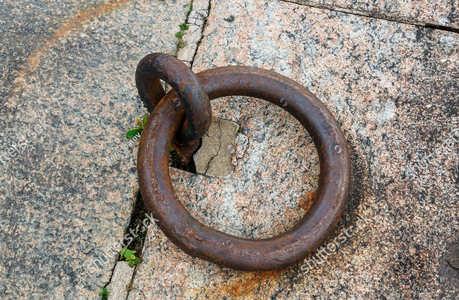
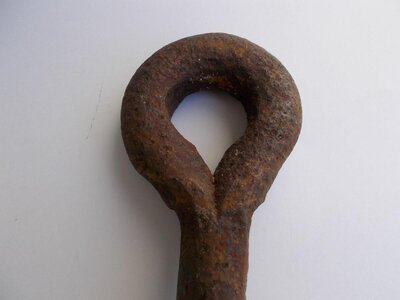
I know, that often the ringbolt is smaller than the ring, like on this example
Screenshot 2024-07-01 152123.png
This is often the case, when a rope is going trough the ring f.e. as a tackle

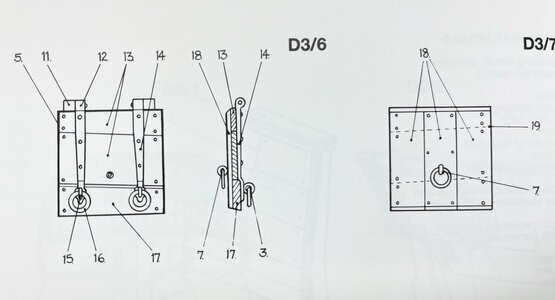
I was trying to follow mainly the sketch made by Goodwin
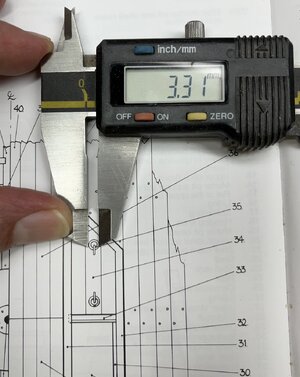
The ring is shown with 3,3mm outer diameter (appr. 16cm in real)
IMG_5365.jpg

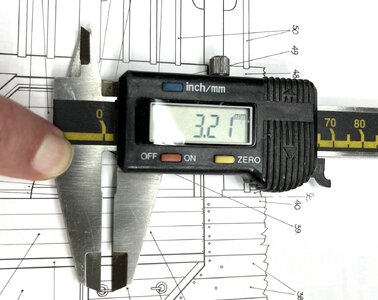
and the shown eyebolt has appr. the same size (appr. 15cm in real)
IMG_5366.jpg

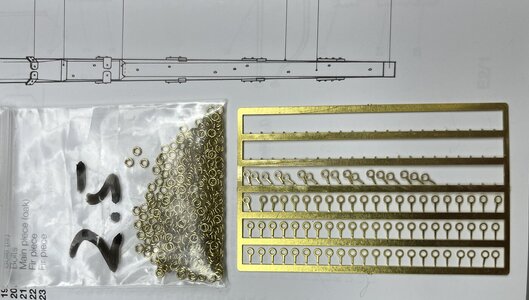
I am using for these rings and eyebolts these on, which I have in stock - rings with 2,5mm outer diameter (12 cm)
IMG_5360.jpg

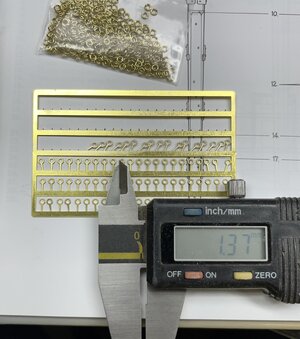
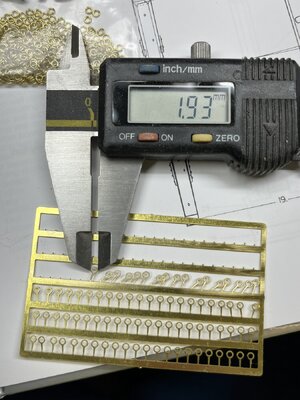
and the eyebolts with inner diameter 1,37mm and outer diameter of 1,93mm (9,2 cm in real)
IMG_5361.jpg IMG_5364.jpg

so definitely my eyebolts are already smaller than the given information from Goodwin

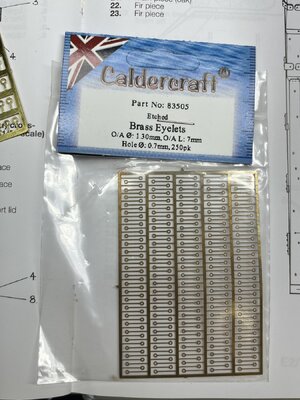
The smallest eyebolts I have in my "collection" are from Caldercraft with 1,3mm (6,2cm in real) but they are looking already very small, so I do not use them for this case
IMG_5358.jpg

Here some short comparison of the model eyebolts and the Goodwin drawing - at the end often it is a question of taste - but maybe I have to check once more the possibility with the smaller 1,3mm Caldercraft eyebolt and the 2,5mm ring
mine are smaller than the Goodwin

IMG_5367.jpg
 
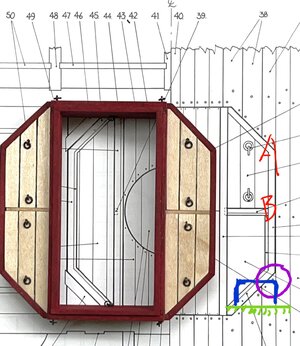
Is the eyebolt an eyebolt? Or a square hook?
At A the ring is lying to the side and at B in the middle. With an eyebolt it is lying always in the middle.
20240702_161746.jpg
When it is an eyebolt it is always very small, just like an iron bar with a hole in it where the ring goes through.
Or how I did it, I believe this method comes from Bibligon.

 
Is the eyebolt an eyebolt? Or a square hook?
At A the ring is lying to the side and at B in the middle. With an eyebolt it is lying always in the middle.
View attachment 456944
When it is an eyebolt it is always very small, just like an iron bar with a hole in it where the ring goes through.
Or how I did it, I believe this method comes from Bibligon.

Like the eyebolt on the gunport-lids?
IMG_2443.jpg

I have to check once more the individual drawings in the Anatomy book, if these are such one, or square hooks - or only a mistake in the drawing
 
Witaj
Wszystko wygląda pięknie Uwe dodałeś tyle szczegółów więc warto by zrobić kółkowanie ale to jest tylko moja sugestia a ty idz swoją drogą. Pozdrawiam Mirek

Witaj
All of Uwe's comments were taken with great enthusiasm, rather than with a rude expression, but it is only my suggestion that you take your own drugs. Regards Mirek
 
Last edited by a moderator:
Many Many Thanks to all of you for the comments and hints - these information are helping me (and others) to make step by step the model(s) better and raise the quality with sharing knowledge and also opinions.

I have sometimes the problem, that I try to build my model as much as possible following the drawings and sketches shown in Goodwins Anatomy book (f.e. the same planking pattern of the deck) - but sometimes there are errors shown....

For some actual overview here some more photos - for the moment I will keep these eyebolts like they are (according Goodwin ;) ) but maybe later on I will change them

IMG_5150.jpg

IMG_5151.jpg

IMG_5152.jpg

IMG_5153.jpg

IMG_5155.jpg

IMG_5156.jpg

IMG_5154.jpg

and the complete upper part of the model

IMG_5149.jpg

Many Thanks for your interest - keep on with commenting - please
 
Many Many Thanks to all of you for the comments and hints - these information are helping me (and others) to make step by step the model(s) better and raise the quality with sharing knowledge and also opinions.

I have sometimes the problem, that I try to build my model as much as possible following the drawings and sketches shown in Goodwins Anatomy book (f.e. the same planking pattern of the deck) - but sometimes there are errors shown....

For some actual overview here some more photos - for the moment I will keep these eyebolts like they are (according Goodwin ;) ) but maybe later on I will change them

View attachment 457072

View attachment 457073

View attachment 457074

View attachment 457075

View attachment 457077

View attachment 457078

View attachment 457076

and the complete upper part of the model

View attachment 457071

Many Thanks for your interest - keep on with commenting - please
That’s looking very nice, Uwe. With nice color contrasts on the deck with those covers.
Regards, Peter
 
Many Many Thanks to all of you for the comments and hints - these information are helping me (and others) to make step by step the model(s) better and raise the quality with sharing knowledge and also opinions.

I have sometimes the problem, that I try to build my model as much as possible following the drawings and sketches shown in Goodwins Anatomy book (f.e. the same planking pattern of the deck) - but sometimes there are errors shown....

For some actual overview here some more photos - for the moment I will keep these eyebolts like they are (according Goodwin ;) ) but maybe later on I will change them

View attachment 457072

View attachment 457073

View attachment 457074

View attachment 457075

View attachment 457077

View attachment 457078

View attachment 457076

and the complete upper part of the model

View attachment 457071

Many Thanks for your interest - keep on with commenting - please
Uwe, great job.
Still, consider changing the eyebolts. Not against the background of the same ones near the gun; on the cover they do not seem natural
IMG_5153.jpg
 
Once again, a lot of catching up to do, great result, Uwe.

There were a lot of questions and answers about nails, eyelets, color scheme, decoration, etc. I don't know what to say, it looks brilliant. Don't put yourself under pressure because of the meeting in October, believe me Uwe, I'm sure I won't reach the construction stage I'd like with Le Rochefort, so no more pressure. There's strength in calmness.
 
Back
Top