HMS GRANADO - full hull - POF kit by CAF in 1:48 - by Uwe

A final work was still necessary on the rudder blade

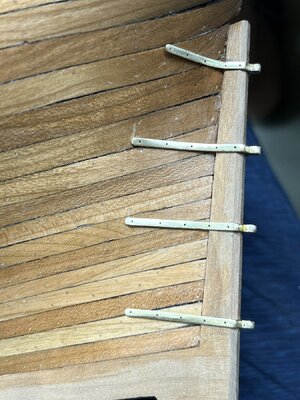
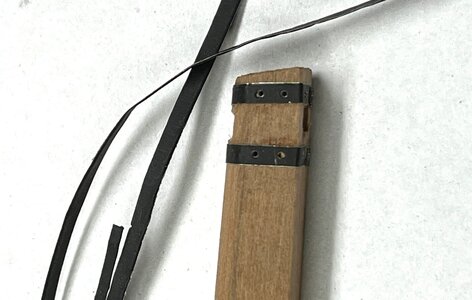
above and directly under the mortice for the tiller were two additional braces installed, both in deepenings in the wooden post
Screenshot 2024-08-13 132343.png

So I was able to use first time this black metal foil which I bought some weeks ago - many thanks once more for the tip

The foil was caut into strips with a sharp knife and fixed with superglue - holes for the bolts are also already drilled
IMG_5557.jpg

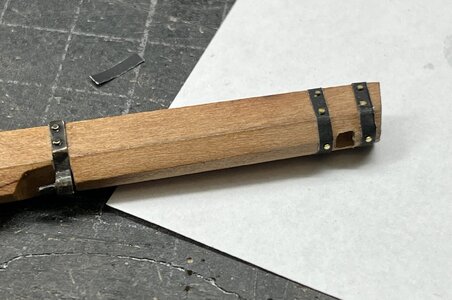
These tinny little bolts from @Dry-Dock Models & Parts are installed (head has 0,6mm diameter)
IMG_5558.jpg

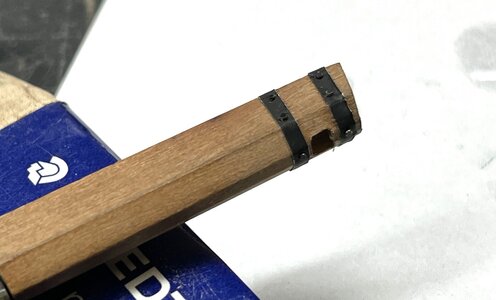
and afterwards blackened with a small drop
IMG_5559.jpg

many thanks for your interest ..... to be continued with the work on the gudgeon braces of the hull ......
 
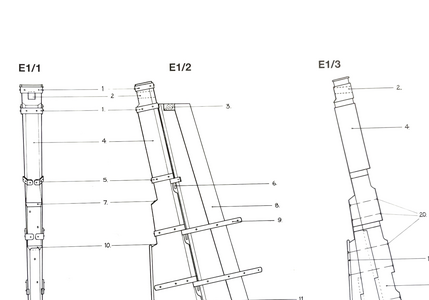
The gudgeon braces of the hull are started

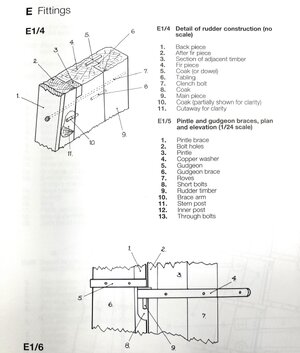
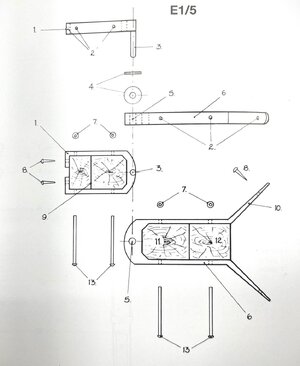
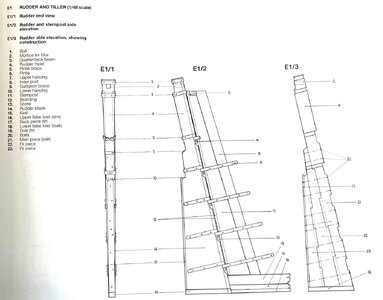
for some information before the related sketches of the Anatomy book

IMG_5493.jpg IMG_5494.jpg

Before I dryfit the parts I had to prepare the stern-post

IMG_5576.jpg

a first dry fit

IMG_5577.jpg

IMG_5578.jpg

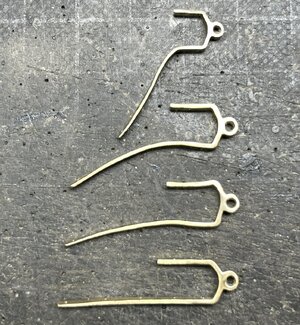
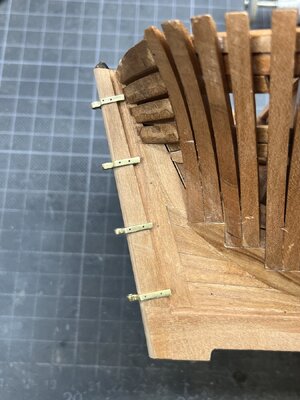
The gudgeons are already cleaned, thinned towards the ends, and also the holes for the bolts drilled - more or less in the final form

IMG_5590.jpg

IMG_5591.jpg

and now all four which have to be installed at the lower hull - a fifth have to be installed later on also at the upper part of the hull (but not connected to the rudder)

IMG_5584.jpg

on the side of the hull, which is not planked I reduced the length - otherwise it would look somehow weird

IMG_5586.jpg

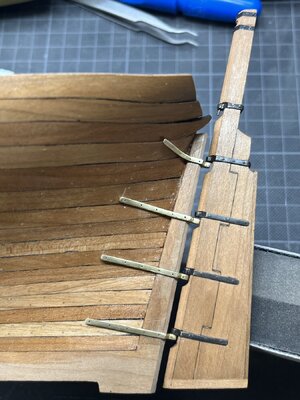
a small dryfit with the rudder in place - also to see and mark the final locations


IMG_5588.jpg


IMG_5589.jpg

Many Thanks for your interest .... to be continued (blackened and bolted)
 
Hello Uwe, I have a question. In the attached picture I have marked a green area, will a false keel be mounted here? If not, wouldn't the rudder be too long, red line? Questions upon questions.

View attachment 464806

Yes, I am planning to install a false keel, although the total height of the keel will be a little bit too high

Here is the total drawing showing the false keels, but I will try to make only one, the #18 "lower false keel (teak)"

IMG_5379.jpg
 
The gudgeon braces of the hull are started

for some information before the related sketches of the Anatomy book

View attachment 464790 View attachment 464791

Before I dryfit the parts I had to prepare the stern-post

View attachment 464781

a first dry fit

View attachment 464782

View attachment 464783

The gudgeons are already cleaned, thinned towards the ends, and also the holes for the bolts drilled - more or less in the final form

View attachment 464788

View attachment 464789

and now all four which have to be installed at the lower hull - a fifth have to be installed later on also at the upper part of the hull (but not connected to the rudder)

View attachment 464784

on the side of the hull, which is not planked I reduced the length - otherwise it would look somehow weird

View attachment 464785

a small dryfit with the rudder in place - also to see and mark the final locations


View attachment 464786


View attachment 464787

Many Thanks for your interest .... to be continued (blackened and bolted)
Good afternoon Uwek. So very very good! Cheers Grant
 
Outstanding solution for the unplanked side!! I was very confused, at first, when I saw this photo:
1723651351137.png
Why would the grudgeons not be symmetrical?? Then I saw them installed on your unplanked side.

A brilliant solution from a master model builder. I had a similar dilemma on my Navy Board model of HMS Serapis and chose to add small "strips" of planking for the grudgeons to be bolted to. Your solution emphasis the unplanked side and keeps it much "cleaner". Again...Brilliant and thanks for sharing!!
rudder 13 Mar 2022.jpg
 
A brilliant solution from a master model builder. I had a similar dilemma on my Navy Board model of HMS Serapis and chose to add small "strips" of planking for the grudgeons to be bolted to. Your solution emphasis the unplanked side and keeps it much "cleaner". Again...Brilliant and thanks for sharing!!
I was also thinking about such a solution - but somehow I wanted to try something else
Many Thanks for your comment and your kind words

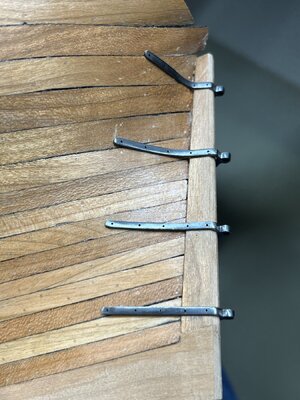
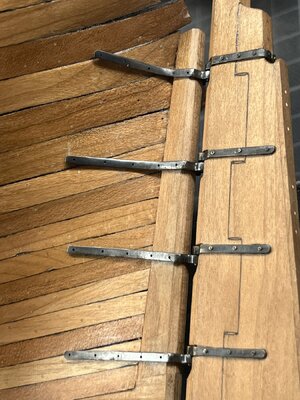
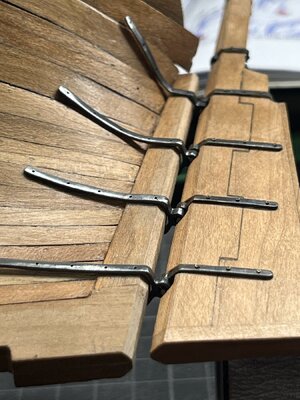
IN the meantime the gudgeons are blackened

IMG_5592.jpg

IMG_5593.jpg

Here important is to check the correct location of the gudgeons with the rudder - and the rudder has to be possible to dismantle

IMG_5594.jpg

IMG_5596.jpg

IMG_5597.jpg

some small bending necessary before I take the glue .....
 
I was also thinking about such a solution - but somehow I wanted to try something else
Many Thanks for your comment and your kind words

IN the meantime the gudgeons are blackened

View attachment 465084

View attachment 465085

Here important is to check the correct location of the gudgeons with the rudder - and the rudder has to be possible to dismantle

View attachment 465086

View attachment 465087

View attachment 465088

some small bending necessary before I take the glue .....
Nice iron works and pictures, Uwe. :)
Regards, Peter
 
I was also thinking about such a solution - but somehow I wanted to try something else
Many Thanks for your comment and your kind words

IN the meantime the gudgeons are blackened

View attachment 465084

View attachment 465085

Here important is to check the correct location of the gudgeons with the rudder - and the rudder has to be possible to dismantle

View attachment 465086

View attachment 465087

View attachment 465088

some small bending necessary before I take the glue .....
Good afternoon Uwek. Everything you do is an example of accuracy and excellence. Kudos. Cheers Grant
 
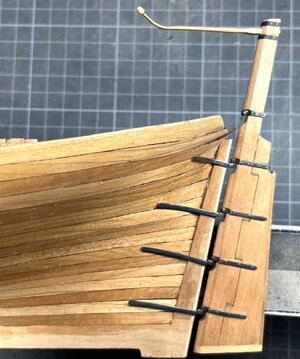
before installing the bolts I wanted to make some "wood" and made the small fragile tiller

I plan to present the lower part of the model in this way.....

IMG_5598.jpg

IMG_5599.jpg

IMG_5600.jpg

Many Thanks for your interest .... to be continued .....

wish you all a nice relaxing weekend
 
Back
Top