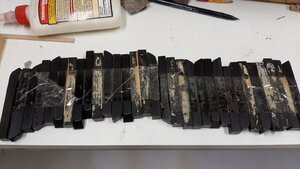
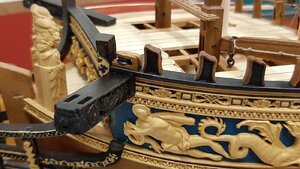
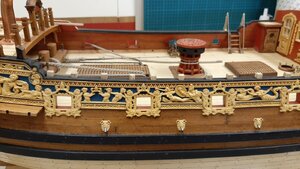
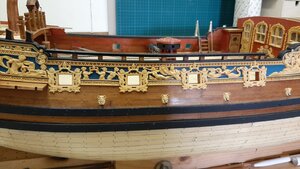
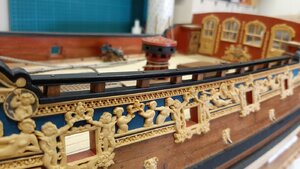
very fine work.... 
-

Win a Free Custom Engraved Brass Coin!!!
As a way to introduce our brass coins to the community, we will raffle off a free coin during the month of August. Follow link ABOVE for instructions for entering.
-

PRE-ORDER SHIPS IN SCALE TODAY!
The beloved Ships in Scale Magazine is back and charting a new course for 2026!
Discover new skills, new techniques, and new inspirations in every issue.
NOTE THAT OUR FIRST ISSUE WILL BE JAN/FEB 2026
You are using an out of date browser. It may not display this or other websites correctly.
You should upgrade or use an alternative browser.
You should upgrade or use an alternative browser.
HMS Royal Caroline kit ZHL 1/30
- Thread starter Maarten
- Start date
- Watchers 112
-
- Tags
- royal caroline zhl
G'day Maarten
I'm sorry for the long time that i haven't looked at your brilliant log.
I've been quite sick and too tired to do anything. I'm just forcing myself to write this post.
In the time that ive away, your craftsmanship and your amazing techniques and imagination has, not only kept up to your un-human standards, but somehow, it has surpassed anything.
All I can say is that everything is Maartiffic! And you have again you have risen the benchmark to out-of-this-world.
I have been working on an English translation from the Chinese institutions.
I will post a pdf file for anyone who needs it. The grammar is not perfect, but it gets the message across quite good. I have made the pictures brighter and easier to see and they are more intertwined into the writen instructions.
Happymodeling my dear friend
Greg
- Joined
- Nov 29, 2019
- Messages
- 74
- Points
- 103

Outstanding workmanship - absolutely wonderful.
Hi Maarten
I am just catching up and can only echo others,exceptional work!
Kind Regards
Nigel
I am just catching up and can only echo others,exceptional work!
Kind Regards
Nigel
Soory Maarten for highjacking your log now:G'day Maarten
I'm sorry for the long time that i haven't looked at your brilliant log.
I've been quite sick and too tired to do anything. I'm just forcing myself to write this post.
In the time that ive away, your craftsmanship and your amazing techniques and imagination has, not only kept up to your un-human standards, but somehow, it has surpassed anything.
All I can say is that everything is Maartiffic! And you have again you have risen the benchmark to out-of-this-world.
I have been working on an English translation from the Chinese institutions.
I will post a pdf file for anyone who needs it. The grammar is not perfect, but it gets the message across quite good. I have made the pictures brighter and easier to see and they are more intertwined into the writen instructions.
Happymodeling my dear friend
Greg
Greg, we are all very happy to read a post from you - Keep Care my friend
Hi Greg,G'day Maarten
I'm sorry for the long time that i haven't looked at your brilliant log.
I've been quite sick and too tired to do anything. I'm just forcing myself to write this post.
In the time that ive away, your craftsmanship and your amazing techniques and imagination has, not only kept up to your un-human standards, but somehow, it has surpassed anything.
All I can say is that everything is Maartiffic! And you have again you have risen the benchmark to out-of-this-world.
I have been working on an English translation from the Chinese institutions.
I will post a pdf file for anyone who needs it. The grammar is not perfect, but it gets the message across quite good. I have made the pictures brighter and easier to see and they are more intertwined into the writen instructions.
Happymodeling my dear friend
Greg
Good to see you back online, think I speak for much more people that we missed you.
Hope you are doing better, will be more frequently online, and find the energy to be back with your build. Many thx for your compliments.
Your translation of the instructions will be very helpfull, I know Alex is also looking for and working on these.
Just a brief update, I would like to ring the bell so time for a bell tower.
This is the kit supplied bell, the bell is ok but the clapper is a joke.
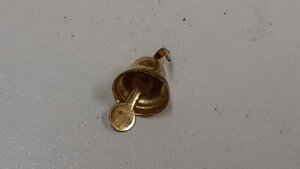
So time for an upgrade. from brass I made a new one on the lathe.
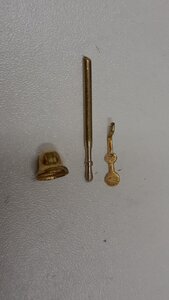
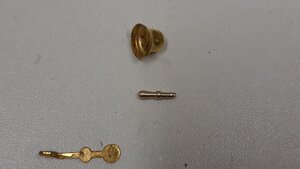
Then fitted it through the bell and hammered the end flat on the envil and drilled a hole for the final fitting to the bell yoke.
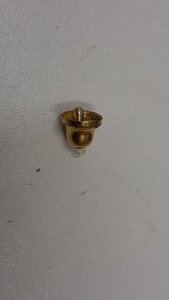
Last step is burnishing it to a nice brass appearance.
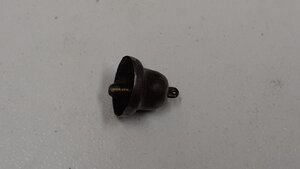
Next is a arm which will be fitted to the yoke to ring the bell. This I made from 1 mm brass fitted in the lathe and shaped with a file.
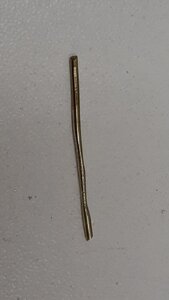
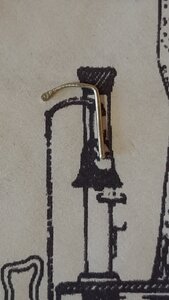
Now it still looks like rubbish, but hammer the end flat on the envill, drill a hole and bend it to shape and you get this.
In the mean time I shaped all the wooden parts for the bell tower, fitted together with brass pins for strenght.
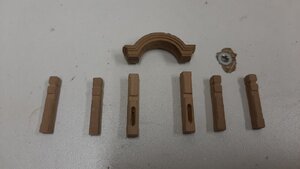
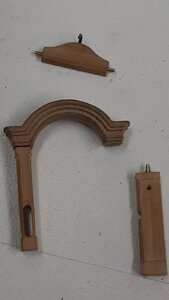
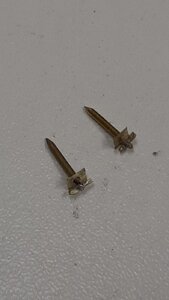
My first idea was to fit the yoke between the bell tower with brass pins but changed that idea to spline connections which I made from 1 mm brass, 0,4 mm brass and brass plate.
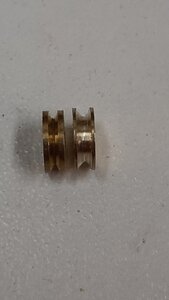
In the legs of the bell tower there are two brass sheaves, also these I modified. For this I fitted a small round needle file in the lathe, moved the sheave with its hole over it and now you can rework the other shape of the sheave with a small needle file.
Time to fit everything together.
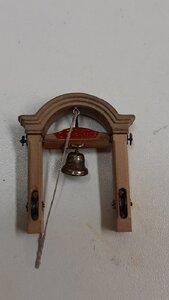
The name plate was supplied with the kit, it is etsched brass. I first gave it a clear paint coat, then painted it red and then removed the paint from the deeper etsched text to give it a golden text on a red background.
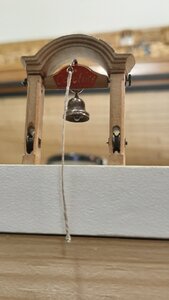
Finally dry fitting with a nice oil finish.
This is the kit supplied bell, the bell is ok but the clapper is a joke.

So time for an upgrade. from brass I made a new one on the lathe.


Then fitted it through the bell and hammered the end flat on the envil and drilled a hole for the final fitting to the bell yoke.

Last step is burnishing it to a nice brass appearance.

Next is a arm which will be fitted to the yoke to ring the bell. This I made from 1 mm brass fitted in the lathe and shaped with a file.

Now it still looks like rubbish, but hammer the end flat on the envill, drill a hole and bend it to shape and you get this.

In the mean time I shaped all the wooden parts for the bell tower, fitted together with brass pins for strenght.


My first idea was to fit the yoke between the bell tower with brass pins but changed that idea to spline connections which I made from 1 mm brass, 0,4 mm brass and brass plate.

In the legs of the bell tower there are two brass sheaves, also these I modified. For this I fitted a small round needle file in the lathe, moved the sheave with its hole over it and now you can rework the other shape of the sheave with a small needle file.

Time to fit everything together.

The name plate was supplied with the kit, it is etsched brass. I first gave it a clear paint coat, then painted it red and then removed the paint from the deeper etsched text to give it a golden text on a red background.

Finally dry fitting with a nice oil finish.


Just a brief update, I would like to ring the bell so time for a bell tower.
This is the kit supplied bell, the bell is ok but the clapper is a joke.
View attachment 155665
So time for an upgrade. from brass I made a new one on the lathe.
View attachment 155666
View attachment 155668
Then fitted it through the bell and hammered the end flat on the envil and drilled a hole for the final fitting to the bell yoke.
View attachment 155669
Last step is burnishing it to a nice brass appearance.
View attachment 155670
Next is a arm which will be fitted to the yoke to ring the bell. This I made from 1 mm brass fitted in the lathe and shaped with a file.
View attachment 155671
Now it still looks like rubbish, but hammer the end flat on the envill, drill a hole and bend it to shape and you get this.
View attachment 155672
In the mean time I shaped all the wooden parts for the bell tower, fitted together with brass pins for strenght.
View attachment 155676
View attachment 155673
My first idea was to fit the yoke between the bell tower with brass pins but changed that idea to spline connections which I made from 1 mm brass, 0,4 mm brass and brass plate.
View attachment 155674
In the legs of the bell tower there are two brass sheaves, also these I modified. For this I fitted a small round needle file in the lathe, moved the sheave with its hole over it and now you can rework the other shape of the sheave with a small needle file.
View attachment 155675
Time to fit everything together.
View attachment 155680
The name plate was supplied with the kit, it is etsched brass. I first gave it a clear paint coat, then painted it red and then removed the paint from the deeper etsched text to give it a golden text on a red background.
View attachment 155684
Finally dry fitting with a nice oil finish.
View attachment 155685
View attachment 155686
I can hear it ringing Maarten, very nice work,
best regards john,
Everything you have done on the model is superb Maarten.
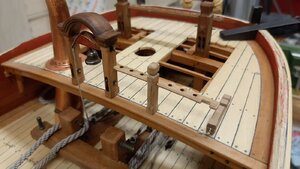
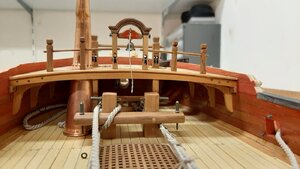
Time to continue the rest of the railing. It is made of two pillars on each side of the bell tower connected with a plank with belaying points.
To create an exact symetric result I copy the scarphs from the PS to the SB plank.
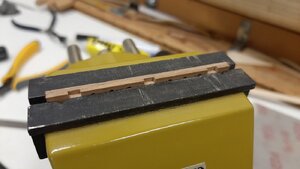
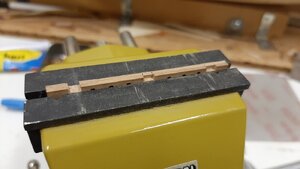
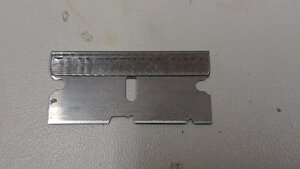
The edges of the plank I give a profile with a home made razor blade. The trim pattern on the right.
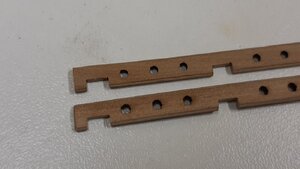
The pillars I will fit with brass pins to provide some strenght.
To put everything straight on the deck I use my cutting mat and place it behind my ship. The ship is in its building stand at the correct trim, which means flat on its waterline and not on the keel. You can then easily check if al the fittings are mounted straight up.
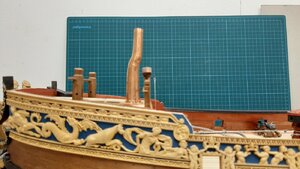
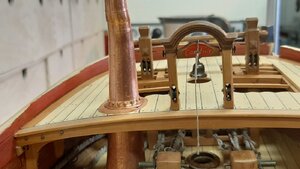
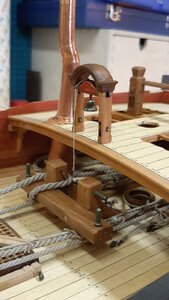
Finally after fitting and oiling.
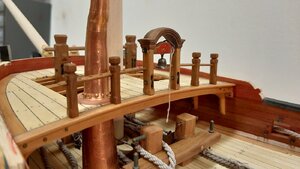
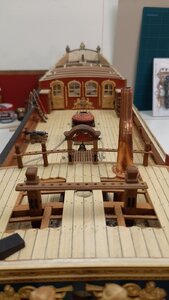
To create an exact symetric result I copy the scarphs from the PS to the SB plank.


The edges of the plank I give a profile with a home made razor blade. The trim pattern on the right.


The pillars I will fit with brass pins to provide some strenght.

To put everything straight on the deck I use my cutting mat and place it behind my ship. The ship is in its building stand at the correct trim, which means flat on its waterline and not on the keel. You can then easily check if al the fittings are mounted straight up.

Finally after fitting and oiling.


great
This week I have some extra time for the hobby, yeahhh.
So time to make some progress.
First I made two blocks to be fitted next to the bell tower on each side.
All blocks excist of two cnc milled halves, these you have to sand to the proper thickness and then glue together followed by finishing them on the out side.
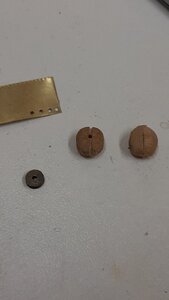
The larger blocks like these contain a brass sheave.
I also made additional plates on which the shaft of the sheave is clinched. You can see here the difference in size with one of the double gun carriage blocks.
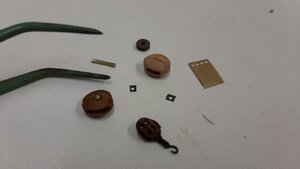
Fitting the block strop will be done later.
So time to make some progress.
First I made two blocks to be fitted next to the bell tower on each side.
All blocks excist of two cnc milled halves, these you have to sand to the proper thickness and then glue together followed by finishing them on the out side.

The larger blocks like these contain a brass sheave.
I also made additional plates on which the shaft of the sheave is clinched. You can see here the difference in size with one of the double gun carriage blocks.

Fitting the block strop will be done later.
Last week I had some time to spent on my build so this week wil post some updates.
After the bellfry I started on the PS railing, made of pear and colored with black ecoline ink finished with oil.
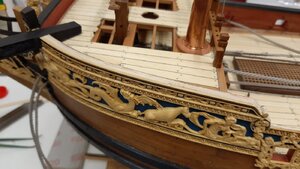
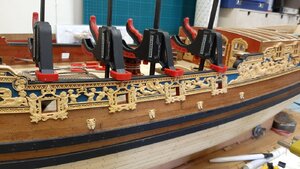
After the flat railing pieces are fitted all the curved railing pieces are added and sanded and filed to fit perfectly.
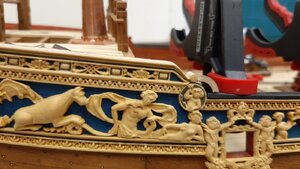
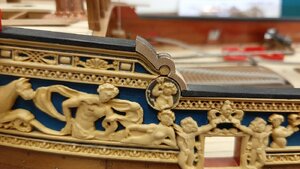
Then they are colored with ink and fitted in place.
After the glue is dry I file and sand the in place to get a smooth fit ad finish.
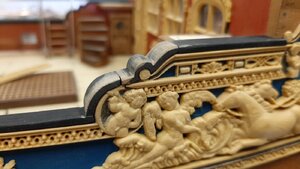
The original the top is again colored with ink followed by a layer of oil to seal it, but first aditional parts to the railing are added. Some bollards to the forward railing.
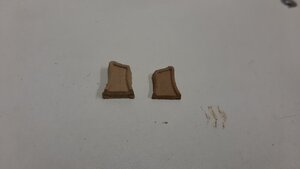
As with a lot of parts in this kit these consist of two halves which are too thick, so again a lot of sanding needed. Left original right sanded to half diameter.
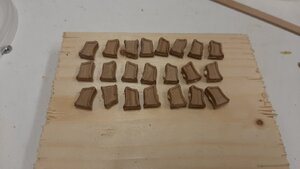
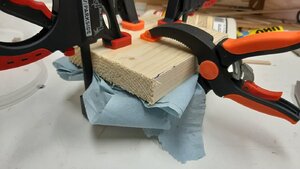
All glued together and I wil press these between two blocks of wood to let them dry. I added some paper to get an even pressure on all of them.
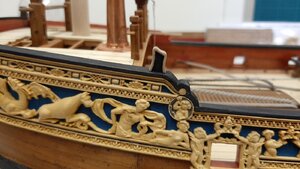
Plain wood color would be to boring so I colored the inside with black ecoline.
As the glue is drying I worked on the chain wale.
In the kit it is a flat lasered part of pear wood. I tapered it.
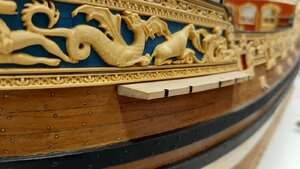
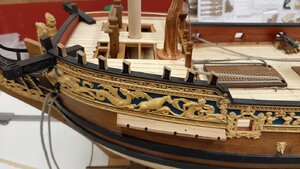
In the mean time the glue was dry and all the bollarts are finished.
Next is the cat head (penterbalk in Dutch), this beam was used to move the anchor to the chain wale for storage. In the model two are supplied but as far as I know only one was on board which could be used on the SB or PS side. So I use only one.
It is fitted in a clamp on the railing and at its end in a iron ring on deck.
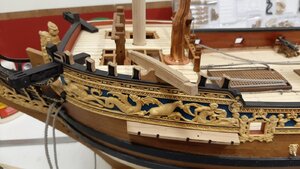
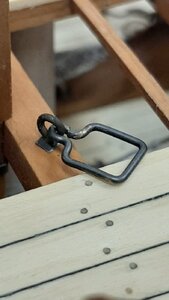
To move the beam ropes were fitted on the side with knots for grip.
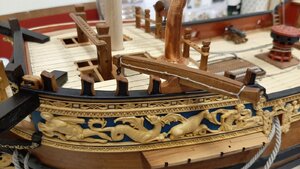
At last I added the iron ribbons around it.
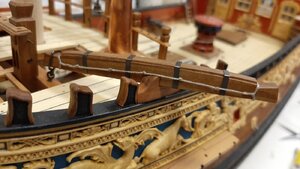
Next time the lower railing.
After the bellfry I started on the PS railing, made of pear and colored with black ecoline ink finished with oil.


After the flat railing pieces are fitted all the curved railing pieces are added and sanded and filed to fit perfectly.


Then they are colored with ink and fitted in place.
After the glue is dry I file and sand the in place to get a smooth fit ad finish.

The original the top is again colored with ink followed by a layer of oil to seal it, but first aditional parts to the railing are added. Some bollards to the forward railing.
As with a lot of parts in this kit these consist of two halves which are too thick, so again a lot of sanding needed. Left original right sanded to half diameter.

All glued together and I wil press these between two blocks of wood to let them dry. I added some paper to get an even pressure on all of them.


Plain wood color would be to boring so I colored the inside with black ecoline.

As the glue is drying I worked on the chain wale.
In the kit it is a flat lasered part of pear wood. I tapered it.


In the mean time the glue was dry and all the bollarts are finished.
Next is the cat head (penterbalk in Dutch), this beam was used to move the anchor to the chain wale for storage. In the model two are supplied but as far as I know only one was on board which could be used on the SB or PS side. So I use only one.
It is fitted in a clamp on the railing and at its end in a iron ring on deck.


To move the beam ropes were fitted on the side with knots for grip.

At last I added the iron ribbons around it.

Next time the lower railing.
Very good work - I love this bigger scale - so the details are looking very realistic - very good work my friend
Many thx for your comments, just a fun kit to build, can certainly recommend it.Amazing. That model will turn out to be nothing less than a high quality, museum worthy masterpiece
Last edited:


