HMS Vanguard 1787 - Victory Models - 1:72 [COMPLETED BUILD]

G'day arthur, I've just had a very enjoyable read through your build log,very nice work, I particularly like the way you have painted the stern, and your lighting looks great, a very nice model,

best regards John.

G'day Arthur
I also been reading (and I'm only half the through) your log and I havta say how great, not only your build, but your information is.
Havagooday
Greg
 
G'day Arthur
I've finished now and O'whattabeauty it was to read. Brilliant is another word not only for your log, but the model as well.
Havagooday
Greg
 
I am relatively new in the forum since some days, so I am making my homework and read the logs.....just went and read your log and I am realy impressed. Very clean and accurate work and like Greg mentioned also shown and explained in a very interesting and informative way.
Also positive to see, that the quality of this kit seems to be very good and you are making a high quality model out of it.....
 
Hi Arthur,

I have been looking on the lego roping machine but it was difficult to get the right parts from less then 3 sources. So I decided to order a small roping machine and a small serving machine from domanoff workshop in Belarus. Comments on these machines were very positive on Internet so I will be using these to not only serve ropes but also make them.

Regs Maarten
 
  • Like
Reactions: aew
Thanks Uwe. There are one or two minor mistakes in the instructions and problems with the odd parts here and there but I'd rate the kit pretty highly.

Regs: It helps if you can beg, borrow, or steal parts from the children or grandchildren! :)
 
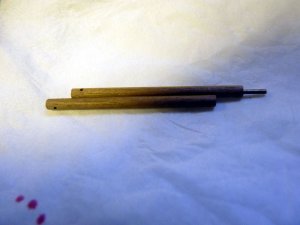
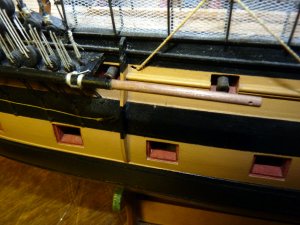
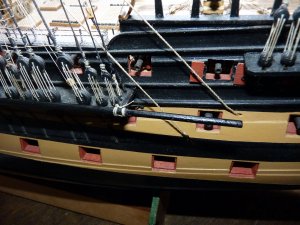
I decided to fit the lower stunsail booms next, but immediately ran into a problem – they don’t appear on the plans!
The mountings for them are provided in the form of photo etched parts, but there are no details of the booms themselves. There’s nothing complicated about them; I could make them the same diameter as the upper booms and the outer ends of them in this period was plain with a single hole drilled through (side to side) one diameter from the end. The inboard ends have a ferrule round them and a hook driven in the centre. The missing piece of information was how long should they be?
I checked the pictures on the box lid but failed to find any there or on the internet so I opted to make them just a bit longer than the channels,
After a bit of fabrication and a coat of ‘dull black’ paint, they were hung up to dry:

PICT_V_9301
PICT_V_9301.jpg

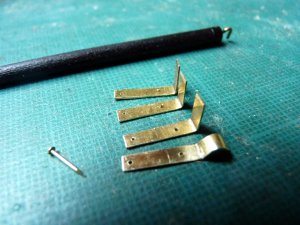
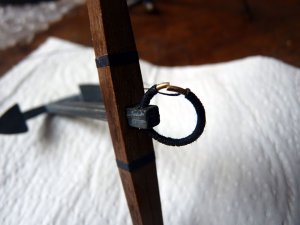
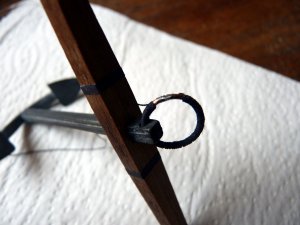
I fitted the inboard brackets on the channels a long time ago, but I didn’t like the brackets for the outboard ends. They were a closed loop! So, time to make some new ones.
These were cut from a coil of bronze strip:

PICT_V_9302
PICT_V_9302.jpg

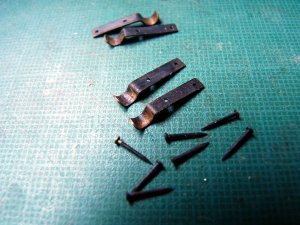
The bronze took longer than brass to blacken, but it got there in the end. (That nail on the left went back in!)

PICT_V_9303

PICT_V_9303.jpg

This is how the inboard end looks:
(A drop of superglue was applied to the bottom of the hook to discourage it from jumping out.)

PICT_V_9304

PICT_V_9304.jpg

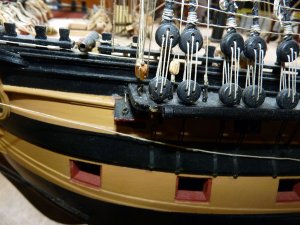
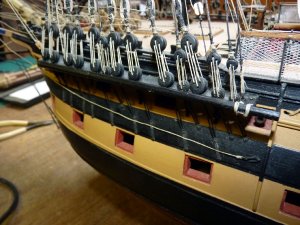
I can’t believe that the booms would have just been left resting on the aft brackets, so I lashed them in place:

PICT_V_9305

PICT_V_9305.jpg

Job done?
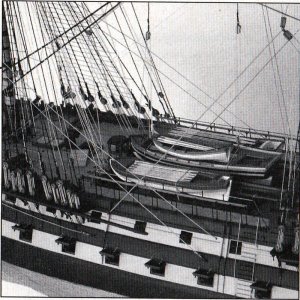
Well not quite, as I’ve since found this picture on the front of the manual:

PICT_V_9306
PICT_V_9306.jpg

Somewhat shorter than they should be!

That left three options:
  1. Leave them as they are and hope no one notices.
  2. Take them off and make some new ones.
  3. Extend the existing ones.
Option 1 was obviously the easiest but unfortunately there’s one person who will notice – guess who!
Option 2 was too much like hard work, so on with option 3:

PICT_V_9307
PICT_V_9307.jpg

When I took that picture, the first two extensions were already fitted. This is the one on the fore port boom:

PICT_V_9308

PICT_V_9308.jpg

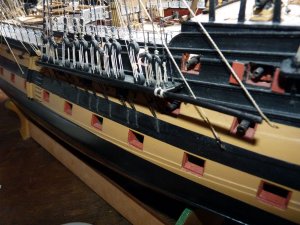
After a little bit of sanding and a coat of paint, this is how they looked:

PICT_V_9309

PICT_V_9309.jpg

This is the boom on the port main channel.

PICT_V_9310
PICT_V_9310.jpg

I’ve still to fit the extensions on the starboard side, but I’ve now had some practice!
 
Hey Arthur. Happy to meet you again. This model is even more facinating than your Gulnara, of which I remember I downloaded the pics for my personal documentation. What's next? The upcoming Bellona? The Stefano clipper? Whatever your choice, sign me in!
 
JPC: I was about to post an update to this log when I spotted your post. My apologies for not responding much sooner!
I've not given any thought to what comes next; although at first glance Vanguard looks more or less complete, there are lots of small (and some not so small) jobs still on the 'to do' list. It won't be a large scale project though.
 
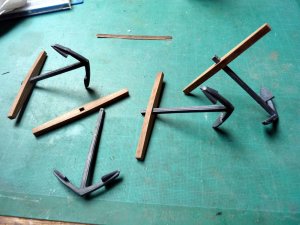
It’s been a long time since the last update for various reasons, but some work did take place although it didn’t seem worth documenting until all the work was complete. The work in question was the ship’s anchors.

The first stage should have been routine, but there was a minor hitch. The anchor stocks were a rattle fit. The laser cut notches were too big for the castings so I glued pieces cut from a thin strip of wood in each of the holes.

PICT_V_9401
pict_v_9401.jpg

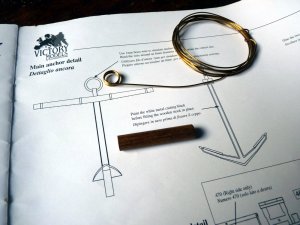
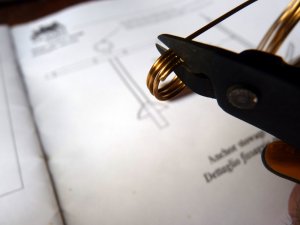
Next job was to make the anchor rings. The instructions say to bend the supplied 1mm wire round a 8mm dowel. There are four anchors so this is what I did:

PICT_V_9402
pict_v_9402.jpg

PICT_V_9403
pict_v_9403.jpg
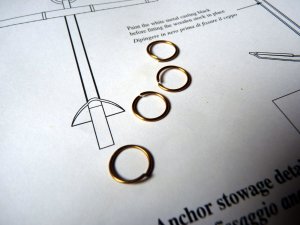
The observant among you will have noticed that although I’m about to cut through four pieces of wire, that’s only going to produce three rings!

Take 2:

PICT_V_9404
pict_v_9404.jpg
That’s as far as the instructions go; the anchors are shown fitted in this condition.

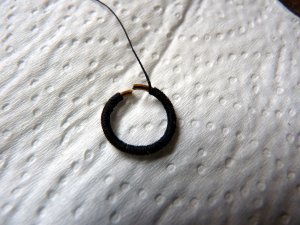
The first departure from the book was ‘Puddening’ the anchor rings; a similar process to serving a shroud or stay.
Here’s how the first one looked:

PICT_V_9405
pict_v_9405.jpg

The section of the ring that goes through the anchor should be left bare, but the hole in the anchor was actually larger than the puddening:

PICT_V_9406
pict_v_9406.jpg
The ring wasn’t going to stay in the correct position, so I opted to do the whole of the ring.
After filing the ends square and soldering them together, I just had a small section to complete:

PICT_V_9407
pict_v_9407.jpg
Oh, and I also had to repeat the job another three times:

PICT_V_9408
pict_v_9408.jpg
The second departure was to attach an anchor buoy. This turned out to be much more of a challenge than I was anticipating!
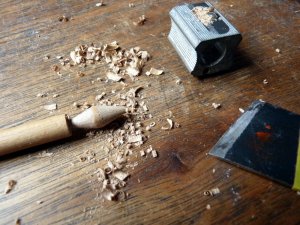
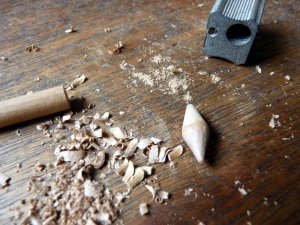
The job started well; use a pencil sharpener on the end of a piece of dowel to shape one half and then carve away at the other half until it falls off the dowel:

PICT_V_9409
pict_v_9409.jpg

PICT_V_9410
pict_v_9410.jpg
That’s when the fun started!
I at first thought I could make up two identical ‘nets’ and fit one from each end. Not so, the second one weaves though the first one. It’s outside it at one end but inside it at the other end.
After several aborted attempts, I found a method that worked.
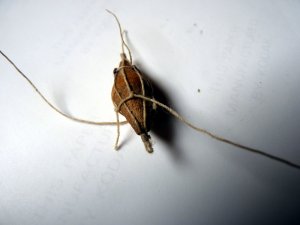
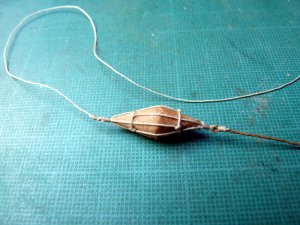
This is what it looked like with just the final two ends and the seizing to trim off:

PICT_V_9411
pict_v_9411.jpg
I’ve another of these to construct so I’ll take some pictures and try and explain later how it was done:

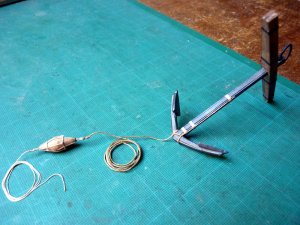
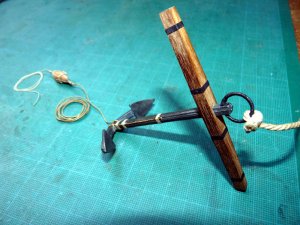
This next picture shows the lines attached to the buoy and how it attaches to the anchor:

PICT_V_9412
pict_v_9412.jpg
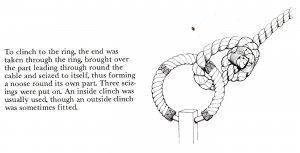
One more departure from the diagrams in the instructions, the anchor cable is shown simply passing through the anchor ring and seized back on itself. I’ve seen various pictures of ‘Anchor’ knots to connect the anchor cable to the anchor but these were apparently only used on small ships and up to about 1850 the cables on warships were ‘Clinched’ to the anchor ring.
This is an extract from James Lees – The Masting and Rigging of English Ships of War:

PICT_V_9413
pict_v_9413.jpg
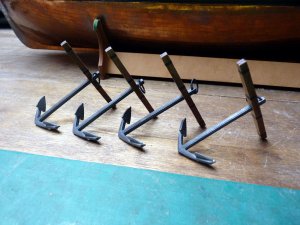
And this is the finished anchor:

PICT_V_9414
pict_v_9414.jpg
 
‘Rigging’ an anchor buoy.

The procedure I ended up with, after several failed attempts, was as follows;

Take a length of cord and tie the end around itself with a simple overhand knot to make a lasso. Adjust the size of the loop to fit around the buoy. Cut the cord to at least three times the length of the buoy. (The cord I used was 0.25mm).
Take another length of cord and tie the end of it, again using a simple overhand knot, to the middle of the loop of your lasso. Cut it to a similar length as the first piece.
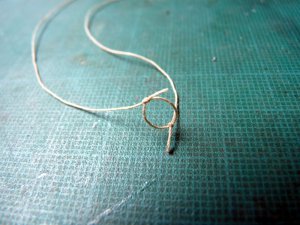
Picture 1.jpg

Apply some PVA glue to the knots, and allow it to dry. (The knot on the first cord that formed the lasso is the one you don’t want to slip.
You can now place your loop over the buoy with a length of cord running along each side. Hold the two cords together where they leave the end of the buoy:
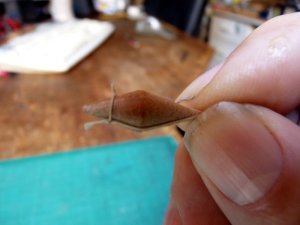
Picture 2.jpg

Slip the loop off the buoy keeping hold of the cords.
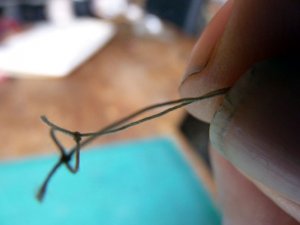
Picture 3.jpg


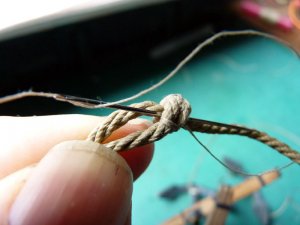
Now change your grip to hold the sections of cord that were running along the buoy rather than those leaving it. Take one of the free ends and bend it back on itself to form a small loop. Now take the other free end and bend that back on itself, but take it to the opposite side from the first one.
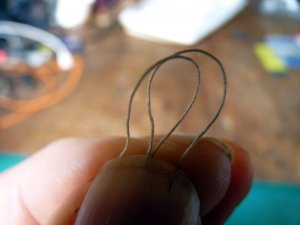
Picture 4.jpg

Gather the cords together and you should now be holding what will become the base of a double loop:
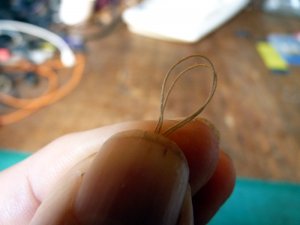
Picture 5.jpg

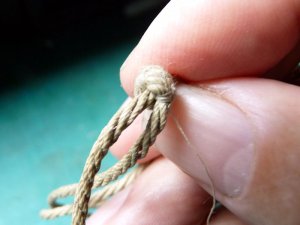
Seize round the base of the double loop you’ve created. The actual position of the seizing isn’t critical.
This is what you should have created:
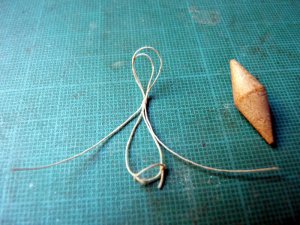
Picture 6.jpg

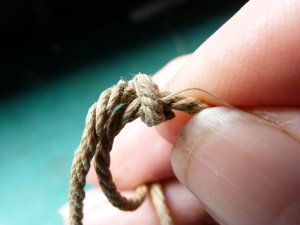
Now put the lasso back over the buoy and adjust the position of your seizing until it’s close up to the end of the buoy.
The easiest way to do this is to slide the seizing slightly too near to the lasso so that it wont reach quite reach over the end of the buoy. Now hold the cords between the lasso and the seizing tightly against the buoy and ease the seizing away until it drops over the end of the buoy.
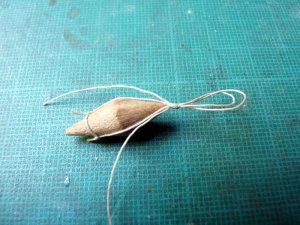
Picture 7.jpg

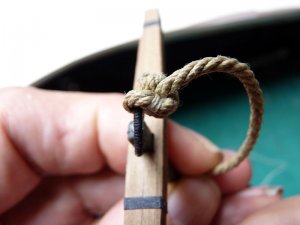
Put a suitable size drill bit or something similar through the double loop you created and pull each of the free ends through the seizing to tighten the loops,
Note: The two lines that will be attached to the buoy are different sizes, that going to the anchor being the larger of the two. It doesn’t matter which you do first but I used a 0.8mm drill first for a 0.5mm line to the anchor.
This shows the first line pulled tight:
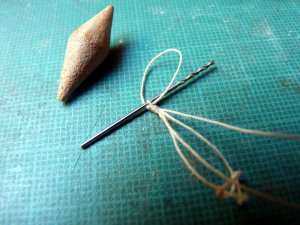
Picture 8.jpg

After pulling the second line tight as well, you now need to feed the two loose ends through your lasso and then position it over the buoy:
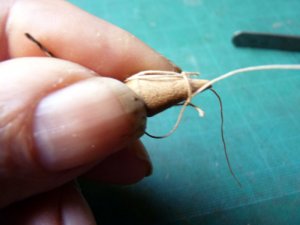
Picture 9.jpg

The next step takes a bit of care, positioning the seizing and the four cords at the end of the buoy. Once the seizing’s in position apply some PVA to the loop and seizing (if you use superglue/CA, don’t glue your drill in place!) and let it set.
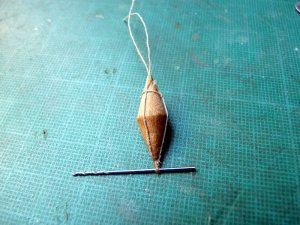
Picture 10.jpg

At this point, you’re on the home straight. Just lead the free ends up the buoy and tie them midway between the start positions….
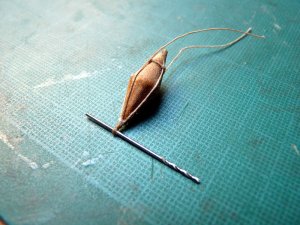
Picture 11.jpg

…and then trim off the loose ends:

Picture 12.jpg

The other half is done the same way, but it’s a little easier to start with because it will stay in position once you thread the lines under the first lasso section. However you can’t remove it completely to make the seizing, so make the ends a bit longer to give yourself working room.
The next picture shows the new section in position with the first cord (on the right) correctly threaded under the first half of the rigging.
Unfortunately it also shows the needle on the second cord threaded under the top lasso. It will eventually end up there, but it should first pass under the bottom lasso in the same way as the one on the right.
I spotted the mistake later, before it was a problem, but not in time to re-take the photo!
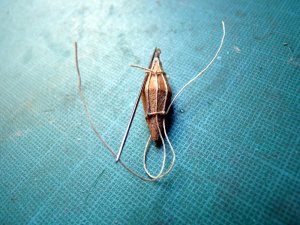
Picture 13.jpg

The next picture shows the final stages with just the two ends to be made off. (The drill at this end was 0.6mm).
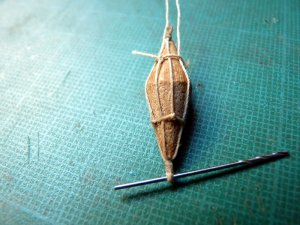
Picture 14.jpg

The final two pictures show the completed buoy.
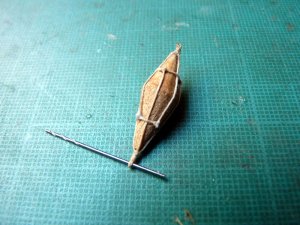
Picture 15.jpg

I can only attach 15 pictures so the final picture will have to go in the next post!
 
Hallo Arthur, @aew ,
many thanks for sharing with us this step-by-step "how to do" post...it is already a small tutorial .... Great work, the result like you showed in your post #133 lashed to the anchor looks realy good!
:D:D:D
 
  • Like
Reactions: aew
Still on the subject of anchors, the anchor was attached using an ‘Inside Clinch’ as described in the last log entry,
This is how it was done.

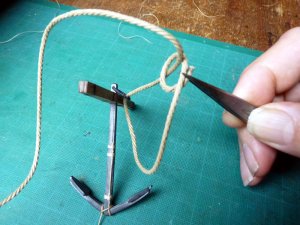
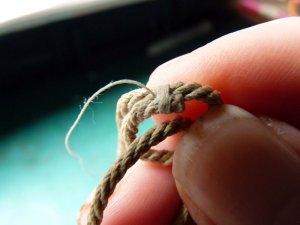
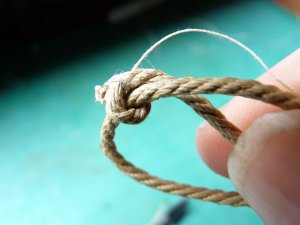
The first picture shows how the cable is brought through the anchor ring and then round itself:

Picture-1.jpg

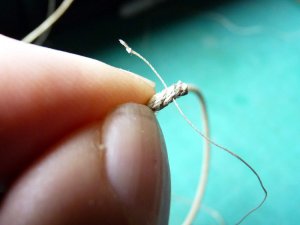
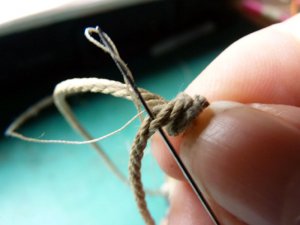
There are three seizings to apply, the first goes, initially, at the point just above the tweezers. Although the loop will be tightened around the cable, the seizing should stay close to the end of the cable; so to start the seizing the cord was passed through one of the cable strands:

Picture-2.jpg

After taking a number of turns around the cables the cord was taken down between the cables to the right and back up on the left in preparation for continuing round the body of the seizing between the two cables:

Picture-3.jpg

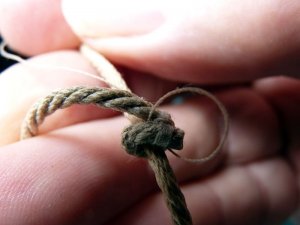
Before making these turns round the centre of the seizing, which will tighten things up considerably, the cable can be pulled through the seizing to tighten the loop around the incoming cable. Take care to keep the lay of the cable tight as you do this:

Picture-4.jpg

You can now complete the turns round the body of the first seizing:

Picture-5.jpg

Now for a little bit of cheating!
Rather than finishing off the first seizing and starting a new one, bring the cord back under the first seizing and pass it through one of the cable strands just over 1/3rd of the way round the cable. (As before, keep the lay tight):

Picture-6.jpg

When making the second seizing, be careful not to pass the needle through the centre cable as this will prevent you tightening the cable on the anchor ring:

Picture-7.jpg


After making a number of turns around the cables, again pass the cord under the centre of the seizing:

Picture-8.jpg


If necessary, you can do a little more cheating at this point. It’s quite difficult to get the needle under the bottom seizings, running it through the middle looks no different:

The cord is again run through one of the strands before making the third seizing in the same way:

Picture-9.jpg

Add a drop of glue to the end of the cord before trimming off the excess and all that’s left to do is tighten the cable on the anchor ring:

Picture-10.jpg
 
Having made and embellished the anchors, the next job was to mount them on the ship.
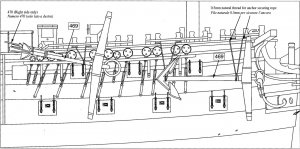
This is the diagram in the instruction book (the last one on the last page!)

PICT_V_9501

mounting.jpg

In the top left corner is a little note telling me I also need to fit part No. 470 on the starboard side.
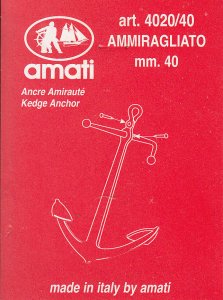
Part 470 turns out to be a kedge anchor that I’d marked off as being supplied and in the box I’d numbered as box 3 – except I couldn’t find it!
The material is shown as ‘4020/40’ which didn’t seem helpful but it at least ruled out ‘casting’, ‘brass etching’ and various varieties of wood. I went back to box 3, tipped everything out and found a little pack containing an anchor construction kit numbered 4020/40. It comes in a plastic pack stapled to a small red card and was at the bottom of one of the tray compartments under a couple of coils of rope.

PICT_V_9502
kedge.jpg

There are three main pieces, the shank & flukes, the stock and a small brass shackle. There are also two brass nails to hold it together, one to fix the shackle to the end of the shank and one as a ‘keep pin’. The way this one works is that the stock fits through a hole at the top of the anchor shank, but a collar on the stock prevents it going more then halfway through the shank. There’s a hole through the stock just past the shank and fitting a pin in this hole keeps the stock from coming back out.
I think you’re expected to bend over the ends of the nails to keep them in place but I opted to rivet them over. In practice, this was a failure so I swapped the brass nails for copper ones and those riveted over no problem.
At his point I started wondering if I’d made a mistake. Looking at the diagram, the kedge anchor shank & flukes looks to be sat on top of the main anchor and with the same orientation. However the stock is shown apparently lashed alongside the shank. I could fairly easily cut off the ‘keep pin’ and fit it this way, but I opted to leave it assembled.
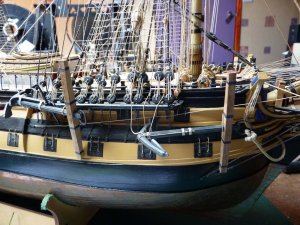
The starboard side:

PICT_V_9503
PICT_V_9503.jpg

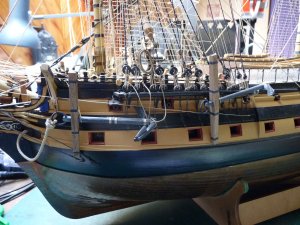
And the port side:

PICT_V_9504

PICT_V_9504.jpg

Don’t ask how the lower stuns’l booms are deployed!
 
Having made and embellished the anchors, the next job was to mount them on the ship.
This is the diagram in the instruction book (the last one on the last page!)

PICT_V_9501

View attachment 48379

In the top left corner is a little note telling me I also need to fit part No. 470 on the starboard side.
Part 470 turns out to be a kedge anchor that I’d marked off as being supplied and in the box I’d numbered as box 3 – except I couldn’t find it!
The material is shown as ‘4020/40’ which didn’t seem helpful but it at least ruled out ‘casting’, ‘brass etching’ and various varieties of wood. I went back to box 3, tipped everything out and found a little pack containing an anchor construction kit numbered 4020/40. It comes in a plastic pack stapled to a small red card and was at the bottom of one of the tray compartments under a couple of coils of rope.

PICT_V_9502
View attachment 48375

There are three main pieces, the shank & flukes, the stock and a small brass shackle. There are also two brass nails to hold it together, one to fix the shackle to the end of the shank and one as a ‘keep pin’. The way this one works is that the stock fits through a hole at the top of the anchor shank, but a collar on the stock prevents it going more then halfway through the shank. There’s a hole through the stock just past the shank and fitting a pin in this hole keeps the stock from coming back out.
I think you’re expected to bend over the ends of the nails to keep them in place but I opted to rivet them over. In practice, this was a failure so I swapped the brass nails for copper ones and those riveted over no problem.
At his point I started wondering if I’d made a mistake. Looking at the diagram, the kedge anchor shank & flukes looks to be sat on top of the main anchor and with the same orientation. However the stock is shown apparently lashed alongside the shank. I could fairly easily cut off the ‘keep pin’ and fit it this way, but I opted to leave it assembled.
The starboard side:

PICT_V_9503
View attachment 48377

And the port side:

PICT_V_9504

View attachment 48378

Don’t ask how the lower stuns’l booms are deployed!


G'day Arthur she is looking great, you have come a long way with her, as fr the lower booms, I think you will find that the main ones were attached to the channels and swung out when in use and swung back in and lashed in place along the channels, however the Fore ones were not treated in the same way, I believe they were stowed on the boat skids and had an eye bolt through the hull in front of the fore channels to which they were attached when in use,

PS I just checked see page 259 Anatomy of Nelsons Ships, half way down the page, but it does'nt say where the fore one was stowed,

best regards John,
 
Last edited:
Back
Top