HMS Victory [1805] 1:79 by serikoff. Started with Mantua -> Upgraded with John McKay's Anatomy.

Part 11

06.2023


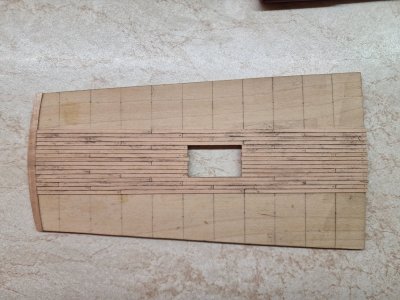
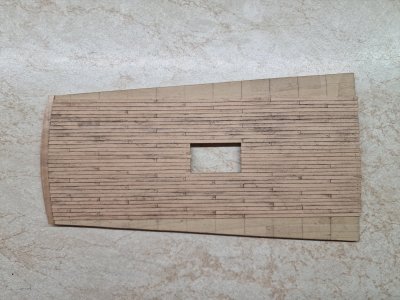
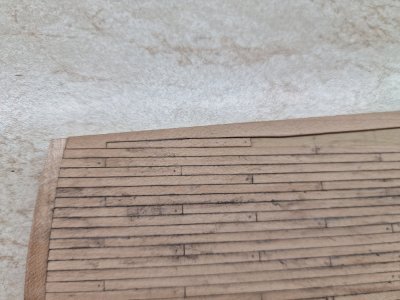
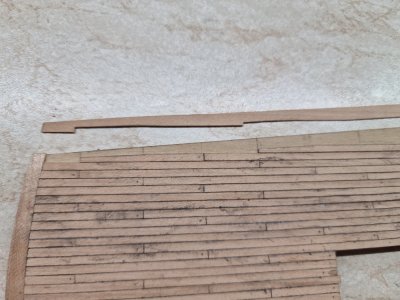
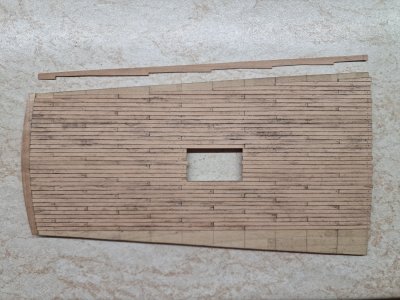
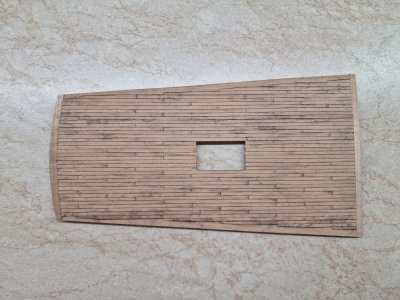
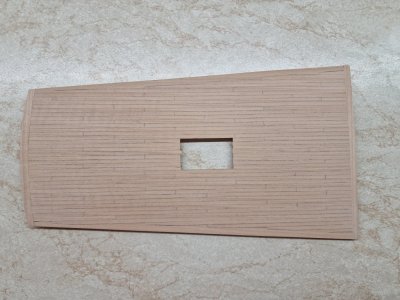
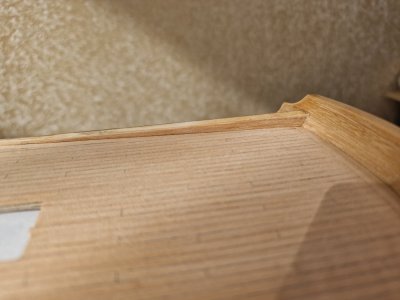
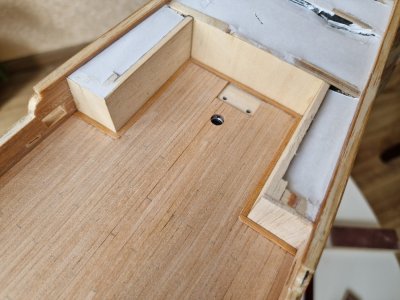
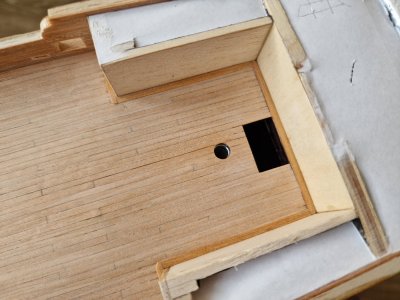
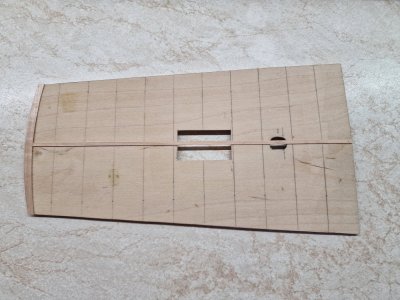
And finally, I planked the uppermost small deck, the poop deck. Starting from the center, I laid down the first plank to ensure the straight line didn’t shift. Then I worked outward in both directions, following a stepped pattern. The side planks were done with some loss. Afterward, everything was sanded down. I glued the planks using PVA, securing them with an iron. The plank ends were colored with a charcoal pencil to imitate caulking.
HMS Victory 245.1.jpg
HMS Victory 245.2.jpg
HMS Victory 245.3.jpg
HMS Victory 245.4.jpg
HMS Victory 245.5.jpg
HMS Victory 245.6.jpg
HMS Victory 246.jpg
HMS Victory 247.jpg
HMS Victory 248.jpg
HMS Victory 249.jpg

I made the finished deck so that it would fit between the beams and small bulwarks, sliding into this space from front to back.
HMS Victory 250.jpg
HMS Victory 251.jpg

Recommendation for beginners!

The main recommendation for all beginners, especially those building models from kits, is to check the size of the deck planks. Kits often simplify things, and the plank width can be two or even three times wider than it should be, which stands out a lot. So, don’t hesitate to either replace the kit’s planks with ones that match your scale or cut them down so they aren’t too wide. The same goes for the length of the planks. Additionally, if you are simulating nails, remember that planks aren’t just nailed at the ends. Nails are driven into every beam along the length of the plank, and plank joints should only occur above the beams.

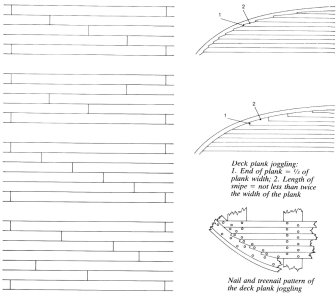
Also, pay attention to where the planks connect with each other. Different ships and periods have their own specific patterns. For example, on my battleship, the joints are positioned over three straight planks, creating a step-like pattern of a certain shape. To understand how this should be done on your particular ship, it’s a good idea to find the anatomy of your vessel or a detailed guide. At the very least, try to gather information about ships from the same era and country as yours.
Good luck!

палуба.JPG
палуба 2.JPG
...
 
Last edited:
06.2023

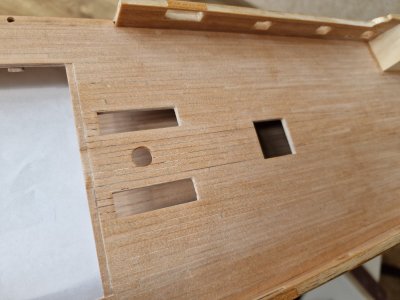
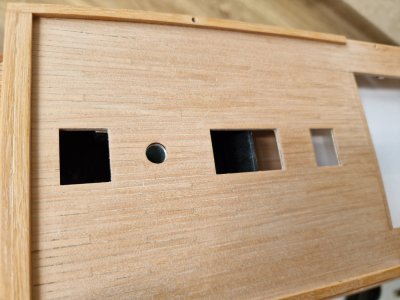
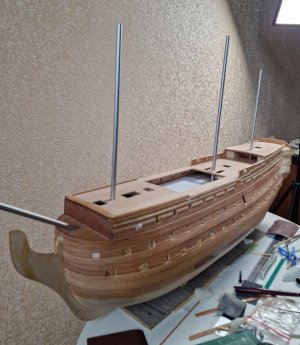
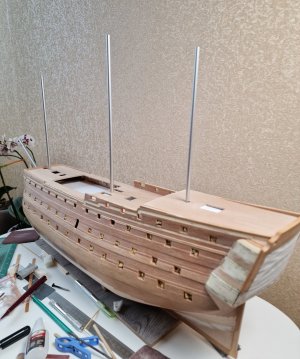
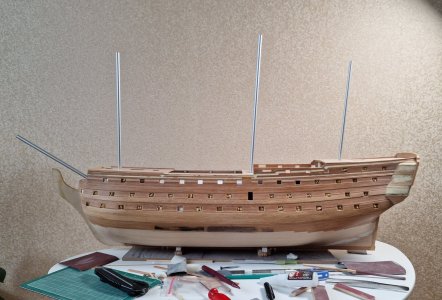
What else did I do with the decks? I cut out holes for the masts and hatches. Behind the helm, I made an opening for the staircase. Additionally, I glued the baseboard under the doors below the poop deck.
HMS Victory 252.jpg
HMS Victory 253.jpg
HMS Victory 254.jpg
HMS Victory 255.jpg

After that, I was able to install the mock masts to check their angle and position. As I mentioned earlier, I had glued aluminum tubes into the hull. Now, I inserted smaller-diameter tubes into those, which simulate the masts. What do you think of the result?
HMS Victory 256.jpg
HMS Victory 257.jpg
HMS Victory 258.jpg
Here, it's clearly visible how much the rear masts are tilted.

P.S. A bit of a "working mess" going on ROTF
...
 
Last edited:
Part 11

06.2023


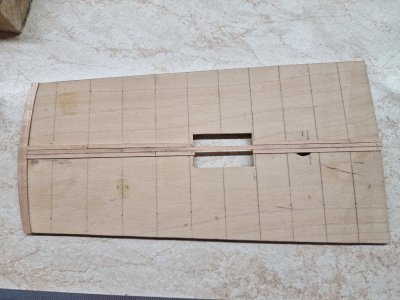
And finally, I planked the uppermost small deck, the poop deck. Starting from the center, I laid down the first plank to ensure the straight line didn’t shift. Then I worked outward in both directions, following a stepped pattern. The side planks were done with some loss. Afterward, everything was sanded down. I glued the planks using PVA, securing them with an iron. The plank ends were colored with a charcoal pencil to imitate caulking.
View attachment 477895
View attachment 477896
View attachment 477897
View attachment 477898
View attachment 477899
View attachment 477900
View attachment 477901
View attachment 477902
View attachment 477903
View attachment 477904

I made the finished deck so that it would fit between the beams and small bulwarks, sliding into this space from front to back.
View attachment 477905
View attachment 477906

Recommendation for beginners!

The main recommendation for all beginners, especially those building models from kits, is to check the size of the deck planks. Kits often simplify things, and the plank width can be two or even three times wider than it should be, which stands out a lot. So, don’t hesitate to either replace the kit’s planks with ones that match your scale or cut them down so they aren’t too wide. The same goes for the length of the planks. Additionally, if you are simulating nails, remember that planks aren’t just nailed at the ends. Nails are driven into every beam along the length of the plank, and plank joints should only occur above the beams.

Also, pay attention to where the planks connect with each other. Different ships and periods have their own specific patterns. For example, on my battleship, the joints are positioned over three straight planks, creating a step-like pattern of a certain shape. To understand how this should be done on your particular ship, it’s a good idea to find the anatomy of your vessel or a detailed guide. At the very least, try to gather information about ships from the same era and country as yours.
Good luck!

View attachment 477907
View attachment 477908
...

Nice poop deck. I like the joggling.

I recognise that drawing, Zu Mondfeld I think.
 
Part 11

06.2023


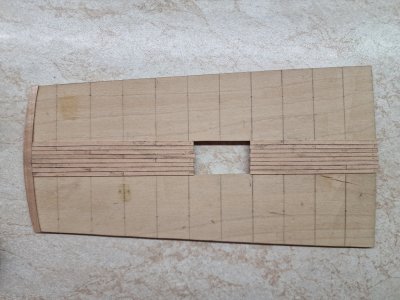
And finally, I planked the uppermost small deck, the poop deck. Starting from the center, I laid down the first plank to ensure the straight line didn’t shift. Then I worked outward in both directions, following a stepped pattern. The side planks were done with some loss. Afterward, everything was sanded down. I glued the planks using PVA, securing them with an iron. The plank ends were colored with a charcoal pencil to imitate caulking.
View attachment 477895
View attachment 477896
View attachment 477897
View attachment 477898
View attachment 477899
View attachment 477900
View attachment 477901
View attachment 477902
View attachment 477903
View attachment 477904

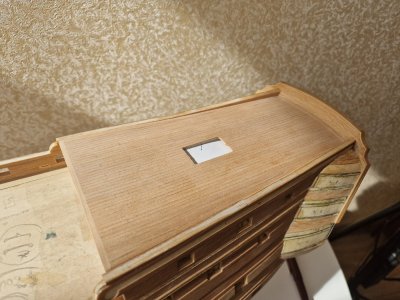
I made the finished deck so that it would fit between the beams and small bulwarks, sliding into this space from front to back.
View attachment 477905
View attachment 477906

Recommendation for beginners!

The main recommendation for all beginners, especially those building models from kits, is to check the size of the deck planks. Kits often simplify things, and the plank width can be two or even three times wider than it should be, which stands out a lot. So, don’t hesitate to either replace the kit’s planks with ones that match your scale or cut them down so they aren’t too wide. The same goes for the length of the planks. Additionally, if you are simulating nails, remember that planks aren’t just nailed at the ends. Nails are driven into every beam along the length of the plank, and plank joints should only occur above the beams.

Also, pay attention to where the planks connect with each other. Different ships and periods have their own specific patterns. For example, on my battleship, the joints are positioned over three straight planks, creating a step-like pattern of a certain shape. To understand how this should be done on your particular ship, it’s a good idea to find the anatomy of your vessel or a detailed guide. At the very least, try to gather information about ships from the same era and country as yours.
Good luck!

View attachment 477907
View attachment 477908
...
Very well done Sergey
I like in particular the sides with sort of butt joints
You are indeed moving very fast !!! How many hours a day do you work on the ship?
I'm impressed
Cheers
 
Nice poop deck. I like the joggling.

I recognise that drawing, Zu Mondfeld I think.
Thank you for the praise.
Yes, you are absolutely right.
That is indeed the book.
зу.JPG

I strongly recommend it for beginners. By the way, adding to the advice about deck planking, this also applies to the planking of the hull. The width and length of the planks and how they connect to each other are very important. It’s especially crucial how the planks are joined at the front and back of the ship.
корп.JPG
 
06.2024

What else did I do with the decks? I cut out holes for the masts and hatches. Behind the helm, I made an opening for the staircase. Additionally, I glued the baseboard under the doors below the poop deck.
View attachment 477933
View attachment 477934
View attachment 477935
View attachment 477936

After that, I was able to install the mock masts to check their angle and position. As I mentioned earlier, I had glued aluminum tubes into the hull. Now, I inserted smaller-diameter tubes into those, which simulate the masts. What do you think of the result?
View attachment 477937
View attachment 477938
View attachment 477939
Here, it's clearly visible how much the rear masts are tilted.

P.S. A bit of a "working mess" going on ROTF
...
splendid
 
Very well done Sergey
I like in particular the sides with sort of butt joints
You are indeed moving very fast !!! How many hours a day do you work on the ship?
I'm impressed
Cheers

Unfortunately, I do not work quickly. I catastrophically lack time for my hobby. I am currently publishing my assembly diary, and the date is June 2023. When I reach the present time, my progress is expected to slow down significantly. However, I try to dedicate as much time to the ship as I can.
Thank you for your feedback.
 
06.2023

Continuing the question about the masts, I encountered the problem that I have nothing to make them from. Yes, it’s still far from making the rigging, but I need to plan the connection between the hull and the masts and bowsprit. So, the question of materials became very urgent. I was constantly looking for good pear wood that would match the color of my block.
HMS Victory 259.jpg

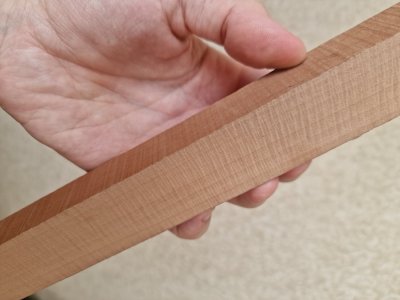
However, I couldn't find exactly the same color. After that, I visited a site similar to eBay, and I was able to get in touch with a person who was selling Carpathian pear wood, and that was, as they say, bingo!

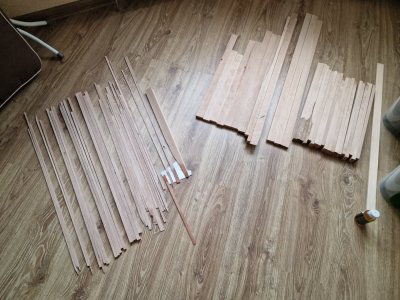
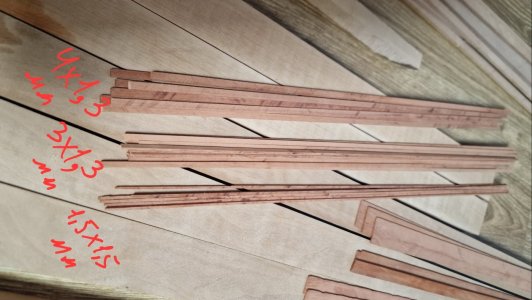
Since the price was very good and I understood that not everything would suit me, I ordered almost everything he had at that time. Soon, I had a stockpile in my room like at a sawmill)) I rejected 2/3 of it because it turned out to be too light for my tasks. But I sealed it respectfully and set it aside for storage, keeping only this piece.
HMS Victory 260.jpg

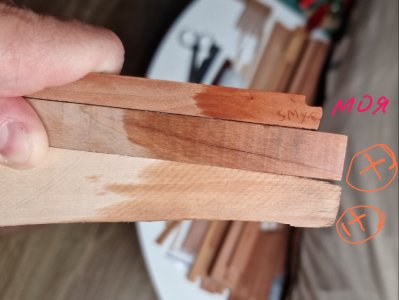
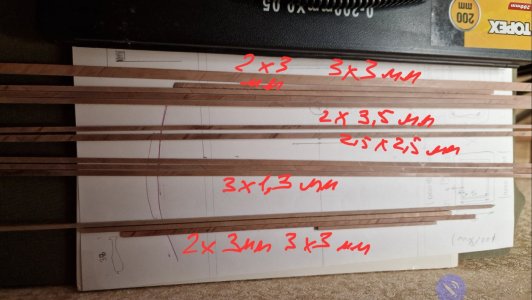
Since my saw couldn't cut large strips, I asked the seller to prepare the wood into suitable blanks for me. He was able to make all sections up to 5 mm, and I cut the rest myself. I immediately started experimenting with how the pear wood would look under oil, and most of the pieces I selected were suitable. Although it wasn't the same color as my block, I liked this color as well. I will use it for the entire rigging, for the latticework, and other details. In other words, I now had a lot of pear wood.

Screenshot_20230720_205711_Gallery.jpg

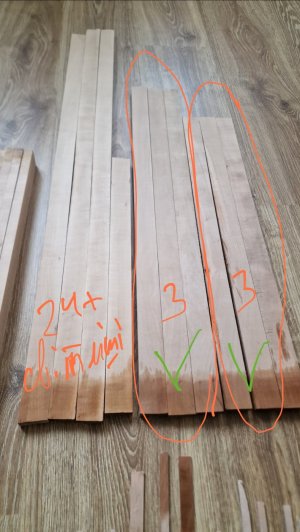
Thus, everything that was cut into blanks up to 5 mm by the man was suitable for me. Now I have enough material to make the rigging. Out of the rest, 3+3 pieces were also suitable, while 24+ pieces were too light. However, I had more than enough suitable pieces.
Screenshot_20230722_113029_Gallery.jpg

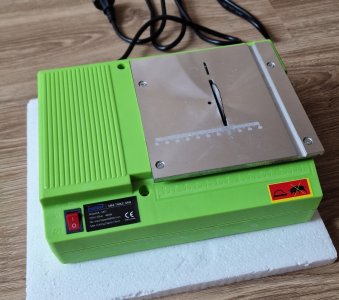
The color under the oil is, of course, very beautiful. I can already envision it in the execution of the masts and small details. Next, I started cutting the wood into blanks of small sections with my new saw. By the way, the saw is not great. It doesn’t compare to Proxxon. It tends to jam in the hard pear wood, making it difficult to work with. But it didn’t make sense to buy something more expensive just for a few strips.
HMS Victory 264.jpg
Screenshot_20230722_203114_Gallery.jpg
Screenshot_20230722_203319_Gallery.jpg

From this pear wood, I began designing a stand for the ship. This will be the final one on which the model will be displayed when finished. But more on that later. In the next part, I will show my experiments with oil finishes on the samples of the deck and hull. And, of course, the painting of the hull itself will be interesting.
 
Hi Serikoff
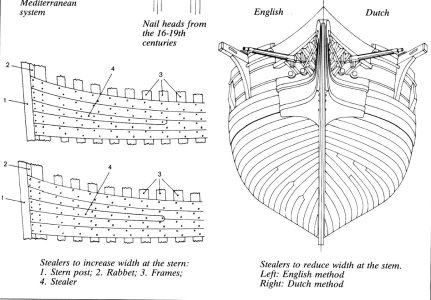
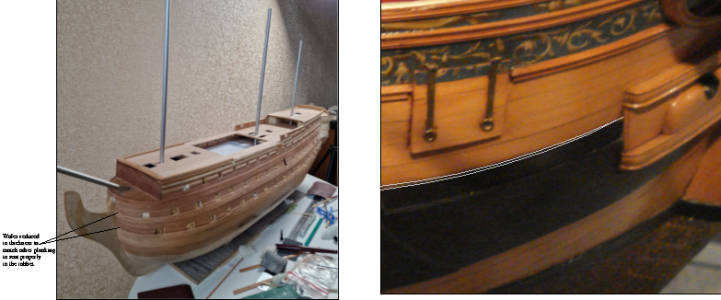
This has been brought up on other build logs so my apologies for the repeat if you have seen this before. The wales reduced in thickness, as did the thick planks above and below the wales so they seated properly in the rabbet at the bow. At your stage of the build this is easily done if you wish to do so. The majority of modern models neglect this, but hopefully you will find it to be an interesting point if not for now, but maybe in the future. A great amount of detail on planking can be found in volume II of The Fully Framed Model by David Antscherl including drawings and written explanations, including the tapering of the thickness of the wales so they seat in the rabbet. The information is very useful for any size vessel.
Allan

The photo on the right is a contemporary model at Preble Hall and I drew in light lines to show more clearly how much tapering there is. For Victory it would go from about 10" to 4.5" in thickness.
1729177420449.png
 
Hi Serikoff
This has been brought up on other build logs so my apologies for the repeat if you have seen this before. The wales reduced in thickness, as did the thick planks above and below the wales so they seated properly in the rabbet at the bow. At your stage of the build this is easily done if you wish to do so. The majority of modern models neglect this, but hopefully you will find it to be an interesting point if not for now, but maybe in the future. A great amount of detail on planking can be found in volume II of The Fully Framed Model by David Antscherl including drawings and written explanations, including the tapering of the thickness of the wales so they seat in the rabbet. The information is very useful for any size vessel.
Allan

The photo on the right is a contemporary model at Preble Hall and I drew in light lines to show more clearly how much tapering there is. For Victory it would go from about 10" to 4.5" in thickness.
View attachment 477964
I’ve seen that execution before. But on the original battleship, the steps extend all the way down to the keel. Naturally, this could have been overlooked during reconstruction, but the fact remains. Moreover, I’ve already painted that area, so I have no way to fix it even if I wanted to. I didn’t find that detail in the plans, but I can say for sure that I’ve seen your version before. I understand it could be applicable to my model. However, as I said, I can’t change anything now. But thank you for your effort. If you have any comments, I’d be happy to hear them.
к.JPG nmhjmg.jpg
 
The color under the oil is, of course, very beautiful.

The colour varies a lot between different batches. Doing tests like this is a very good idea, especially when scratchbuilding with wood from different suppliers.

I have a Proxxon table saw. It's not as good as you might think, for the price. Or maybe it's a defective operator. ROTF
 
The colour varies a lot between different batches. Doing tests like this is a very good idea, especially when scratchbuilding with wood from different suppliers.

I have a Proxxon table saw. It's not as good as you might think, for the price. Or maybe it's a defective operator. ROTF
For me, the natural color of wood under oil is the most important. I don't like painting wood; I prefer its rich, natural appearance. The only exception is black. The parts I plan to paint black, I will print on a 3D printer. Once painted, you can't tell what they are made of, and with 3D printing, I can create precise details in large quantities. But there will be a whole series of posts about this later. As for the saw... Perhaps small saws are not designed for hardwood, especially large sections, but this might not be entirely accurate. ROTF ROTF
 
Greetings. Sergey, how do you like this Chinese saw? I ordered one for myself because my proxon broke. That's why I have a little stagnation in my work, I'm waiting.
To be honest, it's far from perfect. It refuses to cut strips thicker than 6 mm. Any slight misalignment, and it jams. I even put on a Proxxon saw blade, but that didn’t help. The side guide is very poor, it doesn't hold the workpiece straight. If it shifts, the blade stops immediately. Cutting thicker strips took forever. By the way, there’s a speed controller inside, hidden for some reason, but it works. I found out about it from a video on how to improve it, but I haven’t tried it yet. Maybe that will help. There's also poor sealing inside, so dust gets into the motor easily. I recommend keeping that in mind. There's a video on YouTube where someone upgraded it with a lift mechanism and a better side guide—just search for it. However, it's a complex mod, not something you can do on the fly. Overall, I wouldn’t buy it again—too weak.
 
the steps extend all the way down to the keel.
You are not alone in having made a model with the un-tapered wales. I had done the same on a couple models until I learned that this was incorrect. I did not try to fix the first ones but took care to taper the wales on future builds.

When you say steps are you referring to the thick stuff above and below the wales? Assuming you are, you are of course correct. According to the Shipbuilder's Repository 1788 there was a series of strakes below the main wales that were in thickness 8", 7.5". 7", 6", 5.5", and 5". The balance of the bottom planking down to the garboard strake was 4.5" thick. There were variations at the channel and sheer wales as well, but fewer and smaller.

Allan
I’ll keep that in mind for future projects. What’s strange, though, is that I’ve only seen it mentioned a few times in reviews. I understand the logic behind it, but it seems like almost no one actually does it. You rarely see it in the drawings either, and I’m not even talking about kits. Even monographs and anatomy books rarely pay attention to it. But it’s definitely an interesting question.
 
Part 12

06.2023

Oil ...


I sped up the publication of posts to share my experiments with oil finishes since I was interested in your opinion. But I'll ask my question in the next post. Here, I’ll just show the results. Time is moving forward, and the moment has come to think about how the wood will look in the finished version. What should I use to finish it? How should I paint it? To figure that out, you must test samples and experiment, as applying any finish or paint without prior testing is a surefire way to a big failure!

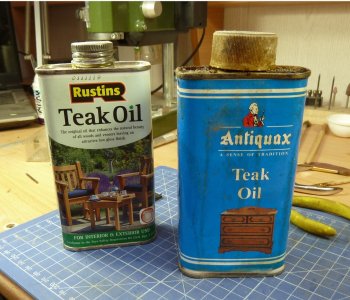
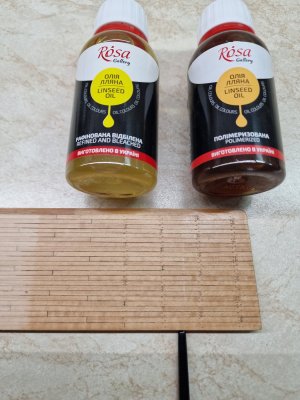
At first, I thought about using teak or antique oil, but after seeing the price, I quickly changed my mind. They do sell sample sizes, but I decided to try using art oil instead. Yes, it doesn’t smell great, but it’s cheap and accessible.
HMS Victory 270.1.jpg

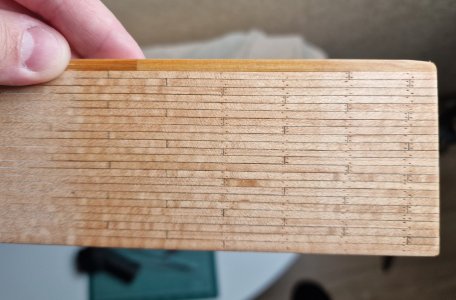
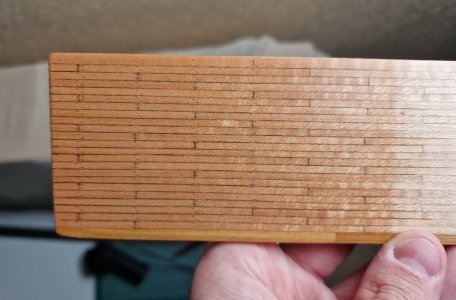
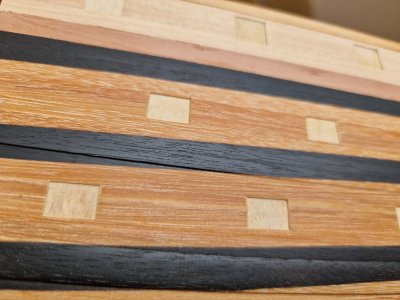
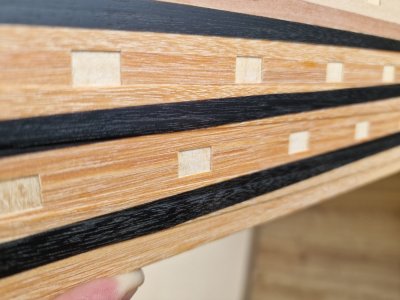
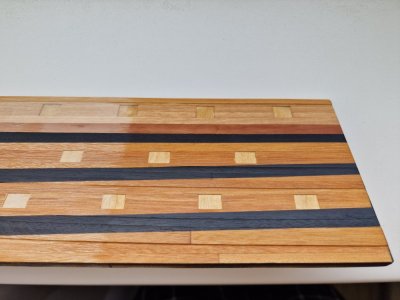
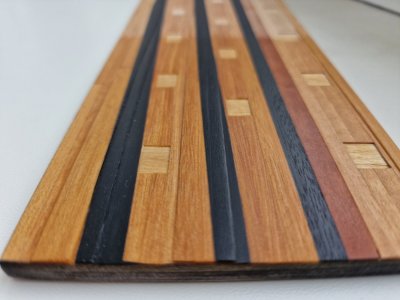
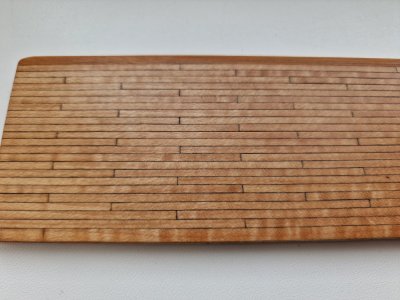
I made a deck sample and coated it: on the left with refined bleached linseed oil, and on the right with polymerized linseed oil.
HMS Victory 270.jpg
N.B. Please disregard the nail simulation for now! This is just a test, and I will approach this issue thoroughly in future posts. Let's not get distracted by it for the time being!
In brief, I tried the method of puncturing with a needle, but I didn’t like it very much. In the future, I experimented with different spacing between the nails. I liked the 3mm distance the most, but I’m not satisfied with the consistency. Upon closer inspection, the punctures vary, and there are micro-fractures in the wood. In short, I will think more about this issue; I might just leave it without nail simulation, as this process would also take a considerable amount of time. However, there is another method, which I will describe later.


Let’s get back to the oil. Spoiler alert, let me clarify a few things. First, after a week of drying, there was no noticeable difference between the two. Second, the polymerized oil is very thick, hard to apply, and takes a long time to dry, so I had to wipe off the excess, which was inconvenient. Third, the refined oil is more liquid in consistency, absorbed well, and dried without any excess... so that’s the one I chose!

I applied three layers of oil and plan to treat all surfaces similarly. The interval between applications is at least a week, depending on air temperature and humidity.

A reminder for anyone using a similar pear veneer: pay attention to the grain direction. I’ve mentioned earlier how I keep track of this. When the test piece is rotated 180 degrees, the brightness changes noticeably—it's not exactly the color but the intensity. In the top photo, it appears lighter, while in the bottom one, it looks darker.
HMS Victory 271.jpg
HMS Victory 272.jpg

I decided to align everything in one direction, and when placing the ship in its viewing position, I will choose the lighter side for the observer.
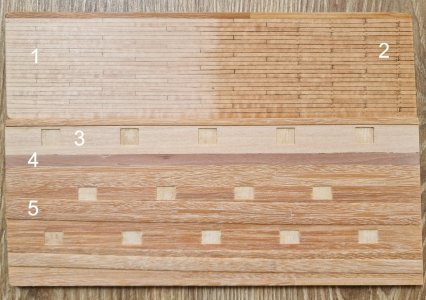
Next, I created a test piece of the hull.
HMS Victory 273.jpg
1 - Dry pear wood. 2 - Pear wood with linseed oil, three layers. 3 - Energy. 4 - Pink pear wood. 5 - Daru.

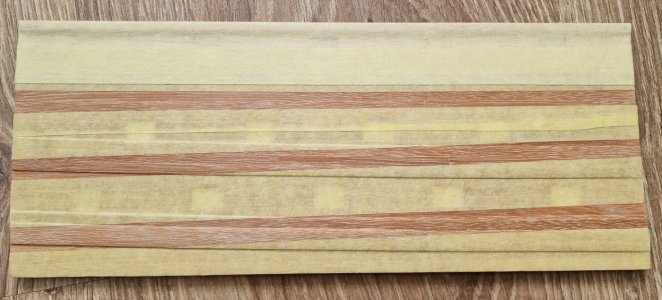
Then I taped part of the test piece of the hull with painter's tape to simulate the black stripes on the hull during painting. I painted it as planned with a spray can of matte black enamel paint. (A matte camouflage paint based on acrylic could also work for this.) The main thing is that it must be matte.
HMS Victory 274.jpg HMS Victory 275.jpg

What I liked about this paint is that it is truly matte (which was important to me). It dries very quickly, applies easily and evenly, holds extremely well, and the texture of the grains is perfectly visible through a thin layer. The only downside is that it has a strong odor, so it needs to be done outside.
HMS Victory 276.jpg

The black color appears slightly different at various angles, but that's only in the photos. In person, it has a very pleasant, deep matte finish.
HMS Victory 277.jpg

What I also liked is that there are no drips and no artificial, toy-like shine; in short, I have resolved the issue of the black stripes for myself.
With several layers of oil, the pear and the black stripes have become even more vibrant and pleasant in color.
HMS Victory 278.jpg

I also really like how the pink pear has turned out. It's absolutely stunning. If I had a lot of it right away, I would make the entire hull and almost everything from it, but it is what it is, and I also really like daru. The color of daru is exactly what I chose to best convey the original orange color of the hull's painting.
HMS Victory 279.jpg

With each layer and drying time, I started to like the deck more and more. After 15 months—exactly how long the samples had been sitting—both the daru and the pear darkened a bit, and the color became even more pleasing. I will show this in the next part...

HMS Victory 280.jpg
...
 
I have a Proxxon table saw. It's not as good as you might think, for the price
There are two (maybe more) problems with the Proxxon mini table-saw. First is the blades they supply with it, which are soso in my opinion, I ordered a slightly larger carbide tipped blade for mine via Ebay- awhile back so I don't have a link , the other is the rather inadequate fence which only locks at the front and is nor always parallel with the sawblade. I made a simple mod to mine by screwing a chunky strip of aluminium angle onto the supplied fence, long enough for me to be able to clamp it at the back.
 
Back
Top