HMS Victory by Occre build log

Like the photo of a real Victory gun port. Shows the look we need to aim for while creating the replica gun ports

Borrowed a drill press and managed to drill a long line of holes for the cannon balls in the 3x3 oak. Still found it tricky with the 1mm drill bit 'bending' - so made a counter sink hole using a spike, then used the smallest drill I had then the 1mm drill. Made up a marker stick with the 3/16 inch gaps marked on it. Tried a ruler but my eyes just could not read it accurately enough - even a magnifying glass did not help (must be getting too old for this!!). Realised how skilled some machinist's must be to do such accurate work !!

Tried out Occre judea bitumen for the first time ever to give an 'aged' look - lots of info on it on this website but especially to Keith Lyall whose post below put me onto this technique. As you can see I used too much (varnished wood then brushed on a very small amount at a time) - need a bit more practise. Fortunately most of this 3rd deck will be hidden by the time the last deck goes on


Made up 30 more guns and glued them in position on the 3rd deck - need to create coils of rope to complete the affect of the gun carriages

Next step - the 4th Deck
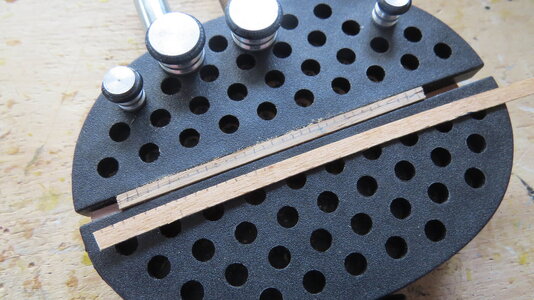
IMG_4780.JPG

IMG_4782.JPG

IMG_4785.JPG
 
Julian . The gun portholes surrounds. Did you pre make little squares and fit them or did you “build them in” in individual pieces?
 
Pillar drill with a cross vice might help drilling cannonball holes?
Thanks for the suggestion; but I have borrowed a small 12v drill on a stand and use my portable vice to drill holes. Yes a pillar drill complete with vice would be better however I would guess a bit more costly. Perhaps put it on my Christmas List??
 
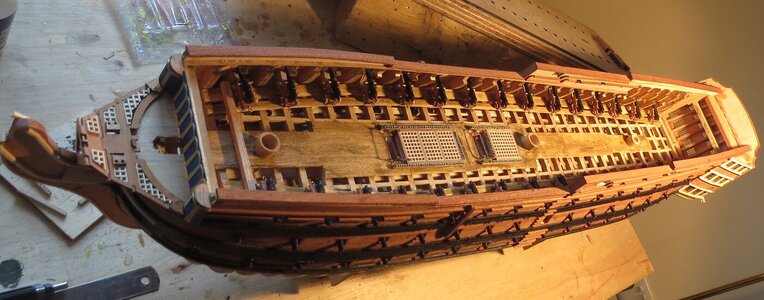
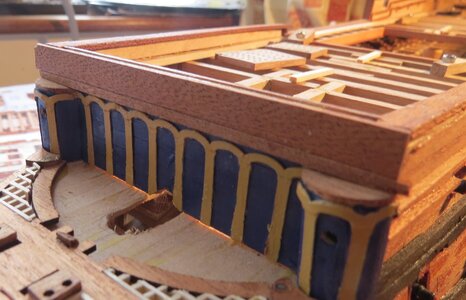
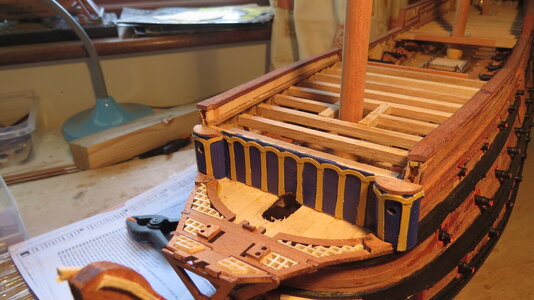
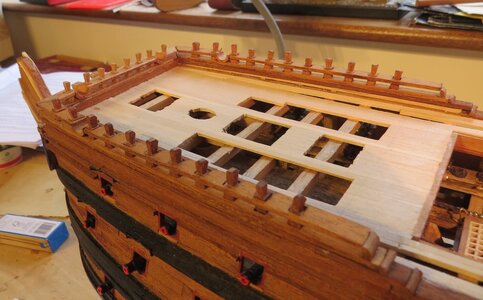
Completed the bulwark at the bow. Occre suggest using 3x3 lime on top of a 2x2 hardwood strip. As I had used hardwood as the 2nd planking the lime would have looked a bit out of place so used a plank of 1mm thick hardwood on top of the 2x2 strip of mahogany - it seems to match up ok

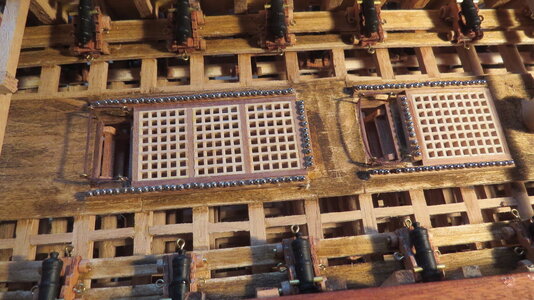
Created the main hatch openings surrounds with 6x2 hardwood. Again this is at odds to what Occre suggest - the plans call for 2x3 African Walnut. Could not work out why this was so shallow as the deck rails are 5x5 - the 2x3 surround would just look inadequate. Before I fitted the 6x2 surrounds I glued a thin strip of 4x1 hardwood to the lower edge - this would support the deck beams and beams across the open hatch.

Put the deck beams in place for the 4th deck and started to fit the deck planking

Note - must glue the cannon balls more securely as one or two have fallen out. Needs a bit more super glue!!. While I am talking about glue one of the lower deck cannons came loose. Much fiddling with tweezers etc to find it in the lower deck and to manoeuvre it back in position. Its won't move now as had to put copious amounts of glue to hold it in place.

Top tip - when you build the bulwark rails make space for the corner crane (instruction no 534) as I had to cut into the corner to fit it. Instructions are not always in a logical sequence

IMG_4788.JPG

IMG_4786.JPG

IMG_4787.JPG

IMG_4789.JPG
 
Last edited:
Completed the bulwark at the bow. Occre suggest using 3x3 lime on top of a 2x2 hardwood strip. As I had used hardwood as the 2nd planking the lime would have looked a bit out of place so used a plank of 1mm thick hardwood on top of the 2x2 strip of mahogany - it seems to match up ok

Created the main hatch openings surrounds with 6x2 hardwood. Again this is at odds to what Occre suggest - the plans call for 2x3 African Walnut. Could not work out why this was so shallow as the deck rails are 5x5 - the 2x3 surround would just look inadequate. Before I fitted the 6x2 surrounds I glued a thin strip of 4x1 hardwood to the lower edge - this would support the deck beams and beams across the open hatch.

Put the deck beams in place for the 4th deck and started to fit the deck planking

Note - must glue the cannon balls more securely as one or two have fallen out. Needs a bit more super glue!!. While I am talking about glue one of the lower deck cannons came loose. Much fiddling with tweezers etc to find it in the lower deck and to manoeuvre it back in position. Its won't move now as had to put copious amounts of glue to hold it in place.

View attachment 432431

View attachment 432432

View attachment 432433

View attachment 432434
Wow ! You build at such a quick pace. Looking absolutely fantastic. Great work Julian.
 
Work at a quick pace - that's retirement for you............. Plus when its going well get a bit obsessed with it and spend rather too much time on it. Expect to slow down once the floods recede and one can get out and about more
 
Created the railings around the Forecastle.

Was not looking forward to creating the railings for it as they created from 4x4x14 wood; the top needed be shaped. Spent a lot of time wondering how on earth I could create such a shape. As it turned out it was almost easy!!. Put the 4x4 piece in the vice, measured 4mm using the measuring stick, made a very shallow cut all round using a fine saw and cut the shoulder out using a very sharp triangular blade. Then cut the angle using the same blade – job done. After a while and a few abortive efforts got the hang of it. With practise each one took about 2-3 minutes. Ended the two hour session quite pleased with the result.- one of the most satisfying creations so far from this model.

Include some photos showing the various stages. Its interesting comparing the final result to the Caldercraft Victory (see final photo) – Caldercraft for some reason provided solid railings (looking at the McGowan book the Occre version is far more faithful to the original design)

Therefore, in the continuing comparison Occre wins by a mile. However still feel let down by Occre’s not referring to parts by name

IMG_4790.JPG

IMG_4793.JPG

IMG_4795.JPG

IMG_4798.JPG

IMG_4800.JPG
 
Amazing progress - you will be finished b4 I even open the box!! Sidetracked on to building a model of a Norfolk wherry on commission, and sailing season about to kick off.
 
Include some photos showing the various stages. Its interesting comparing the final result to the Caldercraft Victory (see final photo) – Caldercraft for some reason provided solid railings (looking at the McGowan book the Occre version is far more faithful to the original design)

Therefore, in the continuing comparison Occre wins by a mile. However still feel let down by Occre’s not referring to parts by name

After reading many comments dissing the Occre Victory, I am glad to read your comments. I have one waiting for me in my workshop that I have yet to begin. Your log is inspiring. Well done! :)
 
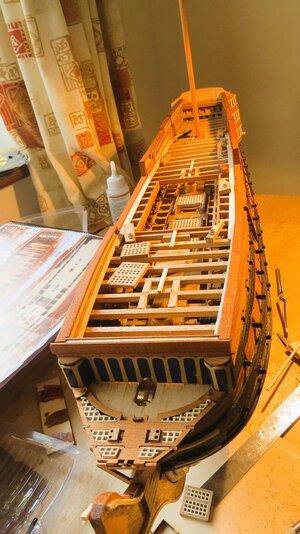
I have noticed from some of the postings here how some people have enhanced their model by creating more detail. So I tried this out - think it works but as always welcome any feedback

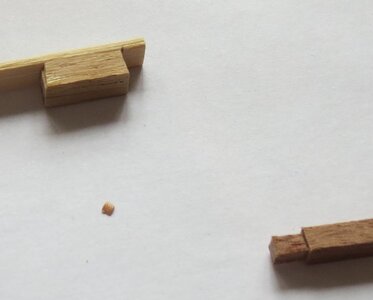
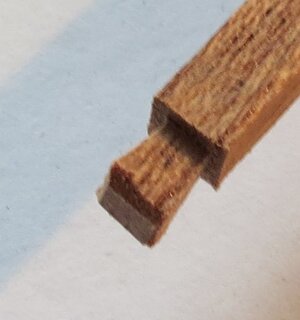
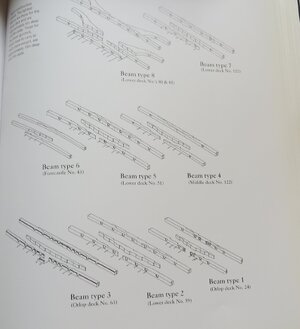
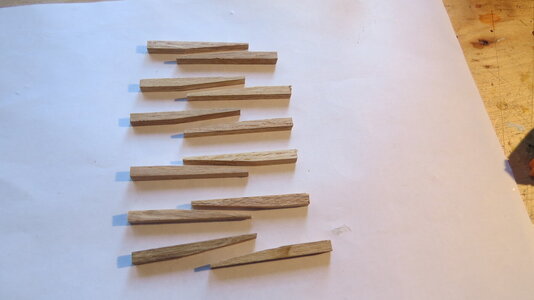
From the instruction's the beams that go across the main hatch use a simple scarf joint. The Mc Gowen book show this joint is actually more complicated with an internal joint - not sure what this joint is called - any ideas??. Could not replicate this but had a go at making pegs which would have helped to hald the two halves of the beams together.

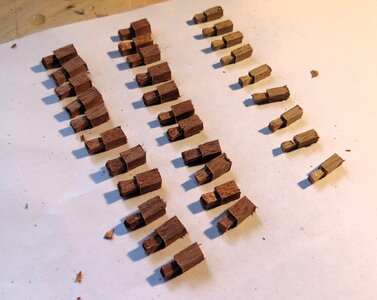
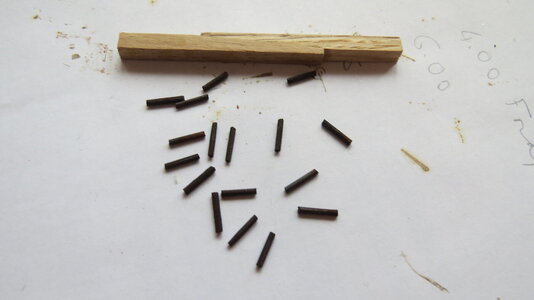
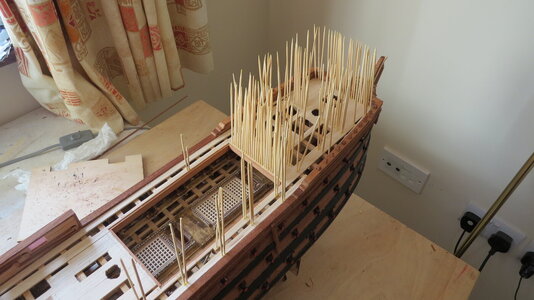
Used cocktail sticks; with a diameter of approx 1.25mm they were out of scale - this would make a peg 100mm in diameter. Thinking it should be more like 50-75mm, put a cocktail stick in the Dremel and using sandpaper quickly reduced the diameter to just under a mm. Cut the stick into approx 6mm long lengths and soaked them overnight in a few drops of Admiralty Walnut wood stain. Drilled 3 no 1mm dia holes in each of the beams and glued them in position. Gave myself 9 out of 10. One thought - presume the beams must have some sort of support in the centre of them as the scalded up length of the some 6.5m. Will do some research - expect as a result to make some sort of pillar to fit under each beam

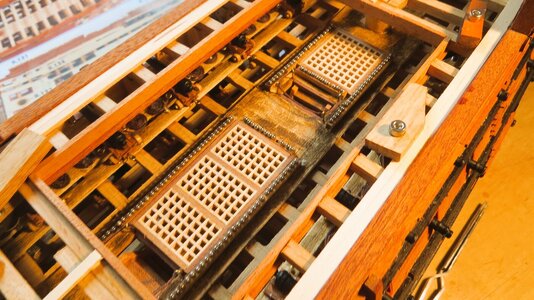
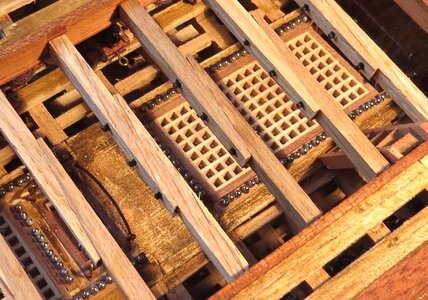
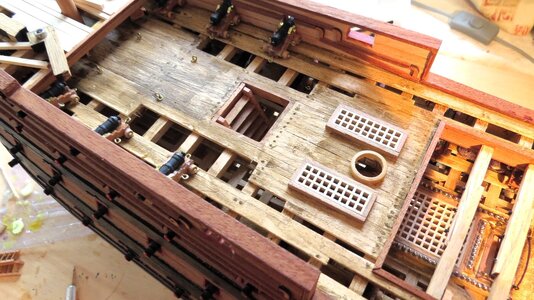
What was not so successful was my attempt at tree nailing. Put single coat of varnish on the deck and then used cocktail sticks glued into 1mm holes drilled in the deck. Cut off the excess sticks using a chisel and brushed a small amount of Occre Judea bitumen onto the deck, removed excess using a paper towel - As you can see I was unable to get a uniform colour (perhaps the varnish was unevenly coated - I presume the varnish stops the Judea bitumen soaking into the wood). Gave myself 4 out of 10 with a 'must do much much better' next time. Need to look at more postings on treenails

Might get it right with the forecastle deck??

IMG_4812.JPG

IMG_4804.JPG

IMG_4809.JPG

IMG_4810.JPG

IMG_4803.JPG

IMG_4811.JPG
 
I have noticed from some of the postings here how some people have enhanced their model by creating more detail. So I tried this out - think it works but as always welcome any feedback

From the instruction's the beams that go across the main hatch use a simple scarf joint. The Mc Gowen book show this joint is actually more complicated with an internal joint - not sure what this joint is called - any ideas??. Could not replicate this but had a go at making pegs which would have helped to hald the two halves of the beams together.

Used cocktail sticks; with a diameter of approx 1.25mm they were out of scale - this would make a peg 100mm in diameter. Thinking it should be more like 50-75mm, put a cocktail stick in the Dremel and using sandpaper quickly reduced the diameter to just under a mm. Cut the stick into approx 6mm long lengths and soaked them overnight in a few drops of Admiralty Walnut wood stain. Drilled 3 no 1mm dia holes in each of the beams and glued them in position. Gave myself 9 out of 10. One thought - presume the beams must have some sort of support in the centre of them as the scalded up length of the some 6.5m. Will do some research - expect as a result to make some sort of pillar to fit under each beam

What was not so successful was my attempt at tree nailing. Put single coat of varnish on the deck and then used cocktail sticks glued into 1mm holes drilled in the deck. Cut off the excess sticks using a chisel and brushed a small amount of Occre Judea bitumen onto the deck, removed excess using a paper towel - As you can see I was unable to get a uniform colour (perhaps the varnish was unevenly coated - I presume the varnish stops the Judea bitumen soaking into the wood). Gave myself 4 out of 10 with a 'must do much much better' next time. Need to look at more postings on treenails

Might get it right with the forecastle deck??

View attachment 435791

View attachment 435792

View attachment 435793

View attachment 435794

View attachment 435795

View attachment 435796
Wow! That looks the biz. Lovely touches , so real !
 
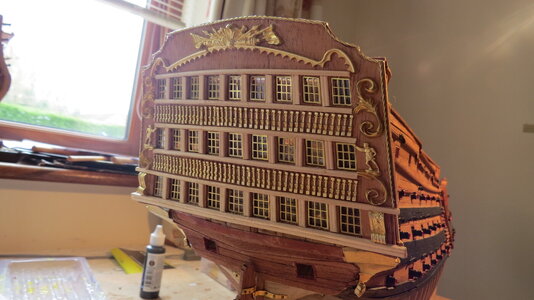
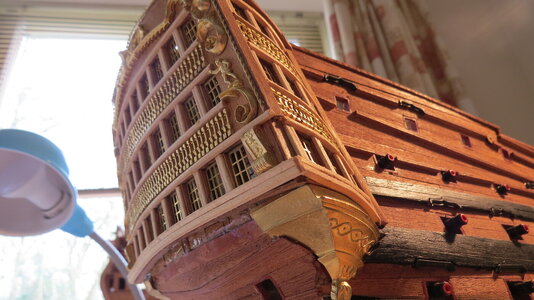
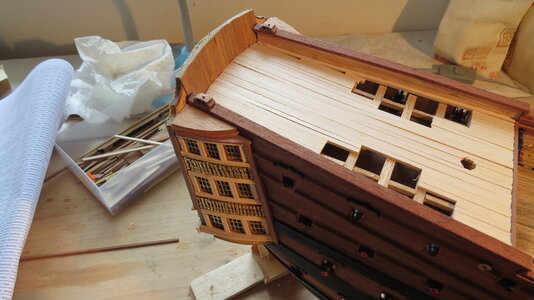
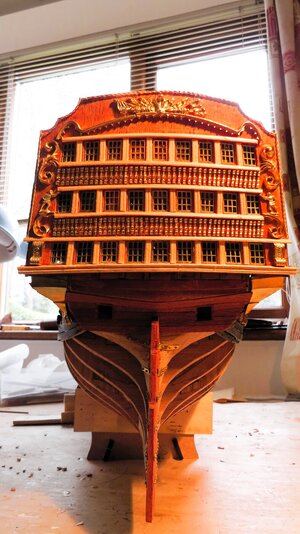
Completed fitting the stern cabins. Bit tricky getting the straight columns lined up above/below the cabin windows - still got some work to do in making them all line up correctly. Also got some glue spillage just above the rudder from where the rear stern section was glued in place (used far too much glue). Occre instructions say to use lime wood to line the inside of the stern gallery above the deck. Decided to use mahogany strips as this matches the rest of the hull (used mahogany strips for the second planking)

At the present rate the hull will be complete in a few weeks; mind you have still got some 100 or so gun ports to fit which will be a long and tedious job!!

IMG_4806.JPG

IMG_4808.JPG

IMG_4814.JPG

IMG_4815.JPG
 
Completed fitting the stern cabins. Bit tricky getting the straight columns lined up above/below the cabin windows - still got some work to do in making them all line up correctly. Also got some glue spillage just above the rudder from where the rear stern section was glued in place (used far too much glue). Occre instructions say to use lime wood to line the inside of the stern gallery above the deck. Decided to use mahogany strips as this matches the rest of the hull (used mahogany strips for the second planking)

At the present rate the hull will be complete in a few weeks; mind you have still got some 100 or so gun ports to fit which will be a long and tedious job!!

View attachment 436239

View attachment 436240

View attachment 436241

View attachment 436242
Very good Julian
 
Back
Top