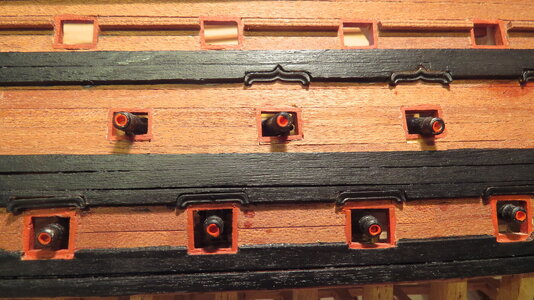
HMS Victory by Occre build log

Hi Julian.
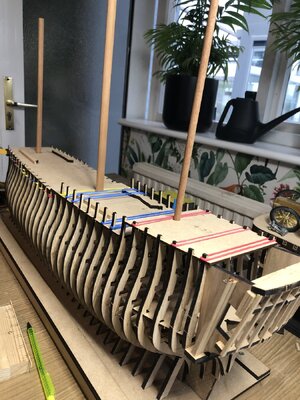
Watching your build with eager novice eyes. I have just reached the stage of sanding the hull for planking. Easy bit according to your pictures and the work ahead. One step at a time. I think I’ll get there.
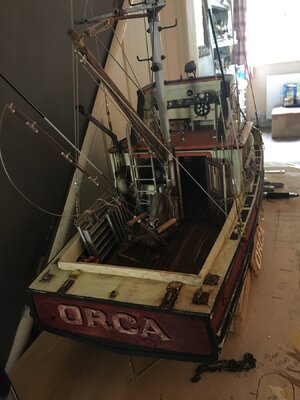
I have built a Jaws orca from scratch, which turned out beautiful so I am confident with following you tiger this right. I thank you for you sharing your build.
Will see if a couple of pictures show but don’t want to pinch your thread.
Keep up the fantastic work.
Looking over your shoulder for guidance.
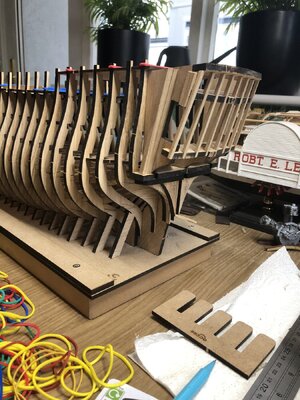
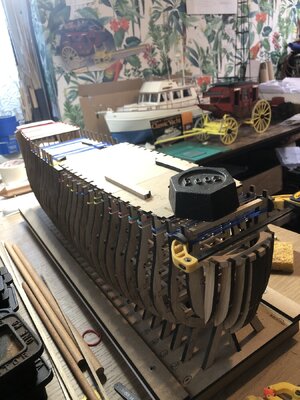
IMG_0195.jpeg

IMG_0200.jpeg

IMG_0203.jpeg

IMG_6612.jpeg

IMG_6494.jpeg
 
Hi Julian.
Watching your build with eager novice eyes. I have just reached the stage of sanding the hull for planking. Easy bit according to your pictures and the work ahead. One step at a time. I think I’ll get there.
I have built a Jaws orca from scratch, which turned out beautiful so I am confident with following you tiger this right. I thank you for you sharing your build.
Will see if a couple of pictures show but don’t want to pinch your thread.
Keep up the fantastic work.
Looking over your shoulder for guidance.
View attachment 426516

View attachment 426517

View attachment 426518

View attachment 426519

View attachment 426520
 
I think looking at the standard of finish you are rather a good novice neilm. I found it difficult to get all of the ribs in line - you seem to have cracked it - I do like this model.
Many thanks Julian. I have been modelling all my life but only just now with ships. Loving the challenge as all us modellers do.
So impressed with your speed of build and thanks to people like you posting a build thread, we can pick up and learn from you.
Keep posting please, loving it.
 
Julian. Did you ever suss out why the gun ports from the template were 4 mm out ?
Seems a fairly simple thing for OcCre to get wrong doesn’t it .
 
Neilm - I never worked out why the gun ports were wrong - spent a day just fiddling around with the paper templates, then I just went back to first principles and placed a gun carriage on the deck and cut the gun port accordingly. Thought of contacting Occre but as I had a work around I am afraid my civic duty failed me!!

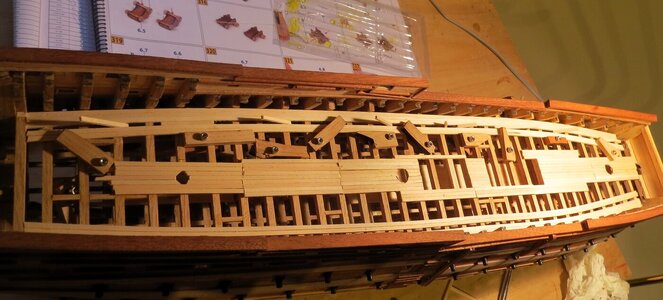
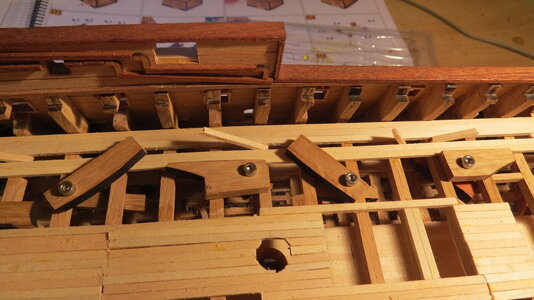
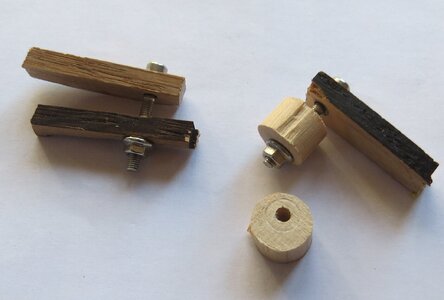
AS you can see I am now on the third deck. Made a clamp out of two strip of wood and a nut and bolt - these were used to hold the lime strips in place to create the deck. I also used a 13mm dia dowel cut into 10 mm thick 'logs' as a clamp (the small dowel fitted in between the deck beams easily). As you can see some of the holes are off set from centre - this enables the clamps better mechanical advantage when used.

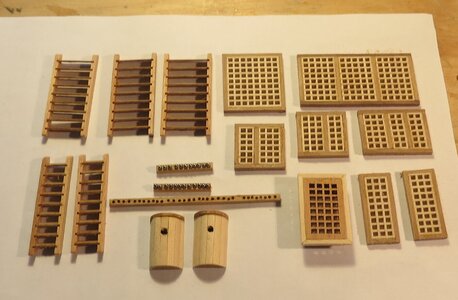
Around Christmas (it seems such a long time ago now) started to make gratings and ladders in between the two hour or so wait for glue to dry in between the various clamping activities (I use J Perkins Aliphatic Resin - seems to make a pretty good bond in 30 mins but I leave for longer to be sure)

As you can see in the photo am using 3x3 Oak strip to make racks to hold the cannon balls. Drilled 1mm dia holes to mount the cannon balls on - as you can see the small strip looks OK ie they are all in line) but on the longer strip some of the holes are a 'bit crooked'!!. Using a hand held Dremel is not accurate enough - am thinking of buying a small drill press - however that will be another £80 or so - for a drill that won't be used that often. Amazon have a NovelLife Mini drill press with clamp for £88 - This is an expensive hobby - the number of electrical drills, small sanders I have bought over the last few years is ridiculous - still they are needed so cannot complain.

IMG_4766.JPG

IMG_4767.JPG

IMG_4771.JPG

IMG_4769.JPG
 
Absolutely brilliant. Love the jigs you invent, great pics and explanations. It really is coming on nicely.
I am now sanding the hull on mine. Hard work, have to be very careful of not knocking any ribs and breaking them.
Keep up the good work.
 
Just finished the gunports on one side, 56 more to go. Mindful of your problem with the position of the gunports I followed the same procedure (with a hole and a gun), looks ok. Plan is to stick with the Occre manual, one layer of planks, no paint. But just in case, have ordered 0,6 mm mahogany strips for an eventual second planking. Removed all the nails and did some preliminary sanding.

All in all it’s a slow process, but haven’t had this much fun in ship modeling since my first Airfix Bismarck when i was 10.

View attachment 426251
Any tips on cutting out the gun ports. I keep thinking that there must be an easier way than drilling the corners and then slowly scratching away joining the dots , so to speak. Any ideas and suggestions?
 
Last edited:
Neilm - I never worked out why the gun ports were wrong - spent a day just fiddling around with the paper templates, then I just went back to first principles and placed a gun carriage on the deck and cut the gun port accordingly. Thought of contacting Occre but as I had a work around I am afraid my civic duty failed me!!

AS you can see I am now on the third deck. Made a clamp out of two strip of wood and a nut and bolt - these were used to hold the lime strips in place to create the deck. I also used a 13mm dia dowel cut into 10 mm thick 'logs' as a clamp (the small dowel fitted in between the deck beams easily). As you can see some of the holes are off set from centre - this enables the clamps better mechanical advantage when used.

Around Christmas (it seems such a long time ago now) started to make gratings and ladders in between the two hour or so wait for glue to dry in between the various clamping activities (I use J Perkins Aliphatic Resin - seems to make a pretty good bond in 30 mins but I leave for longer to be sure)

As you can see in the photo am using 3x3 Oak strip to make racks to hold the cannon balls. Drilled 1mm dia holes to mount the cannon balls on - as you can see the small strip looks OK ie they are all in line) but on the longer strip some of the holes are a 'bit crooked'!!. Using a hand held Dremel is not accurate enough - am thinking of buying a small drill press - however that will be another £80 or so - for a drill that won't be used that often. Amazon have a NovelLife Mini drill press with clamp for £88 - This is an expensive hobby - the number of electrical drills, small sanders I have bought over the last few years is ridiculous - still they are needed so cannot complain.

View attachment 427362

View attachment 427363

View attachment 427364

View attachment 427365
Dremel has a drill press stand that holds a Dremel tool quite nicely and it might be less expensive. Look at the Micro Mark web site....
 
Hi Julian. Just started my own thread on this build. Still copying you but thought a different perspective and nitty bitty bits might help others.
 
Last edited:
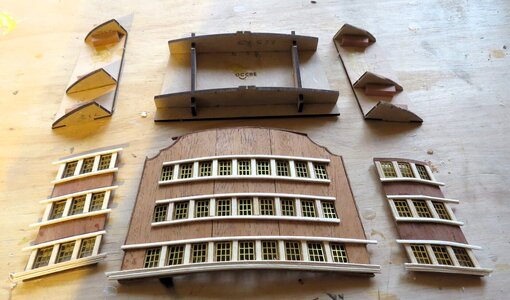
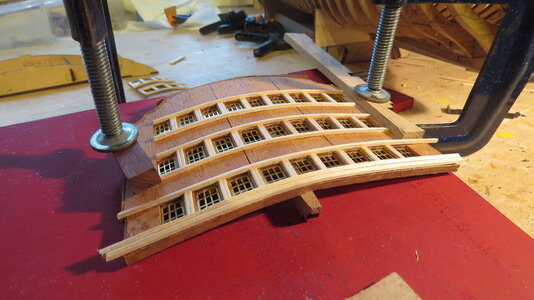
Started to build the stern gallery. As you see the main rear section is slightly curved (the Caldercraft version is flat!). Occre provide a jig which is used to produce the curve. Must say when I trial fit all three sections in place it is beginning to look rather good.

Each section is built as a laminate with the mahogany main piece glued to ply backing. I soaked the ply and used clamps and tape to hold the sections against the jig. I found the curve of the rear section was a a bit hard to maintain so I clamped it with a 10mm deep strip of wood under it. As you can see 2x2mm pieces of lime wood are used to as decoration. Once the glue dried the rear section became really solid and will be easy to glue to the hull without any further bending. There are a lot of decorative metal parts to go on the rear sections, think I will glue the three sections in place and then fit the metal work as I am worried that clamps may damage the metal work - will see how I get on.

As I have said before I prefer the Caldercraft instructions as they actually provide the nautical terminology - Occre just say "part no XYZ"!

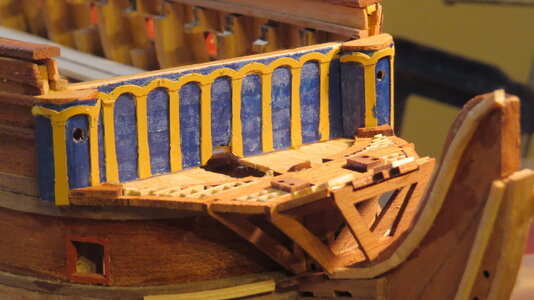
Started to paint the front area (need another coat ASAP as the Blue colour is rather dull!) and also started to fit gratings etc in the bowsprit area

It is coming to life!

IMG_4772.JPG

IMG_4774.JPG

IMG_4773.JPG
 
Any tips on cutting out the gun ports. I keep thinking that there must be an easier way than drilling the corners and then slowly scratching away joining the dots , so to speak. Any ideas and suggestions?
No simple way - its one at a time I am afraid. As you say drill the corner, also drill as much of the rest as possible so its just one mass of holes!! Used a very sharp triangular blade and kept on replacing it as the tip breaks quite easily. Also used a very small saw blade to help join the dots. Had a selection of knives each one has a different blade. Sometime used a small file to tidy up. Only 104 of them so its quite quick (not!!)

Just have fun................
Many thanks Julian. I’m classing this as the most tedious and boring part. Seems like it will take forever.
 
No simple way - its one at a time I am afraid. As you say drill the corner, also drill as much of the rest as possible so its just one mass of holes!! Used a very sharp triangular blade and kept on replacing it as the tip breaks quite easily. Also used a very small saw blade to help join the dots. Had a selection of knives each one has a different blade. Sometime used a small file to tidy up. Only 104 of them so its quite quick (not!!)

Just have fun................
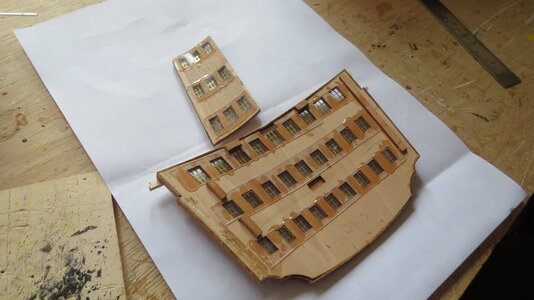
Made first mistake - the LHS side gallery did not fit!!!!!!!!! It fit the hull planking at the top but not at the bottom. I must admit I was always a bit dubious about using the jig as I could never get the wood to follow the rather sharp curvature of the jig. Fortunately I used water based glue so the two pieces of wood glued together forming the side gallery came apart easily after a night of soaking .

Took apart the jig and glued the curved pieces on the hull to act as a template for the side gallery

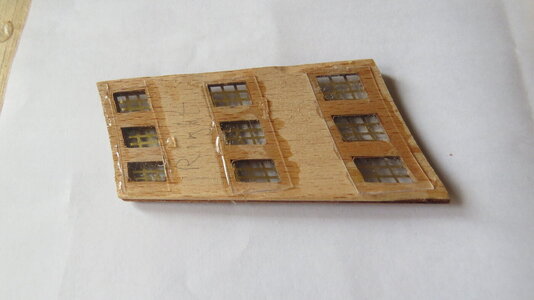
As you can see the windows are made of clear plastic sheet - glued 3 small strips to the inside of the side gallery using Gorilla glue. Soaked it in water overnight in preparation for bending it over the formers - to my amazement the wood had swollen an as it was glued to the rigid plastic sheet it majically produced a perfect curve. Not believing my luck quickly glued it in place with superglue - Job done.......

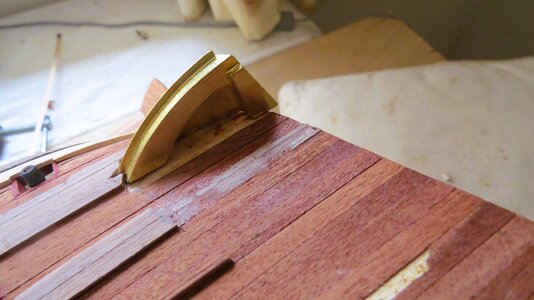
Glued the 90 or so castings in place on the rear gallery using Gorilla Glue (I used to use Supper glue for the metal/wood bonding but am finding Gorilla glue is better due to its longer setting time.)

Fitting the rear gallery in place is a bit tricky; it needs to be perfect - after getting the right fitting glued small pieces of wood inside it to act as markers so it was easy to fit into place. Had to cut into the hull planking to fit the metal casting which forms the underneath of the rear gallery - another 3D juggling act. Finally after a week of 'fathing about' finally this morning glued the rear gallery in place - what a relief to get this done.

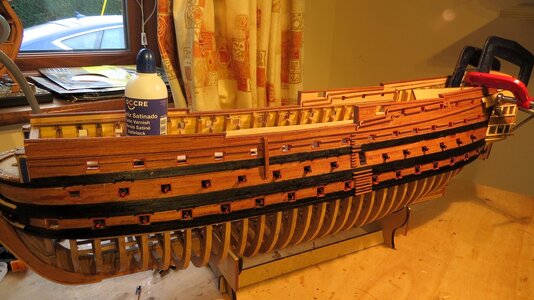
As you can see I have taken good advice from people on this board and started to paint the wales black - still some touching up of the gun muzzles to be done (close up photos don't half show up ones expertise in painting.

Next task fitting the guns on the 3rd deck

Comparision to Caldercraft for rear galleries

Occre wins hands down because the galleries are curved (Caldercraft galleries are flat). Also Occre have some 90 individual castings for the decoration

IMG_4775.JPG

IMG_4776.JPG

IMG_4777.JPG

IMG_4778.JPG

IMG_4779.JPG
 
Last edited:
Back
Top