HMS Victory by Occre build log

I don't believe that the 1765 version was coppered...I may be wrong....besides your Caldercraft is already coppered so why not do this one differently? I think that I will fully plank (double plank) mine and paint the bottom off-white like it had been painted at one time leaving the upper part natural. Jeff is right, you are moving along quite fast on yours. Looking good!
 
I did finally hear from Model Expo. They are telling me that Occre was overloaded with orders and will get more out early next week. So, I am confused how Spree got his 4 days after ordering. I ordered mine 2 months ago. I think I should get a small discount refunded to my credit card as they have had my money for almost 2 months now. What do you all think:?
I suspect that Hobbies uk took a commercial risk and pre-ordered some stock to hold in anticipation of demand (possibly as a preferred supplier??) and thus are able to ship from their shop in Beccles(Norfolk Uk). They still are offering 3 day delivery to UK. Interestingly Cornwall Model Boats another leading UK supplier are out of stock already
. Model expo may only be ordering from Occre against firm/paid orders with a 20/30 day wait time and thus are having to wait in line for supply from Spain. At current US Fed rates interest on usd 1275 equals about USD 11 for 2 months.
 
Hi Julian,

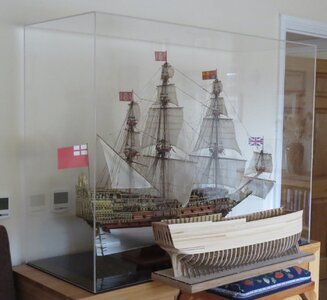
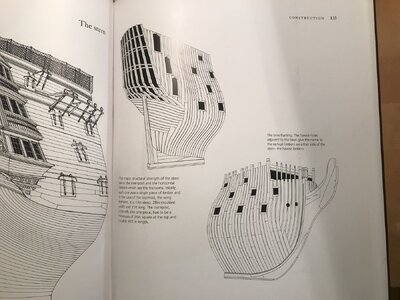
This is impressive progress to date! I'm not a Victory guy so this is a real question not a critique: on the big model the stern facade looks flat or concave - on the smaller model the stern facade looks convex. A camera thing or is something amiss? Or is it an issue of the date (1765) of this particular version?

My vote: cut out the gun ports now and place the final veneer later. If you will framing the inside of the gun ports then place the second planking to the edge of the cutout - and if you will not be framing the inside of the gun ports then leave the second planking just a bit shy of the opening to create the illusion of inside framing. Not sure what the kit calls for...
 
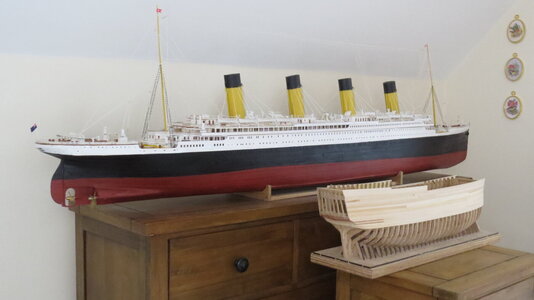
Made a comment earlier the model was small. Think I was comparing it to other "large" models I have - the Sovereign of the Seas although each model is approx the same size the Sovereign looks larger because of the case its in. As for the Titanic - well the Victory is certainly small compared to the 6 foot plus Titanic (which is really OTT - the Titanic will have to be sold as it really does take up too much space.

Have applied about 5 strips for a trial of the 2nd planking and have cut a single line of gun ports.; seemed to work OK. Will try cutting the gun ports first and then applying the 2nd planking to compare technique's.

The inside of the gun ports are framed so don't think Paul's suggestion of leaving the 2nd planking shy of the opening will work; but thanks for the suggestion - always keen for any improvements

Will look into the shape of the stern facade

IMG_4720.JPG

IMG_4722.JPG
 
Made a comment earlier the model was small. Think I was comparing it to other "large" models I have - the Sovereign of the Seas although each model is approx the same size the Sovereign looks larger because of the case its in. As for the Titanic - well the Victory is certainly small compared to the 6 foot plus Titanic (which is really OTT - the Titanic will have to be sold as it really does take up too much space.

Have applied about 5 strips for a trial of the 2nd planking and have cut a single line of gun ports.; seemed to work OK. Will try cutting the gun ports first and then applying the 2nd planking to compare technique's.

The inside of the gun ports are framed so don't think Paul's suggestion of leaving the 2nd planking shy of the opening will work; but thanks for the suggestion - always keen for any improvements

Will look into the shape of the stern facade

View attachment 412146

View attachment 412147
OMG! Next to the Titanic, it does look small. Are they close in scale? just curious.

Jeff
 
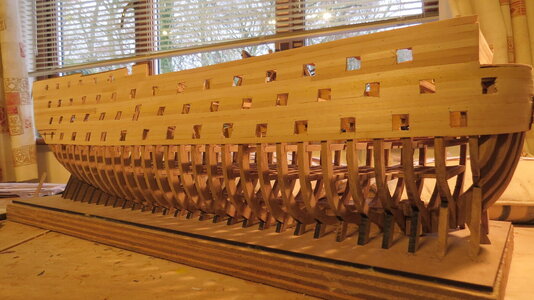
Just complete the long and tedious task of cutting out the gun ports. Took about 10 days...

First problem with the instructions - could not get the paper templates provide by Occre to work!!!!!!!.

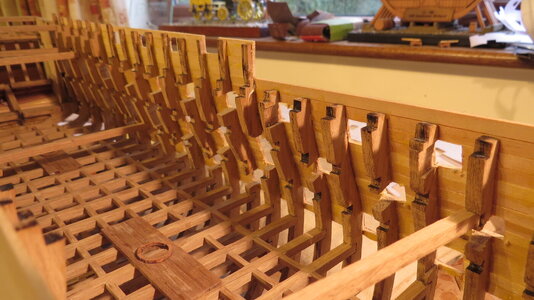
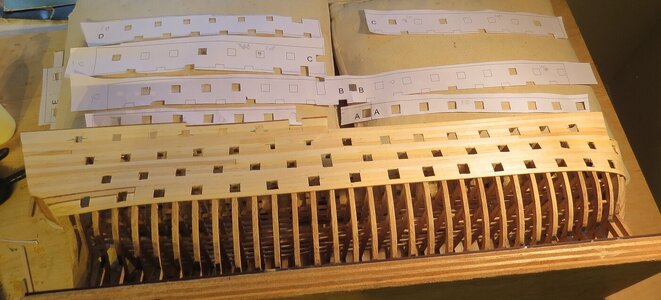
Placed the first template in position as required - in line with the bottom strake of the hull planking - this planking had been fitted using the template provided. I cut out all of the gun ports and then thought I had better check how it looked with a cannon. I then realised all of the lower gun ports were too low by about 4-5mm. Lots of head scratching; double checking with the full sized plans, measuring with a ruler, making a cross section from the plans etc. After a day or so decided to use the templates to mark out the horizontal placing of the ports and to work out the vertical position of the gun ports by making a small hole where I thought the gun barrel would stick out and then place a gun in position and adjust the placement of the gun port accordingly. Following this method successfully cut out the gun posts. Not sure what went wrong but at least all seems OK now.

Any mistakes I made with the holes being too big will be hidden by the 2nd planking - very glad I followed this method as it will hide alot of 'issues'. As you can see from the photos some of the ribs had to be cut to allow the gun port - as the hull structure is so strong this was done without any problems. Used almost 10 blades as the tip of the triangular blade kept on breaking off. One of the photos shows the paper templates used

Will be interested from others whether they have had a problem or not with the templates

Next task - fit the 2nd planking

IMG_4724.JPG

IMG_4725.JPG

IMG_4723.JPG
 
Just complete the long and tedious task of cutting out the gun ports. Took about 10 days...

First problem with the instructions - could not get the paper templates provide by Occre to work!!!!!!!.

Placed the first template in position as required - in line with the bottom strake of the hull planking - this planking had been fitted using the template provided. I cut out all of the gun ports and then thought I had better check how it looked with a cannon. I then realised all of the lower gun ports were too low by about 4-5mm. Lots of head scratching; double checking with the full sized plans, measuring with a ruler, making a cross section from the plans etc. After a day or so decided to use the templates to mark out the horizontal placing of the ports and to work out the vertical position of the gun ports by making a small hole where I thought the gun barrel would stick out and then place a gun in position and adjust the placement of the gun port accordingly. Following this method successfully cut out the gun posts. Not sure what went wrong but at least all seems OK now.

Any mistakes I made with the holes being too big will be hidden by the 2nd planking - very glad I followed this method as it will hide alot of 'issues'. As you can see from the photos some of the ribs had to be cut to allow the gun port - as the hull structure is so strong this was done without any problems. Used almost 10 blades as the tip of the triangular blade kept on breaking off. One of the photos shows the paper templates used

Will be interested from others whether they have had a problem or not with the templates

Next task - fit the 2nd planking

View attachment 413812

View attachment 413813

View attachment 413814
It looks great ! You (and now us) will be the only ones that know this. no one will be taking a caliper to your build model to measure where the ports are. :)
 
Just complete the long and tedious task of cutting out the gun ports. Took about 10 days...

First problem with the instructions - could not get the paper templates provide by Occre to work!!!!!!!.

Placed the first template in position as required - in line with the bottom strake of the hull planking - this planking had been fitted using the template provided. I cut out all of the gun ports and then thought I had better check how it looked with a cannon. I then realised all of the lower gun ports were too low by about 4-5mm. Lots of head scratching; double checking with the full sized plans, measuring with a ruler, making a cross section from the plans etc. After a day or so decided to use the templates to mark out the horizontal placing of the ports and to work out the vertical position of the gun ports by making a small hole where I thought the gun barrel would stick out and then place a gun in position and adjust the placement of the gun port accordingly. Following this method successfully cut out the gun posts. Not sure what went wrong but at least all seems OK now.

Any mistakes I made with the holes being too big will be hidden by the 2nd planking - very glad I followed this method as it will hide alot of 'issues'. As you can see from the photos some of the ribs had to be cut to allow the gun port - as the hull structure is so strong this was done without any problems. Used almost 10 blades as the tip of the triangular blade kept on breaking off. One of the photos shows the paper templates used

Will be interested from others whether they have had a problem or not with the templates

Next task - fit the 2nd planking

View attachment 413812

View attachment 413813

View attachment 413814
Good morning Julian. Very impressive. Cheers Grant
 
I am, admittedly, very new to shipbuilding. But I am perplexed by the requirement to have to saw through main frames to fit the gun ports and cannons. Examining photographs of the victories gun decks, all of the gun ports are between the frames of the ship. So I am scratching my head about why the model would require locating gun ports right on top of main frames. Can somebody please help me understand this?
 
I am, admittedly, very new to shipbuilding. But I am perplexed by the requirement to have to saw through main frames to fit the gun ports and cannons. Examining photographs of the victories gun decks, all of the gun ports are between the frames of the ship. So I am scratching my head about why the model would require locating gun ports right on top of main frames. Can somebody please help me understand this?
Occre has not duplicated the actual framing pattern on the Victory so there will be issues. Looking forward to seeing your work in a build report!
 
Yes some of the support for the deck beams has been removed - however should be able to get glue the end of the deck beams to the ribs OK. It will just be a bit tricky to hold them in place without the support below.
 
Yes some of the support for the deck beams has been removed - however should be able to get glue the end of the deck beams to the ribs OK. It will just be a bit tricky to hold them in place without the support below.
Just got to one of my favourite bits of building models - the second planking;- this is because at this stage the hull starts to come to life. However big problem for me is Superglue - when I first used it 10 years ago I bought the standard variety. After a year or so I realised it was not doing me any good (breathing in fumes made me cough etc. So I started to use Box Smith Industries Super Gold - this claims to be vapour free.

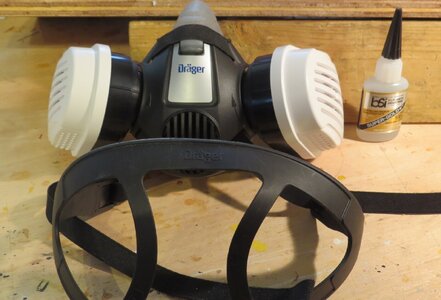
However I could still smell it and it irritated my throat so I bought the best facemask I could buy complete with P2 filter - this claims to absorb harmful vapours - however I still find I can sense the vapour. So I try to only do say 10 minutes of superglueing then leave the room (window is open as well)

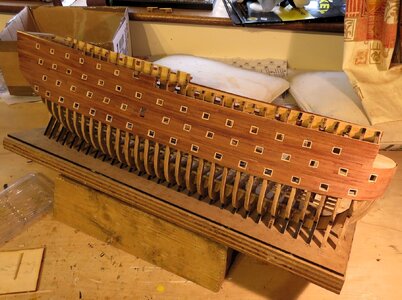
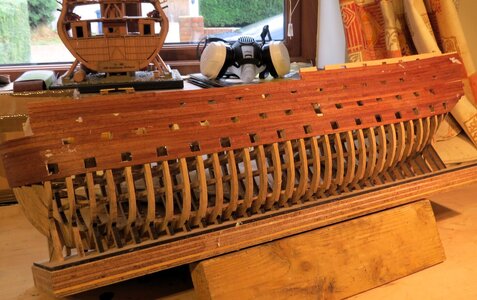
Anyway enough of 'my issues' and on to the latest progress. Finished 2nd planking - used 30 x 5x1mm Basswood left over from the Caldercraft Victory - must say it worked well. Next cut out all of the portholes and filled them in with 3x1 strip. As you cqn see one side is almost complete with the other ‘work in progress’.

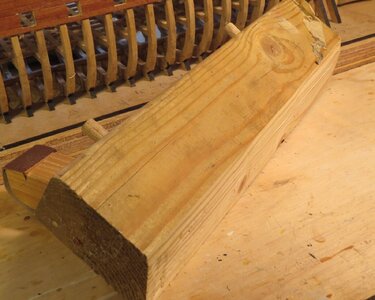
Got fed up with balancing the boat on boxes to work on the sides at and angle so made a wedge out of 4x2 timber with a 30degree angle cut into one edge. Two dowels on the edge can be fitted into either side of the 25mm thick plywood base – makes a great working platform

IMG_4726.JPG

IMG_4728.JPG

IMG_4730.JPG

IMG_4731.JPG
 
Just got to one of my favourite bits of building models - the second planking;- this is because at this stage the hull starts to come to life. However big problem for me is Superglue - when I first used it 10 years ago I bought the standard variety. After a year or so I realised it was not doing me any good (breathing in fumes made me cough etc. So I started to use Box Smith Industries Super Gold - this claims to be vapour free.

However I could still smell it and it irritated my throat so I bought the best facemask I could buy complete with P2 filter - this claims to absorb harmful vapours - however I still find I can sense the vapour. So I try to only do say 10 minutes of superglueing then leave the room (window is open as well)

Anyway enough of 'my issues' and on to the latest progress. Finished 2nd planking - used 30 x 5x1mm Basswood left over from the Caldercraft Victory - must say it worked well. Next cut out all of the portholes and filled them in with 3x1 strip. As you cqn see one side is almost complete with the other ‘work in progress’.

Got fed up with balancing the boat on boxes to work on the sides at and angle so made a wedge out of 4x2 timber with a 30degree angle cut into one edge. Two dowels on the edge can be fitted into either side of the 25mm thick plywood base – makes a great working platform

View attachment 415749

View attachment 415750

View attachment 415751

View attachment 415752
Issues with superglue (and David Granns book “the Wager”) are the reasons why i am trying my hands on this kit. My first wooden ship, probably way to ambitious, but what the heck.

I developed a rather severe allergy, clogged sinuses for 24/48 hours. Tried the p2 filter and a rather expensive vapour free glue, to no avail. The solution (from a reddit post) that worked for me; I bought the cheapest c-pap machine plus a face mask. The positive pressure keeps out all the vapours. But it is still a cumbersome way to work with PE.


Being a complete novice i am following this build with great interest. Just finished building the frame and i am now in the process of sanding the complete structure. After that, the dreaded task of planking. And then the gun ports! When i read that it took you about 10 days….., as an experienced builder…..
 
People have built ship models for hundreds of years without superglue.
¨ Chloroform causes skin irritation, can damage health if inhaled or swallowed and is suspected to cause cancer
I would try to use a different building method.
 
My father used to have a glue pot which contained I think a solid brown mass of glue which looked almost see through. This was heated up and used - it smelt abit. Not sure what it was though. Seem to remember some glue was made from horse's hooves!!. Technology has move on since then however issue of vapour from drying glue still has not been solved. Tried to use other glues on hull but nothing has the instant grab of superglue
 
Back
Top