Did you only get 1 bag of green plates? Sure doesn't look enough to me.
Thanks, Ken
Thanks, Ken
 |
As a way to introduce our brass coins to the community, we will raffle off a free coin during the month of August. Follow link ABOVE for instructions for entering. |
 |
 |
The beloved Ships in Scale Magazine is back and charting a new course for 2026! Discover new skills, new techniques, and new inspirations in every issue. NOTE THAT OUR FIRST ISSUE WILL BE JAN/FEB 2026 |
 |
I had 1 bag. It was more than enough. I had some leftover. You can try estimating how many you need. Try weighing a hundred plates and then weigh whole bag. From this you will figure out total length.Did you only get 1 bag of green plates?
I've been looking at other builds then at the box, They're all over the place. Make sense,,,, kinda?How are yo going to do the yellow/black striping? Your wales don't line up. Look at fig 318. Isn't the black wales supposed to run into the black part of the stern. (below and in between windows.)
This is this ship feature. Wales do NOT match with painted stripes.How are yo going to do the yellow/black striping? Your wales don't line up.
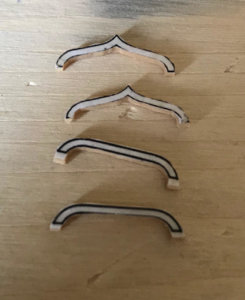
Hello Y.T. Your first soldering experience looks very good.Here I am comparing the deadeye chainplates. On the left is one from the kit. On the right is one I just scratch built. It will be blackened later of course. Which one looks more appealing to you? Buy the way this is my first experience with silver soldering
 However, the chainplate on the left (kit supplied) to me - oversized, and scratch-build is a bit undersized. You may want to find a wire the size in between those two. While it looks undersized to me, the nails head add to this. If you make a decision to go with the one you scratch build, consider finding nails with the smaller head for sure.
 One of the ways to make the head smaller is to tight the pin (nail) in your roto tool, while it is rotated, touch the head against sandpaper laying flat on a hard surface. It will shave the head and make it smaller.The nails are much bigger problem. I have no idea where to find ones with small heads.
