-

Win a Free Custom Engraved Brass Coin!!!
As a way to introduce our brass coins to the community, we will raffle off a free coin during the month of August. Follow link ABOVE for instructions for entering.
You are using an out of date browser. It may not display this or other websites correctly.
You should upgrade or use an alternative browser.
You should upgrade or use an alternative browser.
HMS Victory Mantua 1:78 (first build) by Grant Tyler
- Thread starter GrantTyler
- Start date
- Watchers 102
- Joined
- Jan 9, 2020
- Messages
- 10,534
- Points
- 938

Wow Grant. You have been busy and made excellent progress. The channels look superb and I am sure very secure. By the way I like the idea of the piece of 3mm scarp wood taped to the exact position and then pressing the nails again that piece of wood. The indentations left will indicate the exact position for the holes. Clever and ingenious - I learnt something today - thank you!
This model is way more ambitious than I would attempt as a first build but you are doing a great job and it is looking fantastic, maybe one day I might feel confident to attempt a Victory model.
Hello Richie. Thanks. Yep in hindsight(that perfect science we all wish we had) I would have gone for a smaller simpler model as I make so many mistakes in my learning curve. Non the less I am enjoying it and thus far happy. Luckily the guys and Ladies on SOS are helpful and share so much. I would hate to think what I would have built if not for this forum. Cheers
Hello Richie. Thanks. Yep in hindsight(that perfect science we all wish we had) I would have gone for a smaller simpler model as I make so many mistakes in my learning curve. Non the less I am enjoying it and thus far happy. Luckily the guys and Ladies on SOS are helpful and share so much. I would hate to think what I would have built if not for this forum. Cheers
Cheers Heinrich. Sometimes finding a way to overcome my weaknesses(one of mine is the inability to get my measurements mm exact) stimulates my grey matter.Wow Grant. You have been busy and made excellent progress. The channels look superb and I am sure very secure. By the way I like the idea of the piece of 3mm scarp wood taped to the exact position and then pressing the nails again that piece of wood. The indentations left will indicate the exact position for the holes. Clever and ingenious - I learnt something today - thank you!

- Joined
- Sep 3, 2021
- Messages
- 5,071
- Points
- 738

Most impressive build! Hard to match.
I had the deadeye issue as well; ended up changing the orientation of those "wrongly" installed deadeyes...
Although the canons and opened up ports pose an impressive sight, I wonder how ships of this era would look with ports closed, anybody ever build or seen a module like that?
I had the deadeye issue as well; ended up changing the orientation of those "wrongly" installed deadeyes...
Although the canons and opened up ports pose an impressive sight, I wonder how ships of this era would look with ports closed, anybody ever build or seen a module like that?
Thank you. I think @Alexander74 is going to build his Victory with closed gun ports. I’m looking forward to what an experienced and talented builder like Sasha it going to do with this ship.Most impressive build! Hard to match.
I had the deadeye issue as well; ended up changing the orientation of those "wrongly" installed deadeyes...
Although the canons and opened up ports pose an impressive sight, I wonder how ships of this era would look with ports closed, anybody ever build or seen a module like that?
Execelent job on the chain plates/dead eyes Grant. The color contrast along the gun ports makes this ship a real pleasure to look at!The port side channels for the main shrouds to the 3 masts have been installed. These channels hold the shrouds for the masts and clearly need to be fitted well and have strength for the tension of the many shrouds on this ship. My process:
Used the sheets provided to get the measurements for the brass supports on the hull and channel.
View attachment 275596
Dummy check the channel to hull and tappered where needed to ensure a clean fit to hull and no gaps. As you see below I had to tapper this channel.
View attachment 275599
Drilled more holes and used more nails than the instructions recommended to strengthen the channels. I also added a nail (cut to size) on the brass support to the channel. I use a small drop of CA glue on all the nails.
View attachment 275597
View attachment 275598
To ensure each Chanel fits exactly to the correct line along the wale I taped a 3mm plank along the correct line and then pressed my nails into hull to achieve correct place to drill the holes.
View attachment 275603
Fitted the dead eyes (previously shown here and already done). Used PVa glue and CA glue on the nails and fitted. Made sure the channels where at the 90• to the vertical. Touched up all the Indian ink and black paint where needed.
View attachment 275600
View attachment 275601
View attachment 275602
Looking good Grant. Lots of hours of work in those last posts. Tip from one rookie to another. When you install the metal straps that hold the deadeyes to the hull (below the channels) those straps are to align with the shrouds. I suspect you know that but just in case...it would be a painful re-do.
She’s a beauty, Grant. Love watching how you work around to make things just so.
Yes, the lower two decks will definitely be closed. There will be some guns on the operdek. Most likely everyone will be higher.Thank you. I think @Alexander74 is going to build his Victory with closed gun ports. I’m looking forward to what an experienced and talented builder like Sasha it going to do with this ship.
- Joined
- Sep 3, 2021
- Messages
- 5,071
- Points
- 738

In the mean time I checked out @Alexander74 's build. Impressive model and fascinating to read through his log.Yes, the lower two decks will definitely be closed. There will be some guns on the operdek. Most likely everyone will be higher.
Geez Grant those pics look spectacular!!The port side channels for the main shrouds to the 3 masts have been installed. These channels hold the shrouds for the masts and clearly need to be fitted well and have strength for the tension of the many shrouds on this ship. My process:
Used the sheets provided to get the measurements for the brass supports on the hull and channel.
View attachment 275596
Dummy check the channel to hull and tappered where needed to ensure a clean fit to hull and no gaps. As you see below I had to tapper this channel.
View attachment 275599
Drilled more holes and used more nails than the instructions recommended to strengthen the channels. I also added a nail (cut to size) on the brass support to the channel. I use a small drop of CA glue on all the nails.
View attachment 275597
View attachment 275598
To ensure each Chanel fits exactly to the correct line along the wale I taped a 3mm plank along the correct line and then pressed my nails into hull to achieve correct place to drill the holes.
View attachment 275603
Fitted the dead eyes (previously shown here and already done). Used PVa glue and CA glue on the nails and fitted. Made sure the channels where at the 90• to the vertical. Touched up all the Indian ink and black paint where needed.
View attachment 275600
View attachment 275601
View attachment 275602
This is truly a magnificent modelI decided to keep the nail heads brass as they fit in with the Mantua brass gun port frames and decorations above the gun ports.
I circled my dead eye I put in wrong way around. These dead eyes (found out a little late) are not uniform and are directional in fitting. They are also not uniform in the placement of the actual holes in each dead eye- I’m not sure this will be noticed.
Blue circle I broke my cannon downward when placing the channel. This is the most difficult one to fit. Fun time ahead fixing this.
View attachment 275604
PS guys photos do change the angle of the supports. (and the channels in my previous post) - my heart sank when I re read my post but double checked and whew, they are good
 No-one but you would've noticed the deadeye the wrong way round Grant lol. As for the downward-pointing cannon, while the rest of the guns are firing at the enemy's masts and spars, that will be the one to damage the ship's lower hull and rudder ... everything happens for a reason
Thanks Mark. Hope you having stunning weather down in Aussie. 30• here today but the SW starting to pick up. Kite boarding timeThis is truly a magnificent modelNo-one but you would've noticed the deadeye the wrong way round Grant lol. As for the downward-pointing cannon, while the rest of the guns are firing at the enemy's masts and spars, that will be the one to damage the ship's lower hull and rudder ... everything happens for a reason

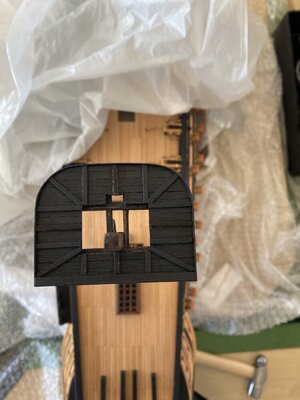
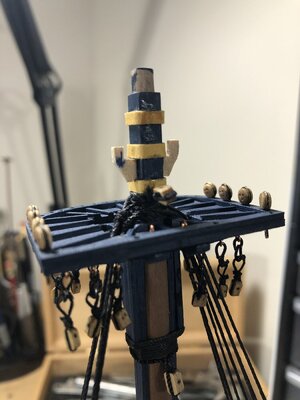
Good morning from a sunny Cape Town. Disaster struck my building yesterday. I decided to make the mizzen mast (lower section) as I want to be able to do some rigging while still making parts etc.
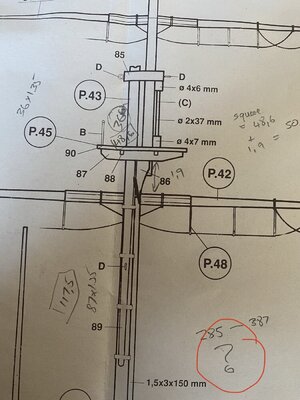
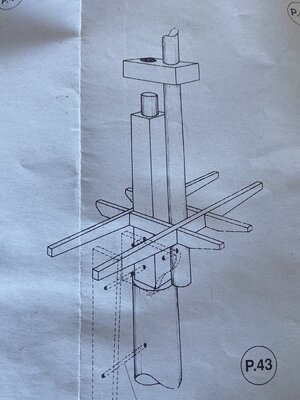
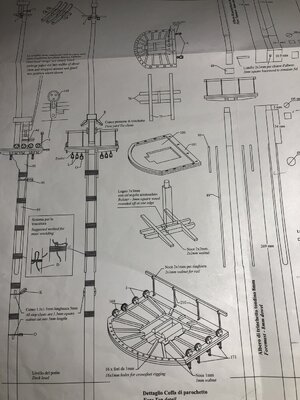
Here my problems began- the plan sheets are not too scale but 35% reduced- ok no problem. But some of the measurements are indicated at full scale. Red circle...but I thought I worked it out. The second plan shows the cheeks fitting over the bibbs which is not accurate but decided to stay with the plan.
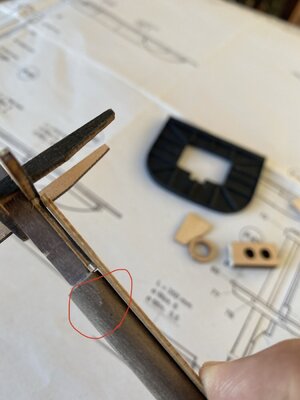
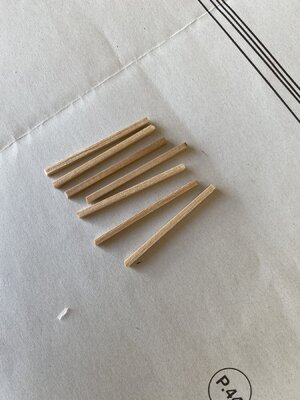
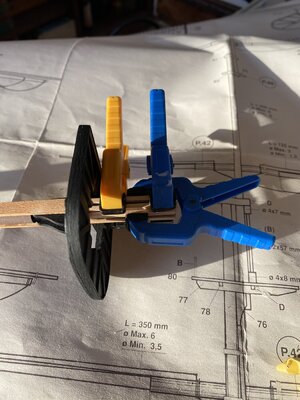
I squared off the 8mm dowel to 6x6 per instruction plan sheet. Measured four line points and used a 6mm plank to mark the dowel. Placed in a micro vise and tappered using an exacto blade. Then smooth it down with 200gritt sand paper- I need to find a better method as while it looks good, it is not 100%. Made the trussel trees (parts supplied) but they where 6x5??. Reduced my dowel square(now rectangular). ???
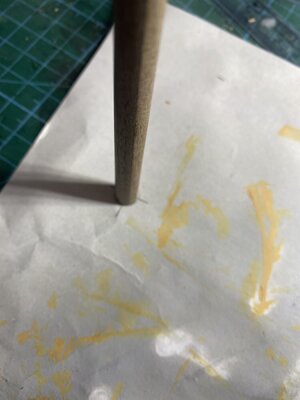
Exacto blade slip. Sanded the dowel so the cheeks and Bibbs fit flusher than in photo.
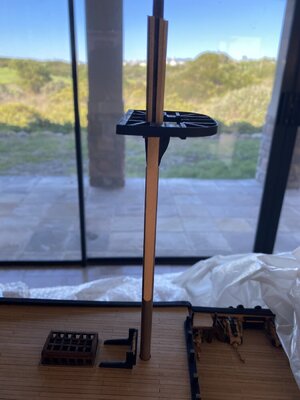
Brought out my siren and added 8 cap supports (not in plan). Measured and checked the angles of the Crows nest and Trussel trees and glued everything together- came out good.


 - all my measurements are wrong. I’m going to have to break it all up and redo. Anyway apologies for the rushed post I have to attend a meeting quick - Cheers


Here my problems began- the plan sheets are not too scale but 35% reduced- ok no problem. But some of the measurements are indicated at full scale. Red circle...but I thought I worked it out. The second plan shows the cheeks fitting over the bibbs which is not accurate but decided to stay with the plan.
I squared off the 8mm dowel to 6x6 per instruction plan sheet. Measured four line points and used a 6mm plank to mark the dowel. Placed in a micro vise and tappered using an exacto blade. Then smooth it down with 200gritt sand paper- I need to find a better method as while it looks good, it is not 100%. Made the trussel trees (parts supplied) but they where 6x5??. Reduced my dowel square(now rectangular). ???


Exacto blade slip. Sanded the dowel so the cheeks and Bibbs fit flusher than in photo.
Brought out my siren and added 8 cap supports (not in plan). Measured and checked the angles of the Crows nest and Trussel trees and glued everything together- came out good.


 - all my measurements are wrong. I’m going to have to break it all up and redo. Anyway apologies for the rushed post I have to attend a meeting quick - Cheers
Attachments
Grant, I'm not sure I understand where you went wrong (it all looked good to me in the photos) but I wish you good luck with the re-do all the sameGood morning from a sunny Cape Town. Disaster struck my building yesterday. I decided to make the mizzen mast (lower section) as I want to be able to do some rigging while still making parts etc.
View attachment 276040
View attachment 276050
Here my problems began- the plan sheets are not too scale but 35% reduced- ok no problem. But some of the measurements are indicated at full scale. Red circle...but I thought I worked it out. The second plan shows the cheeks fitting over the bibbs which is not accurate but decided to stay with the plan.
I squared off the 8mm dowel to 6x6 per instruction plan sheet. Measured four line points and used a 6mm plank to mark the dowel. Placed in a micro vise and tappered using an exacto blade. Then smooth it down with 200gritt sand paper- I need to find a better method as while it looks good, it is not 100%. Made the trussel trees (parts supplied) but they where 6x5??. Reduced my dowel square(now rectangular). ???
View attachment 276042View attachment 276043
View attachment 276044
Exacto blade slip. Sanded the dowel so the cheeks and Bibbs fit flusher than in photo.
Brought out my siren and added 8 cap supports (not in plan). Measured and checked the angles of the Crows nest and Trussel trees and glued everything together- came out good.
View attachment 276048View attachment 276049
View attachment 276057
- all my measurements are wrong. I’m going to have to break it all up and redo. Anyway apologies for the rushed post I have to attend a meeting quick - Cheers

Ferrari cars, HMS Victory, and now kite boarding; is there no limit to your talents Grant? Throw in a couple of Dean's 'models' and I'd definitely say you're living in the fast laneThanks Mark. Hope you having stunning weather down in Aussie. 30• here today but the SW starting to pick up. Kite boarding time

- Joined
- Jan 9, 2020
- Messages
- 10,534
- Points
- 938

Yes you got me stumped as well. I have no idea why you say the measurements are wrong ???Grant, I'm not sure I understand where you went wrong (it all looked good to me in the photos) but I wish you good luck with the re-do all the same
Ferrari cars, HMS Victory, and now kite boarding; is there no limit to your talents Grant? Throw in a couple of Dean's 'models' and I'd definitely say you're living in the fast lane
 need a real Ferrari to agree with you Mark


