- Joined
- Jan 9, 2020
- Messages
- 10,534
- Points
- 938

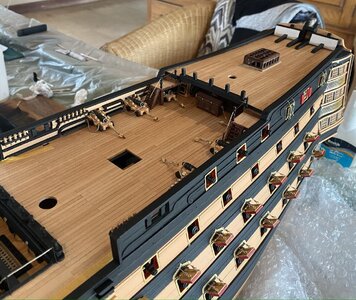
I agree with @dockattner Paul. The stanchions look fantastic and the cannon rigging is amazing. About the added advantage of the stanchions, I will decline comment ... 
 |
As a way to introduce our brass coins to the community, we will raffle off a free coin during the month of August. Follow link ABOVE for instructions for entering. |
 |

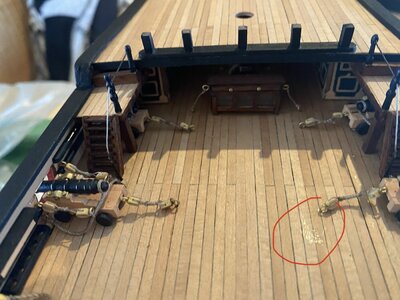
True Story- I see that in the photo now.The cannons and the trunnions are not glued in yet still want align etc. The trunnions came pre cut with the kit and this one did slide A little foreward. I centered it looks better (see photo below) not flush tho. All are like this. I will try remove one and not break the rigging - Filing them down probably the best option? Thanks for the tip Jimsky.....I thinkHello Grant, Completely agree with Doc (a.k.a Poul), the rigging looks great but...if I may make a small suggestion to cut 'flush' with the carriage the trunion. It will make the cannon erotic...
See red circle
View attachment 273144


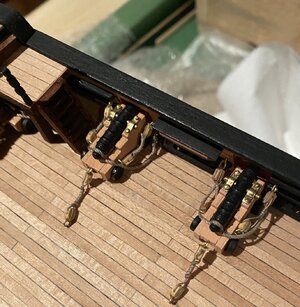
Thanks Paul. Appreciate your comment.They are better. My carving is sad tho- 2 more to go. Jimsky has given me a challenge on my cannon Trunnions thoThis version looks less erotic...
Cannon rigging looks GREAT!
Hello Heinrich. Thanks. I’m with you on that otherwise who know where this will lead......I agree with @dockattner Paul. The stanchions look fantastic and the cannon rigging is amazing. About the added advantage of the stanchions, I will decline comment ...


 .
.Don't take it as a challenge, Grant. Sometimes those small errors are just simply overlooked while working on other things.Thanks Paul. Appreciate your comment.They are better. My carving is sad tho- 2 more to go. Jimsky has given me a challenge on my cannon Trunnions tho
Thanks. Love your advice on mine and others logs it is invaluable. The challenge for me is not to break the rigging connections to bulwark when reinserting the trunnions. It is the detail and knowledge which you have That is so appreciated. I tend to miss the detail. I read someone comment “that a good model is all in the detail”ThanksDon't take it as a challenge, Grant. Sometimes those small errors are just simply overlooked while working on other things.

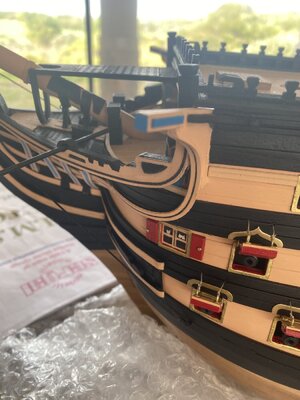
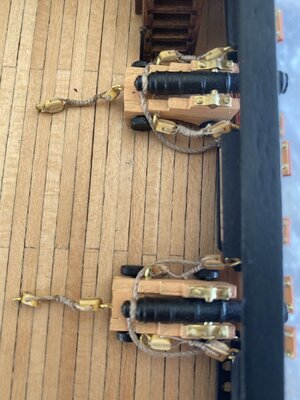
You have nailed it, Grant!!! Great job!Firstly re did my cannon trunnions as per @Jimsky advice.

Agree 100%Looks like you have gone with the current colour scheme for Victory. Thats great as the old yellow ochre is dated.
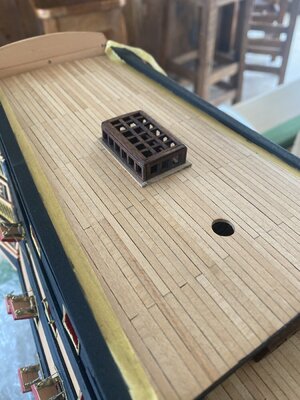
Great work on the crow's nest Grant, and well done on the re-work to raise the border edges. It's one of those things that probably would have kept you up at night if you hadn't made the extra effortGood evening. Crows nest time. Planked and framed - used the 3mm x 0.5mm deck planking wood. I used wood glue and super glue “nails” for the framing and the 0.5mm planking bent around easily. As I am going to stain the decking I was careful not to get glue on the planks.
View attachment 272985
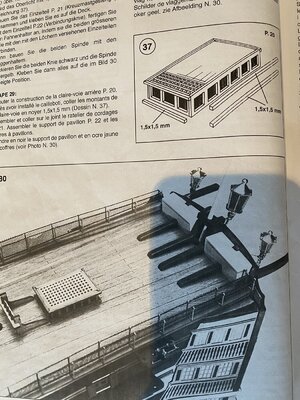
On having a look at various builds -yet another Victory by Bernd (Deagostini) and Jotika (caldercraft) website (has some good instructions and some drawings) it is clear that the frame needs to be higher than the base of the crows nest. Removed framing and redid.View attachment 272986View attachment 272987View attachment 272989
Stained planking with Indian Ink as it shows the wood planking better than painting. Added the individual “strakes” (Sorry guys cannot find what these are called) as per Mantua instructions. A little cleaning up and then dead eye installation.
I am debating wether to leave the wood effect(not authentic) or to stain these black as well.
View attachment 272990View attachment 272991View attachment 272992
I agree, had a look, next level stuffI just had a look at “Victory inside and out” by Jan in the scratch build section. It is like out of this world what he has made - no words.



 .
.