-

Win a Free Custom Engraved Brass Coin!!!
As a way to introduce our brass coins to the community, we will raffle off a free coin during the month of August. Follow link ABOVE for instructions for entering.
-

PRE-ORDER SHIPS IN SCALE TODAY!
The beloved Ships in Scale Magazine is back and charting a new course for 2026!
Discover new skills, new techniques, and new inspirations in every issue.
NOTE THAT OUR FIRST ISSUE WILL BE JAN/FEB 2026
You are using an out of date browser. It may not display this or other websites correctly.
You should upgrade or use an alternative browser.
You should upgrade or use an alternative browser.
Hohenzollernmodell 1660-1670 Scale 1/75 POF build by Stephan Kertész (Steef66)
- Thread starter Steef66
- Start date
- Watchers 57
-
- Tags
- 1:75 dutch two-decker pof
- Joined
- Aug 8, 2019
- Messages
- 5,571
- Points
- 738

Dat is mij zeker gelukt Johan, bedanktTe laat, als mosterd na de maaltijd...
Ik hoop dat je op gepaste wijze je verjaardag hebt kunnen vieren, maar vooral dat je het komende jaar weer veel mooie herinneringen kunt maken.
- Joined
- Aug 8, 2019
- Messages
- 5,571
- Points
- 738

@All thanks again for the Birthday wishes. I had a wonderfull day And one of the presents I got was this set of files. I already got the zeeg 2 (fine) but needed some rough ones, Zeeg (cut) 0.
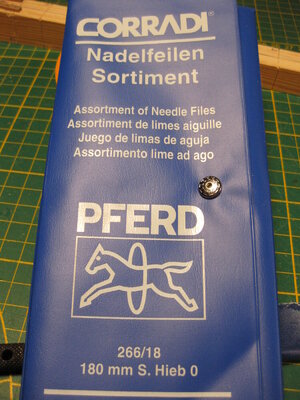
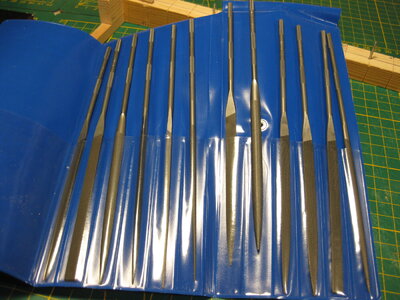
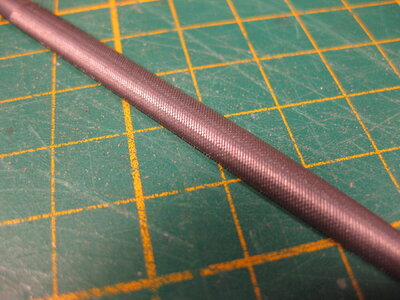
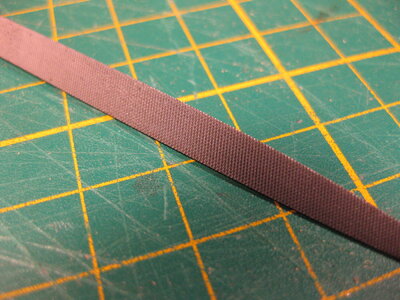
It is so much fun working with these ones. Precise and accurate and above all, sharp.
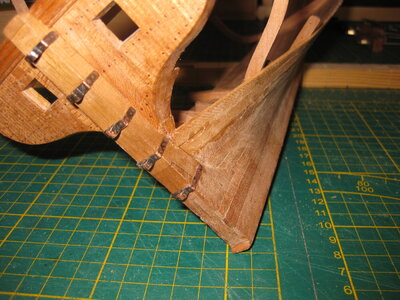
Back to the ship. I finished 3 layers of planks and started with the bilge, also an extra frame on the back to make sure the planking goes in the right direction. Enjoy the pictures.
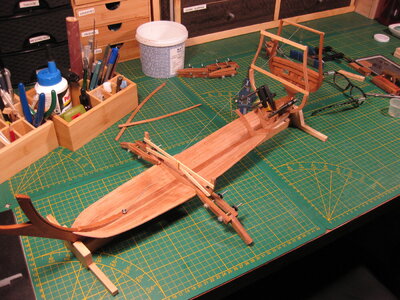
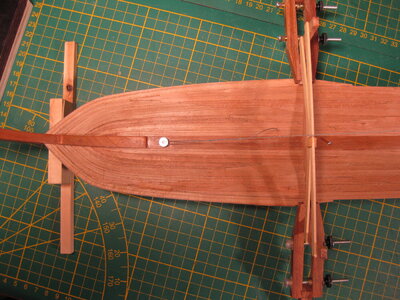
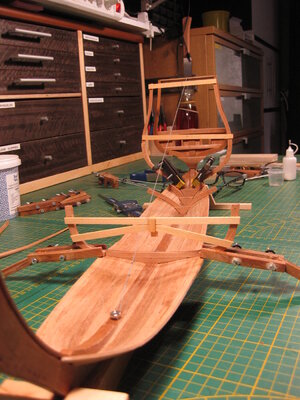
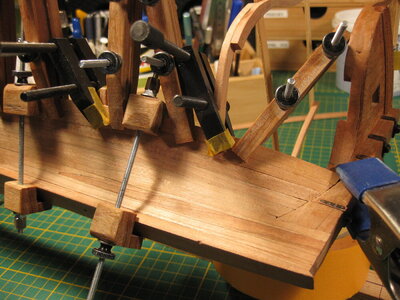
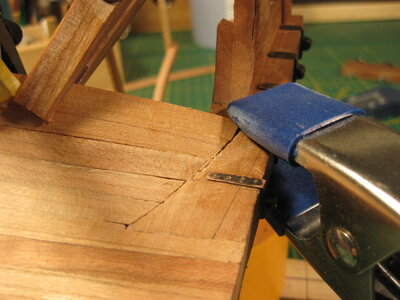
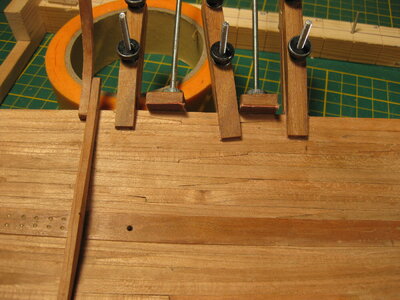
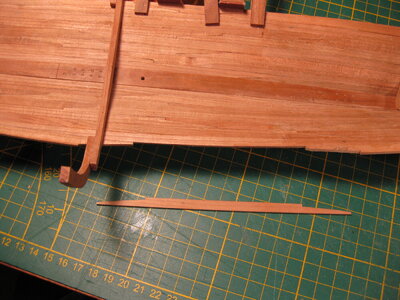
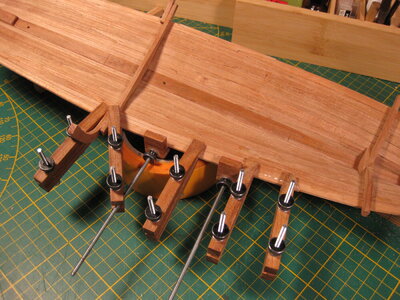
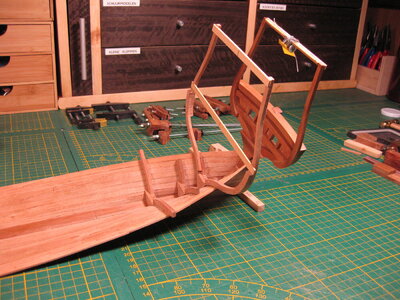
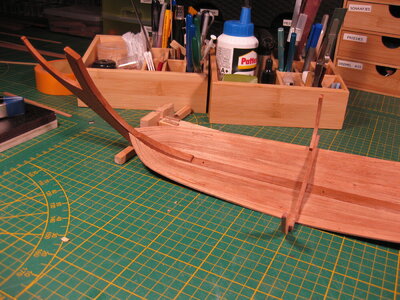
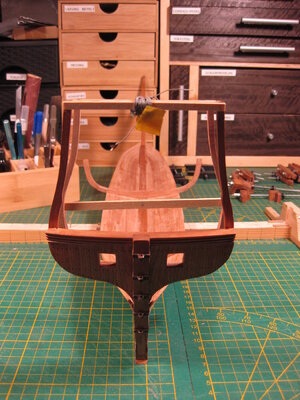
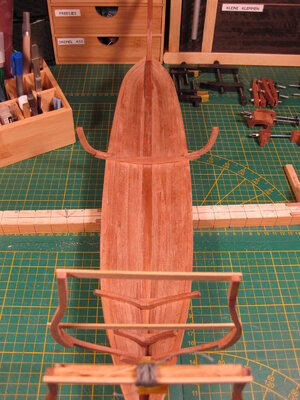
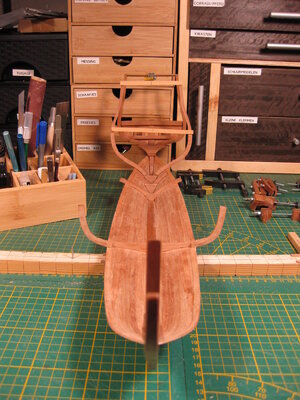
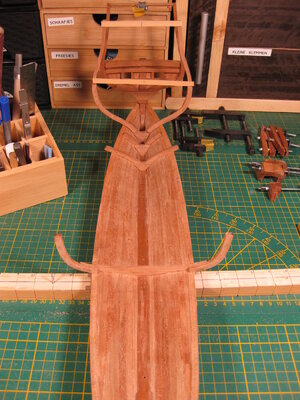
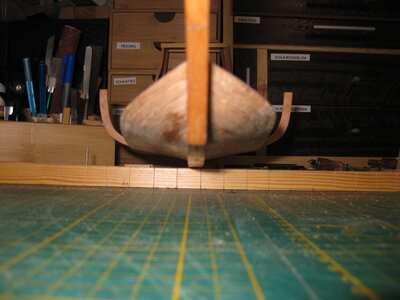
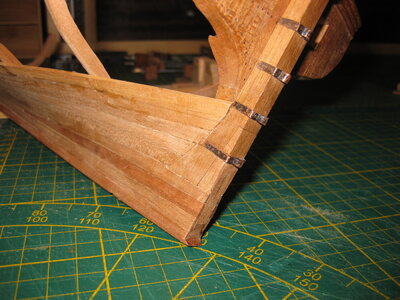
In this moment I have to plan how I go further in this build, continuing the planking and floor timber or go on making the frames complete (8 in total) and go from that point further with the planking and the rest of the floor timber and bilges. Due to the scale I'm working it is a bit tricky to reach certain spots in the build.


It is so much fun working with these ones. Precise and accurate and above all, sharp.
Back to the ship. I finished 3 layers of planks and started with the bilge, also an extra frame on the back to make sure the planking goes in the right direction. Enjoy the pictures.


In this moment I have to plan how I go further in this build, continuing the planking and floor timber or go on making the frames complete (8 in total) and go from that point further with the planking and the rest of the floor timber and bilges. Due to the scale I'm working it is a bit tricky to reach certain spots in the build.

Looking very good - and with your new set of needle files it will get even faster in future.
I have this set also - very good quality
I have this set also - very good quality
- Joined
- Aug 8, 2019
- Messages
- 5,571
- Points
- 738

Thanks Uwe, the quality is superb. I'm saving money at the moment for the diamond version. These are on my wishlist too.Looking very good - and with your new set of needle files it will get even faster in future.
I have this set also - very good quality
This is really looking great Stephan! I'm happy to see those partial frames in place as a guide - the contours look very much improved to this landlubbers eyes now.
Very clean work Stephan, looks great.
Hello Stephan,
it's nice to hear that you were able to enjoy your birthday. Very nice set of files, I have them like Uwe and they are wonderful. The structure of your Hohenzollern is taking shape, really fantastic work.
it's nice to hear that you were able to enjoy your birthday. Very nice set of files, I have them like Uwe and they are wonderful. The structure of your Hohenzollern is taking shape, really fantastic work.
- Joined
- Aug 8, 2019
- Messages
- 5,571
- Points
- 738

@All thanks for the likes
When I constructed the floor timber in the middle, I made a complete frame that I can put together with pins, and precise drilled holes. That makes it posible to attached parts separate on the ship. Like I did with the bilge on that frame. I will do this with the other frames from the drawing of Winter too. The first 2 frames I will construct are frame 11 and 9. At this moment I got the drawing ready for the wooden parts.
Thanks Shota, nice words you give me.Glad to hear that you had a pleasant birthday and that you received a gift that you liked / needle files. I admit that I salute your persistence and commitment to a no less excellent process and result, well done friend

Thanks Paul, the first part of this shell first build is ready. Now it is a little more like most other builds, starting mouting frame timbers. Floor first.This is really looking great Stephan! I'm happy to see those partial frames in place as a guide - the contours look very much improved to this landlubbers eyes now.
Thanks MaartenVery clean work Stephan, looks great.
Thanks Tobias, yes I'm glad with the files and with the shape of the ship take out so well.Hello Stephan,
it's nice to hear that you were able to enjoy your birthday. Very nice set of files, I have them like Uwe and they are wonderful. The structure of your Hohenzollern is taking shape, really fantastic work.
When I constructed the floor timber in the middle, I made a complete frame that I can put together with pins, and precise drilled holes. That makes it posible to attached parts separate on the ship. Like I did with the bilge on that frame. I will do this with the other frames from the drawing of Winter too. The first 2 frames I will construct are frame 11 and 9. At this moment I got the drawing ready for the wooden parts.
- Joined
- Aug 8, 2019
- Messages
- 5,571
- Points
- 738

@ All thanks again for the visit, the comments and the likes.
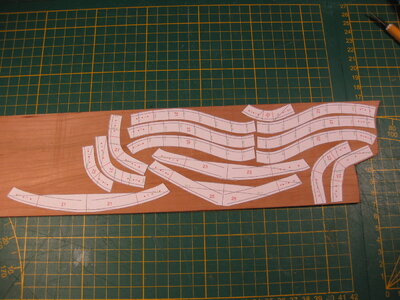
I started to make the frames of the drawing I got from the book and made in AutoCAD. First the frame 9 and 11.
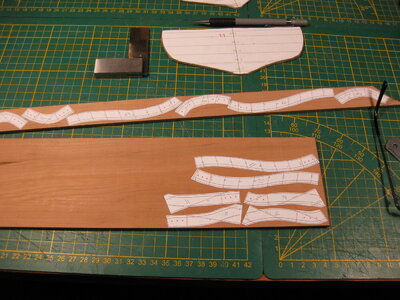
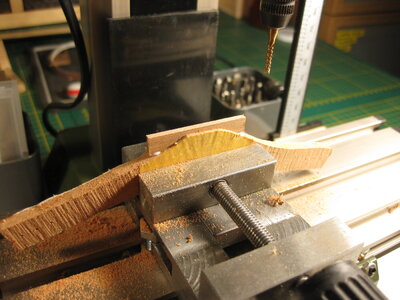
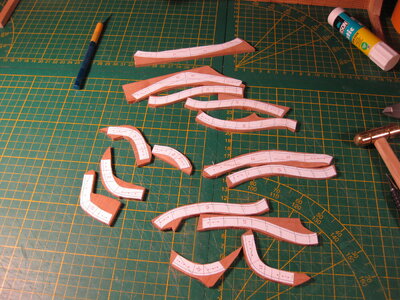
I made a design to cut out by hand. (the wood you see I cut from a table top of cherry on my Scheppach Basa 1 bandsaw)
Then I dry fit them together to look if it is roughly okay.
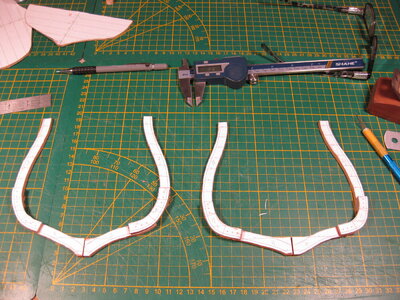
Then I glued the floor timber or crutch (I think crutch because the planking of the floor on that place is going vertical) together. And make a wooden connection between both parts for reinforcement.
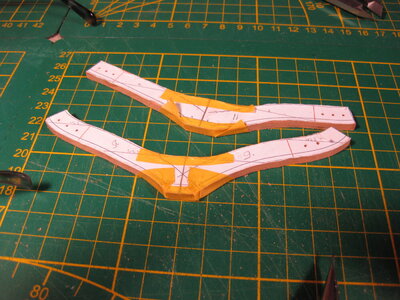
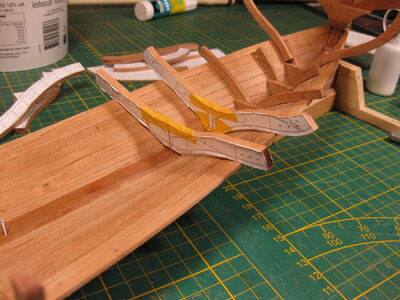
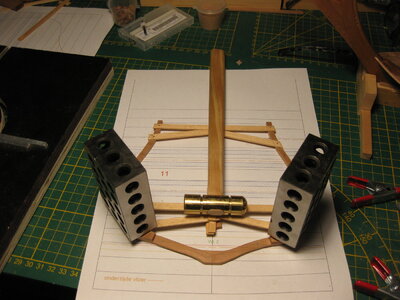
After that I drilled the holes in the parts that connect to each other and lay them on the plan to fit them in the right way. With pieces of scratch wood I fixed them. So I can take them apart.
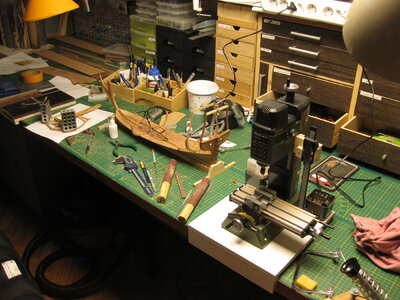
The working space is started to look messy but cosy at one time.
After the parts are dried I make the crutch fit perfectly to the hull, and glue it in place after a few tiny corrections.
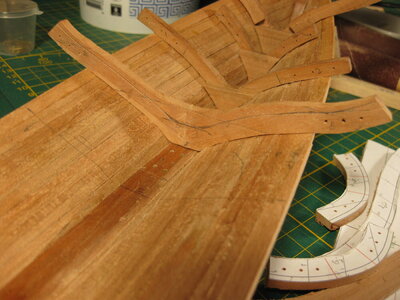
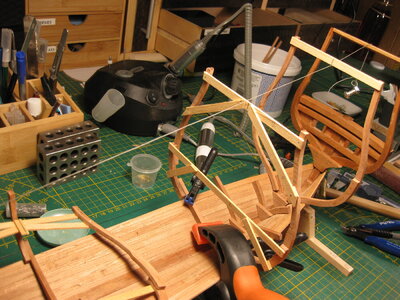
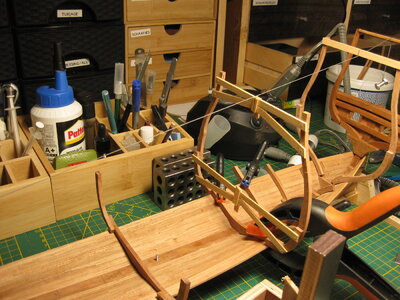
This is how it looks when they are in place. Include the bilges on the main floor timber. (frame 17)
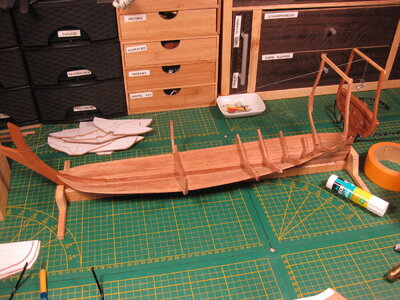
Then I start with the frames 21, 23 and 25. First on paper, then roughly cut out. The same way as I done before. After that is done I only have to make the floor timber number 14 and then I can go on with the planking.
Thanks for watching
I started to make the frames of the drawing I got from the book and made in AutoCAD. First the frame 9 and 11.
I made a design to cut out by hand. (the wood you see I cut from a table top of cherry on my Scheppach Basa 1 bandsaw)

Then I dry fit them together to look if it is roughly okay.

Then I glued the floor timber or crutch (I think crutch because the planking of the floor on that place is going vertical) together. And make a wooden connection between both parts for reinforcement.


After that I drilled the holes in the parts that connect to each other and lay them on the plan to fit them in the right way. With pieces of scratch wood I fixed them. So I can take them apart.

The working space is started to look messy but cosy at one time.

After the parts are dried I make the crutch fit perfectly to the hull, and glue it in place after a few tiny corrections.


This is how it looks when they are in place. Include the bilges on the main floor timber. (frame 17)

Then I start with the frames 21, 23 and 25. First on paper, then roughly cut out. The same way as I done before. After that is done I only have to make the floor timber number 14 and then I can go on with the planking.


Thanks for watching
- Joined
- Aug 8, 2019
- Messages
- 5,571
- Points
- 738

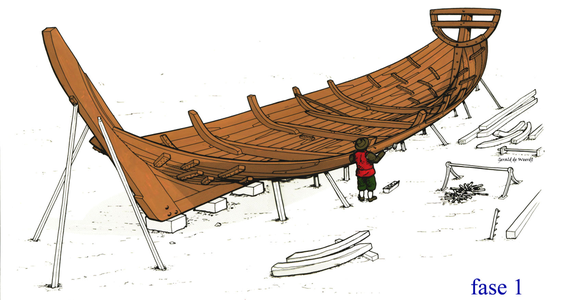
Almost. Actually it starts after bilge and planking of the bilge. I skipped the planking of the bilge and start in this stage of the build. It is almost impossible to go further without these floor timbers. The scale is to little to get the shape of the HZ ship I try to duplicate. Something I have to deal with from the beginning.Is this now where you transition from "shell first" to "plank-on-frame" building?
But, I'm still in fase 1.
- Joined
- Sep 3, 2021
- Messages
- 5,191
- Points
- 738

is this due to the more compound curvature of the planks, or more that small deviations resulting in large mismatches between planks and frames, once you start installing the latter?It is almost impossible to go further without these floor timbers. The scale is to little to get the shape of the HZ ship I try to duplicate. Something I have to deal with from the beginning.
- Joined
- Aug 8, 2019
- Messages
- 5,571
- Points
- 738

Both, because it is all small and a half mm. in the curvature will be a bigger mismatch in the top. Dificult to get these small planks in the right shape and place without these timbers in placeis this due to the more compound curvature of the planks, or more that small deviations resulting in large mismatches between planks and frames, once you start installing the latter?
- Joined
- Sep 3, 2021
- Messages
- 5,191
- Points
- 738

I can only imagine that. To me the shell first method seems quite complex and prone to errors. I would say this is for experienced shipwrights/builders only.Dificult to get these small planks in the right shape and place without these timbers in place
- Joined
- Aug 8, 2019
- Messages
- 5,571
- Points
- 738

No, no, I'm not experienced. It is fun. Just don't care to much on the shape, let there be a bit of tolerance in the build.I would say this is for experienced shipwrights/builders only.
- Joined
- Sep 3, 2021
- Messages
- 5,191
- Points
- 738

Yeah, right...No, no, I'm not experienced.

Steef, with all due respect, I find that hard to believe.
Setting this aside, I have newfound respect for both you and @Maarten, taking on a challenge like this.
You made a nice progress, Stephan. Nice tinkering with the floor timber parts of the frames. The reinforcement in the middle is a good option to absorb the forces of the curved hull planks.@ All thanks again for the visit, the comments and the likes.
I started to make the frames of the drawing I got from the book and made in AutoCAD. First the frame 9 and 11.
I made a design to cut out by hand. (the wood you see I cut from a table top of cherry on my Scheppach Basa 1 bandsaw)
View attachment 384689
Then I dry fit them together to look if it is roughly okay.
View attachment 384690
Then I glued the floor timber or crutch (I think crutch because the planking of the floor on that place is going vertical) together. And make a wooden connection between both parts for reinforcement.
View attachment 384691View attachment 384692
View attachment 384693
After that I drilled the holes in the parts that connect to each other and lay them on the plan to fit them in the right way. With pieces of scratch wood I fixed them. So I can take them apart.
View attachment 384694
The working space is started to look messy but cosy at one time.
View attachment 384695
After the parts are dried I make the crutch fit perfectly to the hull, and glue it in place after a few tiny corrections.
View attachment 384696
View attachment 384697View attachment 384698
This is how it looks when they are in place. Include the bilges on the main floor timber. (frame 17)
View attachment 384701
Then I start with the frames 21, 23 and 25. First on paper, then roughly cut out. The same way as I done before. After that is done I only have to make the floor timber number 14 and then I can go on with the planking.
View attachment 384699
View attachment 384700
Thanks for watching
Regard, Peter
- Joined
- Aug 8, 2019
- Messages
- 5,571
- Points
- 738

Thanks Peter. Yes especially in the stern part of the hull there are some tensions in the hull.You made a nice progress, Stephan. Nice tinkering with the floor timber parts of the frames. The reinforcement in the middle is a good option to absorb the forces of the curved hull planks.
Regard, Peter


