Kingfisher 1770 1:48 POF

Hmm. Not sure how much planking there will be on this ship. I need to see what it all looks like once the deck parts are installed. The further I progress on the build the more elements I am thinking I will leave off.

I’ll be honest, I really don’t know what I’m doing.
I see you are in a hurry to start the next build. ROTF
I am honoured that you think that we know what we are doing.

Don't finish it before Le Fleuron is on the market, that kit has your name on it.
 
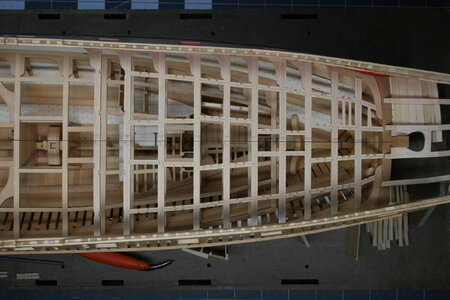
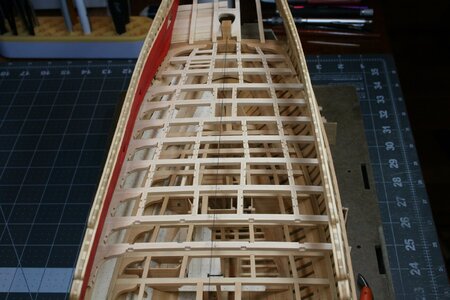
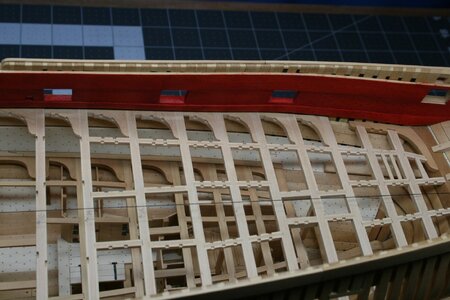
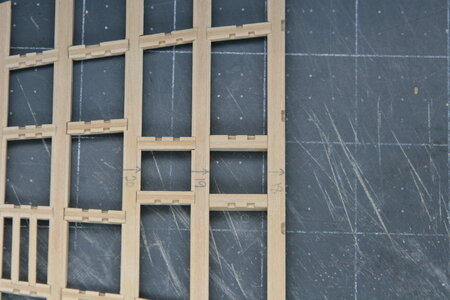
Not much to report...work continues on the upper deck:

IMG_0825.JPG

IMG_0826.JPG

IMG_0827.JPG

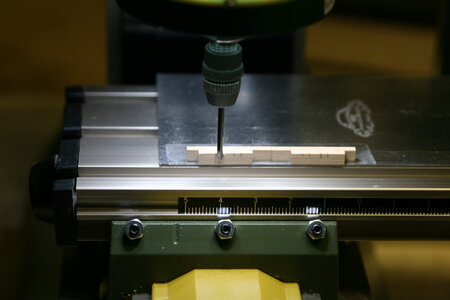
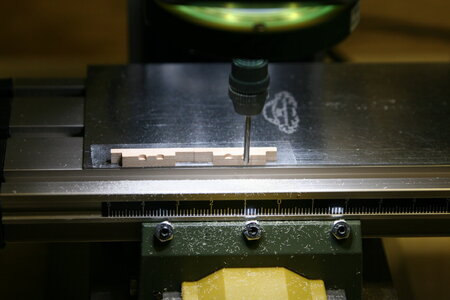
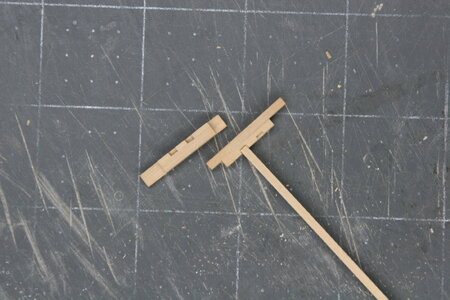
And a few bonus pictures to show how I have been cutting the table joint if (when) I ruin one of the kit-supplied parts...

With the piece turned 90 degree I mill to the preferred depth:

IMG_0820.JPG

IMG_0821.JPG

I then just square off the 'box' using a sharp chisel.

IMG_0822.JPG

IMG_0824.JPG

Honestly, apart from layout, its actually faster to mill the joints versus making the layered carlings from the kit. But using the kit-supplied parts does assure proper alignment of the carlings and ledges (as long as I'm careful trimming the pieces to fit).

I'm enjoying following so many of your wonderful builds! Thanks for sharing your work!
 
Not much to report...work continues on the upper deck:

View attachment 455877

View attachment 455878

View attachment 455879

And a few bonus pictures to show how I have been cutting the table joint if (when) I ruin one of the kit-supplied parts...

With the piece turned 90 degree I mill to the preferred depth:

View attachment 455873

View attachment 455874

I then just square off the 'box' using a sharp chisel.

View attachment 455875

View attachment 455876

Honestly, apart from layout, its actually faster to mill the joints versus making the layered carlings from the kit. But using the kit-supplied parts does assure proper alignment of the carlings and ledges (as long as I'm careful trimming the pieces to fit).

I'm enjoying following so many of your wonderful builds! Thanks for sharing your work!
Good morning Paul. Fabulous. I am in admiration of your joinery and ability to keep "almost" perfect symmetry. I just had to throw in the "almost" for the perfectionist in you ROTF . Cheers Grant
 
Not much to report...work continues on the upper deck:

View attachment 455877

View attachment 455878

View attachment 455879

And a few bonus pictures to show how I have been cutting the table joint if (when) I ruin one of the kit-supplied parts...

With the piece turned 90 degree I mill to the preferred depth:

View attachment 455873

View attachment 455874

I then just square off the 'box' using a sharp chisel.

View attachment 455875

View attachment 455876

Honestly, apart from layout, its actually faster to mill the joints versus making the layered carlings from the kit. But using the kit-supplied parts does assure proper alignment of the carlings and ledges (as long as I'm careful trimming the pieces to fit).

I'm enjoying following so many of your wonderful builds! Thanks for sharing your work!
Hi Paul,

It is better than the kit supplied one, propese you do the rest as well? :cool:
 
Good morning Paul. Fabulous. I am in admiration of your joinery and ability to keep "almost" perfect symmetry. I just had to throw in the "almost" for the perfectionist in you ROTF . Cheers Grant
Oh yes. There are lots of imperfections to be seen. But the remedy is unthinkable: take it all apart and remake the beams! That's a non-starter for me :D.
 
Not much to report...work continues on the upper deck:

View attachment 455877

View attachment 455878

View attachment 455879

And a few bonus pictures to show how I have been cutting the table joint if (when) I ruin one of the kit-supplied parts...

With the piece turned 90 degree I mill to the preferred depth:

View attachment 455873

View attachment 455874

I then just square off the 'box' using a sharp chisel.

View attachment 455875

View attachment 455876

Honestly, apart from layout, its actually faster to mill the joints versus making the layered carlings from the kit. But using the kit-supplied parts does assure proper alignment of the carlings and ledges (as long as I'm careful trimming the pieces to fit).

I'm enjoying following so many of your wonderful builds! Thanks for sharing your work!
Hi Paul,

Thanks for showing how you achieved these beautiful cuts. By now you have realised if you don't tell us how, you know I am going to ask.

With the milling setup, have you used double sided tape on a cabinet scraper to secure the piece? Did it hold reliably when the bit engages?

I remain enchanted by your work.

Thanks
Michael
 
With the milling setup, have you used double sided tape on a cabinet scraper to secure the piece? Did it hold reliably when the bit engages?
Yes, double sided tape seems to be a very reliable way of holding these small pieces in place without clamping. And yes, that is a repurposed scraper - though I also recently salvaged some thin aluminum scraps that I hope to use so I can have my scraper back...
 
Good morning Paul. Only you know those imperfections. From what I see it’s pretty much perfect. I was just pulling your leg ;).Cheers Grant
The older I get the more perfection becomes a 'range' as opposed to a singular outcome :rolleyes:. In that way 'pretty much perfect' and 'almost perfect' and 'what happened there?' all take on a similar state of perfection. This is a very satisfying and comforting way to live :).

Of course, I also edited this post 12 times to make sure it was perfect ROTF.

Hmmm, edited 12 times. However, only posting once permits a form of latent perfection ROTF.
 
Hello friends!

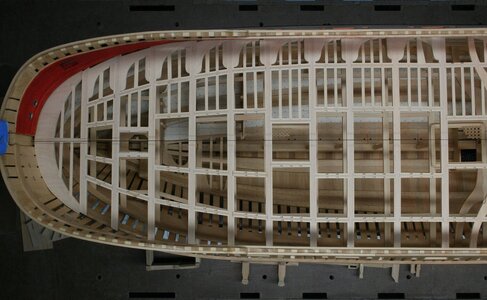
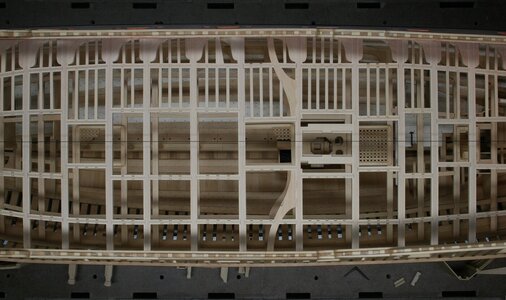
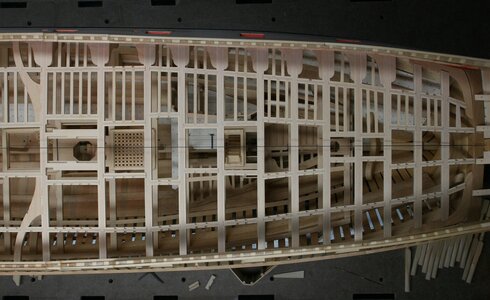
After nearly a month of work (felt longer), the upper deck framing is just about complete:

IMG_0828.JPG

Forward:

IMG_0829.JPG

Midship:

IMG_0830.JPG

Aft:

IMG_0831.JPG

As you can see, I have only added ledges (the thin athwartships pieces) to the most starboard portion of the deck (a few odds and ends still need to be added here). I suspect I'll add more ledges near the center of the ship, but I am holding off for now.

I find myself in a constant battle between wanting to build a representative ship model while still allowing for sightlines into the lower levels (holster that Japanese saw, Johan ROTF).

A few detailed images:

IMG_0837.JPG

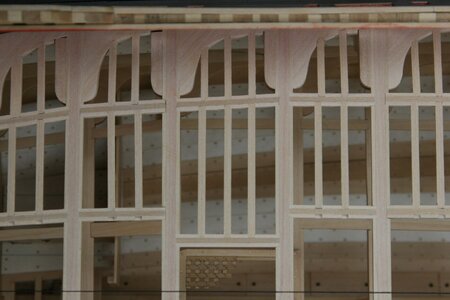
The lodging knees change direction near the center of the ship, so the upper deck (like the lower deck) features a 'bi-level' knee:
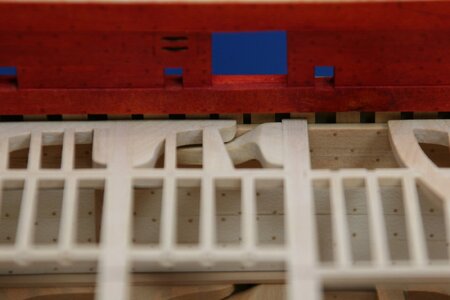
IMG_0833.JPG

And I do have hanging knees, but they are difficult to photograph (actually pretty easy to see on the model):
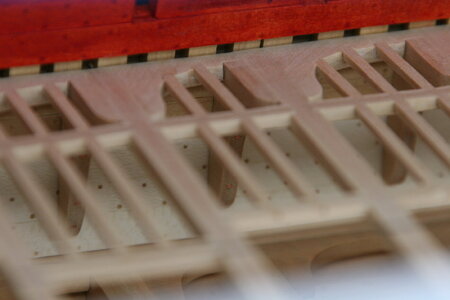
IMG_0836.JPG

I have decided to add (not built yet) a sail room for the lower deck - and I still need to add the previously fabricated pillars for the upper deck beams - so everything is still loose fit. In fact, I have the deck in five sections as you can see below:
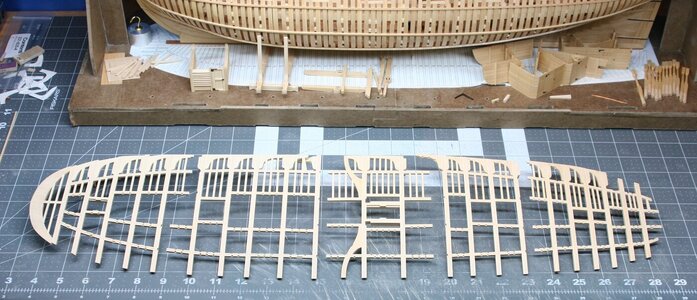
IMG_0838.JPG

This has been a learning curve item. It is now nearly impossible to get these sections into place. The tolerances are razor thin, and the tumblehome of the hull is not my friend. I have puzzled out a way to get these sections in and out of the ship, but I know that once I get the walls/rooms placed on the lower deck it will no longer be possible to keep these sections intact as you see them here :(. It would seem this deck needed to be built in place (and glued in place) during fabrication which runs counter to my adopted 'best practices.' Or maybe not???

A parting shot of the hanging knees:
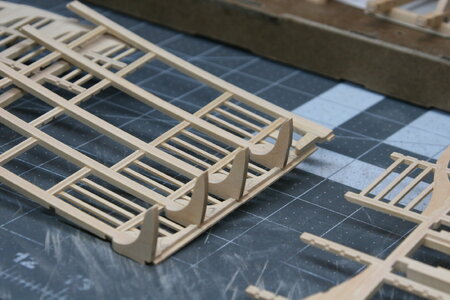
IMG_0840.JPG

You are kind to stop by!
 
Well let's see, outside of the almost perfect millwork, joinery, and surface finish on your work Paul, I just love the offset 'bi-level' knees. You do have quite a bit of pieces stacked next to her hull; I can't imagine you would ever build yourself out of room to install those bits. I also love your new word at least to me 'tumblehome',
a great one-word description for bottleneck. Ha, I love it. Happy 4th my friend.
 
Back
Top