Kingfisher 1770 1:48 POF

I take no credit. But I also cannot provide an attribution - where I first saw this is lost to the ravages of too much wine...
Wine or age ROTF. Maybe it was my Royal Caroline some years ago. If you take the silver ones you can colour them with some boiled egg in a closed plastic bag (due to the sulphur in the eggs). They then get the nice lead like colour.
 
I agree with that statement. I bought a set, new, on marketplace. The first use on the first cut the chisel broke!!
Junk.

Making a few handy chisels is not difficult to do.
Metal is a curious material. If it is really hard, it will hold an edge for a very long time, but is brittle and will break easy. At the other end of the spectrum, it can be softer, but then it will not hold an edge for very long, requiring frequent sharpening.
 
Metal is a curious material. If it is really hard, it will hold an edge for a very long time, but is brittle and will break easy. At the other end of the spectrum, it can be softer, but then it will not hold an edge for very long, requiring frequent sharpening.
For the price you expect more. I got cheap ones from Ali what are 100 time better and just 5% of the price of MicroMark.
 
Too bad that the slot in the cathead ruined the piece. Are You redoing the part from scratch or maybe fill the slot and rerout it?

It seems I do ask myself that question (redo or patch) way too often during my build... there's always something breaking, too short, a loose fit or mishaps during shaping.
But anyway, seeing the rest of Your update went so well I think this is not too bad ;)
I patch stuff all the time...but in this case I chose to remake the piece because it is so visibly 'hanging out there'.

The first attempt was with the kit parts but the laminations were so bad I couldn't use it. The first scratch attempt suffered the milling mishap.

What's interesting is that the first scratch attempt took nearly two hours - the second only 30 minutes. That is a very complicated piece as it bends in two directions and has to relate to a hole in the hull and notches into three beams. It's not perfect, but it is done.
 
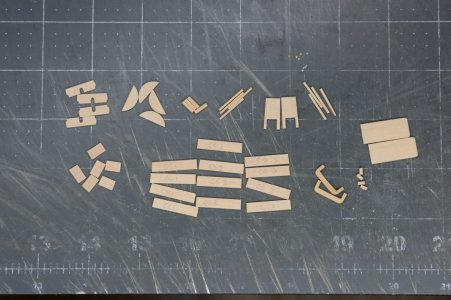
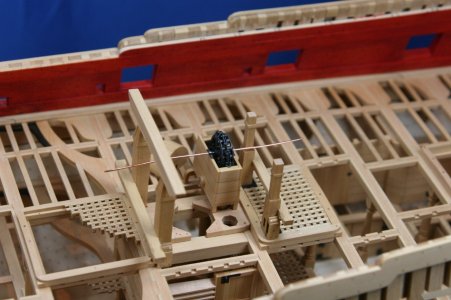
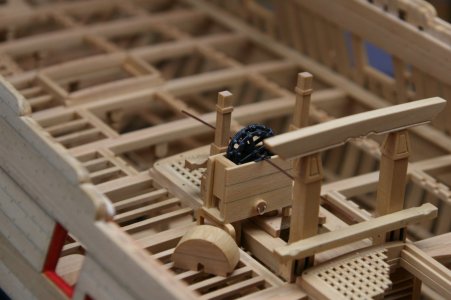
Attention now turned to the chain pumps. These are a fairly complicated affair with pump tubes, cisterns, winches (with support posts), sprocket wheels, and the chain itself.

The tubes were previously fabricated and have now been installed. The cistern is a box that sits on the deck over the top of the tubes:

IMG_1000.JPG

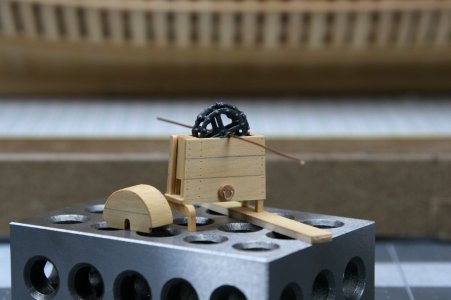
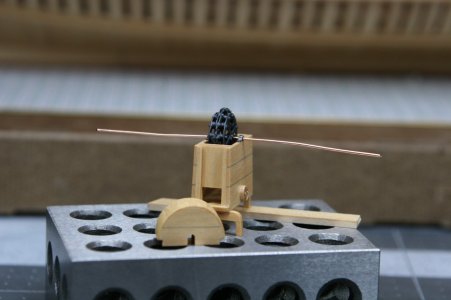
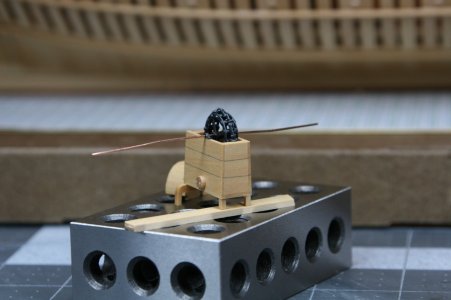
In the end I only made up one of the cisterns along with a hood that will sit alongside it on the deck:

IMG_1010.JPG

IMG_1011.JPG

IMG_1012.JPG

The sprocket and chain parts came from a photoetched sheet included with the kit. I tricked them out a bit, but then got careless while painting and lost some of the detail (a previous attempt to use blackening solution was a failure). The 'axle' rides in a pair of rhodings - and these were cut/filed from brass bar and successfully blackened.

Here is the cistern sitting temporarily in place on the ship:

IMG_1015.JPG

IMG_1016.JPG

Now I need to figure out the winch system and the posts that support the cranking bars...
 
Attention now turned to the chain pumps. These are a fairly complicated affair with pump tubes, cisterns, winches (with support posts), sprocket wheels, and the chain itself.

The tubes were previously fabricated and have now been installed. The cistern is a box that sits on the deck over the top of the tubes:

View attachment 468373

In the end I only made up one of the cisterns along with a hood that will sit alongside it on the deck:

View attachment 468374

View attachment 468375

View attachment 468376

The sprocket and chain parts came from a photoetched sheet included with the kit. I tricked them out a bit, but then got careless while painting and lost some of the detail (a previous attempt to use blackening solution was a failure). The 'axle' rides in a pair of rhodings - and these were cut/filed from brass bar and successfully blackened.

Here is the cistern sitting temporarily in place on the ship:

View attachment 468377

View attachment 468378

Now I need to figure out the winch system and the posts that support the cranking bars...
Wow, The chain pump is looking beautiful, I like it open
 
Attention now turned to the chain pumps. These are a fairly complicated affair with pump tubes, cisterns, winches (with support posts), sprocket wheels, and the chain itself.

The tubes were previously fabricated and have now been installed. The cistern is a box that sits on the deck over the top of the tubes:

View attachment 468373

In the end I only made up one of the cisterns along with a hood that will sit alongside it on the deck:

View attachment 468374

View attachment 468375

View attachment 468376

The sprocket and chain parts came from a photoetched sheet included with the kit. I tricked them out a bit, but then got careless while painting and lost some of the detail (a previous attempt to use blackening solution was a failure). The 'axle' rides in a pair of rhodings - and these were cut/filed from brass bar and successfully blackened.

Here is the cistern sitting temporarily in place on the ship:

View attachment 468377

View attachment 468378

Now I need to figure out the winch system and the posts that support the cranking bars...
It just looks like 3D-printed parts, almost too immaculate. I can't imagine her full size predecessor left the shipyard in this pristine condition.
 
Last edited:
Back
Top