Kingfisher 1770 1:48 POF

An easy thing and two hard things...

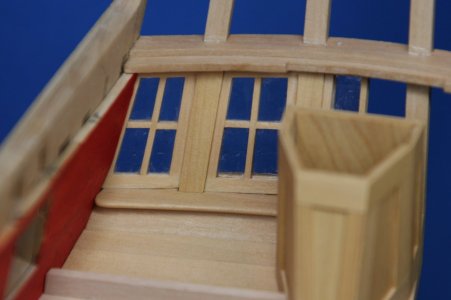
Moving now to the back of the ship I have planked the inside surface of the counter (an easy thing) and added a sill for the stern lights. The sill qualifies for a hard thing. It has to be level to the keel, account for the curved shape of the lower transom, and fit around the counter timbers. I was able to achieve a pretty nice fit where the sill will be visible - and the window frames will hide the areas where I wasn't able to get a good fit on the sides of the transom timbers:

View attachment 477066

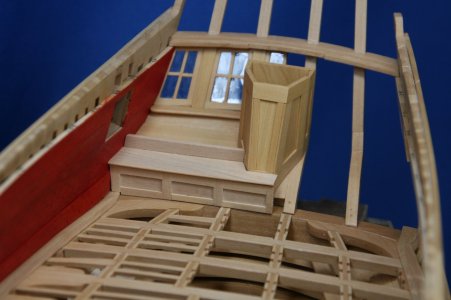
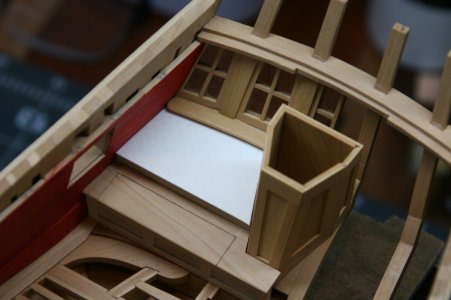
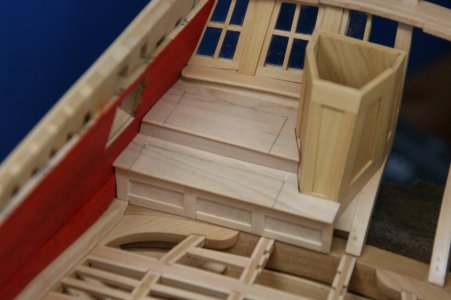
The other hard thing was the rudder trunk. This mini-construction has too many planes and curves intersecting in three dimensions for it to be even remotely enjoyable to fabricate. A responsible forum member would have taken pictures during the construction, but I have failed you in this regard.

Here is what I ended up with:

View attachment 477068

View attachment 477069

View attachment 477070

View attachment 477067

All in all, I'm satisfied with this outcome.

And yes, it does have a bit of an Iron Man vibe ROTF:

View attachment 477075
The rudder trunk in combination with the following curve of the planking look (as usual) very nice, Paul.
Regards, Peter
 
Extremely sharp work as always Paul.

My only observation is that the internal panelling is sitting directly on the deck beams, in reality, they would sit on top of the deck planking. Some modellers choose to represent the planking only for the thickness of the panelling to represent reality.

If I sound overcritical, then I apologise, I just thought I would through it into the mix so you can decide which option you prefer.

As it stands, the results are stunning, it would be your preference if you chose to tweak this detail.
 
An easy thing and two hard things...

Moving now to the back of the ship I have planked the inside surface of the counter (an easy thing) and added a sill for the stern lights. The sill qualifies for a hard thing. It has to be level to the keel, account for the curved shape of the lower transom, and fit around the counter timbers. I was able to achieve a pretty nice fit where the sill will be visible - and the window frames will hide the areas where I wasn't able to get a good fit on the sides of the transom timbers:

View attachment 477066

The other hard thing was the rudder trunk. This mini-construction has too many planes and curves intersecting in three dimensions for it to be even remotely enjoyable to fabricate. A responsible forum member would have taken pictures during the construction, but I have failed you in this regard.

Here is what I ended up with:

View attachment 477068

View attachment 477069

View attachment 477070

View attachment 477067

All in all, I'm satisfied with this outcome.

And yes, it does have a bit of an Iron Man vibe ROTF:

View attachment 477075
great craftsmanship as usual. Congratulations For me it would be a hard thing and two harder things. lol
 
Extremely sharp work as always Paul.

My only observation is that the internal panelling is sitting directly on the deck beams, in reality, they would sit on top of the deck planking. Some modellers choose to represent the planking only for the thickness of the panelling to represent reality.

If I sound overcritical, then I apologise, I just thought I would through it into the mix so you can decide which option you prefer.

As it stands, the results are stunning, it would be your preference if you chose to tweak this detail.
Thank you for sharing this 'criticism' Nigel. I am eager to improve both my modeling skills as well as my understanding of ship construction, so I am grateful that you felt comfortable sharing these thoughts.

In this case it was a conscious decision on my part - but now you have me thinking if I have made a good choice. Before I do the final installation I'll run a trial to see if I would like to represent some planking under the bulkheads and walls. It would be possible to remove a bit off the bottom and/or top of the internal panels and keep the work I have completed.

Again, my thanks!
 
An easy thing and two hard things...

Moving now to the back of the ship I have planked the inside surface of the counter (an easy thing) and added a sill for the stern lights. The sill qualifies for a hard thing. It has to be level to the keel, account for the curved shape of the lower transom, and fit around the counter timbers. I was able to achieve a pretty nice fit where the sill will be visible - and the window frames will hide the areas where I wasn't able to get a good fit on the sides of the transom timbers:

View attachment 477066

The other hard thing was the rudder trunk. This mini-construction has too many planes and curves intersecting in three dimensions for it to be even remotely enjoyable to fabricate. A responsible forum member would have taken pictures during the construction, but I have failed you in this regard.

Here is what I ended up with:

View attachment 477068

View attachment 477069

View attachment 477070

View attachment 477067

All in all, I'm satisfied with this outcome.

And yes, it does have a bit of an Iron Man vibe ROTF:

View attachment 477075
Iron man just reflecting the builder......
 
Really wonderful progress, Paul.
It's time that I also find time to go back to my shipyard and continue with my projects... until next years exhibition in Germany are only 6 month. That is not a lot of time.
Thank you, Christian. And progress is plodding even when we do have time at the workbench. I look forward to seeing more of your work!
 
I went through all 148 pages of your review. It's simply breathtaking! I would have never guessed that this is a kit! This is probably the coolest one I've ever seen. And your Manufacturing execution deserves only the highest praise. I'm eagerly waiting for more updates. And I really hope that you build this model with sails and rigging—it would be fantastic!
 
I went through all 148 pages of your review. It's simply breathtaking! I would have never guessed that this is a kit! This is probably the coolest one I've ever seen. And your Manufacturing execution deserves only the highest praise. I'm eagerly waiting for more updates. And I really hope that you build this model with sails and rigging—it would be fantastic!
Thank you very much, Sergey! I have never seen anyone work backwards through a build report but you did it! And my thanks for all the likes.

Yes, this is a very nice kit and I have enjoyed trying to enhance it along the way with some scratch-built additions. And I am very sorry to disappoint you but in my humble opinion admiralty models and spars, rigging and sails are a mismatch (don't really belong together). Of course it has been done and it is always 'builder's choice.'

Having said that, I agree that full rigging and sails makes for a most impressive model. After you catch your breath from this 150 page report you are welcome to explore the 200 page Vasa report in my signature ROTF - it is built to your preferred specifications. Or, and this is the approach I would use, just check out the final photos:


Thanks, again, for your nice post.
It was really interesting to start from the end and work backward. I understand that admiralty models show only the hull, but sometimes I've seen both the frame and the rigging included as well. As for sails, I don’t really appreciate them either. For scales up to 1:24, they might look fine, but anything larger looks disproportionate and a bit like a toy. I’ll likely make my ship without sails, or perhaps with them tightly furled. In the latter case, it adds more rigging, which I like. But these are just thoughts for now. I’m nowhere near your level, but with the rigging, I hope to catch up! I’ll definitely go through your completed project—it’s next on my list!
 
On the contrary, I think you are a very skilled modeler and I aspire to work at your level. The Kingfisher is only my second attempt and I still consider myself a relative beginner with much to learn... Isn't this a wonderful hobby! Always learning - never perfecting...
You've made a huge leap after your first model. The first one is amazing, but the second one—it's something extraordinary! It’s always nice to hear compliments, but I still believe you are the more impressive one! :)
 
Thanks Sergey, you are very kind.

As work continued on the stern portion of the ship my attention turned to the stern lights (windows).

From cardstock templates of each opening I drew the window patterns on a piece of rigid paper and used double sided tape to begin placing the frames:

IMG_1233.JPG

Once the first layer of frames was placed, I cut out a piece of mica and glued it (CA) to the frames:

IMG_1235.JPG

I then added the second layer of frames:

IMG_1236.JPG

These were then trimmed and thinned out and inserted in the openings:

IMG_1245.JPG

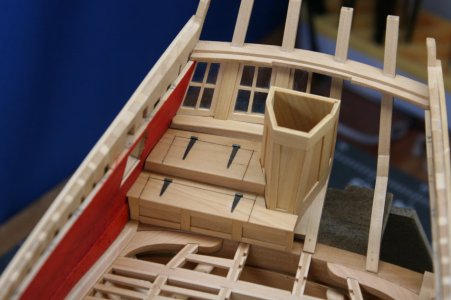
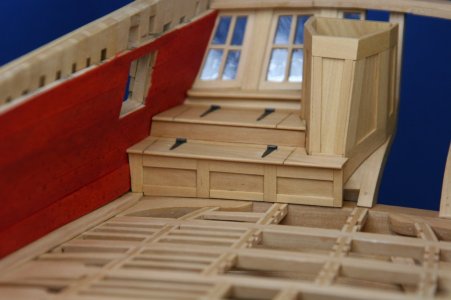
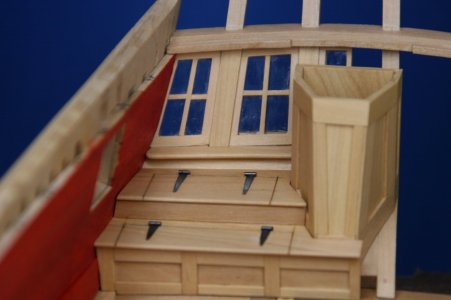
As long I was in the vicinity, I decided this was as good a time as any to add lockers to this area. First, I added a lower locker:

IMG_1242.JPG

But I wasn't too impressed with what that looked like, so I added an upper locker:

IMG_1246.JPG

IMG_1250.JPG

Of course, this means I have forever hidden the inside planking of the counter but that seemed like a rather insignificant loss.

As this portion of the ship will soon be inaccessible, I added the final details and a first coat of finish:

IMG_1253.JPG

IMG_1254.JPG

IMG_1257.JPG

I feel like I'm just sort of wandering around aimlessly at this point, so I can't really say what will come next...

Thanks for visiting!
 
Back
Top