Kyrenia Ship, 290 BCE Reconstruction POF Build Log PT-2 [COMPLETED BUILD]

The more details you add, the more convincing your build becomes.
Your second set of ingots though: beautiful!
I didn't know anything about ships from this era; your attention to not only the details of your build, but also the history of these ships is enlightening. Thanks for your elaborate descriptions!
 
Last edited:
I have no words to describe this work..... your work shows me what one can do with detail and authenticity. This is no model but a scale replica. So good Rich.
My thanks for the above compliments and encouragement. I am taking as much pleasure in finding and scanning/reading the underwater archaeological research papers as in the model. That was a very fascinating period of history from which so much of our later advancements came. One paper proposed that the development of a keel and brailed sails were as revolutionary (if even slowly adopted) as were ICBMx from the initial V-1 Buzz Bombs from Germany in WWII blindly coasting on a clock timer to somewhere in England if not intercepted by fighters sooner. From what I have seen in SoS a good number of builders are taking great measures to learn as much as possible that is related to their own models/builds. The time that I spend surfing What's New and those threads is time off of my own build but well spent in adding to my brain box. Rich
 
My thanks for the above compliments and encouragement. I am taking as much pleasure in finding and scanning/reading the underwater archaeological research papers as in the model. That was a very fascinating period of history from which so much of our later advancements came. One paper proposed that the development of a keel and brailed sails were as revolutionary (if even slowly adopted) as were ICBMx from the initial V-1 Buzz Bombs from Germany in WWII blindly coasting on a clock timer to somewhere in England if not intercepted by fighters sooner. From what I have seen in SoS a good number of builders are taking great measures to learn as much as possible that is related to their own models/builds. The time that I spend surfing What's New and those threads is time off of my own build but well spent in adding to my brain box. Rich
Friday will be the day to enter the sail shop to bring out the fabric and begin the work.
My thanks for the above compliments and encouragement. I am taking as much pleasure in finding and scanning/reading the underwater archaeological research papers as in the model. That was a very fascinating period of history from which so much of our later advancements came. One paper proposed that the development of a keel and brailed sails were as revolutionary (if even slowly adopted) as were ICBMx from the initial V-1 Buzz Bombs from Germany in WWII blindly coasting on a clock timer to somewhere in England if not intercepted by fighters sooner. From what I have seen in SoS a good number of builders are taking great measures to learn as much as possible that is related to their own models/builds. The time that I spend surfing What's New and those threads is time off of my own build but well spent in adding to my brain box. Rich
To continue be starting the sail after previously drawing it out on the plan sheet where it was not shown.
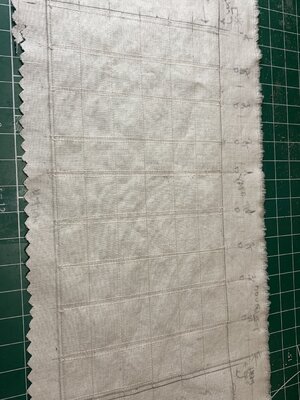
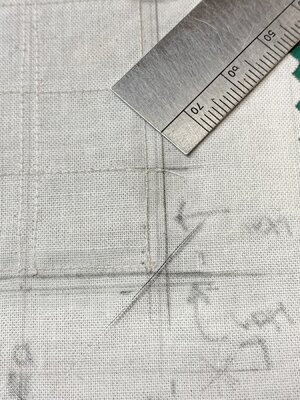
First after stiffening the fabric on one side with some Quilt Basting Spray it is stable enough to draw the guide lines for sewing:
Kyrenia Sail cutting and sewing guide lines.jpg
Following the lines I have double lines for the faux vertical brailing lines reinforcement and single lines across for reinforcement.
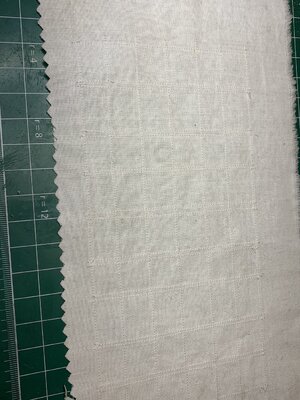
The back side sewn looks like this:
Kyrenia Sail sewing backside.jpg
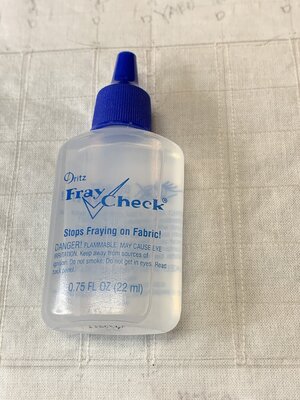
Less textured than the other side due to needle and thread tension. Brailing rings will be sewn onto the crossing points of both horizontal and vertical lines after I hem and sew on the bolt rope.Kyrenia sail fabric anti-fraying solution.jpgKyrenia sail fabric anti-fraying solution.jpg
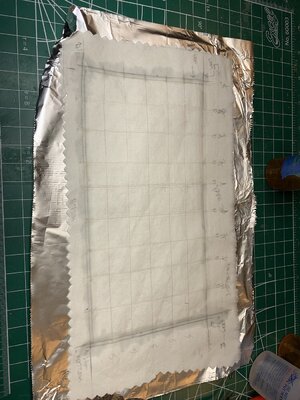
Using the Fray-Check solution on round the edges to be cut and folded for the hems has to dry over night.
Kyrenia Sail anti-fraying on cut edges.jpg
to him I'll follow the same process that I posted for my Bluenose sails but this is a much smaller sail and rectangular following the fabric lines it will be easier to do without the diagonals.
 
Great planning Rich! I can't wait to see the execution!
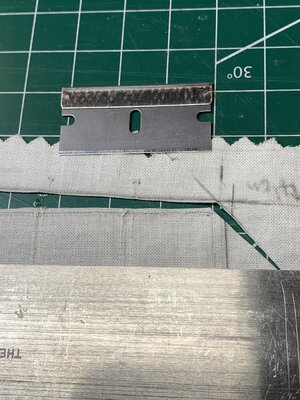
Next step in the process after lifting the sail off of the foil when the fabric frey check has set is to cut diagonals across each corner for a folded miter corner:
Kyrenai Sail Hem Corner Prep.jpg
I use only new, unused razor blades for all of the fabric cutting which is fairly easy along the fabric weave lines
Kyrenia Sail Hem Edges Cutting.jpg
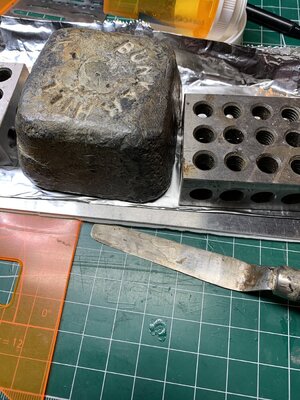
When all sides are cut I turn it over so that the hem will be on the back or leeward side of the sail and moisten the edge with water using a small brush holding the sail down with a heavy straight edge. The moistened edge is then lifted up with a pallet knife into an upwards direction and slide plastic triange edges to hole it vertical.
Kyrenia Sail Hem Softening and Lift.jpgAfter adjusting the lifted edge I weight it in place to take a set:
Kyrenia Sail Hem fold.jpg
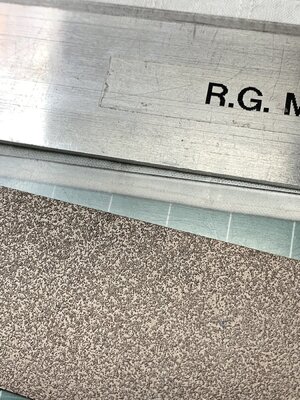
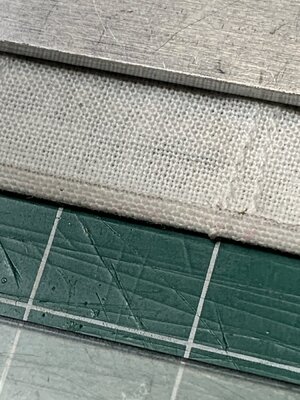
After an hour or so I remove the weight and have the exposed fabric edge to fold up and over the sail forming the hem which is again secured with a metal straight edge (notice this file was the one used to texture the faux copper ingots faces).
Kyrenia Sail Folded Hem Pressing.jpg
I impatiently have to wait for a couple of hours so that the weight presses the fold into a stable hemmed position on the sail. and the following is a closer view of that hem edge which in drying has glued itself together with the fabric edge solution.
Kyrenia Sail Folded Hem for bolt rope sewing.jpg
When all edges are hemmed in this manner I will sew a bolt rope through the hem all around the sail. Then I can begin to sew on edge brail hoops and other rigging items before moving to the sail windward side to sew on the brail rings at the sewn crossing points. I can use some of the drying time to cut the rings off off of a small chain and practice my Irish Tin Whistle and concertina between stages. Slow work at best!!! Rich
 
I am sitting here reading this with my jaw nearly hitting the floor. You have this so well under control Rich! When it comes to rigging it is the one aspect that makes most people uncomfortable, but with you it is a totally different story. You seem to relish this challenge!
 
Next step in the process after lifting the sail off of the foil when the fabric frey check has set is to cut diagonals across each corner for a folded miter corner:
View attachment 270406
I use only new, unused razor blades for all of the fabric cutting which is fairly easy along the fabric weave lines
View attachment 270407
When all sides are cut I turn it over so that the hem will be on the back or leeward side of the sail and moisten the edge with water using a small brush holding the sail down with a heavy straight edge. The moistened edge is then lifted up with a pallet knife into an upwards direction and slide plastic triange edges to hole it vertical.
View attachment 270408After adjusting the lifted edge I weight it in place to take a set:
View attachment 270409
After an hour or so I remove the weight and have the exposed fabric edge to fold up and over the sail forming the hem which is again secured with a metal straight edge (notice this file was the one used to texture the faux copper ingots faces).
View attachment 270410
I impatiently have to wait for a couple of hours so that the weight presses the fold into a stable hemmed position on the sail. and the following is a closer view of that hem edge which in drying has glued itself together with the fabric edge solution.
View attachment 270411
When all edges are hemmed in this manner I will sew a bolt rope through the hem all around the sail. Then I can begin to sew on edge brail hoops and other rigging items before moving to the sail windward side to sew on the brail rings at the sewn crossing points. I can use some of the drying time to cut the rings off off of a small chain and practice my Irish Tin Whistle and concertina between stages. Slow work at best!!! Rich

I am sitting here reading this with my jaw nearly hitting the floor. You have this so well under control Rich! When it comes to rigging it is the one aspect that makes most people uncomfortable, but with you it is a totally different story. You seem to relish this challenge!
Possibly the sails and rigging are a continuation of my earlier time spent sailing and racing in smaller one design boats, primarily "round the bouys" and not on the deep blue. My mind continually sees and body feels the action, vibrations, and sounds which come forth with each aspect of what I am working on and the relationship to all of the others. It is enjoyable even with the model building blunders.

Oh yes, with a side PM questioning the bright copper ingots in the hold,I have gone back and dusted them with drafting pencil sharpening powder to give them a darker appearing finish which may have been present with any slag on the ingots that may not have been drawn off. Copper can oxidize wither a darker brown or a green depending upon the ore content and atmospheric or rain chemistry conditions. Both experienced from my architectural days when copper was used in some manner, whether as a sheet metal finish or roof gutters and drains. Rich
 
The kit finally arrived in a plain corregated cardboard box with instruction manual in Chinese, single plan sheet, and laser cut parts except for small dowels. I will likely swap out and upgrade some of the rigging fittings and lines. View attachment 258664View attachment 258665View attachment 258666View attachment 258667View attachment 258668View attachment 258670View attachment 258669
While my Bluenose MS2130 is being finished I have time to study this kit carefully to better understand the insturctions via grap;hics as all text is in Chinese. I will bring some of my side research into the wreck discovery, recovery, and reconstruction to bear on how this model will be worked out and possibly tricked up according to the best underwater archaeological research papers on the Kyrenia and the three following reconstructions that have been build and sailed. Ships and boats didn't move very fast in the Late Bronze Age so I don't have to stress over a fast beaten tempo of rowing while there is no wind to fill the sail.
Rich (PT-2)
Hallo Rich alias @PT-2
we wish you all the BEST and a HAPPY BIRTHDAY
Birthday-Cake
 
Possibly the sails and rigging are a continuation of my earlier time spent sailing and racing in smaller one design boats, primarily "round the bouys" and not on the deep blue. My mind continually sees and body feels the action, vibrations, and sounds which come forth with each aspect of what I am working on and the relationship to all of the others. It is enjoyable even with the model building blunders.

Oh yes, with a side PM questioning the bright copper ingots in the hold,I have gone back and dusted them with drafting pencil sharpening powder to give them a darker appearing finish which may have been present with any slag on the ingots that may not have been drawn off. Copper can oxidize wither a darker brown or a green depending upon the ore content and atmospheric or rain chemistry conditions. Both experienced from my architectural days when copper was used in some manner, whether as a sheet metal finish or roof gutters and drains. Rich
While I'm already following your log - congratulations Birthday-Cake
 
Welcome aboard SOS!

BTW, you can start the build log of your HMS VIctory, it is not that difficult. How about that?
@Blues22, you should start a build log for your HMS Victory separately from this Kyrenia log to not get things mixed up and allow you to continue with your project in a clear line of progression.

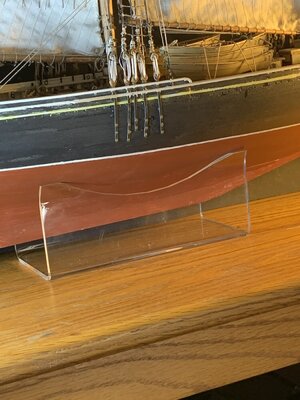
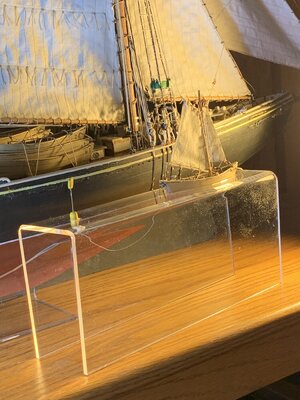
As to my log for Kyrenia the three parts of my "clear" acrylic presentation were picked up today. The major part not shown here is a five sided box of folded acrylic and no wood edges. The other two essential and smaller display mounting pieces are both channel shapes, upside down.
First is the "saddle" to hold the hull in any position that I want to place it in the channel which has the top corners rolled slightly out which conform to the curvature of the hull:
BN Acrylic Hull Saddle.jpg
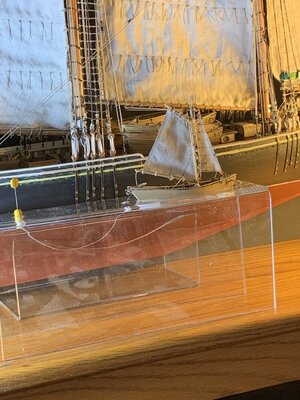
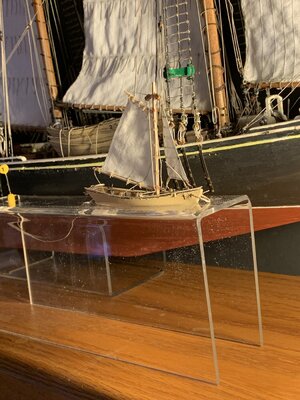
My thought was to have a much of a floating presentation as feasible in a minimal manner. This and the following channel which is upside down for the dory will both sit inside of the five sided acrylic box:
BN and Sailed Dory Hull Saddles.jpg
When I am satisfied with the cutout for the dory and marker float for the trawl line I will tie the bait lines onto the longer trawl line between the dory and float. This is a test to see how to attach those lines and the scale length and spacing. Next a closer view:
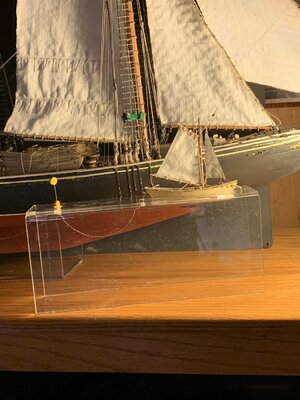
BN and Dory Fishing Sided View.jpg
This aft view is followed by a more forward position view:
BN Sailed Dory Fishing Fore Stbd View.jpgand a parting view again more aft:
BN and  Sailed fishing dory Stbd Aft Qtr View.jpg
OOps!! that was out of sequence and obviously is a side elevation view that give s a better scale impression of the relative size of each. I didn't want to add water effects to the surface choosing a more simple and clear view of both. Maybe the plastic edges intrude on the idea but this is what it is and I'll accept that. Tomorrow I will have my son help me lift the box dust cover which is too large/heavy/cumbersome to try alone. When that is in place I think that I will be able to rotate one end upwards to remove the dory saddle to complete the trawl line. I have had the schooner out as a dust collector too long as it is an want to get it covered ASAP while I finalize the dory. Different mount but I like the flexibility to reposition the schooner hull in its saddle as my eye and mind wander. Rich
 
Wonderful to hear that it is your birthday Rich! We have come a long way and I have always appreciated your friendship, loyalty and support. Right now you are busy with a build that I think you truly enjoy and one which gives your love for all things historical, free reins. I hope that the Lord spares you many more years in which you can share your talents with us!
 
Back
Top