Kyrenia Ship, 290 BCE Reconstruction POF Build Log PT-2 [COMPLETED BUILD]

Looking more complete all the time Rich. Nice to see you making such good progress.
Not that much different to show with the installation of the after-deck stanchions (I finally looked up the spelling) and railings. then did a dry loose set of the midships stanchions with the ropes. I will remove these until after I have completed the mast shrouds to the lower thimbles (primitive deadeye function). So the mast and yard are next on the docket leading to the sail.
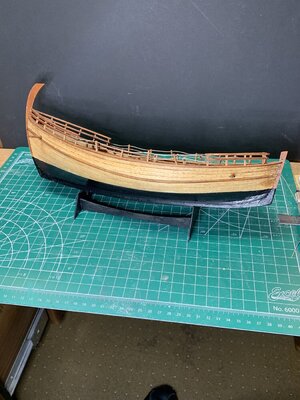
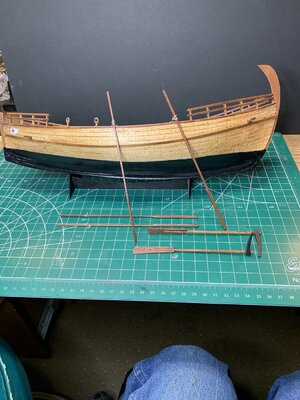
Here is the Stbd elevation with bow to the right:Kyrenia Stbd Elevation Bow Right.jpg
And tied off the lower thimbles beneath the cap railing to the small longitudinal piece below. Port side shown:
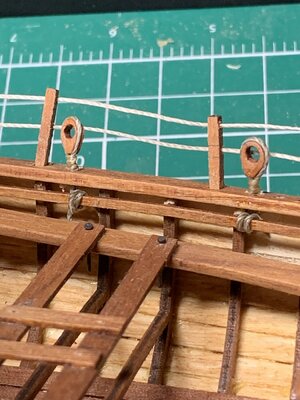
Kyrenia Port Shrouds Thimbles Secured.jpg
Disregard the loose stanchion lines as they will be drawn taught at final installation. The kit pieces did not extend past the stanchion far enough for a drilled hole to secure those ends so I will splice them around the fixed stanchions.
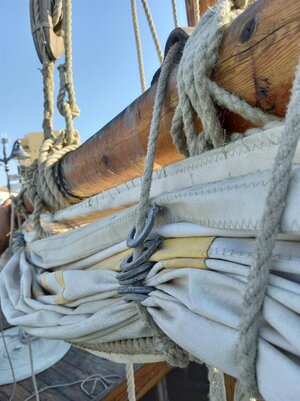
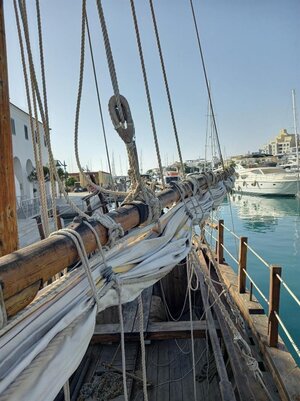
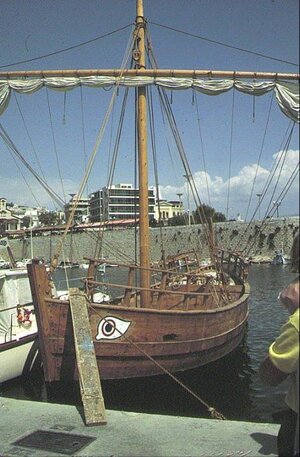
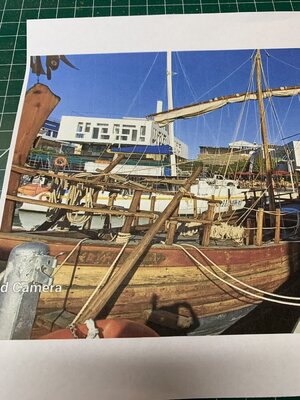
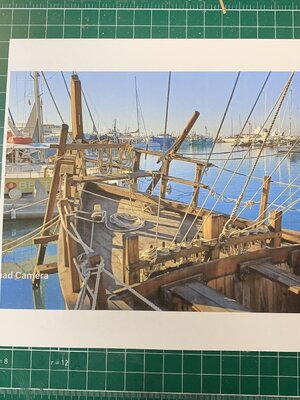
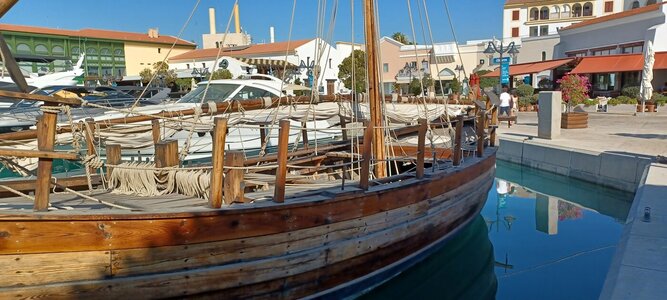
Her is what the reconstructed Kryenia looks like for those ends. (Photo thanks to Mensis)
Kyrenai Stbd Lkg Fwd.jpg
This is the after end of the rope lines and you can see the connection to the after rails on the left. I should have looked at this and the fore end before using the kit cut parts and made my own to better serve the connection purpose. Maybe there is another Kyrenia build across the horizon as the present one will be given away and the recipients will never know the difference.
Mast and yard next.
 
Not that much different to show with the installation of the after-deck stanchions (I finally looked up the spelling) and railings. then did a dry loose set of the midships stanchions with the ropes. I will remove these until after I have completed the mast shrouds to the lower thimbles (primitive deadeye function). So the mast and yard are next on the docket leading to the sail.
Here is the Stbd elevation with bow to the right:View attachment 266952
And tied off the lower thimbles beneath the cap railing to the small longitudinal piece below. Port side shown:
View attachment 266953
Disregard the loose stanchion lines as they will be drawn taught at final installation. The kit pieces did not extend past the stanchion far enough for a drilled hole to secure those ends so I will splice them around the fixed stanchions.
Her is what the reconstructed Kryenia looks like for those ends. (Photo thanks to Mensis)
View attachment 266955
This is the after end of the rope lines and you can see the connection to the after rails on the left. I should have looked at this and the fore end before using the kit cut parts and made my own to better serve the connection purpose. Maybe there is another Kyrenia build across the horizon as the present one will be given away and the recipients will never know the difference.
Mast and yard next.
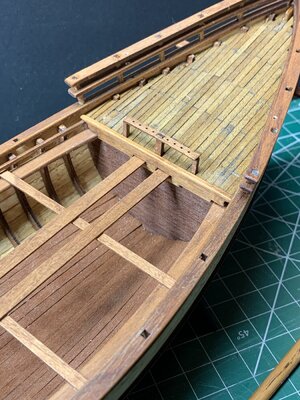
Not much progress since yesterday. Small things that the kit did not include and made the ends of the decks look like the fly was not zipped closed on the pants. First was adding a cross beam for the after deck and supporting the two center high walking planks:
Kyrenia Aft Deck Beam not in Kit.jpg
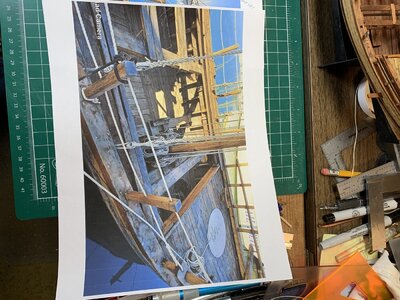
Next was a similar member at the fore deck as shown on the Kryenia II:
Kyrenia II For Deck Beam.jpg

Kyrenai Fore Deck Beam not in Kit.jpg
I jumped ahead of showing the Kyrenia II Aft Deck area and beam:
Kyrenia II Aft Deck Beam.jpg
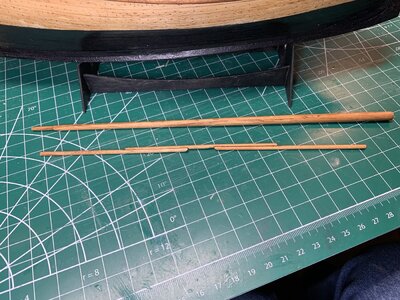
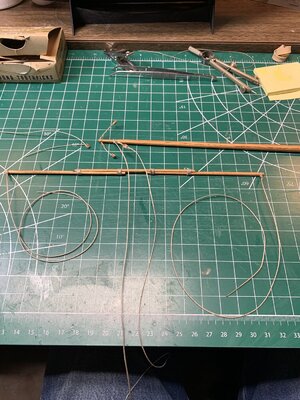
I also used my Proxon lathe to carefully taper the mast and cut in the narrow top section as well as shaping the three yard pieces which nest into each other which is not shown in the kit but taken from the Kyrenia photos:Kyrenia Tapered Mast and Composit Yard.jpg
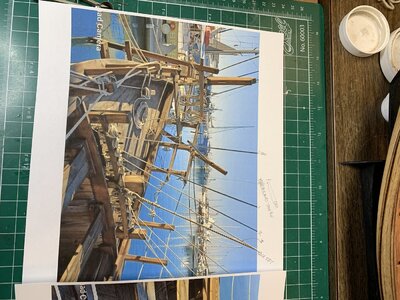
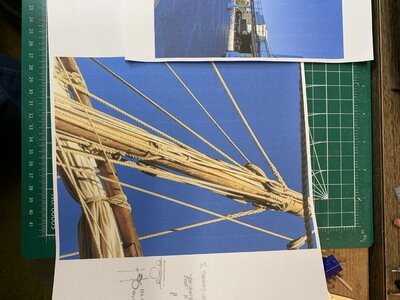
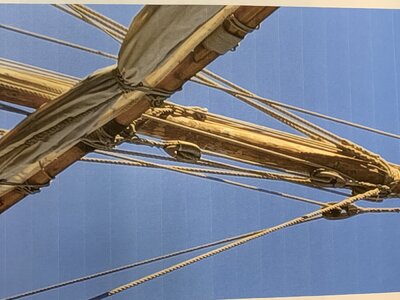
The kit only provides a small rag for a furled sail on the yard and is not complete or accurate with the standing and running rigging. As I want to present a full sail and correct rigging I have some challenges to sort things out as well as determining the correct proportions for a full sail. Messis has sent additional photos of the upper mast and rigging which I can only partially understand and he has graciously agreed to go back to the Kyrenia II for some additional photos to sort out how the yard is actually secured to the mast and can be raised and lowered with the correct blocks and falls. A couple of examples of what I have at this time:
Kyrenia II Upper Mast Rigging for Yard.jpgThat view is looking at the after side of the mast/yard. Now to the fore side view:
Kyrenia II Upper Mast Rigging for Yard Forward Side.jpg
The kit designer had no idea of these aspects or chose to disregard them for simplicity and inaccuracy. Related will be the correct height to place the yard and the proportions of the sail in depth to the width of the yard. I love these questions as having sailed a lot in my younger years I cannot escape thinking about the hands on usage.
 
Messis, Thank you for these additional photos which help me with my rigging questions. Rich
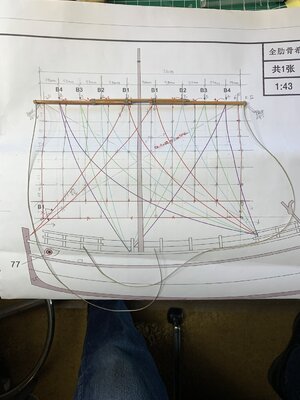
With the assistance of photos from Messis I have completed most of the yard rigging and turned to drawing a sail matching the yard for fairleads and an assumed depth with the horizontal cross sail lines and locations for the brailing rings:
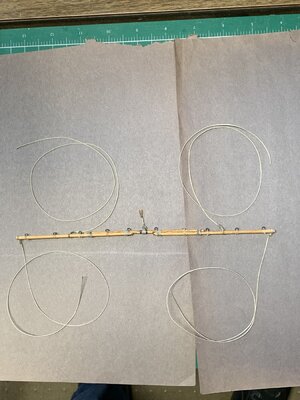
Kyrenia Continuing Mast and Yard Rigging.jpgHere is the yard and some of the top mast rigging. Next to the Kyrenia Design a Sail Matching the Yard.jpgSail drawn on the kit rigging plan which shows braing lines which are not correct and locations adjusted to match the yard. The bottom initial sail line was discarded to use the red line one above it. Krrenai Yard Mostly Rigged.jpg
Here is the yard with most of the rigging attached. I still need a line that secures the yard to the front of the mast which will be added later when more elements are in place and yard/sail hoisted for review.
 
With the assistance of photos from Messis I have completed most of the yard rigging and turned to drawing a sail matching the yard for fairleads and an assumed depth with the horizontal cross sail lines and locations for the brailing rings:
View attachment 268164Here is the yard and some of the top mast rigging. Next to the View attachment 268166Sail drawn on the kit rigging plan which shows braing lines which are not correct and locations adjusted to match the yard. The bottom initial sail line was discarded to use the red line one above it. View attachment 268167
Here is the yard with most of the rigging attached. I still need a line that secures the yard to the front of the mast which will be added later when more elements are in place and yard/sail hoisted for review.
Good job Rich! Looks promising! ;)
 
Good job Rich! Looks promising! ;)
Thank you. It is interesting to see that at different times the photos show the rigging in different configurations. (Locations of connection points, number of lines such as a single or two passing out of a single block to another and returning through the first, etc. . . ) I'm considering each and coming to my own judgement as to what is reasonable and feasible in this model. I have found that some areas are too tight to serve as I would like but keeping viewing distance and direction a major consideration I have been willing to give up on a few for more crude executions and can live (not well though) with those.

How realistic it is to see the cast off or dropped in place of so many things in the similar sloppy manner that we saw in the old BN photos. Certainly not a visitors inspection tour presentation!
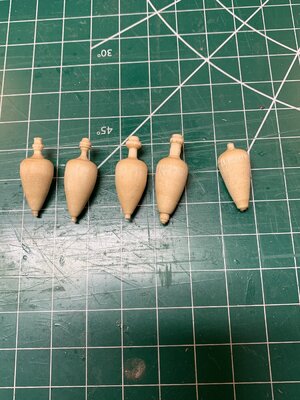
Today was work on the pier to turn a few Maritime Transport Containers (MTC) as I have learned these are called in research papers about recovered wrecks and their cargo. Four are OK but one had the top of the neck break off but I may use it anyway. To be complete handles should be added which will be bent wire attachments.
Kyrenia Maritime Transport Containers.jpg
The kit provided four plastic ones but there are more needed to fill the hold. The actual wreck had 400 that were found.
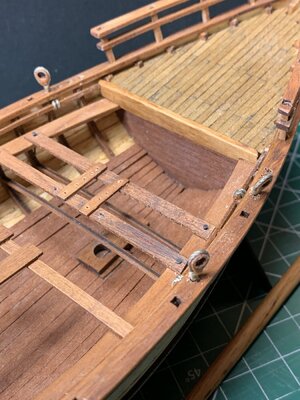
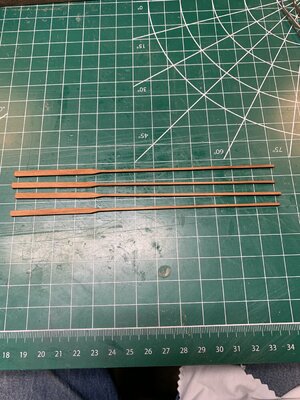
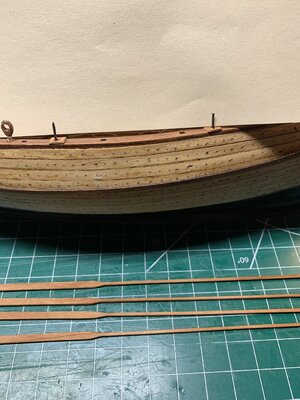
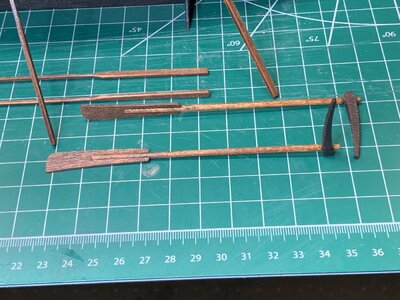
Next I removed the oars and touched them up. These are used in a standing position pushing the oar against a thole pin for which the kit makes no mention or provision. They were seen in the Kyrenia II photos from Messis.
Kyrenia Oars.jpg
The small diameter of the kit oars seems too fragile for actual use. I may consider making my own with a more substantial diameter. Following is a close view of the Thole pins and pads for the stbd. rail. Same on port.
Kyrenia Thole Pins.jpg
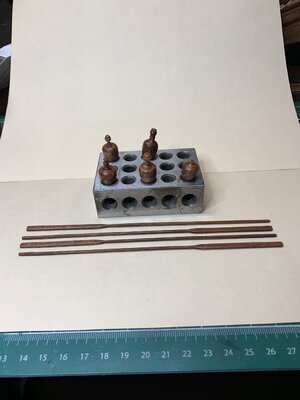
Next and last for today is a photo of the stained oars and MTCs:
Kyrenai Finished MTC and Oars.jpg
Next it is time to focus on the sail.
 
Rich, I never plank a deck sheet prior to installation for that reason, and because most decks have a camber that would create a gap between planks. That said, it would be better to install the deck sheet, and then start from the center outward towards the port and starboard sides. When you get to a board that needs to be notched, then you lay it in position next to the frame and make two tiny cuts with an xacto blade using the edge of the frame as your template. Then it’s just a matter of making the notch deep enough, which can be measured from the last full width board. I get exact fits every time this way! ;)
Now you tell meROTF... this site is like an online university for ship building.
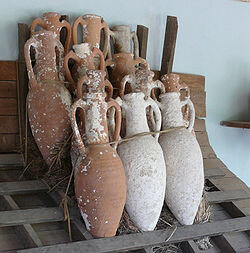
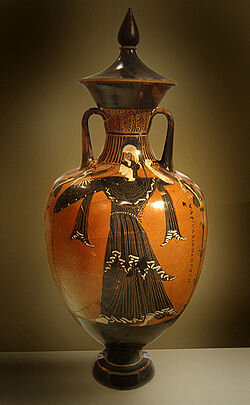
 
Today was work on the pier to turn a few Maritime Transport Containers (MTC) as I have learned these are called in research papers about recovered wrecks and their cargo.
Yes it can be that this the way they are called today. Still they were called at that time αμφορείς plural, αμφορέας singular. I believe in english that is called amphora. So I would very much prefer still to use their original and real name and not a burocratic/technical designation of today.250px-Amphorae_stacking.jpg250px-Anforagrega-atenas.jpg
 
Yes it can be that this the way they are called today. Still they were called at that time αμφορείς plural, αμφορέας singular. I believe in english that is called amphora. So I would very much prefer still to use their original and real name and not a burocratic/technical designation of today.View attachment 268520View attachment 268521
I also prefer the original name/designation. Rich
 
I also prefer the original name/designation. Rich
Small work pulling along today doing the rudders with reference to the photos of KyreniaKryenia II After Quarter Rudder View.jpg II photos with a few different views following:
Kyrenia II Stbd Rudder.jpg
Kyrenia II Aft Deck Rudders.jpg
Now to a composite view of today's work including the rudders at the bottom together with lines to secure the oars to the tholes when rowing:
Kyrenia Oars.jpg
Staying with the rigging for the oars:
Kyrnia Oar and Thole Rowing Connector.jpg
and the rudders which will be installed with the rigging lines when mounted:
Kyrenia Rudders for mounting.jpg
Now back to turning some more amphorae.
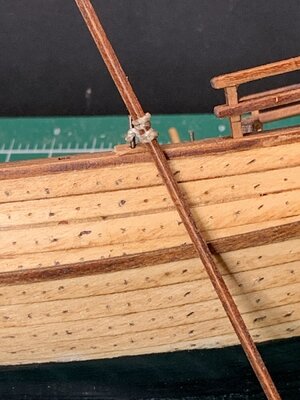
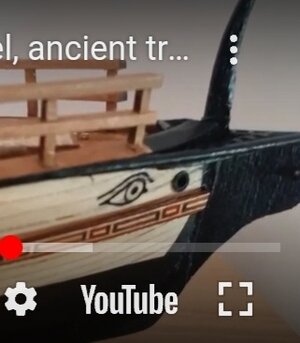
Need to take some time to get used to the eyes on the bow (First port elevation photo) which are on all three reconstructions of Kyrenia but look out of place on the model. Their fate is somewhere in the unknown future of a decision by me. Other's thoughts welcome.
Rich
 
Y
Small work pulling along today doing the rudders with reference to the photos of KyreniaView attachment 268565 II photos with a few different views following:
View attachment 268567
View attachment 268568
Now to a composite view of today's work including the rudders at the bottom together with lines to secure the oars to the tholes when rowing:
View attachment 268569
Staying with the rigging for the oars:
View attachment 268570
and the rudders which will be installed with the rigging lines when mounted:
View attachment 268571
Now back to turning some more amphorae.
Need to take some time to get used to the eyes on the bow (First port elevation photo) which are on all three reconstructions of Kyrenia but look out of place on the model. Their fate is somewhere in the unknown future of a decision by me. Other's thoughts welcome.
Rich
You are achieving a realistic look on this model. I think it looks better than a pristine “new out the box” build. Awesome
 
Y

You are achieving a realistic look on this model. I think it looks better than a pristine “new out the box” build. Awes
Y

You are achieving a realistic look on this model. I think it looks better than a pristine “new out the box” build. Awesome
Y

You are achieving a realistic look on this model. I think it looks better than a pristine “new out the box” build. Awesome


@GrantTyler, thank you as that has been my objective. It is not that hard with the skills that I have preventing me from reaching the pristine level. Rich
 
Need to take some time to get used to the eyes on the bow (First port elevation photo) which are on all three reconstructions of Kyrenia but look out of place on the model. Their fate is somewhere in the unknown future of a decision by me. Other's thoughts welcome.
Rich
What about my idea back then.... black lines only. Though its believed that the eyes were colourfull and a little naive.Screenshot_20211109-212302_Chrome.jpg
 
Just let me say that rudders were not used to travel an olkas. Olkades were sailing and rudders were used only for maneuvering when in port or anchorage.
 
Just let me say that rudders were not used to travel an olkas. Olkades were sailing and rudders were used only for maneuvering when in port or anchorage.
This YouTube video shows setting sail and line handling of Kyrenia II. I may have posted it previously but it is of specific interest to me now as I am working to determine the best/actual rigging and belaying pins' points.
Rich
 
Back
Top