When you compare the cost of the kit you are starting with to the overall cost of building the model, even a $1100 kit doesn't look all that bad. You don't notice the overall cost unless you track it in detail like I did (merely out of curiosity).So you can see that the prices for the top of the bill Chinese POF kits is not that high allthough the first investment is on the higher end.
-

Win a Free Custom Engraved Brass Coin!!!
As a way to introduce our brass coins to the community, we will raffle off a free coin during the month of August. Follow link ABOVE for instructions for entering.
-

PRE-ORDER SHIPS IN SCALE TODAY!
The beloved Ships in Scale Magazine is back and charting a new course for 2026!
Discover new skills, new techniques, and new inspirations in every issue.
NOTE THAT OUR FIRST ISSUE WILL BE JAN/FEB 2026
You are using an out of date browser. It may not display this or other websites correctly.
You should upgrade or use an alternative browser.
You should upgrade or use an alternative browser.
La Couronne Corel/scratch 1:100 First build [COMPLETED BUILD]
- Thread starter DARIVS ARCHITECTVS
- Start date
- Watchers 54
Fantastic work Kurt,
I have had a look at your spreadsheet,something I am far too undisciplined to do outside of my day job.Strictly speaking,many of the costs regarding books and tools will be offset against several models.In theory,the more models you build,the cheaper the cost per kit


Kind Regards
Nigel
I have had a look at your spreadsheet,something I am far too undisciplined to do outside of my day job.Strictly speaking,many of the costs regarding books and tools will be offset against several models.In theory,the more models you build,the cheaper the cost per kit


Kind Regards
Nigel
Yes, our hobby isn't the cheapest...and books and tools are pretty much an important part of it if you are a serious modeler. But...who can actually calculate the joy of built model when she displays proudly in your home, or a competition table perhaps? 
Treue! Since this is my first model, it will naturally be the most expensive. I didn't include the tools already in my shop such as the 1960's Delta 890 band saw, sandpaper, sanding blocks, 1948 South Bend 9" lathe, Delta 6" bench top belt/disc combination sander, and many others.Fantastic work Kurt,
I have had a look at your spreadsheet,something I am far too undisciplined to do outside of my day job.Strictly speaking,many of the costs regarding books and tools will be offset against several models.In theory,the more models you build,the cheaper the cost per kit
Kind Regards
Nigel
Hallo Kurt,
we from SOS wish you all the BEST and a HAPPY BIRTHDAY
Enjoy your day

we from SOS wish you all the BEST and a HAPPY BIRTHDAY
Enjoy your day

Happy Birthday Kurt!!  Wishing you all the best, enjoy your special day!!
 Wishing you all the best, enjoy your special day!!
Thanks guys!
Vielen Dank!
Vielen Dank!
Not much going on for construction on La Couronne lately. My brain is still working on the next step. With the help of the Don, our illustrious forum admin, I think I have an idea on where to go next. Before work on the shrouds, a few things need to be done such as attaching lift blocks to the mast assemblies, and cutting out the holes for simulating the sheaves for the top mast toplines and attaching blocks for the same. I will have to start with the fore mast, gluing the lowest section of the mast in place and making sure it's vertical, then running temporary stays in various directions to make sure it stays that way before making shroud lines. Installing the forestay and making some temporary backstays might be a good idea before installing the shrouds. First I have to learn how to wrap (serve) the shrouds and forestay with line, and make figure the easiest way to make a decent looking mouse for this scale of ship.
Last edited:
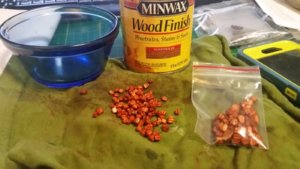
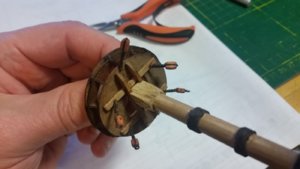
After a long delay and much thought, it's time to get working on the ship model again. The block pendants and the eyebolts that attach them to the tops for various lines were made for the foremast top. First, the blocks had to be prepared. The blocks from the kit come with sharp edges and needed to be reshaped into more rounded and realistic shapes by rounding the sharp edges off with the Block Buster from ModelExpo, which is basically a plastic cup with lid that has 100 grit sandpaper on the inside surfaces. You put the blocks in, attach the shaft for the internal flapper of the Block Buster to a portable drill, and spin the flapper inside the cup, which you hold with your other hand. It's like a rock polishing tumbler for blocks. After spinning the flapper at slow to moderate speed for about 30 seconds, you open the cup and dump out your nicely reshaped blocks and a bit of sawdust. The blocks were then stained with a red-brown stain to give them a rich color.
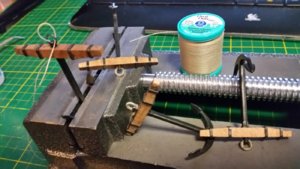
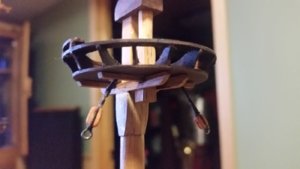
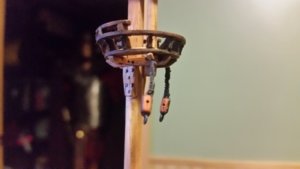
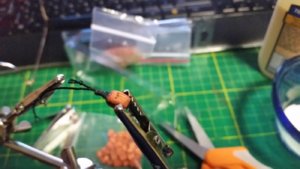
The pendants were made by taking a length of 0.045" dark brown line and gluing it around the block on one end and feeding the other through a blackened laser etched eyebolt. PVA glue was used to hold the loop of line together at the center, and a cheap Chinese serving jig was used to wrap the pendant with 0.008" diameter dark brown line. The serving was tied at the block end with an overhand knot secured with a touch of PVA glue, then more PVA was applied to the line of the pendant. The jig was then used to slowly rotate the pendant which keeping tension on the serving line with your other hand. When the serving approached the eye of the eyebolt, it was secured with a simple reverse turn of the line, then the end was trimmed off. The glue holds the line assembly together.
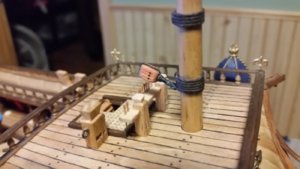
A total of five pendants were made. The two in front included an eyebolts attached to the ends of 4mm blocks, and are for the foremast's course yard lift lines. Two at the rear of the top are 5mm blocks for the hoist tackle lines used for general lifting and hoisting the pinnace off it's cradle. The fifth is for the block that the main topmast stay passes through and is attached to the rear of the top. The shafts of the eyebolts were CA glued into hand drilled holes. For the eyebolts attached to the crosstrees, the shafts of the eyebolts were bent in outboard direction like a turn nail for extra strength. The tip of a razor knife was used to cut a tint slot into the top of the crosstrees to accept each bent over portion of the eyebolt, so they would not protrude above the surface of the wood. The top itself will glued to the trestle tree after all blocks and pendants for rigging in the area of the of have been installed. This will take some thought, since the Corel model was not meant to include sails, and more eyebolts and blocks may have to installed than the instructions call for, especially if some more lines and details are added to the model.
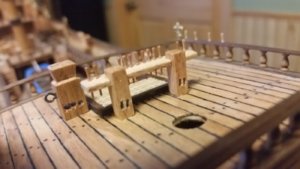
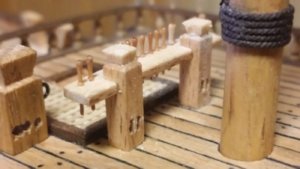
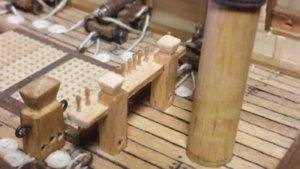
A couple errors had to be corrected for the fore and main fiferails. The holes to simulate the sheaves in the fore fiferail needed improvement. A square needle file was used to open and shape the hole, and a small flat piece of wood was glued into the holes to divide them into two holes, simulating two sheaves in each side. The tops of the vertical members for both fore and main fiferails were cut too short to tie lines to easily so more wood was added to form the bitts on top. The holes in the fore knight are a bit sloppy, but at this scale, they won't be that noticeable once the lined for the tackles for the yard ties are installed. The next ship will be easier since it's larger.
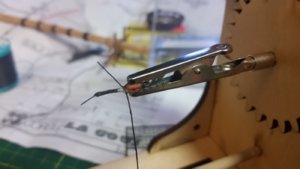
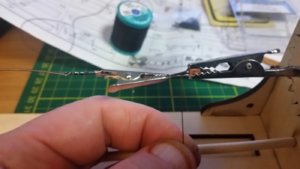
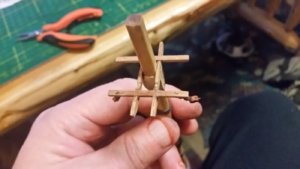
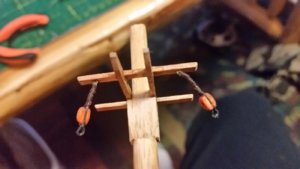


Last edited:
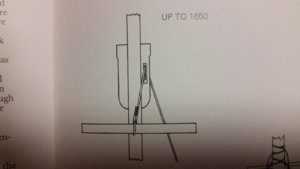
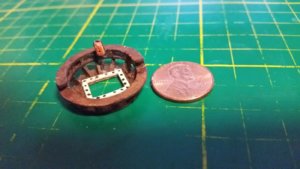
More preparation for rigging, drilling and carving the sheaves in the topmasts and top-gallant masts. Then, installed blocks for halyards which, with blocks, haul the ties for supporting the mizzen topmast yard and bowsprit topsail yard. The diagram from R.C. Anderson's book shows how that sheaves appear in the hounds of the topmasts and top-gallant masts. A tie line is attached to the yard, runs up and through a sheave, back down to a fiddle block. This fiddle block, combined with another block that is secured to the rearmost side of the lower mast top and a halyard line, are used to haul the tie and raise or lower the yardarm. The lower 4 mm blocks for each tie were rigged to a small brass laser etched eye-bolt, one for the mizzen mast and one for the bowsprit topmast. The 0.25 mm line which passes around each block is seized with 0.08 mm brown thread, then PVA glue thinned with water is applied. A heat gun or hair dryer is useful in drying the glue quickly. In each case, the shank of the brass eye-bolt is inserted through a hold in the top, then the end is turned over and passed into a second hole in from the bottom surface of the top. Turn nailing this thin and flexible shank and gluing it in place ensure that it will be a strong connection. For the bowsprit top, wood was installed which forms the rectangular hole in the center.
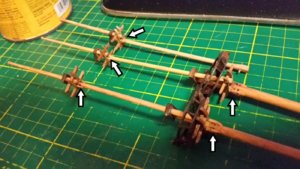
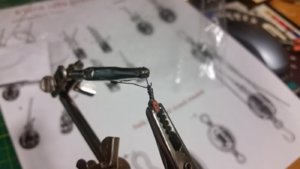
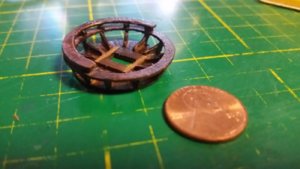
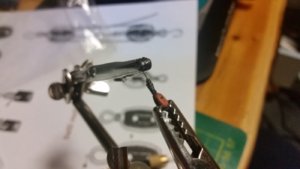
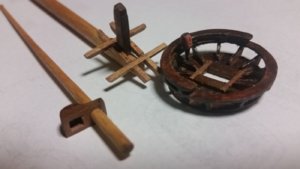
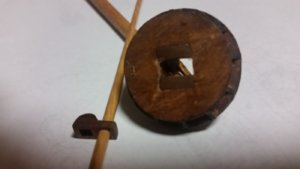


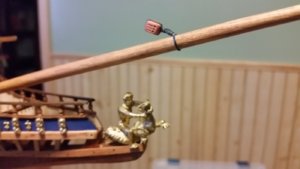
Blocks were attached to the masts for the stays. After a while, I found that for stropping blocks, tying a traditional whipping to secure the line around the block, even on blocks as small as 4mm. They stay tighter than just winding thread around the line and hoping the glue will be strong enough to hold it in place.


Just catching up on your build, great work Kurt!
Thanks guys for the compliments!
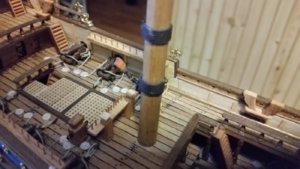
A couple more blocks were attached to the sprit, then more blocks were added to the topmast tops. Two lift line blocks and the main topmast stay line block were attached to the fore topmast crosstrees and top. Then, two lift line blocks were attached to the crosstrees on the main topmast. Since the standing rigging basically begins at the front and proceeds aft, It's time to install the bowsprit and make the gammoning to secure it to the beakshead. The bowsprit was pegged and glued to the forepeak deck. Now, for the gammoning.
Using the directions in R.C. Anderson's book, I decided to challenge myself to making the eyesplice on the end of the 0.8mm diameter gammoning line. After about 30 minutes, it was done and it looked great. Not bad for an old sailor who hasn't held a marlin spike for 36 years! Taking the line and passing it over the the top of the bowsprit and feeding it down through the eye on the end of the line, the gammon line was passed down through the beakshead, through the slot and up and around the bowsprit. A total of nine passes were made before the slot in the beakshead was full of line. The gammon line starts at the rear most end of the sprit and subsequent passes go over the sprit, moving in a forward direction. In the beakshead slot, the line passes are layered in the opposite direction, beginning at the front of the slot, with subsequent passes added, moving rearward. After nine wraps (your number may vary), the line passes a final time over the sprit, down, and forms a half hitch around the port side group of lines. Then the line is passed around the starboard line bundle and wrapped around both bundles, drawing them together. The number of wraps around the center of the gammon line bundle should be equal to the number of gammon line wraps around the sprit, in this case, nine wraps. The remaining is half hitched around the bundle, glued in place with watered down PVA glue, and the excess line cut off. The gammoning should be nearly vertical, but with older ships like this, it may angle upward to the rear. To keep the gammoning from sliding down the sprit, cleats (stops) are attached to the sprit behind the line bundle. Usually five are arranged in a semi-circle around the top of the sprit. You may need to attach the cleats before wrapping the gammoning to keep the cord from moving around, but I didn't have to in this case. The cleats were cut and shaped from 2mm x 2mm cherry wood and glued onto the sprit with CA glue.
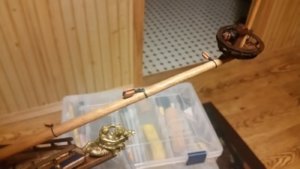
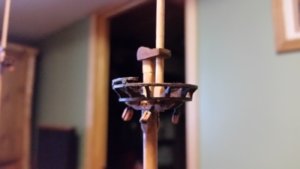
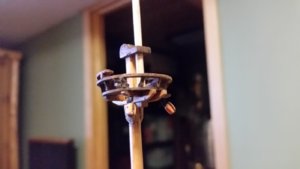
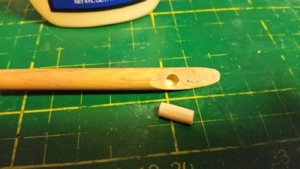
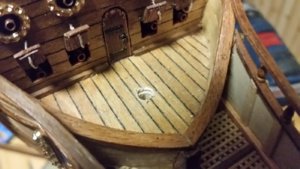
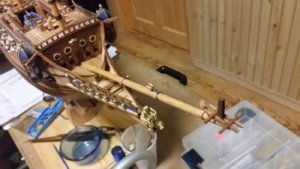
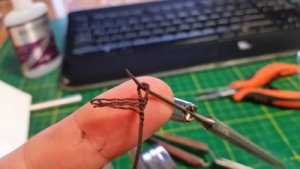
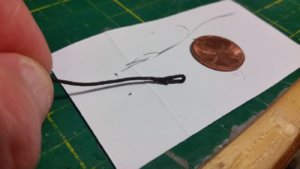
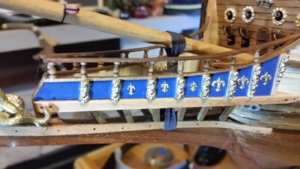
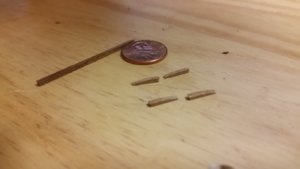
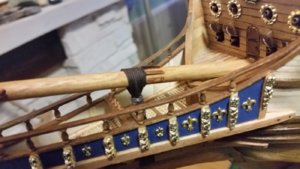


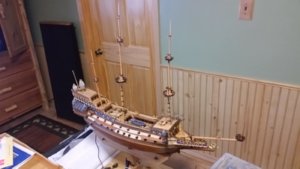
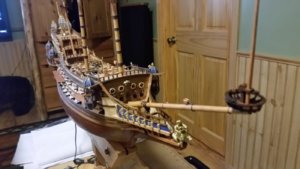
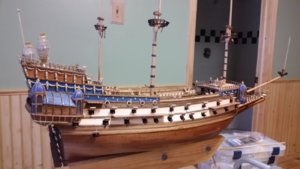
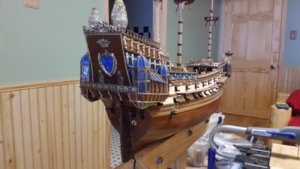
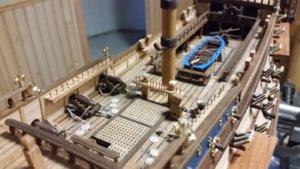
Here are a bunch of pictures to show the progress so far. An alignment jig was made with some wood and a plumb bob to be used later in aligning the masts as they get assembled, and to check alignment as the shrouds and stays are added. An 8" long level is used to align the ship model to a level position before using the jig to set the masts at the correct angle. A protractor may be added to the jig later to set mast rake angles. However, there is little to no information on the proper mast rake angles for ships this old.
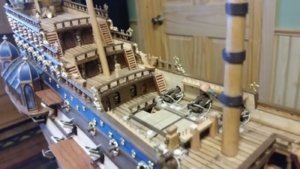
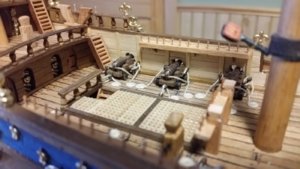
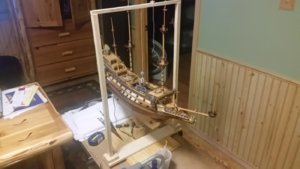


Vincenzo Lusci's book Costruiamo insieme il modello de La Couronne, Vascello francese del 1636, states:
"Nella Couronne peraltro le bigotte dovrebbero essere triangoleggianti (bigotte a
cuore)."
"In Couronne, however, the blocks (deadeyes) should be triangular (heart shaped blocks?)."
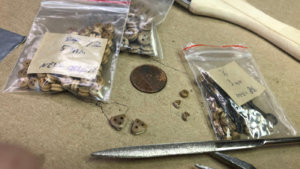
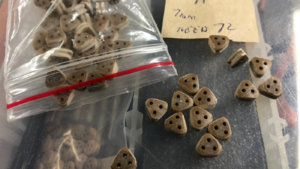
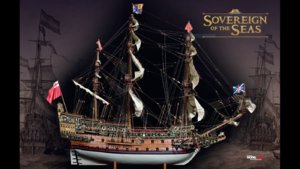
This is not the first time I have seen references to early 17th century deadeyes being triangular as opposed to circular in shape. The deadeyes on the DeAgostini model of HMS Sovereign of the Seas are triangular. (the model which the kit is based on, not the ship created using the kit). Since La Couronne is an early early 17th century vessel, it made sense to make the deadeye shapes using this older shape than the round deadeyes provided in the kit. So, based on this information, I decided to reshape all the deadeyes in the kit to triangular. This will lend an older appearance to the vessel, setting it apart from later ships build in the 1650's. It also means I have to file each of the 180 deadeyes, since no one I know makes triangular commercially. Tonight I got through 74 of them. All 72 of the 7mm deadeyes, and two of the 3mm deadeyes (very tiny!) were reshaped. New chain plates were purchased from Model Expo to replace the kit ones. This is because the kit chain plates were made of wire and looked cheap, and the new ones needed to be a bit longer due to the changes made when I moved the channels down below the upper gun deck. They needed to be a few millimeters long in order to reach their attachment points on the wale located below the lower gun deck. The top portions of the new chain plates will be reshaped to the new triangular shape to accommodate the deadeyes.
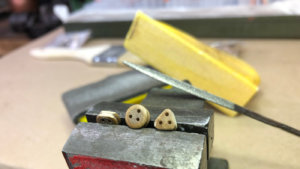
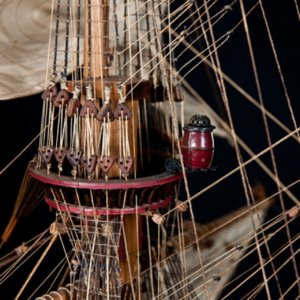
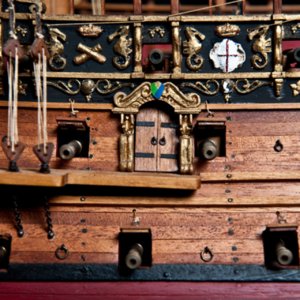
Examples of triangular deadeyes on ORIGINAL DeAgostini HMS Sovereign of the Seas.
"Nella Couronne peraltro le bigotte dovrebbero essere triangoleggianti (bigotte a
cuore)."
"In Couronne, however, the blocks (deadeyes) should be triangular (heart shaped blocks?)."
This is not the first time I have seen references to early 17th century deadeyes being triangular as opposed to circular in shape. The deadeyes on the DeAgostini model of HMS Sovereign of the Seas are triangular. (the model which the kit is based on, not the ship created using the kit). Since La Couronne is an early early 17th century vessel, it made sense to make the deadeye shapes using this older shape than the round deadeyes provided in the kit. So, based on this information, I decided to reshape all the deadeyes in the kit to triangular. This will lend an older appearance to the vessel, setting it apart from later ships build in the 1650's. It also means I have to file each of the 180 deadeyes, since no one I know makes triangular commercially. Tonight I got through 74 of them. All 72 of the 7mm deadeyes, and two of the 3mm deadeyes (very tiny!) were reshaped. New chain plates were purchased from Model Expo to replace the kit ones. This is because the kit chain plates were made of wire and looked cheap, and the new ones needed to be a bit longer due to the changes made when I moved the channels down below the upper gun deck. They needed to be a few millimeters long in order to reach their attachment points on the wale located below the lower gun deck. The top portions of the new chain plates will be reshaped to the new triangular shape to accommodate the deadeyes.


Examples of triangular deadeyes on ORIGINAL DeAgostini HMS Sovereign of the Seas.


Very nice work Kurt.I am impressed by the results of the block buster,the blocks look so much better for rounding off.I admire your patience reshaping all the deadeyes,I would have given in and ordered the triangular ones produced by Amati.
Looking at the Sovereign pictures,it reminds me why I subscribed but it is sad how different the model supplied was to the pictures shown.
Kind Regards
Nigel
Looking at the Sovereign pictures,it reminds me why I subscribed but it is sad how different the model supplied was to the pictures shown.
Kind Regards
Nigel


