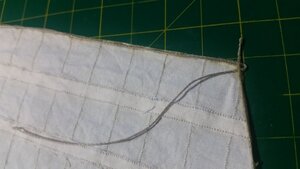
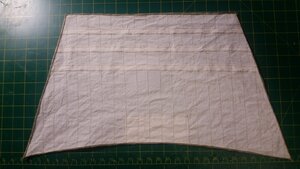
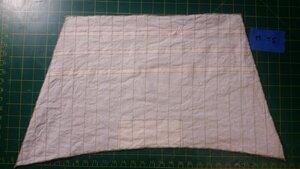
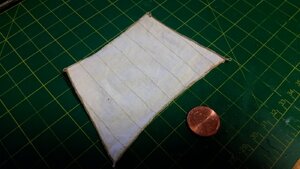
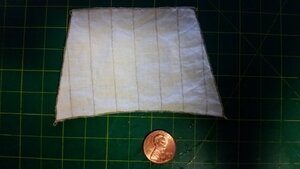
The darkness of the lines and the sail color varies widely between ships. The staining really increased the contrast of the stitching for the seams. The test sail came out a shade darker in the cloth and seams than the rest of the sails, because I didn't rinse the test sail off as vigorously. The seams are more subtle on the sails than on the test sail. The sails just finished drying and I'm looking them over. Reef bands need to be trimmed on the lateen, and main and fore courses. Lots of work left to be done.Are the thread lines supposed to be that dark? Just asking out of ignorance on my part. I’ve been debating the color of thread to use.
-

Win a Free Custom Engraved Brass Coin!!!
As a way to introduce our brass coins to the community, we will raffle off a free coin during the month of August. Follow link ABOVE for instructions for entering.
-

PRE-ORDER SHIPS IN SCALE TODAY!
The beloved Ships in Scale Magazine is back and charting a new course for 2026!
Discover new skills, new techniques, and new inspirations in every issue.
NOTE THAT OUR FIRST ISSUE WILL BE JAN/FEB 2026
You are using an out of date browser. It may not display this or other websites correctly.
You should upgrade or use an alternative browser.
You should upgrade or use an alternative browser.
La Couronne Corel/scratch 1:100 First build [COMPLETED BUILD]
- Thread starter DARIVS ARCHITECTVS
- Start date
- Watchers 54
You’re doing great. Very instructional too.The darkness of the lines and the sail color varies widely between ships. The staining really increased the contrast of the stitching for the seams. The test sail came out a shade darker in the cloth and seams than the rest of the sails, because I didn't rinse the test sail off as vigorously. The seams are more subtle on the sails than on the test sail. The sails just finished drying and I'm looking them over. Reef bands need to be trimmed on the lateen, and main and fore courses. Lots of work left to be done.
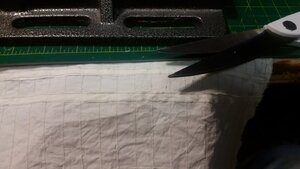
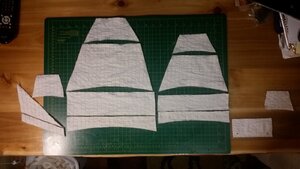
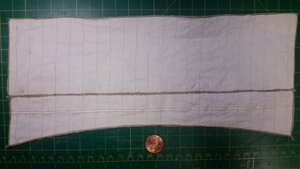
The next step is to carefully trim the fabric on the reef bands without cutting into the sail or into the reef band stitching. Any loose threads are cut off. The first photo shows the reef bands on the main topsail prior to the final trim to make the edges as straight as possible using precise control of the scissors and snipping along the edge very slowly. The effort is worth it.
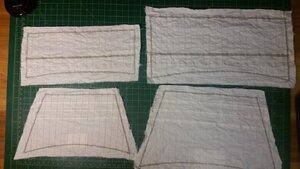
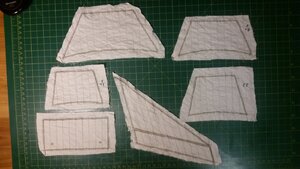
All of the sails have CA glue around their outer edge, applied outside the stitching. The glue will seep into the edge stitch (tabling) on it's own. The discoloration tells you where the glue goes. A spare piece of cloth is used to dab the areas where the glue it and remove excess before it soaks beyond the stitch and into the sail.
When dry, the sails are carefully trimmed along the outer edge of the edge stitch. The tip of a sharp razor knife is used to cut out the drain holes in the sprit sail. The bonnets are separated from the main and fore course sails and lateen sail.


On the test sail, I started sewing the bolt rope onto the back side of the sail, but gave up on that approach since the stitching look overly large for the scale of the model. Instead, the bolt ropes will be glued on. Starting with the crojack sail, the bolt rope is attached in the following manner, and it looks good at 1:100 scale. Wolfram zu Mondfeld's Historic Ship Models provides information for British ships on the diameters of the bolt rope for different sails so you can choose the correct line size. The rope on the head were about twice the diameter on the rope used on the leeches and foot of a square sail. On the course sails, bolt ropes were about half the diameter of the stays use to support the lower mast. Topsail and topgallant sail bolt ropes were 1/4 the diameter of the topmast stay line, and royal sail bolt ropes were 1/5 of that diameter. The lateen sail has the same size bolt rope all the way round the sail. I used these rules as a guide in choosing the line size for the bolt ropes.
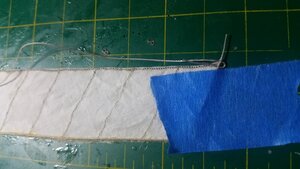
A length of bolt rope from 0.25mm line was cut long enough to be placed at the leeches and foot of the sail. 0.45mm line will be used for the head of the sail as a separate piece. Masking tape is used to hold the sail and the line on the cutting board. You start at the upper corner of the leech, and will run the line across the foot, and back up the other leech side while forming clews and cringles along the way.
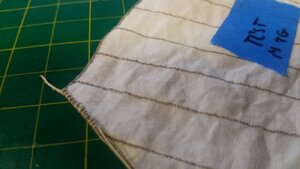
Here is what the bolt rope looks like when it is sewn onto the test sail. The stitching stood out far too much. This method is okay for larger models, but not one this small, so it was abandoned.
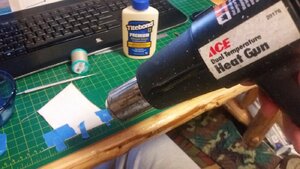
The following shows how to attach the bolt rope to the crojack sail. The line and sail are taped down lightly, then PVA glued diluted weakly with some water is brush along the edge of the sail and the bolt rope. A heat gun set on low heat setting is used to quickly set the glue and dry it.
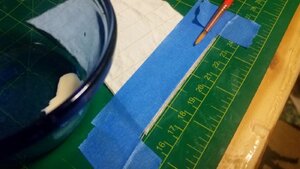
The heat gun anchors the rope in place by drying the glue.
A length of thin thread is used to seize a loop at the lower corner of the sail to form the clew loop. After the seize is drawn tight, the bolt rope is drawn until the clew loop is the correct size.
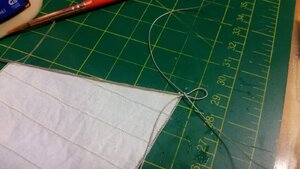
Here is the finished clew from the front side of the sail after the PVA is dried to firmly attach it to the sail corner.
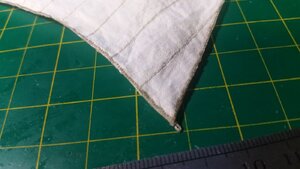
Continue gluing the bolt rope around the sail and drying the glue with the heat gun.
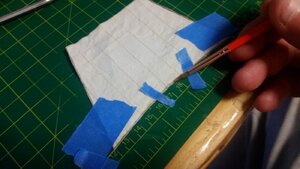
Form the second clew loop just as you did on the first one and continue attaching the bolt rope up the other leech side of the sail.
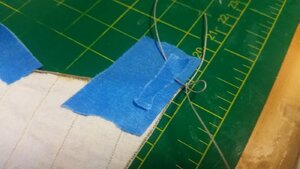
At the top of the sail, the heavier bolt rope used for the head is passed through and glued to the leech bolt rope where the bottom of the earring cringle is supposed to be.
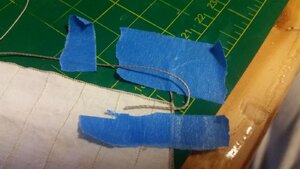
The head bolt rope is then passed through the leech bolt rope at the top edge of the sail, and pulled through until the earring cringle is the same size.
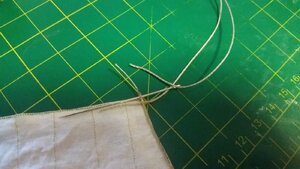
Then the earrings has diluted PVA applied to secure it to the sail.
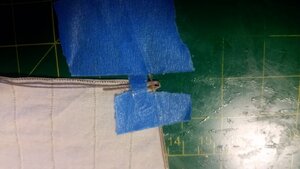
The end of the leech bolt rope and starting end of the head bolt rope are trimmed off, leaving a nice earring cringle at the corner of the sail, here viewed from the front side of the sail.
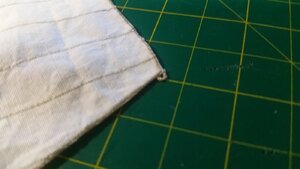
Attach the head rope along the top of the sail, thread it through the leech bolt rope, then back round to form the second earring cringle by passing it once more through the leech rope, glue it all down with diluted PVA, trim the bitter ends, and you're done! For courses, you can add cringles on the leeches and foot using the same method as the earring cringles. They should be strong enough to support the sail and rigging unless you get careless and catch and tear them.
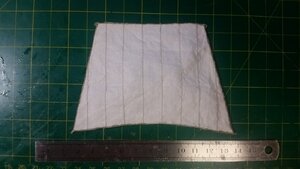
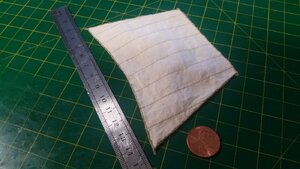
A length of bolt rope from 0.25mm line was cut long enough to be placed at the leeches and foot of the sail. 0.45mm line will be used for the head of the sail as a separate piece. Masking tape is used to hold the sail and the line on the cutting board. You start at the upper corner of the leech, and will run the line across the foot, and back up the other leech side while forming clews and cringles along the way.
Here is what the bolt rope looks like when it is sewn onto the test sail. The stitching stood out far too much. This method is okay for larger models, but not one this small, so it was abandoned.

The following shows how to attach the bolt rope to the crojack sail. The line and sail are taped down lightly, then PVA glued diluted weakly with some water is brush along the edge of the sail and the bolt rope. A heat gun set on low heat setting is used to quickly set the glue and dry it.

The heat gun anchors the rope in place by drying the glue.

A length of thin thread is used to seize a loop at the lower corner of the sail to form the clew loop. After the seize is drawn tight, the bolt rope is drawn until the clew loop is the correct size.

Here is the finished clew from the front side of the sail after the PVA is dried to firmly attach it to the sail corner.

Continue gluing the bolt rope around the sail and drying the glue with the heat gun.

Form the second clew loop just as you did on the first one and continue attaching the bolt rope up the other leech side of the sail.

At the top of the sail, the heavier bolt rope used for the head is passed through and glued to the leech bolt rope where the bottom of the earring cringle is supposed to be.

The head bolt rope is then passed through the leech bolt rope at the top edge of the sail, and pulled through until the earring cringle is the same size.

Then the earrings has diluted PVA applied to secure it to the sail.

The end of the leech bolt rope and starting end of the head bolt rope are trimmed off, leaving a nice earring cringle at the corner of the sail, here viewed from the front side of the sail.

Attach the head rope along the top of the sail, thread it through the leech bolt rope, then back round to form the second earring cringle by passing it once more through the leech rope, glue it all down with diluted PVA, trim the bitter ends, and you're done! For courses, you can add cringles on the leeches and foot using the same method as the earring cringles. They should be strong enough to support the sail and rigging unless you get careless and catch and tear them.


Last edited:
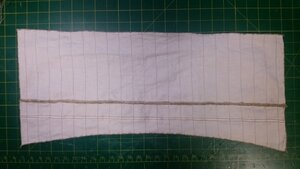
Since the bonnets were cut away from them main course, fore course, and lateen sails to allow installation of the bolt ropes, they needed to be restitched together. Even though I laid down a stitch to simulate the lacing, the stitch to hold them together would obscure that and if it were not done the same way as the real lacing it would not look as good. I started using a running stitch to join the sail parts, but it didn't look right, so I took the stitch out and started to lace the bonnets together with a stitch that simulates the loops used on a ship to attach the bonnets. At present, the stitching to attach the bonnet to the main course was started after attaching the bolt ropes and is about 2/3 done after many hours of hand sewing. It's slow work, but the end result will appear more correct.
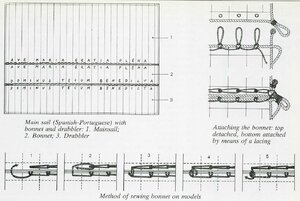
Front side of main course.
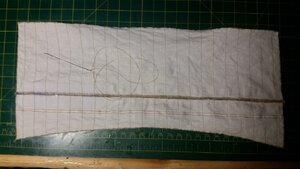
Rear side of main course.
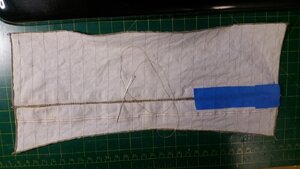
Rear side, bonnet lacing.
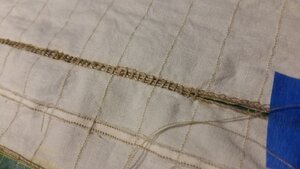
Front side , bonnet lacing.
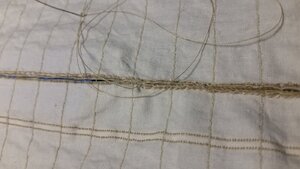

Front side of main course.

Rear side of main course.

Rear side, bonnet lacing.

Front side , bonnet lacing.

- Joined
- Aug 16, 2019
- Messages
- 870
- Points
- 343

Your small method to do the sail
Is very well done in fact it is perfect for anybody that is ready to take the time
I have copy everything in my trick folder
tanks
Is very well done in fact it is perfect for anybody that is ready to take the time
I have copy everything in my trick folder
tanks
I have bookmarked this log for when I get to sails. I will definitely NOT go into this much detail and work because my ship is so simplistic, but these are great ideas and the explanation is so meticulous. Thank you so much, Darius.Your small method to do the sail
Is very well done in fact it is perfect for anybody that is ready to take the time
I have copy everything in my trick folder
tanks
Charles QC and VFordyce, Thank you both for your kind comments. Yes, the sewing takes time, but if you listen to your favorite podcasts while you sew, its goes faster.
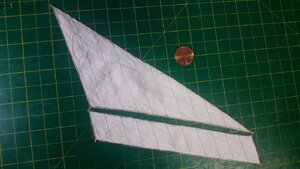
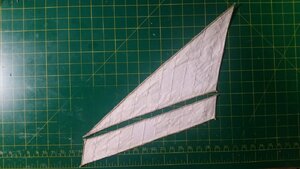
The main course and its bonnet lacing is complete. The cringles for the bowlines and other lines will be added later, once the places where they attach to the sail is determined. Next, the bolt rope was attached with diluted PVA to the lateen bonnet and lateen sails. Clew loops and cringles were added like before.


Beautiful sails Kurt.
Thanks Andre! Only 7 more to go...Beautiful sails Kurt.
- Joined
- Aug 16, 2019
- Messages
- 870
- Points
- 343

+1 to other friend comment
Your sail are fantastic

Your sail are fantastic

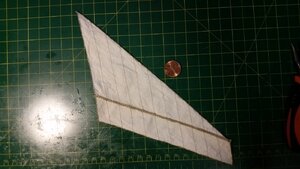
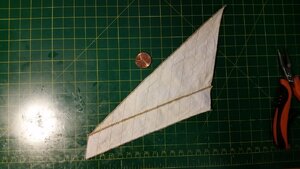
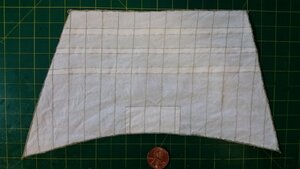
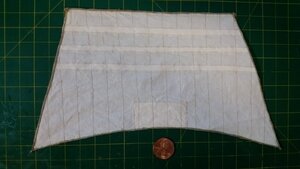
Two more sails are complete today, the lateen and the fore topsail. The lateen bonnet was lashed onto the upper sail using the proper lacing stitch shown in the previous post for the main course sail. This took about 2-1/2 hours while watching history videos about Sumeria on YouTube. The boltrope for the fore topsail was attached and clews and cringle loops fashioned. Greetings to all of you who are following this build log!


Keep 'em coming!
Thanks guys!
IRL I have seen small lines dangling from the front of the sails. I’m not sure what they are called. I think they are to tie up the sails when furled. Do you plan on adding them? I’m not sure where they would go.
Yes, those lines are reef points. They act as grab handles which sailors use to haul up and furl the sails. All sails which should have reef points will get them. I'm still working on getting boltropes and bonnet lacings done. Reef points add a lot of detail to a sail. You can see that the reefing bands for topsails have already been added to those sails. When reef points are added on and which sail they are used depends on the time period and country. La Couronne will have early 17th century (c. 1636) style sails, so the location and number of reef bands will be different than those found on a typical British 1750's vessel like HMS Victory. I've seen a few different interpretations of what the sails on La Couronne looked like and used other models and book information to help decide what features to use.IRL I have seen small lines dangling from the front of the sails. I’m not sure what they are called. I think they are to tie up the sails when furled. Do you plan on adding them? I’m not sure where they would go.
I decided that the sail plan below fits the research information best. The mainsails have a row of reef points below the bonnet lacing and the topsails have three rows of reef points in the top half of each sail. The spritsail has no reef points since they would typically be used on galleons later than La Couronne. The topgallants would not have any reef points, nor would the crojack sail or the lateen. The courses and the lateen would not typically have reef bands because they had bonnets. The number of row of reefs on the courses and topsails can vary. Now that I look at the it looks like I put the reefing band on the wrong side of the sails. They should be on the front side, not the rear side like with the top lining.
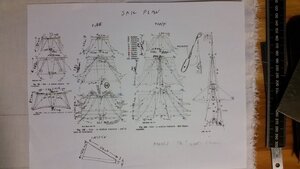
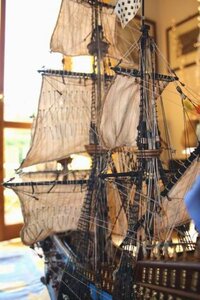
Scratch Build of La Couronne by Karl Faendrich in Germany
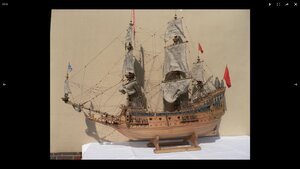
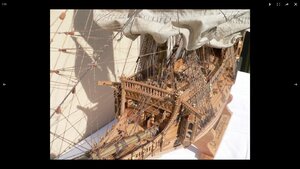
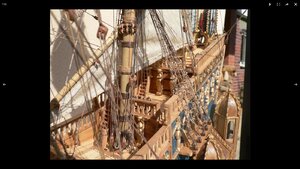
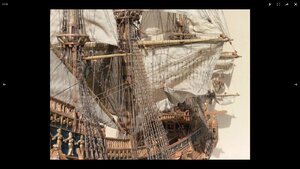
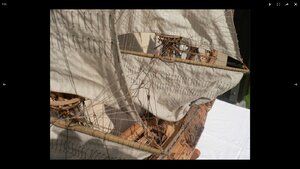
Italian scratch build of La Couronne
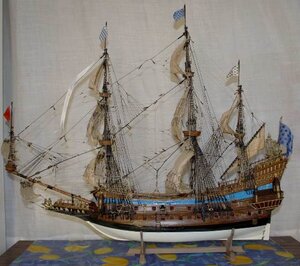
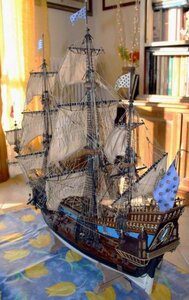
Last edited:


