-

Win a Free Custom Engraved Brass Coin!!!
As a way to introduce our brass coins to the community, we will raffle off a free coin during the month of August. Follow link ABOVE for instructions for entering.
-

PRE-ORDER SHIPS IN SCALE TODAY!
The beloved Ships in Scale Magazine is back and charting a new course for 2026!
Discover new skills, new techniques, and new inspirations in every issue.
NOTE THAT OUR FIRST ISSUE WILL BE JAN/FEB 2026
You are using an out of date browser. It may not display this or other websites correctly.
You should upgrade or use an alternative browser.
You should upgrade or use an alternative browser.
La Couronne Corel/scratch 1:100 First build [COMPLETED BUILD]
- Thread starter DARIVS ARCHITECTVS
- Start date
- Watchers 54
This ship is too early to have jibsails. Stay sails like jibsails came later. Instead, turning the ship is done using the lateen and the sprit topsail. Without stay sails, large Baroque galleons like this could not steer close hauled to the wind.How are you planning to attach the jibs (I think that’s what you call the triangular sails up front.)
Thanks for the explanation of how it works with your ship.This ship is too early to have jibsails. Stay sails like jibsails came later. Instead, turning the ship is done using the lateen and the sprit topsail. Without stay sails, large Baroque galleons like this could not steer close hauled to the wind.
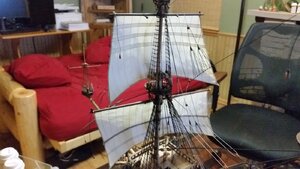
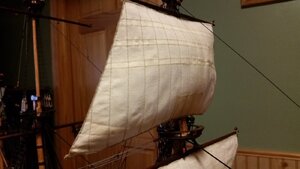
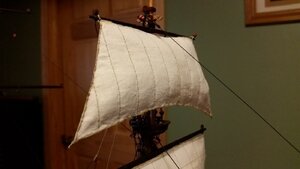
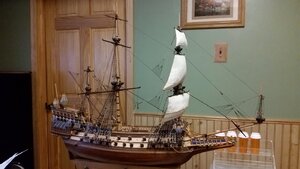
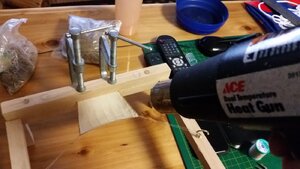
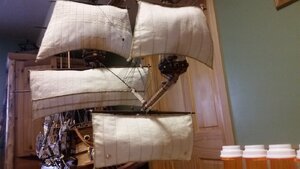
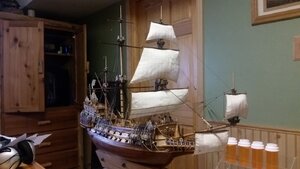
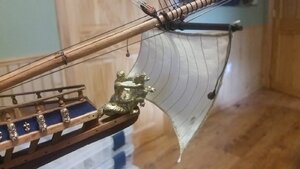
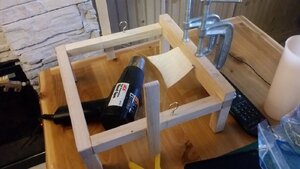
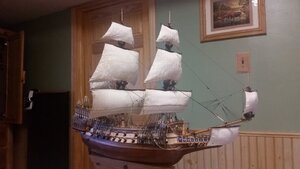
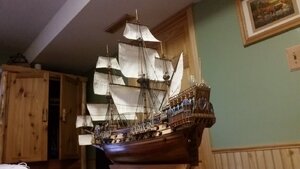
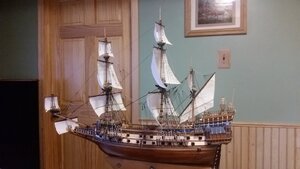
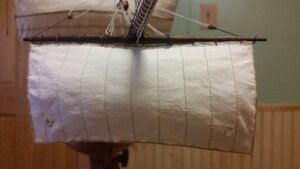
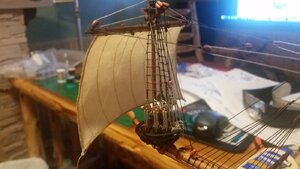
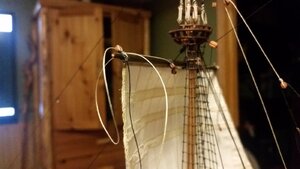
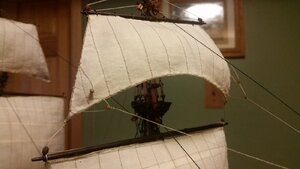
The last sail to be starched and stretched was the crojack sail. All the sails are test fitted on the yard arms now. When all the rigging is completed, the sails will be better positioned than they are now. They are just hanging from the upper cringles at the tips of the yards. This is a good look ahead to how the ship will appear when finished.


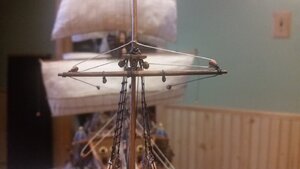
The bowsprit area of the ship is where work today was concentrated. Lifts and braces were rigged on the sprit sail and sprit topsail yardarms. The Corel instructions will be used for rigging and belaying brace lines and lifts for all the sails. For sheets, clewlines, and martnets, Costrulamo insieme il modello de La Couronne; Vascello francese del 1636 will be used to for rigging and belaying all lines which manipulate the sails. Hopefully it will be possible to blend the two sources together, and add cleats, belaying pins, and other features required to belay these additional lines without having an accident and tearing the rigging.
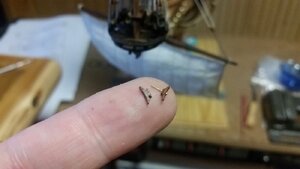
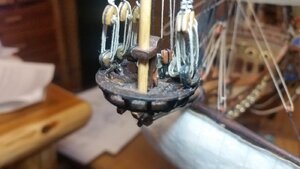
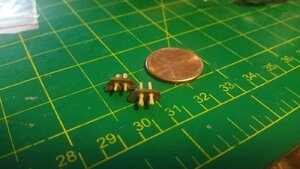
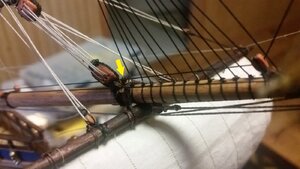
In preparation for rigging the sprit topsail clew lines, two cleats were required to be installed on the sprit topmast in a very tight area just above the sprit topmast top. A brass pin cut to length was used to provide more purchase for the CA glue as the cleats were installed using small needle nosed pliers.
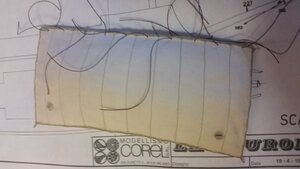
The first sail to be bent to the yard is the sprit sail. Robands were made from lengths of heavy brown thread and sewn through the head of the sail. I didn't use lighter colored thread because it would stand out with too much contrast against the dark yardarms. The robands were tied individually, in the style of the early 17th century. Next will be rigging of the sprit sail sheets and clew lines, then work on the sprit topsail will begin. Since sails are being added to this model, there will be no more help from EJ's La Couronne build log or the Corel drawings. I'm now in uncharted waters.
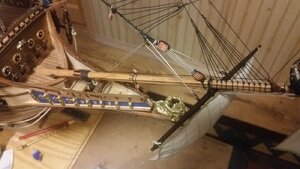
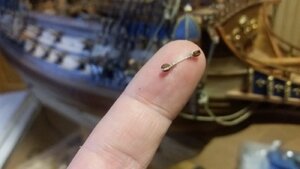
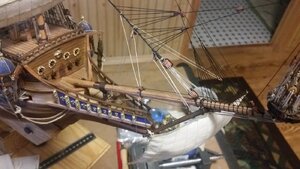
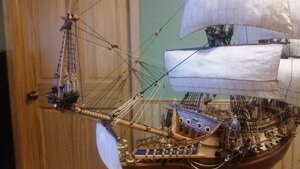
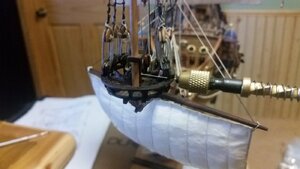
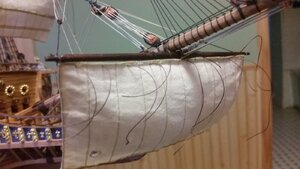
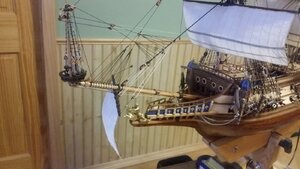


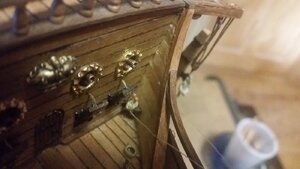
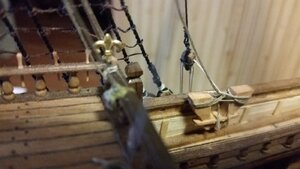
Rigging of the spritsail was completed. The clewlines start at the yard, pass through the blocks on each clew, then are belayed to the pin rail beneath the bowsprit. Cleats were installed on the beakshead deck to tie the spritsail sheets to. The other ends of the sheets are attached to eyebolts on the hull, located just forward of the bow turrets. All the blocks used were 2mm blocks from Falkonet, because they rock.
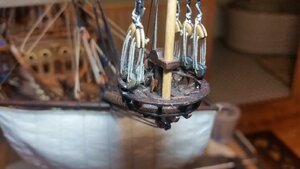
Work on the sprit topsail was next. Two 2mm blocks were tied to the sprit topsail yard in preparation for the clewlines. The sail was them bent to the yard with robands made of heavy brown thread. The clewlines run from the clews to blocks on the sprit topmast yard, and down to cleats on the sides of the topmast itself. Coils of rope were fashioned and hung on the cleats for more realism. The sheets were rigged next. Two pin rails were made from scratch and installed in the aft outboard corners of the beakshead deck. The sheets run form the sail clews through blocks on the ends of the spritsail yard below, then to the forward-most belaying pin on the pin rails. It was easier to tie the lines on the belaying pins, then glued the pin rails to the bulwarks of the beakshead deck. I always belay lines on belaying pins and on cleats exactly the same way as they are done on the ship, when a full bend, then a figure eight pattern. Extra coils of line to simulate the entire length of the line are installed afterward, but the knots underneath are properly tied, which is a real challenge on a small model, especially with the interference of previous rigging.
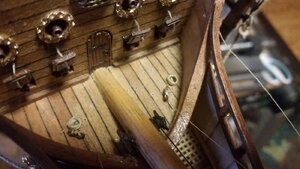
Deck cleats for the spritsail sheet lines. Four more deck cleats will be installed for the fore bowlines later, and shown by the holes in the deck.
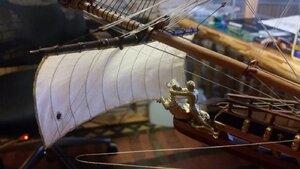
Spritsail rigging complete
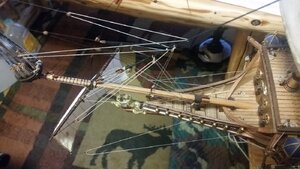
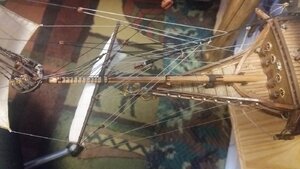
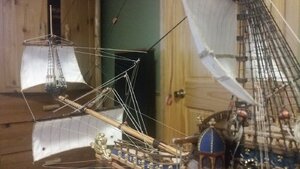
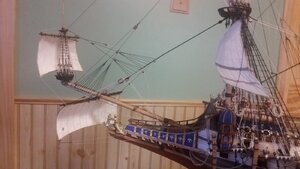
All bowsprit rigging complete
Work on the sprit topsail was next. Two 2mm blocks were tied to the sprit topsail yard in preparation for the clewlines. The sail was them bent to the yard with robands made of heavy brown thread. The clewlines run from the clews to blocks on the sprit topmast yard, and down to cleats on the sides of the topmast itself. Coils of rope were fashioned and hung on the cleats for more realism. The sheets were rigged next. Two pin rails were made from scratch and installed in the aft outboard corners of the beakshead deck. The sheets run form the sail clews through blocks on the ends of the spritsail yard below, then to the forward-most belaying pin on the pin rails. It was easier to tie the lines on the belaying pins, then glued the pin rails to the bulwarks of the beakshead deck. I always belay lines on belaying pins and on cleats exactly the same way as they are done on the ship, when a full bend, then a figure eight pattern. Extra coils of line to simulate the entire length of the line are installed afterward, but the knots underneath are properly tied, which is a real challenge on a small model, especially with the interference of previous rigging.
Deck cleats for the spritsail sheet lines. Four more deck cleats will be installed for the fore bowlines later, and shown by the holes in the deck.


Spritsail rigging complete


All bowsprit rigging complete

I ran into the same issue with tying to belaying pins around other rigging. At 1:100 it’s a challenge.Rigging of the spritsail was completed. The clewlines start at the yard, pass through the blocks on each clew, then are belayed to the pin rail beneath the bowsprit. Cleats were installed on the beakshead deck to tie the spritsail sheets to. The other ends of the sheets are attached to eyebolts on the hull, located just forward of the bow turrets. All the blocks used were 2mm blocks from Falkonet, because they rock.
Work on the sprit topsail was next. Two 2mm blocks were tied to the sprit topsail yard in preparation for the clewlines. The sail was them bent to the yard with robands made of heavy brown thread. The clewlines run from the clews to blocks on the sprit topmast yard, and down to cleats on the sides of the topmast itself. Coils of rope were fashioned and hung on the cleats for more realism. The sheets were rigged next. Two pin rails were made from scratch and installed in the aft outboard corners of the beakshead deck. The sheets run form the sail clews through blocks on the ends of the spritsail yard below, then to the forward-most belaying pin on the pin rails. It was easier to tie the lines on the belaying pins, then glued the pin rails to the bulwarks of the beakshead deck. I always belay lines on belaying pins and on cleats exactly the same way as they are done on the ship, when a full bend, then a figure eight pattern. Extra coils of line to simulate the entire length of the line are installed afterward, but the knots underneath are properly tied, which is a real challenge on a small model, especially with the interference of previous rigging.
Deck cleats for the spritsail sheet lines. Four more deck cleats will be installed for the fore bowlines later, and shown by the holes in the deck.
View attachment 179317
View attachment 179318
Spritsail rigging complete
View attachment 179319
View attachment 179320
View attachment 179321
View attachment 179322
View attachment 179323
View attachment 179324
View attachment 179325
All bowsprit rigging complete
View attachment 179326
- Joined
- Aug 16, 2019
- Messages
- 870
- Points
- 343

Verry hard to find word to tell you how much I love your work
Way over my skill
Way over my skill
Thank you Charles, words cannot express how gratifying it is to have one's work admired and appreciated. The build is getting tougher now, with rigging becoming more difficult because of lack of space to work among the lines and masts. If you have any suggestions on what to add to the model or questions regarding it, please let me know. It's how I learn too.Verry hard to find word to tell you how much I love your work
Way over my skill
I haven't thought this all the way through yet, Kurt, but I wonder if it would be easier to do the running lines for the yards before doing the shrouds and ratlines. They do get in the way when trying to tie off the lines on the belaying pins. Maybe on my net ship I'll give that a try.Thank you Charles, words cannot express how gratifying it is to have one's work admired and appreciated. The build is getting tougher now, with rigging becoming more difficult because of lack of space to work among the lines and masts. If you have any suggestions on what to add to the model or questions regarding it, please let me know. It's how I learn too.
I've seen others tie lines to belaying pins and leaving them hang off the side prior to rigging shrouds. That approach has huge advantages later in rigging. You don't have to reach in through shrouds and ratlines to attach lines to belaying pin racks like I am. This is my first run at rigging. Lines for manipulating sails are being added beyond the instructions of the original kit, so the instructions did not provide guidance for when certain lines should be installed. The kit provided a limited amount of line to use, so extra line had to be purchased. Corel was so precise in providing only enough wood that when applying the final mahogany layer to the hull, only two sticks of wood were left over after planking was completed.
We are definitely learning through experience.I've seen others tie lines to belaying pins and leaving them hang off the side prior to rigging shrouds. That approach has huge advantages later in rigging. You don't have to reach in through shrouds and ratlines to attach lines to belaying pin racks like I am. This is my first run at rigging. Lines for manipulating sails are being added beyond the instructions of the original kit, so the instructions did not provide guidance for when certain lines should be installed. The kit provided a limited amount of line to use, so extra line had to be purchased. Corel was so precise in providing only enough wood that when applying the final mahogany layer to the hull, only two sticks of wood were left over after planking was completed.
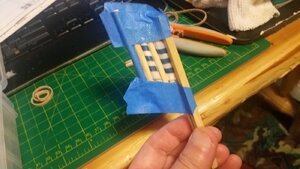
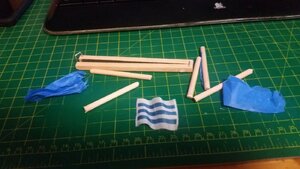
I tried my hand at putting waves in one of the rayon flags. The flag was cut out and the edges applied with a very small amount of CA glue to prevent fraying. Dowels held with masking tape were used to create a wave pattern in the flag, and it was starched and dried. The result was adequate. Future flags may come out better with practice.
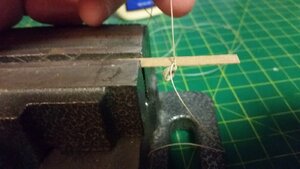
I devised a way to tie a line to a rail with the coil hank all in one process. The steps are shown below.
1) Tie an overhand knot on a 4mm dowel.
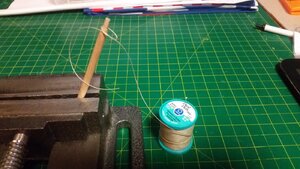
2) Take a short length of line and form a loop.
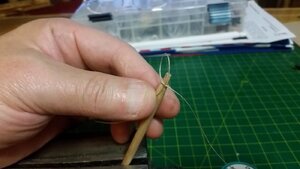
3) Take the long length of line, long enough for the finished rigged line, and make several wraps around the held loop.
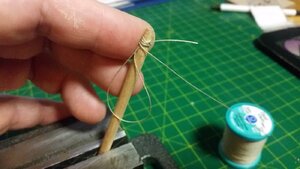
4) Pass the entire length of the long end (on the left) through the loop.
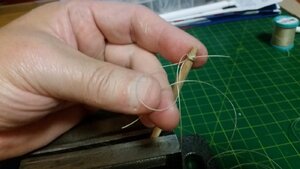
5) draw the loop tight.
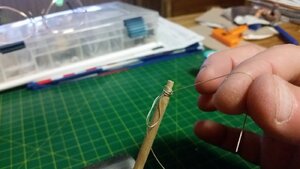
6) A coil of is now seized.
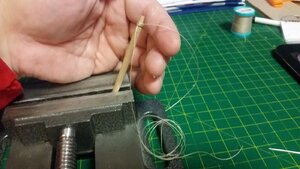
7) Tie and overhand knot to secure the loops of the coil together.
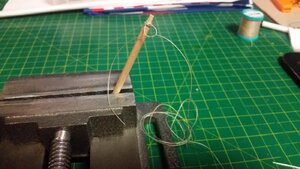
8) Apply PVA and soak the coil through.
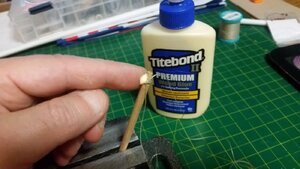
9) While still damp and pliable, slip the coil off the dowel.
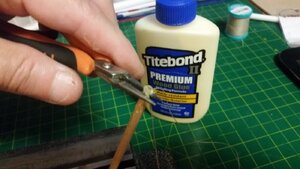
10) Completed coil.
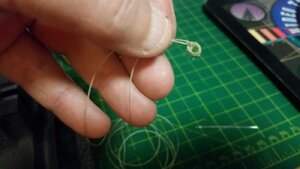
11) Shape the coil with your fingers and bend it as if it were laying over the rail.
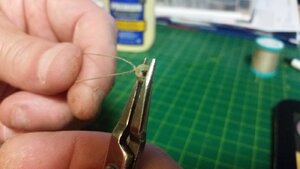
12) The piece of wood below simulates a rail. At this point you would simply use the short end and the long length to tied the coil onto the rail on the model, apply some PVA underneath it to glue it in position, and adjust it until it looks right.
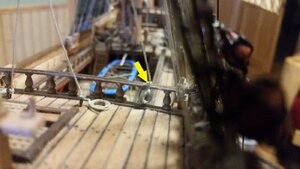
Here is an example of the a line with coil tied to the aft railing of on the forecastle.


I devised a way to tie a line to a rail with the coil hank all in one process. The steps are shown below.
1) Tie an overhand knot on a 4mm dowel.

2) Take a short length of line and form a loop.

3) Take the long length of line, long enough for the finished rigged line, and make several wraps around the held loop.

4) Pass the entire length of the long end (on the left) through the loop.

5) draw the loop tight.

6) A coil of is now seized.

7) Tie and overhand knot to secure the loops of the coil together.

8) Apply PVA and soak the coil through.

9) While still damp and pliable, slip the coil off the dowel.

10) Completed coil.

11) Shape the coil with your fingers and bend it as if it were laying over the rail.

12) The piece of wood below simulates a rail. At this point you would simply use the short end and the long length to tied the coil onto the rail on the model, apply some PVA underneath it to glue it in position, and adjust it until it looks right.

Here is an example of the a line with coil tied to the aft railing of on the forecastle.

Last edited:
Rigging continues. All the lines for the fore topgallant sail except the bowlines were rigged today. The steps are shown below for clarity.
Tie the fore topgallant lift lines to the belaying pins symmetrically port and starboard on the forecastle rail.
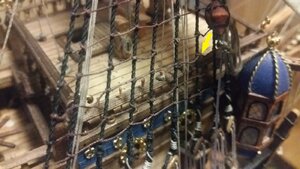
Run each fore topgallant lift line up through the tops on each side of the crosstree, then through two blocks, and tie off on the flagstaff. The topgallant lift lines are done.
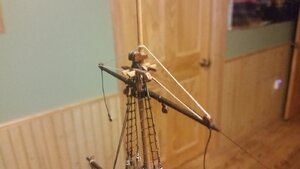
In preparation of rigging the bowlines for the sails on the foremast, four blocks were tied to the bowsprit just in front of the foremast stay line.
Rig the topgallant sheet lines, starting with tying the lines with coils to the aft rail of the forecastle, port and starboard symmetrically.
Port side: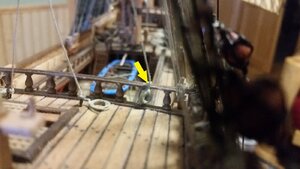
Stbd Side:
Pass each sheet line up through the tops and crosstrees, then through two blocks on the topsail yardarm, and let the ends hang for now.
Tie the port fore topgallant clew line, with coils already made on the end, to the rail just behind the cathead.
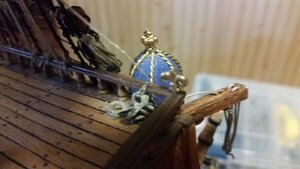
Do the same for the starboard fore topgallant clew line.
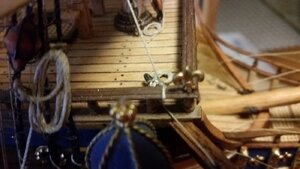
Pass the fore topgallant clew lines up through the tops and crosstrees to the blocks on the fore topgallant yardarm.
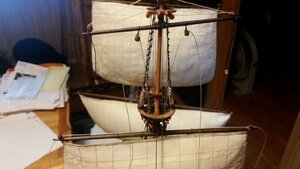
Now the fore topgallant sheets and clews are hanging loosely above, ready to attach to the sail.
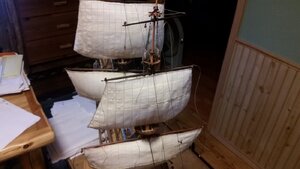
Attach the fore topgallant sail to the topgallant yardarm with gaskets in the form of robands. The gaskets are loops of line tied at the top with a square knot after passing around the yardarm twice and through the sail once. Roband gaskets are only one method of attaching a sail to the yard, and are correct for this period. The connect the sheet and clue lines to the sail.
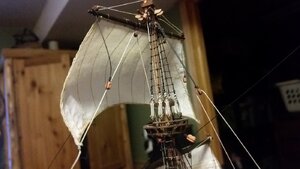
Tie the fore topgallant brace lines to the rail, port and starboard, and run them through double sets of single blocks that are attached to the main mast stays. The lines then pass through the pennants attached at each end of the yardarm and tied off to the main topgallant stay line. The braces were adjusted to turn the yardarm to starboard since this ship is being rigged with sails deployed for a port side broad reach.
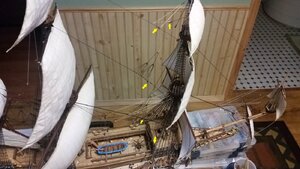
The fore topgallant braces are now complete.
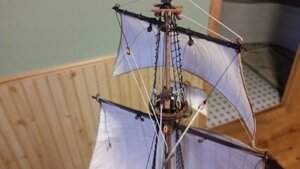
Here's how the ship is looking thus far. Rigging of the fore topgallant bowlines is next, then work begins on the running rigging for the fore topsail.
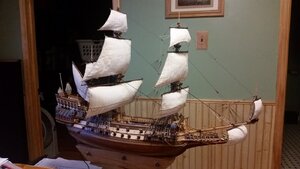
Tie the fore topgallant lift lines to the belaying pins symmetrically port and starboard on the forecastle rail.

Run each fore topgallant lift line up through the tops on each side of the crosstree, then through two blocks, and tie off on the flagstaff. The topgallant lift lines are done.

In preparation of rigging the bowlines for the sails on the foremast, four blocks were tied to the bowsprit just in front of the foremast stay line.

Rig the topgallant sheet lines, starting with tying the lines with coils to the aft rail of the forecastle, port and starboard symmetrically.
Port side:

Stbd Side:

Pass each sheet line up through the tops and crosstrees, then through two blocks on the topsail yardarm, and let the ends hang for now.

Tie the port fore topgallant clew line, with coils already made on the end, to the rail just behind the cathead.

Do the same for the starboard fore topgallant clew line.

Pass the fore topgallant clew lines up through the tops and crosstrees to the blocks on the fore topgallant yardarm.

Now the fore topgallant sheets and clews are hanging loosely above, ready to attach to the sail.

Attach the fore topgallant sail to the topgallant yardarm with gaskets in the form of robands. The gaskets are loops of line tied at the top with a square knot after passing around the yardarm twice and through the sail once. Roband gaskets are only one method of attaching a sail to the yard, and are correct for this period. The connect the sheet and clue lines to the sail.

Tie the fore topgallant brace lines to the rail, port and starboard, and run them through double sets of single blocks that are attached to the main mast stays. The lines then pass through the pennants attached at each end of the yardarm and tied off to the main topgallant stay line. The braces were adjusted to turn the yardarm to starboard since this ship is being rigged with sails deployed for a port side broad reach.

The fore topgallant braces are now complete.

Here's how the ship is looking thus far. Rigging of the fore topgallant bowlines is next, then work begins on the running rigging for the fore topsail.

Last edited:
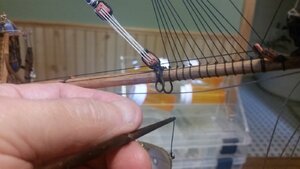
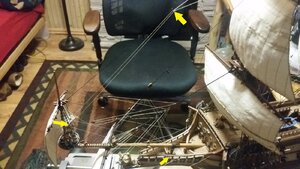
The fore topgallant sail bowlines were rigged. Things are really getting crowded. It take literally hour to tie lines to rails and belaying pins using dental pics, needle nose pliers, and dabbing a tiny bit of glue every pass around a belaying pin so delicate that is you sneeze, you'll demolish the entire pin rack. These pins are slivers, 9mm Falkonet pins, the smallest made. So far I've broken about two dozen since the build started. Anyhow, the bowlines were made using 2mm blocks, also the smallest ones available from Falkonet, and the same ones I used to rig the cannon gun truck tackles. I noticed that the "one size fits all" approach of most kits is to use only a few sizes of HUGE blocks, making the model look out of scale if it's smaller like this one. So, I've been buying lots of smaller blocks and figuring out which sizes go where. I've also started to use thinner thread for the running rigging than the instructions call for. Not everything has to be a hawser. These changes are slowly occurring to me over the build since this is my first ship and everything has a steep learning curve, mostly the days of research and information gathering.
Back to the rigging. The bowlines are really thin thread. After attaching them to the sails, the lines are run through blocks on the fore topgallant approximately half way down the stay line, then through 2mm block attached to the aftermost shroud of the sprit topmast, about halfway up the shroud, and then rearward to blocks on pinrail called the "range", located on the beakhead under the bowsprit.
The hardest part of these lines is figuring out where to belay them. I'm reconciling the belaying plans of both Core and Vincenzo Lusci's Costrulamo insieme il modello de La Couronne; Vascello francese del 1636, and both are in Italian. Google translate is so literal that when translated, a cleat in Italian come out as "ankle", bowline as "upwind" and so on. This is no longer a ship build, it's a word puzzle. There were not enough belaying pins on the range rack. Lines terminate in different locations, and Firenze has belaying pins along all the rails of the forecastle. Where Lusci has pins, I'll just be tying the lines to the rails. This presence of belaying pins on a ship this old is controversial. On my model, there will be an arbitrary mix of use of pins and tying to rails. So, two lines on the range and two on the forecastle rails will have to share the same belaying pins just to fit everything in. I can't WAIT to work on a larger size more. 1:100 scale is proving difficult when you fully rig the ship with all the sails and running rigging.


That is precisely why I opted not to fully rig my Connie at 1:100. I really don’t know how you have the time for that much research. You are quite busy. But the model is coming along very nicely. I’m so impressed with what you’ve done so far.The fore topgallant sail bowlines were rigged. Things are really getting crowded. It take literally hour to tie lines to rails and belaying pins using dental pics, needle nose pliers, and dabbing a tiny bit of glue every pass around a belaying pin so delicate that is you sneeze, you'll demolish the entire pin rack. These pins are slivers, 9mm Falkonet pins, the smallest made. So far I've broken about two dozen since the build started. Anyhow, the bowlines were made using 2mm blocks, also the smallest ones available from Falkonet, and the same ones I used to rig the cannon gun truck tackles. I noticed that the "one size fits all" approach of most kits is to use only a few sizes of HUGE blocks, making the model look out of scale if it's smaller like this one. So, I've been buying lots of smaller blocks and figuring out which sizes go where. I've also started to use thinner thread for the running rigging than the instructions call for. Not everything has to be a hawser. These changes are slowly occurring to me over the build since this is my first ship and everything has a steep learning curve, mostly the days of research and information gathering.
Back to the rigging. The bowlines are really thin thread. After attaching them to the sails, the lines are run through blocks on the fore topgallant approximately half way down the stay line, then through 2mm block attached to the aftermost shroud of the sprit topmast, about halfway up the shroud, and then rearward to blocks on pinrail called the "range", located on the beakhead under the bowsprit.
The hardest part of these lines is figuring out where to belay them. I'm reconciling the belaying plans of both Core and Vincenzo Lusci's Costrulamo insieme il modello de La Couronne; Vascello francese del 1636, and both are in Italian. Google translate is so literal that when translated, a cleat in Italian come out as "ankle", bowline as "upwind" and so on. This is no longer a ship build, it's a word puzzle. There were not enough belaying pins on the range rack. Lines terminate in different locations, and Firenze has belaying pins along all the rails of the forecastle. Where Lusci has pins, I'll just be tying the lines to the rails. This presence of belaying pins on a ship this old is controversial. On my model, there will be an arbitrary mix of use of pins and tying to rails. So, two lines on the range and two on the forecastle rails will have to share the same belaying pins just to fit everything in. I can't WAIT to work on a larger size more. 1:100 scale is proving difficult when you fully rig the ship with all the sails and running rigging.
View attachment 179858
View attachment 179859
Thanks Richie!Just found this log, looks amazing great work.


